
Upside Down Eggplant Bottle Growing: Sounds a little crazy, right? But trust me, this quirky DIY project is about to revolutionize your gardening game! Forget sprawling gardens and endless weeding – we’re taking eggplant cultivation to new heights (literally!). For centuries, gardeners have sought innovative ways to maximize space and yield, and while the exact origins of upside-down gardening are debated, the spirit of ingenuity is timeless. Think of the Hanging Gardens of Babylon – a testament to human creativity in cultivating plants in unconventional ways.
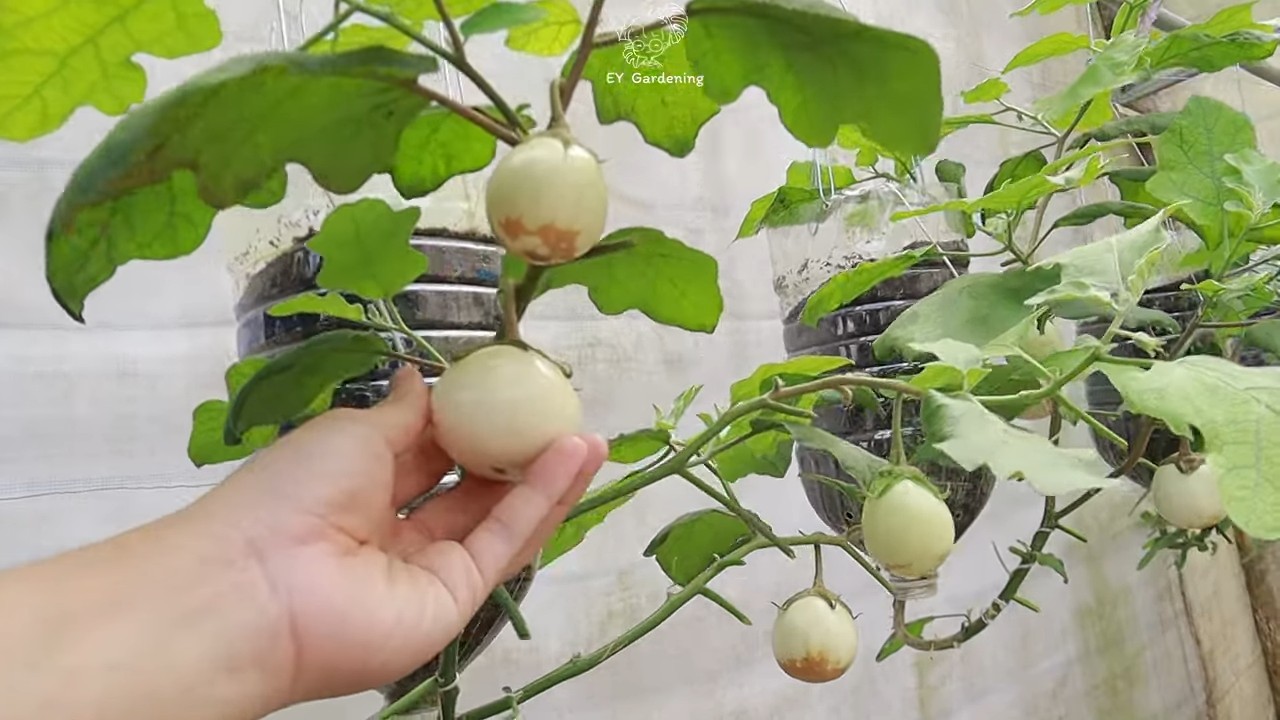
But why should *you* try growing eggplants upside down in a bottle? Well, imagine harvesting plump, juicy eggplants from your balcony, patio, or even a sunny windowsill. This method is perfect for urban dwellers with limited space, allowing you to enjoy fresh, homegrown produce without a traditional garden. Plus, it’s a fantastic way to recycle those plastic bottles that would otherwise end up in the landfill. I’ve found that upside down eggplant bottle growing also helps to deter pests and diseases, keeping your precious plants healthy and thriving. So, are you ready to ditch the dirt and embrace a fun, space-saving, and eco-friendly gardening adventure? Let’s get started!
DIY: Auberginen kopfüber in Flaschen ziehen – So geht’s!
Hey Leute! Habt ihr Lust auf ein wirklich cooles und platzsparendes Gartenprojekt? Ich zeige euch heute, wie ihr Auberginen kopfüber in Plastikflaschen ziehen könnt. Das ist nicht nur super effektiv, sondern sieht auch noch richtig stylisch aus! Keine Sorge, es ist einfacher als es klingt. Lasst uns loslegen!
Was du brauchst:
* Eine leere 2-Liter-Plastikflasche (oder größer, je nachdem wie groß deine Auberginensorte wird)
* Eine junge Auberginenpflanze (am besten eine kompakte Sorte)
* Gute Blumenerde
* Ein scharfes Messer oder eine Schere
* Ein Stück Stoff oder Vlies (ca. 10×10 cm)
* Wasser
* Einen Haken oder eine stabile Schnur zum Aufhängen
* Optional: Langzeitdünger
Vorbereitung der Flasche:
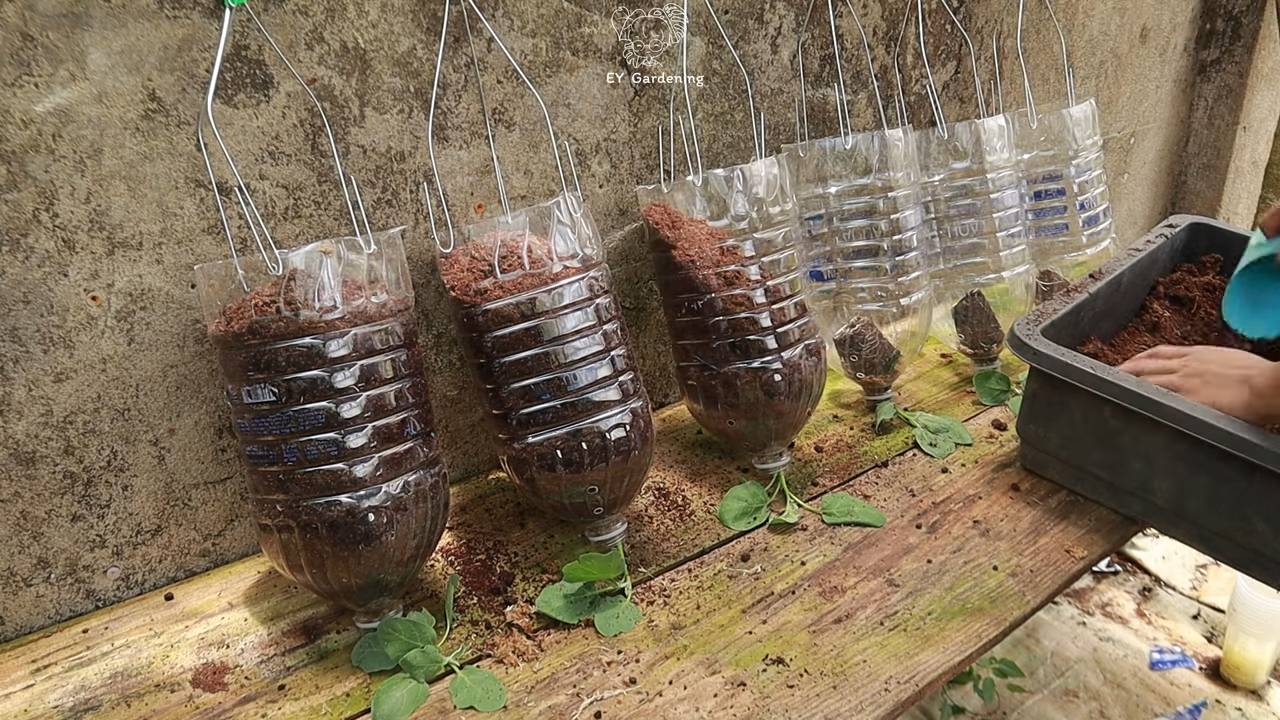
1. Schneide den Boden der Flasche ab: Nimm dein Messer oder deine Schere und schneide den Boden der Plastikflasche vorsichtig ab. Du brauchst eine ausreichend große Öffnung, um die Auberginenpflanze später hindurchzustecken. Achte darauf, dass die Kanten nicht zu scharf sind, damit du dich nicht verletzt.
2. Bohre Löcher für die Aufhängung: Mach zwei Löcher in den oberen Teil der Flasche, knapp unterhalb des Flaschenhalses. Diese Löcher dienen dazu, die Flasche später aufzuhängen. Achte darauf, dass die Löcher stabil genug sind, um das Gewicht der Flasche, der Erde und der Pflanze zu tragen.
3. Bereite den Flaschenhals vor: Der Flaschenhals wird das “Auspflanzloch” für deine Aubergine. Hier kommt das Stück Stoff oder Vlies ins Spiel.
Einpflanzen der Aubergine:
1. Schütze den Flaschenhals: Lege das Stück Stoff oder Vlies über den Flaschenhals. Das verhindert, dass Erde herausfällt, lässt aber trotzdem Wasser durch. Fixiere es eventuell mit einem Gummiband, wenn es nicht von selbst hält.
2. Fülle die Flasche mit Erde: Fülle die Flasche langsam mit Blumenerde. Lass dabei etwa 5-7 cm Platz bis zum Rand. Drücke die Erde leicht an, aber nicht zu fest.
3. Setze die Auberginenpflanze ein: Jetzt kommt der knifflige Teil! Drehe die Flasche vorsichtig um, so dass der Flaschenhals nach unten zeigt. Halte die Auberginenpflanze vorsichtig fest und führe sie langsam durch den Flaschenhals. Achte darauf, die Wurzeln nicht zu beschädigen.
4. Fülle mit Erde auf: Sobald die Pflanze richtig positioniert ist, fülle den restlichen Platz in der Flasche mit Erde auf. Drücke die Erde wieder leicht an.
5. Gieße die Pflanze: Gieße die Pflanze vorsichtig von oben, bis die Erde gut durchfeuchtet ist. Achte darauf, dass das Wasser durch den Stoff am Flaschenhals abfließen kann.
Aufhängen und Pflege:
1. Befestige die Aufhängung: Führe die Schnur oder den Haken durch die Löcher, die du in den oberen Teil der Flasche gebohrt hast. Achte darauf, dass die Aufhängung stabil ist und das Gewicht der Flasche tragen kann.
2. Hänge die Flasche auf: Suche einen sonnigen Platz für deine hängende Aubergine. Ein Balkon, eine Terrasse oder ein Garten mit ausreichend Sonnenlicht sind ideal.
3. Gießen: Gieße die Pflanze regelmäßig, besonders an heißen Tagen. Die Erde sollte immer leicht feucht sein, aber nicht nass. Überprüfe die Feuchtigkeit, indem du mit dem Finger in die Erde stichst.
4. Düngen: Auberginen sind Starkzehrer. Dünge deine Pflanze regelmäßig mit einem geeigneten Dünger. Ich empfehle einen Langzeitdünger, den du beim Einpflanzen in die Erde mischen kannst. Alternativ kannst du auch regelmäßig Flüssigdünger verwenden.
5. Beobachten und Pflegen: Beobachte deine Pflanze regelmäßig auf Schädlinge oder Krankheiten. Entferne verwelkte Blätter und Blüten, um die Bildung neuer Früchte zu fördern.
Zusätzliche Tipps und Tricks:
* Sortenwahl: Wähle eine kompakte Auberginensorte, die nicht zu groß wird. Das erleichtert die Handhabung und verhindert, dass die Flasche zu schwer wird. Es gibt spezielle Sorten, die für den Anbau in Töpfen und Containern gezüchtet wurden.
* Drainage: Achte darauf, dass das Wasser gut abfließen kann. Wenn du Bedenken hast, dass der Stoff am Flaschenhals nicht ausreichend Drainage bietet, kannst du zusätzlich kleine Löcher in den unteren Teil der Flasche bohren.
* Windschutz: Hänge die Flasche an einem windgeschützten Ort auf. Starker Wind kann die Pflanze beschädigen oder die Flasche zum Schwingen bringen.
* Sonnenbrand: Achte darauf, dass die Auberginenfrüchte nicht zu starker direkter Sonneneinstrahlung ausgesetzt sind, da sie sonst Sonnenbrand bekommen können. Du kannst die Früchte bei Bedarf mit einem leichten Tuch abdecken.
* Stützen: Wenn die Auberginenfrüchte zu schwer werden, kann es notwendig sein, die Pflanze zusätzlich zu stützen. Du kannst dazu kleine Stäbe oder Schnüre verwenden.
* Schädlinge: Auberginen können von verschiedenen Schädlingen befallen werden, wie z.B. Blattläusen, Spinnmilben oder Weißen Fliegen. Kontrolliere deine Pflanze regelmäßig und bekämpfe Schädlinge bei Bedarf mit geeigneten Mitteln.
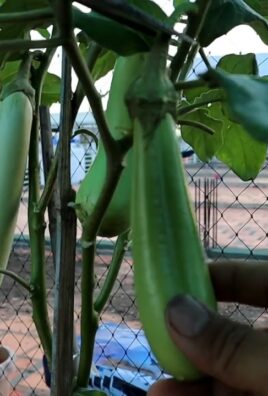
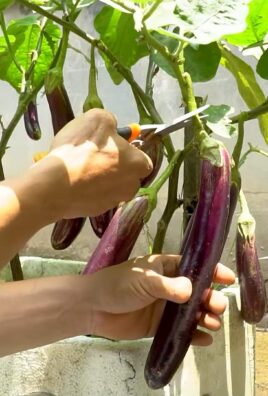
* Ernte: Auberginen sind erntereif, wenn sie eine glänzende, pralle Haut haben und sich leicht eindrücken lassen. Schneide die Früchte mit einem scharfen Messer ab, um die Pflanze nicht zu beschädigen.
Warum kopfüber?
Du fragst dich vielleicht, warum das Ganze kopfüber? Hier sind ein paar Vorteile:
* Platzsparend: Ideal für kleine Balkone oder Terrassen.
* Weniger Unkraut: Da die Pflanze hängt, haben Unkräuter weniger Chancen, sich auszubreiten.
* Bessere Belüftung: Die Blätter sind besser belüftet, was das Risiko von Pilzkrankheiten reduziert.
* Schutz vor Schädlingen: Einige Schädlinge haben es schwerer, die Pflanze zu erreichen.
* Einfache Ernte: Die Früchte hängen frei und sind leicht zu ernten.
Häufige Fehler und wie man sie vermeidet:
* Zu kleine Flasche: Wähle eine ausreichend große Flasche, damit die Wurzeln genügend Platz haben.
* Falsche Erde: Verwende hochwertige Blumenerde, die gut drainiert und ausreichend Nährstoffe enthält.
* Zu wenig Wasser: Auberginen brauchen viel Wasser, besonders an heißen Tagen. Überprüfe die Feuchtigkeit der Erde regelmäßig.
* Zu viel Wasser: Staunässe kann zu Wurzelfäule führen. Achte darauf, dass das Wasser gut abfließen kann.
* Zu wenig Dünger: Auberginen sind Starkzehrer und brauchen regelmäßige Düngung.
* Falscher Standort: Auberginen brauchen viel Sonne. Wähle einen sonnigen Standort für deine Pflanze.
Fazit:
Das Anpflanzen von Auberginen kopfüber in Flaschen ist ein wirklich lohnendes Projekt. Es ist nicht nur platzsparend und effektiv, sondern macht auch noch Spaß und sieht toll aus! Mit ein wenig Geduld und Pflege kannst du bald deine eigenen, frischen Auberginen ernten. Viel Erfolg und viel Spaß beim Gärtnern! Ich hoffe, diese Anleitung hilft dir dabei, deine eigenen hängenden Auberginen zu ziehen. Lass mich wissen, wie es läuft!
Conclusion
So, there you have it! The upside-down eggplant bottle growing method – a surprisingly simple yet remarkably effective way to cultivate these delicious vegetables, even in limited spaces. We’ve explored the ins and outs of this technique, highlighting its benefits for urban gardeners, those with mobility issues, or anyone simply looking for a novel and space-saving approach to growing their own food.
Why is this a must-try? Because it democratizes gardening. It removes the barriers of large plots of land and extensive digging. It allows you to enjoy the satisfaction of harvesting your own fresh eggplants, bursting with flavor and free from harmful pesticides, right from your balcony, patio, or even a sunny windowsill. Imagine the pride of serving a dish made with eggplants you nurtured from seedling to harvest, all thanks to a repurposed plastic bottle!
But the beauty of this method lies not only in its practicality but also in its adaptability. Feel free to experiment with different bottle sizes to accommodate various eggplant varieties. Consider adding companion plants like marigolds or basil to the bottle’s opening to deter pests and enhance the overall health of your eggplant. You can even get creative with the bottle’s exterior, painting it with vibrant colors or adding decorative elements to transform it into a unique piece of garden art.
Don’t be afraid to tweak the soil mixture to suit your specific climate and eggplant variety. Some gardeners prefer a slightly more acidic soil, while others find that adding compost tea regularly provides an extra boost of nutrients. The key is to observe your plants closely and adjust your approach as needed.
This method isn’t just about growing eggplants; it’s about fostering a connection with nature, learning about the growing process, and experiencing the joy of self-sufficiency. It’s about reducing your carbon footprint by growing your own food locally and repurposing materials that would otherwise end up in a landfill.
We wholeheartedly encourage you to give the upside-down eggplant bottle growing method a try. It’s a fun, rewarding, and surprisingly easy way to bring the bounty of the garden to your doorstep. And most importantly, don’t forget to share your experiences! We’d love to hear about your successes, your challenges, and any innovative variations you come up with. Post pictures of your upside-down eggplant gardens on social media using [Your Hashtag Here] and let’s inspire others to embrace this sustainable and space-saving gardening technique. Let’s cultivate a community of upside-down eggplant enthusiasts!
Now, let’s address some frequently asked questions to ensure your upside-down eggplant adventure is a resounding success.
Frequently Asked Questions (FAQ)
What type of eggplant is best suited for upside-down bottle growing?
While you can technically grow any eggplant variety using this method, smaller, more compact varieties tend to thrive best. Look for cultivars like ‘Patio Baby,’ ‘Fairy Tale,’ or ‘Hansel.’ These varieties are naturally more manageable in a confined space and produce smaller, more manageable fruits. Larger varieties, while possible, may require more support and attention to ensure they don’t become too heavy for the bottle. Consider the mature size of the eggplant when making your selection.
How often should I water my upside-down eggplant?
Watering frequency depends on several factors, including the climate, the size of the bottle, and the type of soil you’re using. As a general rule, check the soil moisture daily. If the top inch of soil feels dry to the touch, it’s time to water. Water thoroughly until you see water draining from the bottom of the bottle. Avoid overwatering, as this can lead to root rot. During hot, dry periods, you may need to water more frequently, perhaps even twice a day. Conversely, during cooler, wetter periods, you may only need to water every few days. The key is to observe your plant and adjust your watering schedule accordingly.
What kind of soil should I use for upside-down eggplant growing?
A well-draining potting mix is essential for successful upside-down eggplant growing. Avoid using garden soil, as it tends to be too heavy and can compact in the bottle, hindering drainage and root growth. A good potting mix should be light, airy, and rich in organic matter. You can purchase a pre-made potting mix or create your own by combining equal parts peat moss, perlite, and vermiculite. Adding compost to the mix will provide an extra boost of nutrients. Ensure the pH of the soil is slightly acidic, ideally between 6.0 and 6.8.
How much sunlight does an upside-down eggplant need?
Eggplants are sun-loving plants and require at least 6-8 hours of direct sunlight per day to thrive. Choose a location that receives ample sunlight throughout the day. If you’re growing your eggplant indoors, supplement with grow lights if necessary. Insufficient sunlight can lead to leggy growth, reduced flowering, and smaller fruit. Rotate the bottle regularly to ensure all sides of the plant receive adequate sunlight.
How do I fertilize my upside-down eggplant?
Eggplants are heavy feeders and require regular fertilization to produce abundant fruit. Start fertilizing your eggplant seedlings a few weeks after transplanting them into the bottle. Use a balanced liquid fertilizer, diluted to half strength, every two weeks. As the plant begins to flower and fruit, switch to a fertilizer that is higher in phosphorus and potassium. You can also supplement with compost tea or worm castings to provide additional nutrients. Avoid over-fertilizing, as this can lead to excessive foliage growth at the expense of fruit production.
How do I prevent pests and diseases in my upside-down eggplant?
Regularly inspect your eggplant for signs of pests and diseases. Common pests that affect eggplants include aphids, flea beetles, and spider mites. You can control these pests with insecticidal soap or neem oil. Diseases that can affect eggplants include fungal diseases like powdery mildew and blight. Prevent these diseases by ensuring good air circulation around the plant and avoiding overhead watering. If you notice any signs of disease, treat the plant with a fungicide. Companion planting with marigolds or basil can also help deter pests.
How do I support the eggplant as it grows?
As your eggplant grows and produces fruit, it may become necessary to provide additional support to prevent the plant from breaking or tipping over. You can use stakes, trellises, or even tie the plant to the bottle itself. Ensure the support is sturdy enough to withstand the weight of the plant and the fruit. Regularly check the support and adjust it as needed.
When is the right time to harvest my eggplants?
Eggplants are typically ready to harvest when they are firm, glossy, and have reached their mature size. The skin should be smooth and unblemished. Gently press the eggplant with your thumb; if it gives slightly, it’s ripe. Use a sharp knife or pruning shears to cut the eggplant from the plant, leaving a small stem attached. Harvest eggplants regularly to encourage continued fruit production. Overripe eggplants will become bitter and seedy.
Can I reuse the plastic bottle for future plantings?
Yes, you can reuse the plastic bottle for future plantings, but it’s essential to clean and sanitize it thoroughly before each use. Wash the bottle with soap and water to remove any dirt or debris. Then, disinfect it with a solution of bleach and water (1 part bleach to 9 parts water). Rinse the bottle thoroughly with clean water before using it again. This will help prevent the spread of diseases and pests to your new plants.
What if my eggplant doesn’t produce any fruit?
Several factors can contribute to a lack of fruit production in eggplants. These include insufficient sunlight, improper watering, lack of pollination, and nutrient deficiencies. Ensure your eggplant is receiving at least 6-8 hours of direct sunlight per day. Water regularly and fertilize with a balanced fertilizer. If you suspect pollination is an issue, you can hand-pollinate the flowers by gently shaking the plant or using a small brush to transfer pollen from one flower to another. Check the soil pH and adjust it if necessary. By addressing these potential issues, you can increase your chances of a bountiful eggplant harvest.
Leave a Comment