
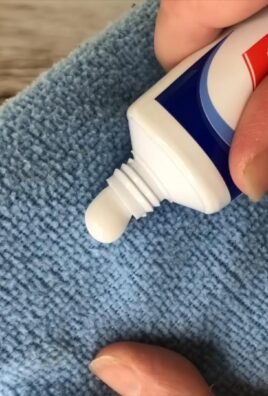
Toothpaste uses outside the bathroom? I know, it sounds crazy, right? We all associate that minty fresh paste with brushing our teeth, but trust me, there’s a whole world of unexpected applications waiting to be discovered! For centuries, people have relied on simple household items for more than their intended purpose, and toothpaste is no exception. Think of it as a little bit of MacGyver-esque ingenuity, using what you have on hand to solve everyday problems.
But why should you care about toothpaste uses outside the bathroom? Well, life gets messy! From stubborn stains on your clothes to scuffed shoes and even tarnished jewelry, everyday mishaps can leave you feeling frustrated. Instead of rushing out to buy expensive specialty cleaners, wouldn’t it be amazing to tackle those problems with something you already have in your bathroom cabinet? I’m here to show you how this humble tube can become your secret weapon against all sorts of household woes. Get ready to unlock the surprising potential of toothpaste and save yourself time, money, and a whole lot of hassle!
Beyond the Brush: Unexpected Toothpaste Hacks You Need to Know
Okay, let’s be honest. We all have a tube of toothpaste sitting in our bathroom, ready to wage war against plaque and keep our smiles sparkling. But what if I told you that this humble tube holds a secret arsenal of cleaning and problem-solving power that extends far beyond your pearly whites? That’s right! Toothpaste is a surprisingly versatile DIY tool, and I’m here to spill the beans on some of my favorite unexpected uses. Get ready to be amazed!
Cleaning Silverware and Jewelry
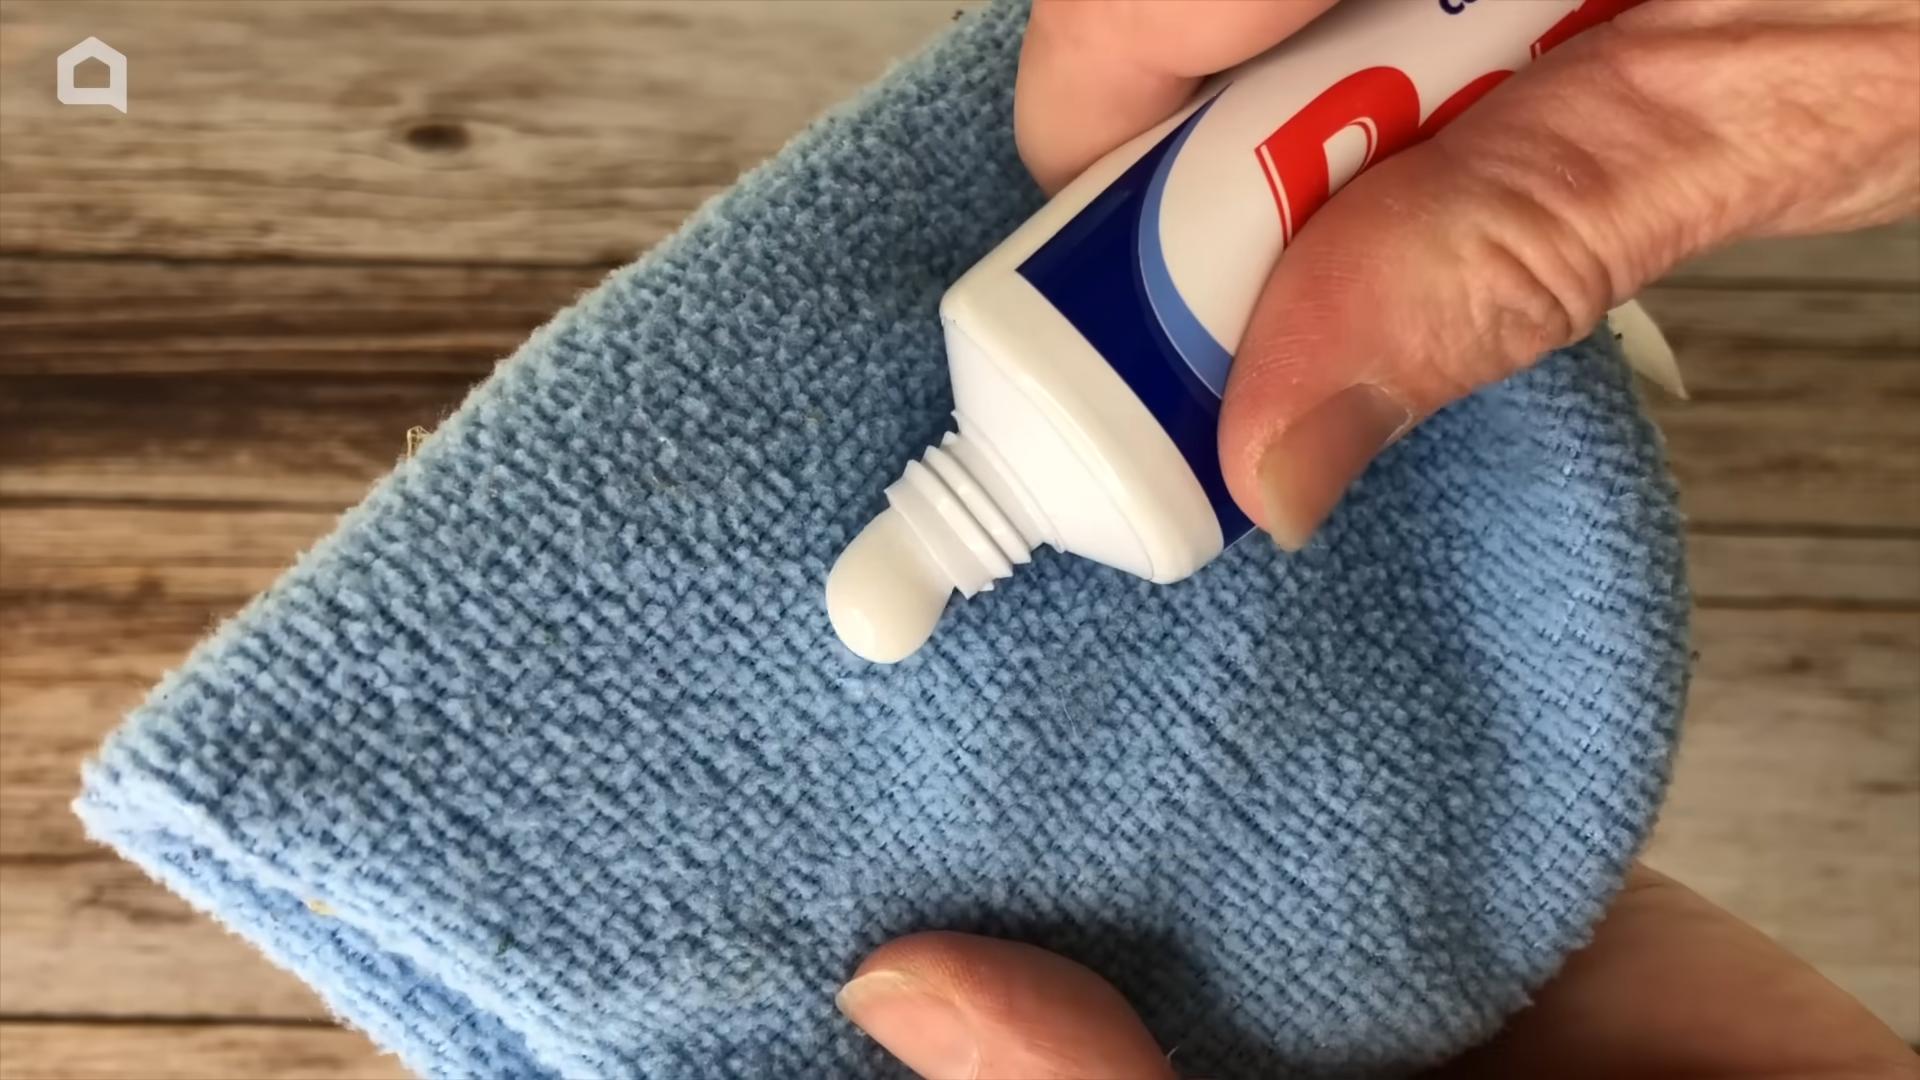
Tarnished silverware and dull jewelry can really bring down the elegance of a table setting or an outfit. Instead of reaching for harsh chemicals, grab your trusty toothpaste! This is one of my go-to tricks for restoring shine without damaging delicate surfaces.
What you’ll need:
* Toothpaste (non-gel, plain white is best)
* Soft cloth or sponge
* Warm water
* Soft-bristled toothbrush (optional, for intricate designs)
Step-by-step instructions:
1. Apply a small amount of toothpaste: Squeeze a pea-sized amount of toothpaste onto your soft cloth or sponge. Remember, less is more! You can always add more if needed.
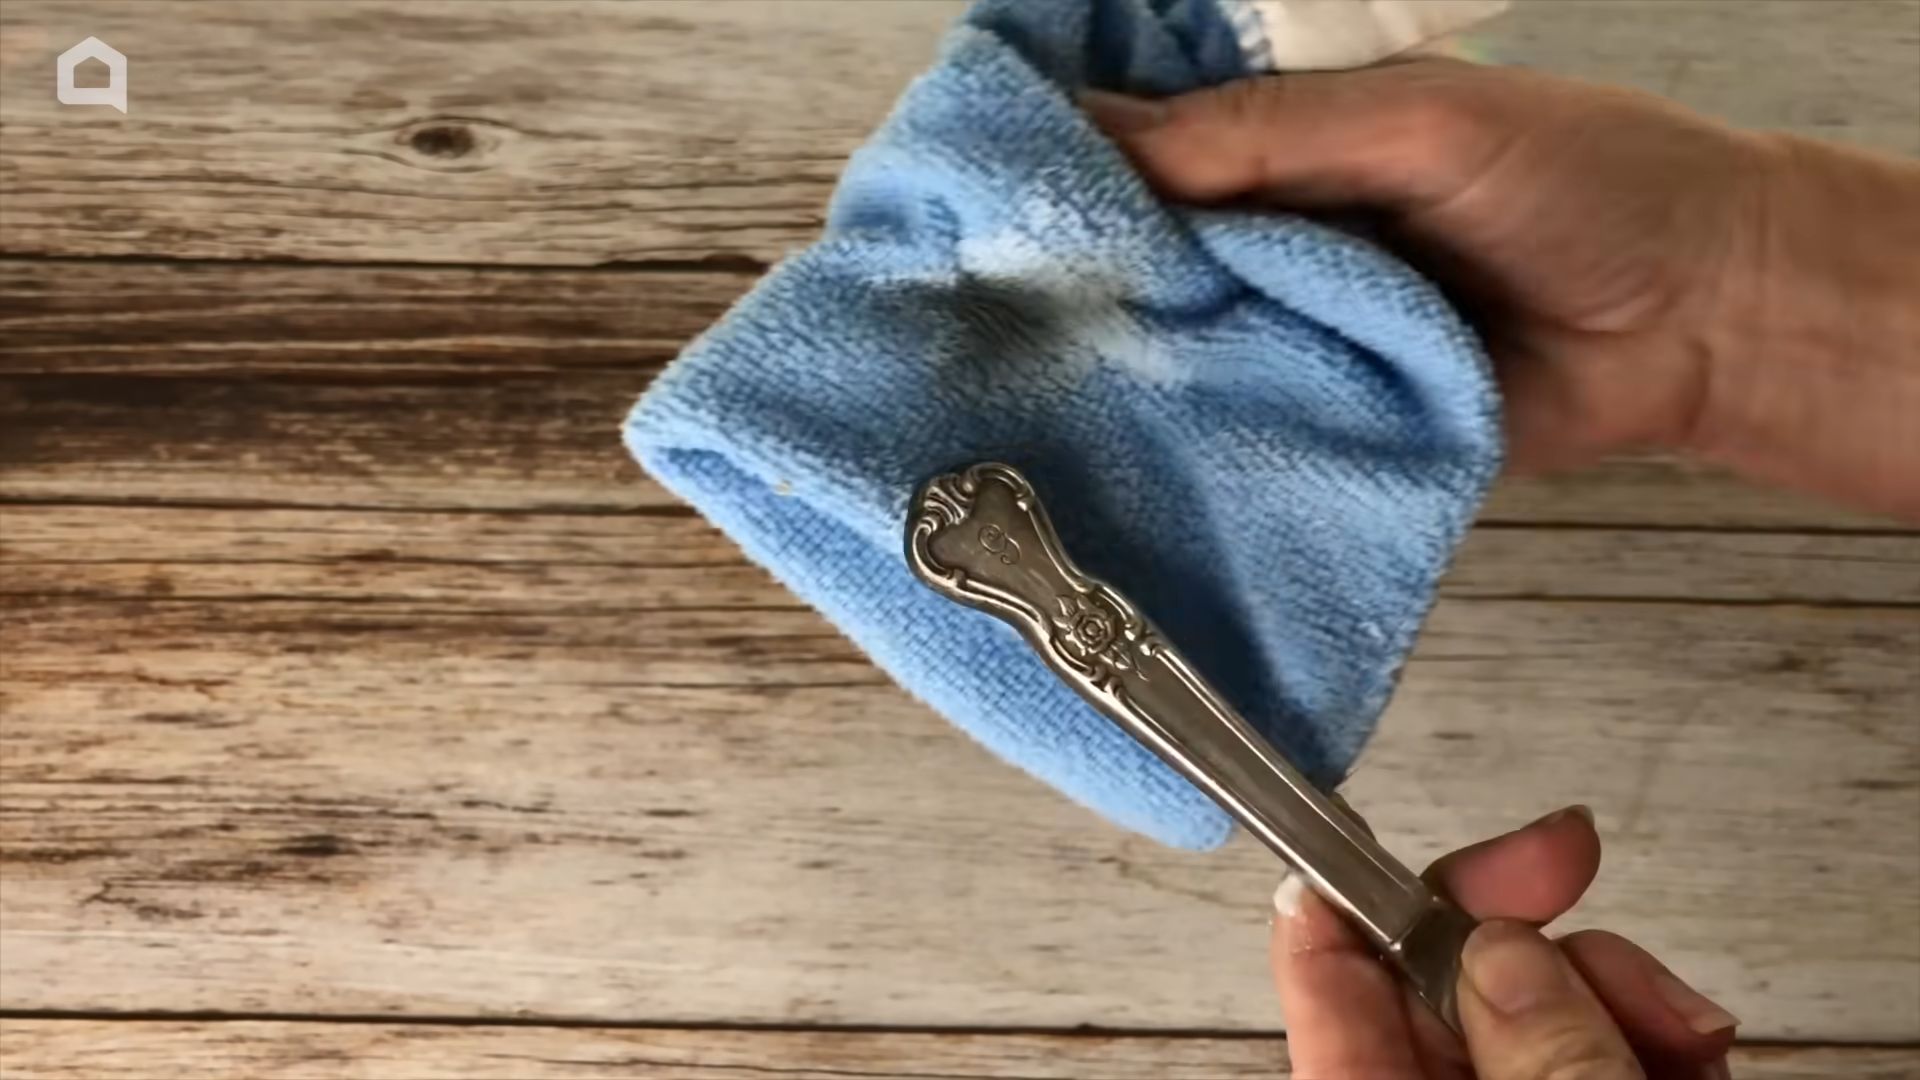
2. Gently rub the tarnished area: Gently rub the toothpaste onto the tarnished silverware or jewelry. Use circular motions and apply light pressure. Avoid scrubbing too hard, especially on delicate items.
3. Reach intricate areas with a toothbrush (optional): If your silverware or jewelry has intricate designs, use a soft-bristled toothbrush to reach those hard-to-clean areas. Be extra gentle!
4. Rinse thoroughly: Once you’ve cleaned the entire surface, rinse the silverware or jewelry thoroughly with warm water. Make sure to remove all traces of toothpaste.
5. Dry and buff: Use a clean, dry cloth to dry the silverware or jewelry completely. Then, buff it gently to restore its shine. You’ll be amazed at the difference!
Removing Scuff Marks from Leather Shoes and Furniture
Scuff marks are the bane of my existence! They seem to appear out of nowhere and can make even the most stylish leather items look worn and tired. But fear not, toothpaste to the rescue!
What you’ll need:
* Toothpaste (non-gel, plain white is best)
* Soft cloth
* Damp cloth
* Leather conditioner (optional)
Step-by-step instructions:
1. Test in an inconspicuous area: Before applying toothpaste to the entire scuff mark, test it in a small, inconspicuous area to ensure it doesn’t damage the leather. This is crucial!
2. Apply a small amount of toothpaste: Squeeze a small amount of toothpaste onto a soft cloth.
3. Gently rub the scuff mark: Gently rub the toothpaste onto the scuff mark using circular motions. Apply light pressure and avoid scrubbing too hard.
4. Wipe away the toothpaste: Use a damp cloth to wipe away the toothpaste residue.
5. Dry the area: Allow the area to dry completely.
6. Apply leather conditioner (optional): Once the area is dry, you can apply a leather conditioner to help restore moisture and protect the leather. This will keep your leather looking its best!
Cleaning Chrome Fixtures
Chrome fixtures in your bathroom and kitchen can easily become dull and stained with water spots and soap scum. Toothpaste is a fantastic, gentle abrasive that can restore their shine without scratching the surface.
What you’ll need:
* Toothpaste (non-gel, plain white is best)
* Soft cloth or sponge
* Warm water
Step-by-step instructions:
1. Apply toothpaste to the fixture: Apply a small amount of toothpaste directly to the chrome fixture.
2. Rub gently: Use a soft cloth or sponge to gently rub the toothpaste onto the fixture, focusing on areas with water spots or soap scum.
3. Rinse thoroughly: Rinse the fixture thoroughly with warm water to remove all traces of toothpaste.
4. Dry and buff: Use a clean, dry cloth to dry the fixture completely. Then, buff it gently to restore its shine. Prepare to be dazzled!
Removing Permanent Marker from Walls (and Other Surfaces!)
Oh, the joys of having kids (or clumsy adults!) who wield permanent markers like paintbrushes. Finding marker masterpieces on your walls can be incredibly frustrating, but don’t panic! Toothpaste can often come to the rescue.
What you’ll need:
* Toothpaste (non-gel, plain white is best)
* Soft cloth
* Damp cloth
Step-by-step instructions:
1. Test in an inconspicuous area: As with any cleaning solution, test the toothpaste in a small, inconspicuous area first to ensure it doesn’t damage the surface.
2. Apply toothpaste to the marker stain: Apply a generous amount of toothpaste directly to the permanent marker stain.
3. Let it sit for a few minutes: Allow the toothpaste to sit on the stain for a few minutes to help break down the ink.
4. Gently rub the stain: Gently rub the toothpaste onto the stain using a soft cloth. Use circular motions and apply light pressure.
5. Wipe away the toothpaste: Use a damp cloth to wipe away the toothpaste residue and the marker stain. You may need to repeat this process a few times to completely remove the stain.
6. Dry the area: Allow the area to dry completely.
Defogging Bathroom Mirrors
Steamy showers are great for relaxation, but not so great for your bathroom mirror. Constantly wiping away the fog can be a real pain. Here’s a simple toothpaste trick to keep your mirror clear.
What you’ll need:
* Toothpaste (non-gel, plain white is best)
* Soft cloth
* Damp cloth
Step-by-step instructions:
1. Apply a thin layer of toothpaste: Apply a very thin layer of toothpaste to the entire surface of the mirror.
2. Rub it in: Use a soft cloth to rub the toothpaste into the mirror, ensuring it’s evenly distributed.
3. Wipe away the toothpaste: Use a damp cloth to wipe away the toothpaste residue.
4. Dry and buff: Use a clean, dry cloth to dry and buff the mirror. This will leave a protective layer that prevents fog from forming.
Treating Minor Burns
Important Note: This is for minor, superficial burns only. For serious burns, seek medical attention immediately!
Toothpaste can provide temporary relief from minor burns by cooling the affected area. The menthol in some toothpastes can also have a soothing effect.
What you’ll need:
* Toothpaste (non-gel, plain white is best, avoid whitening or flavored toothpastes)
* Cool water
Step-by-step instructions:
1. Cool the burn: Immediately run cool water over the burn for several minutes.
2. Apply a thin layer of toothpaste: Apply a thin layer of toothpaste to the burn.
3. Leave it on: Leave the toothpaste on the burn until the pain subsides.
4. Rinse gently: Gently rinse the toothpaste off with cool water.
Cleaning Your Cell Phone Screen
Our cell phone screens are magnets for fingerprints, smudges, and all sorts of grime. Toothpaste can help restore your screen’s clarity.
What you’ll need:
* Toothpaste (non-gel, plain white is best)
* Soft cloth
* Damp cloth
Step-by-step instructions:
1. Apply a tiny amount of toothpaste: Apply a very tiny amount of toothpaste to a soft cloth. Seriously, just a dab!
2. Gently rub the screen: Gently rub the toothpaste onto the screen using circular motions. Avoid getting toothpaste in any of the phone’s openings.
3. Wipe away the toothpaste: Use a damp cloth to wipe away the toothpaste residue.
4. Dry the screen: Use a clean, dry cloth to dry the screen completely.
Removing Crayon Marks
Another common occurrence in households with children is crayon marks on walls and furniture. Toothpaste can help lift those colorful creations.
What you’ll need:
* Toothpaste (non-gel, plain white is best)
* Soft cloth
* Damp cloth
Step-by-step instructions:
1. Apply toothpaste to the crayon marks: Apply toothpaste directly to the crayon marks.
2. Let it sit for a few minutes: Allow the toothpaste to sit on the crayon marks for a few minutes.
3. Gently rub the marks: Gently rub the toothpaste onto the crayon marks using a soft cloth.
4
Conclusion
So, there you have it! Stepping outside the bathroom and unlocking the surprising potential of toothpaste offers a world of practical solutions you probably never imagined. From banishing stubborn stains on clothing and shoes to polishing silverware and even removing water rings from wooden furniture, this humble tube is a veritable Swiss Army knife for your home.
Why is this DIY trick a must-try? Because it’s economical, readily available, and surprisingly effective. You likely already have a tube of toothpaste in your home, saving you a trip to the store and the expense of specialized cleaning products. Plus, it’s a fantastic way to reduce your reliance on harsh chemicals, opting instead for a gentler, more eco-friendly approach to everyday cleaning and maintenance.
But the versatility doesn’t stop there! Consider these variations to tailor the toothpaste trick to your specific needs:
* For delicate surfaces: Opt for a non-gel, non-whitening toothpaste to minimize the risk of abrasion. Always test in an inconspicuous area first.
* For extra cleaning power: Combine toothpaste with a small amount of baking soda for a gentle abrasive boost. This is particularly effective for cleaning grout or removing stubborn stains.
* For a refreshing scent: Choose a toothpaste with a pleasant minty aroma to leave your items smelling clean and fresh.
We’ve explored just a few of the many ways toothpaste can be used outside the bathroom. The possibilities are truly endless! The key is to experiment and discover what works best for you. Remember to always exercise caution and test on a small, hidden area before applying toothpaste to a larger surface.
We are confident that once you experience the magic of toothpaste uses outside bathroom, you’ll be hooked. It’s a game-changer for household cleaning and maintenance, offering a simple, affordable, and effective solution to a wide range of everyday problems.
Now, it’s your turn! We encourage you to try these DIY tricks and share your experiences with us. Did you discover a new and innovative use for toothpaste? Did you find a particular variation that worked wonders for you? Let us know in the comments below! We’re eager to hear your stories and learn from your successes. Together, we can unlock even more hidden potential of this everyday essential. So, go ahead, grab that tube of toothpaste, and prepare to be amazed!
Frequently Asked Questions (FAQs)
Is it safe to use any type of toothpaste for these DIY tricks?
Not all toothpastes are created equal, and choosing the right one is crucial for achieving the best results and avoiding potential damage. As a general rule, it’s best to opt for a plain, white, non-gel toothpaste. These types typically contain mild abrasives that are effective for cleaning and polishing without being overly harsh.
Avoid using whitening toothpastes, as they often contain stronger abrasives that can scratch delicate surfaces. Similarly, gel toothpastes may not have the same cleaning power as their non-gel counterparts. If you’re unsure, always test the toothpaste on a small, inconspicuous area first to ensure it doesn’t cause any discoloration or damage. For particularly delicate surfaces, consider using a toothpaste specifically formulated for sensitive teeth, as these tend to be gentler.
Can I use toothpaste to remove scratches from my phone screen?
While some sources suggest that toothpaste can be used to remove minor scratches from phone screens, we generally advise against it. Toothpaste is an abrasive, and while it might buff out very superficial scratches, it can also potentially damage the screen’s coating or create new, more noticeable scratches.
There are specialized screen repair kits and professional services available that are specifically designed to address scratches on electronic devices. These options are generally safer and more effective than using toothpaste. If you’re determined to try toothpaste, proceed with extreme caution and use a very small amount of non-gel toothpaste, applying it gently with a soft cloth. However, be aware that you’re doing so at your own risk.
Will toothpaste damage my silver jewelry?
Toothpaste can be used to polish silver jewelry, but it’s important to do so carefully and with the right type of toothpaste. As with other applications, opt for a non-gel, non-whitening toothpaste. Apply a small amount of toothpaste to a soft cloth and gently rub it onto the silver jewelry. Rinse thoroughly with water and dry with a clean cloth.
Avoid using toothpaste on delicate or intricate silver pieces, as the abrasives can get trapped in small crevices and be difficult to remove. Also, be cautious when polishing silver jewelry with gemstones, as toothpaste can potentially damage certain types of stones. If you’re unsure, it’s best to consult a professional jeweler for advice on cleaning your silver jewelry.
Can I use toothpaste to clean my leather shoes?
Toothpaste can be effective for removing scuffs and stains from leather shoes, but it’s crucial to use it sparingly and with the right technique. Again, choose a non-gel toothpaste and apply a small amount to a soft cloth. Gently rub the toothpaste onto the affected area, being careful not to apply too much pressure. Wipe away the toothpaste with a damp cloth and allow the shoes to air dry.
After cleaning your leather shoes with toothpaste, it’s important to condition them with a leather conditioner to prevent them from drying out and cracking. Always test the toothpaste on a small, inconspicuous area of the shoe first to ensure it doesn’t cause any discoloration or damage. Avoid using toothpaste on suede or nubuck leather, as it can be difficult to remove and may damage the delicate surface.
How do I remove toothpaste residue after cleaning?
Removing toothpaste residue is essential for achieving a clean and polished finish. The best way to remove residue is to use a damp cloth. Wet a soft cloth with clean water and gently wipe away any remaining toothpaste. You may need to repeat this process several times to ensure all the residue is removed.
For hard-to-reach areas or stubborn residue, you can use a cotton swab dipped in water. Be sure to dry the cleaned surface thoroughly with a clean, dry cloth to prevent water spots. If you’re cleaning a porous surface, such as grout, you may need to use a brush to scrub away the residue. In some cases, a mild vinegar solution (1 part vinegar to 1 part water) can be used to help dissolve stubborn toothpaste residue. However, always test the solution on a small, inconspicuous area first to ensure it doesn’t damage the surface.
Leave a Comment