
Thriving Chili Peppers Growing Tips: Want to turn up the heat in your garden and your kitchen? I’m here to tell you, it’s totally achievable, even if you don’t have a sprawling farm! For centuries, chili peppers have been adding zest to cuisines around the globe, from the fiery curries of India to the vibrant salsas of Mexico. Their cultivation dates back thousands of years, a testament to their enduring appeal and versatility. But let’s be honest, sometimes getting those peppers to truly thrive can feel like a battle.
That’s where I come in! I’m sharing my tried-and-true DIY tricks and hacks to help you unlock the secrets to bumper crops of beautiful, spicy chili peppers. Forget complicated gardening jargon and expensive equipment. We’re talking simple, effective solutions that anyone can implement. Whether you’re a seasoned gardener or just starting out, these thriving chili peppers growing tips will empower you to cultivate a pepper patch that’s the envy of the neighborhood. Get ready to spice up your life – one chili pepper at a time!
Unlocking the Secrets to Bumper Chili Pepper Harvests: A DIY Guide
Hey fellow chili enthusiasts! I’m thrilled to share my tried-and-true methods for growing vibrant, productive chili pepper plants. Forget those puny peppers you find at the grocery store – we’re aiming for a chili explosion in your garden! This guide is packed with tips and tricks I’ve learned over years of experimenting, so get ready to turn up the heat!
Choosing the Right Chili Pepper Variety
Before we even think about soil, let’s talk peppers! The variety you choose will significantly impact your success.
* Consider your climate: Some peppers thrive in hot, humid conditions, while others prefer cooler, drier climates. Research which varieties are best suited for your region.
* Think about heat level: From mild bell peppers to scorching ghost peppers, the Scoville scale is your friend. Choose peppers that match your spice tolerance.
* Space matters: Some chili pepper plants grow quite large, while others are more compact. Consider the available space in your garden or containers.
* Disease resistance: Look for varieties that are resistant to common pepper diseases in your area. This will save you a lot of headaches later on.
Some of my personal favorites include Jalapeños (versatile and reliable), Serrano peppers (a nice kick), and Cayenne peppers (great for drying and making chili powder). But don’t be afraid to experiment!
Starting Your Chili Pepper Seeds
Starting your chili pepper seeds indoors is crucial, especially if you live in a region with a shorter growing season. This gives your plants a head start and allows them to mature before the first frost.
When to Start Seeds
* Timing is key: Start your seeds 6-8 weeks before the last expected frost in your area. This will give them ample time to germinate and grow into healthy seedlings.
* Check your local frost dates: A quick online search will provide you with the average last frost date for your region.
Materials You’ll Need
* Chili pepper seeds: Choose your desired varieties.
* Seed starting trays or small pots: I prefer using seed starting trays with a humidity dome.
* Seed starting mix: This is a lightweight, sterile mix that’s perfect for germinating seeds.
* Heat mat (optional): Chili pepper seeds germinate best in warm soil (around 80-85°F). A heat mat can significantly improve germination rates.
* Grow lights (optional): If you don’t have a sunny windowsill, grow lights will provide your seedlings with the light they need to thrive.
* Spray bottle: For misting the soil.
Step-by-Step Seed Starting Guide
1. Prepare your seed starting trays: Fill each cell of your seed starting tray with seed starting mix. Gently tap the tray to settle the mix.
2. Sow the seeds: Place 2-3 chili pepper seeds in each cell, about ¼ inch deep.
3. Cover the seeds: Lightly cover the seeds with seed starting mix.
4. Water gently: Use a spray bottle to mist the soil until it’s evenly moist but not soggy.
5. Cover with a humidity dome: This will help retain moisture and create a warm, humid environment for germination.
6. Place on a heat mat (optional): If using a heat mat, place the seed starting tray on top.
7. Provide light: Place the tray under grow lights or on a sunny windowsill.
8. Monitor moisture levels: Check the soil daily and mist as needed to keep it moist.
9. Germination: Chili pepper seeds can take anywhere from 7-21 days to germinate, depending on the variety and temperature. Be patient!
10. Remove the humidity dome: Once the seedlings emerge, remove the humidity dome to prevent fungal diseases.
11. Thin the seedlings: Once the seedlings have their first true leaves (the second set of leaves), thin them to one seedling per cell. Choose the strongest, healthiest seedling and snip off the others at the soil line.
Transplanting Your Chili Pepper Seedlings
Once your seedlings have grown a few inches tall and have a strong root system, it’s time to transplant them into larger pots or directly into your garden.
Hardening Off Your Seedlings
Before transplanting, it’s crucial to harden off your seedlings. This process gradually acclimates them to outdoor conditions, preventing transplant shock.
* Gradual exposure: Start by placing your seedlings outdoors in a sheltered location for just an hour or two each day.
* Increase exposure time: Gradually increase the amount of time they spend outdoors each day, over the course of a week or two.
* Protect from harsh conditions: Protect your seedlings from strong winds, direct sunlight, and extreme temperatures during the hardening off process.
Preparing Your Garden Bed or Containers
* Choose a sunny location: Chili peppers need at least 6-8 hours of sunlight per day.
* Well-draining soil: Chili peppers prefer well-draining soil that’s rich in organic matter. Amend your soil with compost or well-rotted manure.
* Container size: If growing in containers, choose pots that are at least 5 gallons in size.
* Soil pH: Chili peppers prefer a slightly acidic soil pH of around 6.0-6.8.
Transplanting Steps
1. Dig a hole: Dig a hole that’s slightly larger than the root ball of your seedling.
2. Gently remove the seedling: Carefully remove the seedling from its pot or cell, being careful not to damage the roots.
3. Loosen the roots: Gently loosen the roots of the seedling.
4. Place the seedling in the hole: Place the seedling in the hole, ensuring that the top of the root ball is level with the surrounding soil.
5. Fill the hole: Fill the hole with soil and gently firm it around the base of the plant.
6. Water thoroughly: Water the seedling thoroughly after transplanting.
7. Mulch: Apply a layer of mulch around the base of the plant to help retain moisture and suppress weeds.
Caring for Your Chili Pepper Plants
Now that your chili pepper plants are in the ground, it’s time to provide them with the care they need to thrive.
Watering
* Water deeply and regularly: Water your chili pepper plants deeply and regularly, especially during hot, dry weather.
* Avoid overwatering: Overwatering can lead to root rot. Allow the soil to dry out slightly between waterings.
* Water at the base of the plant: Avoid wetting the foliage, as this can promote fungal diseases.
Fertilizing
* Balanced fertilizer: Use a balanced fertilizer (e.g., 10-10-10) at planting time.
* Side-dress with fertilizer: Side-dress your plants with fertilizer every 4-6 weeks during the growing season.
* Epsom salts: Add Epsom salts to the soil to provide magnesium, which is essential for pepper production. I usually add a tablespoon per plant every few weeks.
Pruning
* Pinch off early flowers: Pinch off the first few flowers that appear on your plants to encourage them to focus on vegetative growth.
* Remove suckers: Remove any suckers (small shoots that grow from the base of the plant) to improve air circulation and prevent disease.
* Prune for shape: You can prune your chili pepper plants to maintain a desired shape and size.
Pest and Disease Control
* Monitor your plants regularly: Check your plants regularly for signs of pests or diseases.
* Handpick pests: Handpick any pests that you find on your plants.
* Insecticidal soap: Use insecticidal soap to control aphids, whiteflies, and other soft-bodied insects.
* Neem oil: Neem oil is a natural insecticide and fungicide that can be used to control a wide range of pests and diseases.
* Good air circulation: Ensure good air circulation around your plants to prevent fungal diseases.
* Remove diseased foliage: Remove any diseased foliage immediately to prevent the spread of disease.
Supporting Your Plants
* Staking or caging: As your chili pepper plants grow, they may need to be staked or caged to provide support. This is especially important for taller varieties or those that produce heavy fruit.
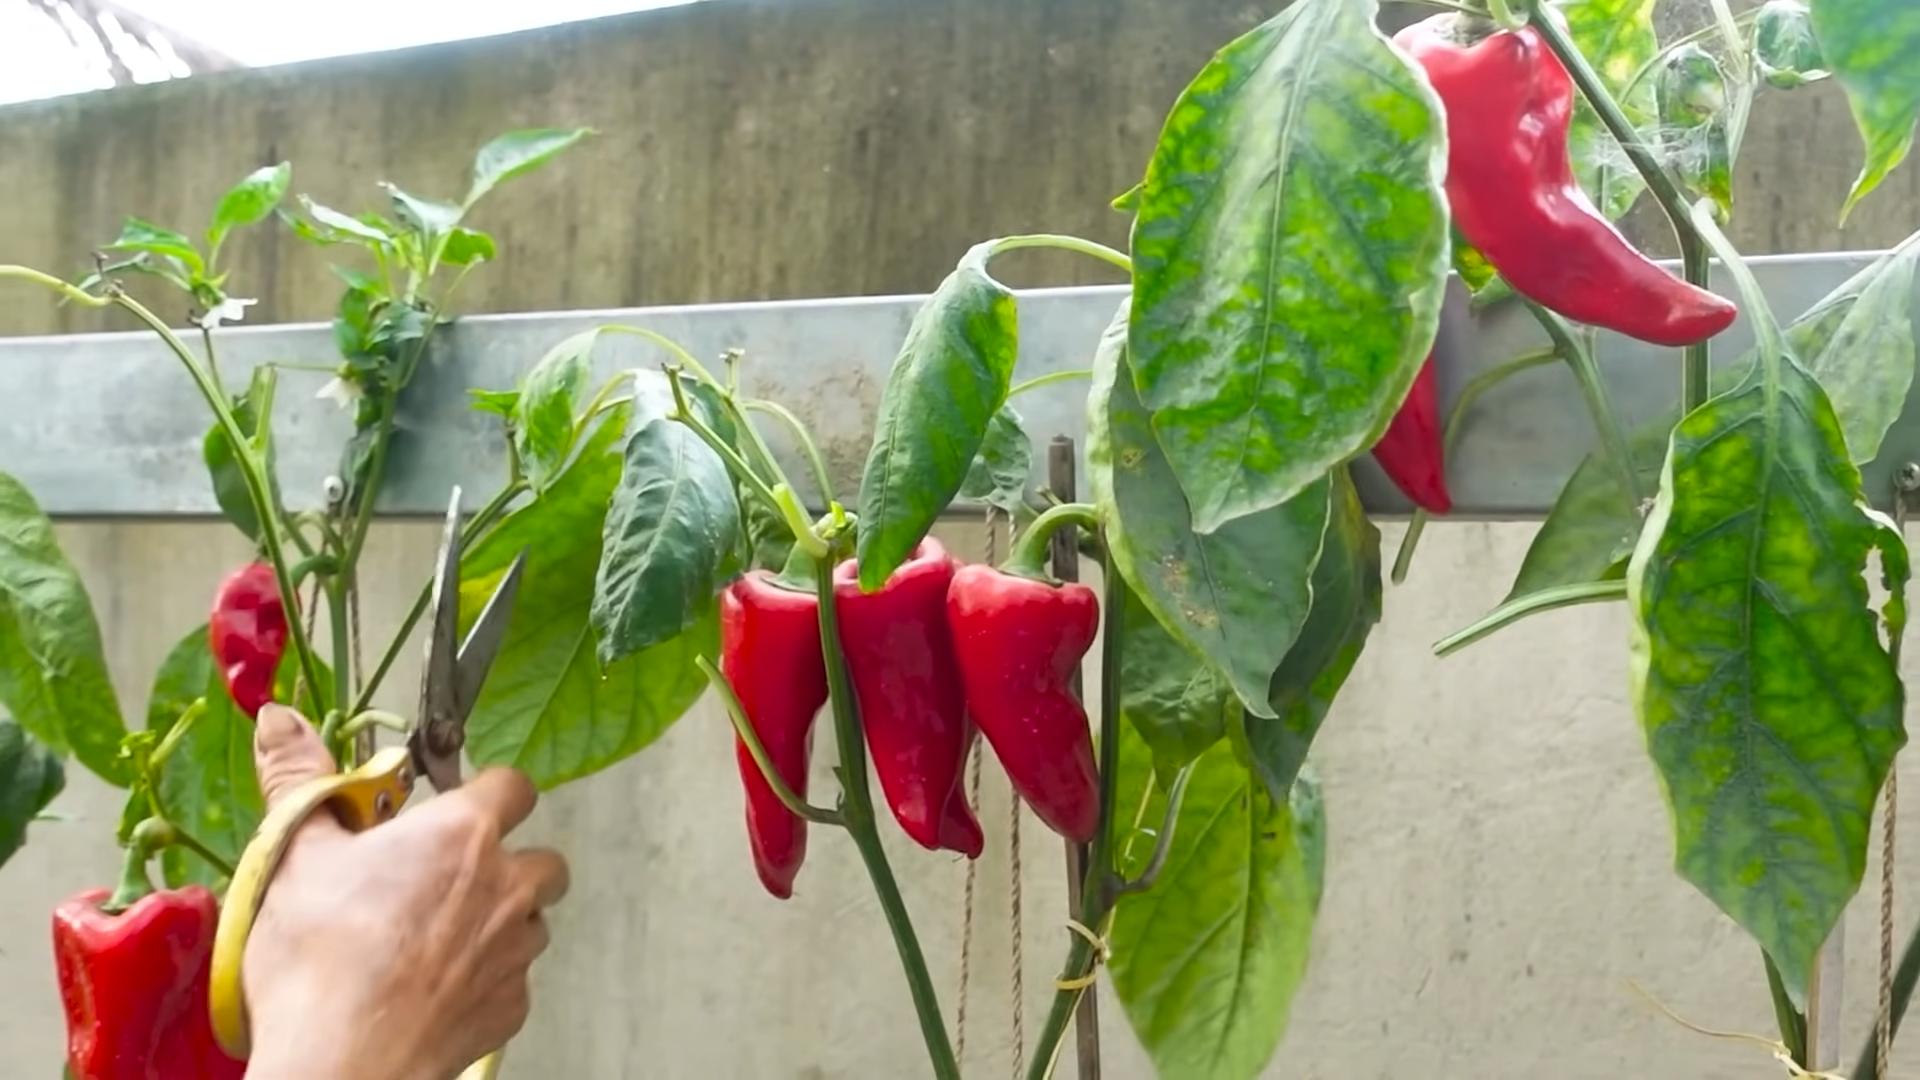
Harvesting Your Chili Peppers
The moment you’ve been waiting for! Harvesting your chili peppers is the most rewarding part of the process.
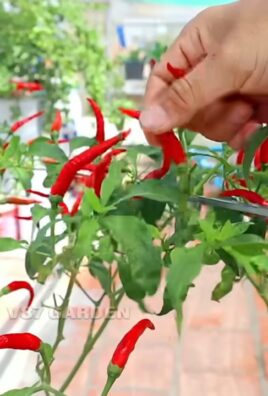
* Harvest when ripe: Harvest your chili peppers when they’ve reached their mature color and size.
* Use pruning shears or scissors: Use pruning shears or scissors to cut the peppers from the plant, leaving a

Conclusion
So, there you have it! Mastering the art of growing thriving chili peppers doesn’t require a green thumb blessed by the gardening gods. It’s about understanding their needs and providing them with the right environment and care. This DIY trick, focusing on creating a nutrient-rich, well-draining soil mix, is a game-changer for anyone serious about harvesting a bumper crop of fiery peppers.
Why is this a must-try? Because it addresses the two most critical factors for chili pepper success: nutrient availability and drainage. Store-bought potting mixes, while convenient, often lack the specific nutrients chili peppers crave and can sometimes retain too much water, leading to root rot. Our DIY approach allows you to tailor the soil composition precisely to your plants’ needs, ensuring they receive the perfect balance of nitrogen, phosphorus, and potassium, along with essential micronutrients. The improved drainage prevents waterlogging, which is a silent killer of chili pepper plants.
But don’t stop there! Feel free to experiment with variations to further optimize your chili pepper growing experience. For example, if you live in a particularly humid climate, consider adding extra perlite or vermiculite to your soil mix to enhance drainage even further. If you’re growing organically, you can substitute bone meal for the superphosphate and kelp meal for the Epsom salts. Another great addition, especially for container gardening, is a slow-release fertilizer specifically formulated for tomatoes and peppers. These fertilizers provide a steady stream of nutrients over several months, reducing the need for frequent liquid feeding.
Consider the specific type of chili pepper you are growing. Some varieties, like habaneros and scotch bonnets, are notoriously heavy feeders and may benefit from a slightly richer soil mix. Others, like jalapenos and serranos, are more forgiving and can thrive in a less nutrient-dense environment. Researching the specific needs of your chosen chili pepper variety will help you fine-tune your soil mix for optimal results.
Furthermore, think about the size of your container. Larger containers require more soil, and the soil in larger containers tends to dry out more slowly. Adjust your watering schedule accordingly to prevent overwatering. Mulching around the base of your chili pepper plants with organic materials like straw or wood chips can also help retain moisture and suppress weeds.
The key takeaway is that growing thriving chili peppers is an iterative process. Don’t be afraid to experiment and adjust your approach based on your observations. Pay close attention to your plants’ leaves, stems, and fruits. Are the leaves a vibrant green? Are the stems strong and sturdy? Are the fruits developing properly? These are all clues that will help you fine-tune your growing techniques.
We are confident that this DIY trick will significantly improve your chili pepper growing success. We encourage you to give it a try and share your experiences with us! Let us know what variations you’ve tried, what challenges you’ve faced, and what successes you’ve achieved. Your feedback will help us refine this guide and make it even more valuable for other chili pepper enthusiasts. Post pictures of your thriving chili peppers and tag us! We can’t wait to see your fiery creations. Happy growing!
Frequently Asked Questions (FAQ)
What exactly is the benefit of making my own soil mix instead of buying one from the store?
While commercially available potting mixes offer convenience, they often lack the specific nutrient profile that chili peppers crave for optimal growth and fruit production. Many commercial mixes are designed for general-purpose gardening and may not provide the right balance of nitrogen, phosphorus, and potassium, as well as essential micronutrients like calcium and magnesium. Furthermore, some commercial mixes can retain too much water, leading to root rot, a common problem for chili pepper plants. By creating your own soil mix, you have complete control over the ingredients and can tailor the composition to meet the specific needs of your chili pepper variety. This allows for better drainage, improved nutrient availability, and ultimately, healthier and more productive plants.
What if I don’t have access to all the ingredients listed in the DIY soil mix recipe? Are there any substitutions I can make?
Yes, there are several substitutions you can make depending on the availability of ingredients. If you can’t find perlite, you can use vermiculite as an alternative. Vermiculite also improves drainage and aeration, but it retains more moisture than perlite, so adjust your watering schedule accordingly. If you can’t find superphosphate, you can use bone meal as a natural source of phosphorus. Bone meal is a slow-release fertilizer, so it will provide phosphorus over a longer period. If you can’t find Epsom salts (magnesium sulfate), you can use dolomitic lime, which also provides calcium and magnesium. However, dolomitic lime will also raise the pH of your soil, so use it sparingly and monitor the pH regularly. If you can’t find peat moss, you can use coconut coir as a sustainable alternative. Coconut coir is made from coconut husks and has excellent water retention and drainage properties.
How often should I water my chili pepper plants after using this DIY soil mix?
The watering frequency will depend on several factors, including the size of your container, the climate, and the type of chili pepper you are growing. As a general rule, water your chili pepper plants when the top inch of soil feels dry to the touch. Avoid overwatering, as this can lead to root rot. When you water, water deeply until water drains out of the bottom of the container. This ensures that the entire root system is adequately hydrated. During hot and dry weather, you may need to water your plants more frequently. During cooler and wetter weather, you may need to water them less frequently. Monitor your plants closely and adjust your watering schedule accordingly.
My chili pepper plants are growing, but they aren’t producing any peppers. What could be the problem?
There are several reasons why your chili pepper plants may not be producing peppers. One common reason is a lack of pollination. Chili peppers are self-pollinating, but they often require a little help from wind or insects to transfer pollen from the male parts of the flower to the female parts. You can help pollinate your plants by gently shaking them or using a small brush to transfer pollen between flowers. Another common reason is a lack of nutrients. Chili peppers need a balanced supply of nutrients to produce peppers. Make sure you are fertilizing your plants regularly with a fertilizer that is high in phosphorus and potassium. A third possible reason is temperature stress. Chili peppers prefer warm temperatures and may not produce peppers if the temperatures are too hot or too cold. If you live in an area with extreme temperatures, you may need to provide your plants with some protection.
Can I use this DIY soil mix for other types of plants besides chili peppers?
While this DIY soil mix is specifically formulated for chili peppers, it can also be used for other plants that prefer well-draining, nutrient-rich soil, such as tomatoes, peppers, eggplants, and herbs. However, you may need to adjust the nutrient levels depending on the specific needs of the plant. For example, tomatoes are heavy feeders and may benefit from a slightly richer soil mix. Herbs, on the other hand, generally prefer a less nutrient-dense soil. Always research the specific needs of the plant you are growing and adjust your soil mix accordingly.
How do I know if my chili pepper plants are getting too much or not enough nutrients?
The appearance of your chili pepper plants can provide clues about their nutrient status. If your plants are getting too much nitrogen, the leaves may be dark green and lush, but the plants may not produce many flowers or fruits. If your plants are not getting enough nitrogen, the leaves may be pale green or yellow, and the plants may be stunted. If your plants are not getting enough phosphorus, the leaves may be dark green with purple veins, and the plants may have poor root development. If your plants are not getting enough potassium, the leaves may have yellow or brown edges, and the plants may be susceptible to disease. Monitor your plants closely and adjust your fertilizer accordingly. Soil testing can also help you determine the nutrient levels in your soil and identify any deficiencies or imbalances.
Leave a Comment