
Terrace sweet potato growing might sound intimidating, but trust me, it’s a surprisingly rewarding and accessible project, even if you’re a beginner gardener like I once was! Imagine harvesting your own vibrant, nutrient-packed sweet potatoes right from your terrace – the taste of homegrown goodness is simply unmatched. For centuries, sweet potatoes have been a staple crop in many cultures, particularly in South America and Asia, where they’re celebrated not just for their delicious flavor but also for their incredible nutritional value and resilience.
But why should you consider terrace sweet potato growing? Well, beyond the satisfaction of growing your own food, it’s a fantastic way to maximize limited space, especially if you live in an apartment or have a small yard. Plus, sweet potatoes are relatively low-maintenance, making them perfect for busy individuals. In this article, I’m going to share some simple yet effective DIY tricks and hacks that will help you successfully cultivate a thriving sweet potato patch on your terrace, regardless of your experience level. Get ready to transform your outdoor space into a mini sweet potato farm!
Growing Sweet Potatoes in Containers on Your Terrace: A DIY Guide
Hey there, fellow gardening enthusiasts! Ever thought about growing your own sweet potatoes? It’s surprisingly easy, even if you don’t have a sprawling backyard. I’m going to walk you through how to cultivate these delicious and nutritious tubers right on your terrace in containers. Get ready to enjoy the fruits (or rather, vegetables!) of your labor.
What You’ll Need
Before we dive in, let’s gather our supplies. This is a crucial step to ensure a smooth and successful growing experience.
* Large Containers: Think big! Sweet potatoes need room to grow. I recommend containers that are at least 20 gallons in size. The bigger, the better, as it allows for more tuber development. Fabric pots are a great option because they allow for good drainage and air pruning of the roots.
* Well-Draining Potting Mix: This is key. Sweet potatoes don’t like soggy feet. A mix of compost, peat moss (or coco coir), and perlite works wonders. Avoid using garden soil, as it can compact and hinder growth.
* Sweet Potato Slips: These are sprouts grown from a sweet potato. You can buy them online, at your local nursery, or even grow your own (more on that later!).
* Watering Can or Hose: For, well, watering!
* Fertilizer: A balanced fertilizer (10-10-10) or one specifically formulated for root vegetables will give your sweet potatoes a boost.
* Trowel or Small Shovel: For planting.
* Mulch (Optional): Straw or wood chips can help retain moisture and suppress weeds.
* Gardening Gloves: To keep your hands clean and protected.
Growing Your Own Sweet Potato Slips (Optional but Recommended!)
If you’re feeling adventurous (and want to save some money), you can grow your own sweet potato slips. It’s a fun project and gives you more control over the variety you’re growing.
1. Choose a Sweet Potato: Select an organic sweet potato from the grocery store or farmer’s market. Organic is important to avoid any growth inhibitors.
2. Prepare the Sweet Potato: Wash the sweet potato thoroughly. You can either suspend it in a jar of water or bury it halfway in a container of moist potting mix.
* Water Method: Use toothpicks to suspend the sweet potato over a jar or glass filled with water, with the bottom half submerged. Place the jar in a warm, sunny location.
* Soil Method: Bury the sweet potato halfway in a container filled with moist potting mix. Keep the soil consistently moist.
3. Wait for Sprouts: In a few weeks, you should see sprouts (slips) emerging from the sweet potato. Keep the water fresh (if using the water method) and the soil moist (if using the soil method).
4. Harvest the Slips: Once the slips are 6-8 inches long, gently twist or cut them off the sweet potato.
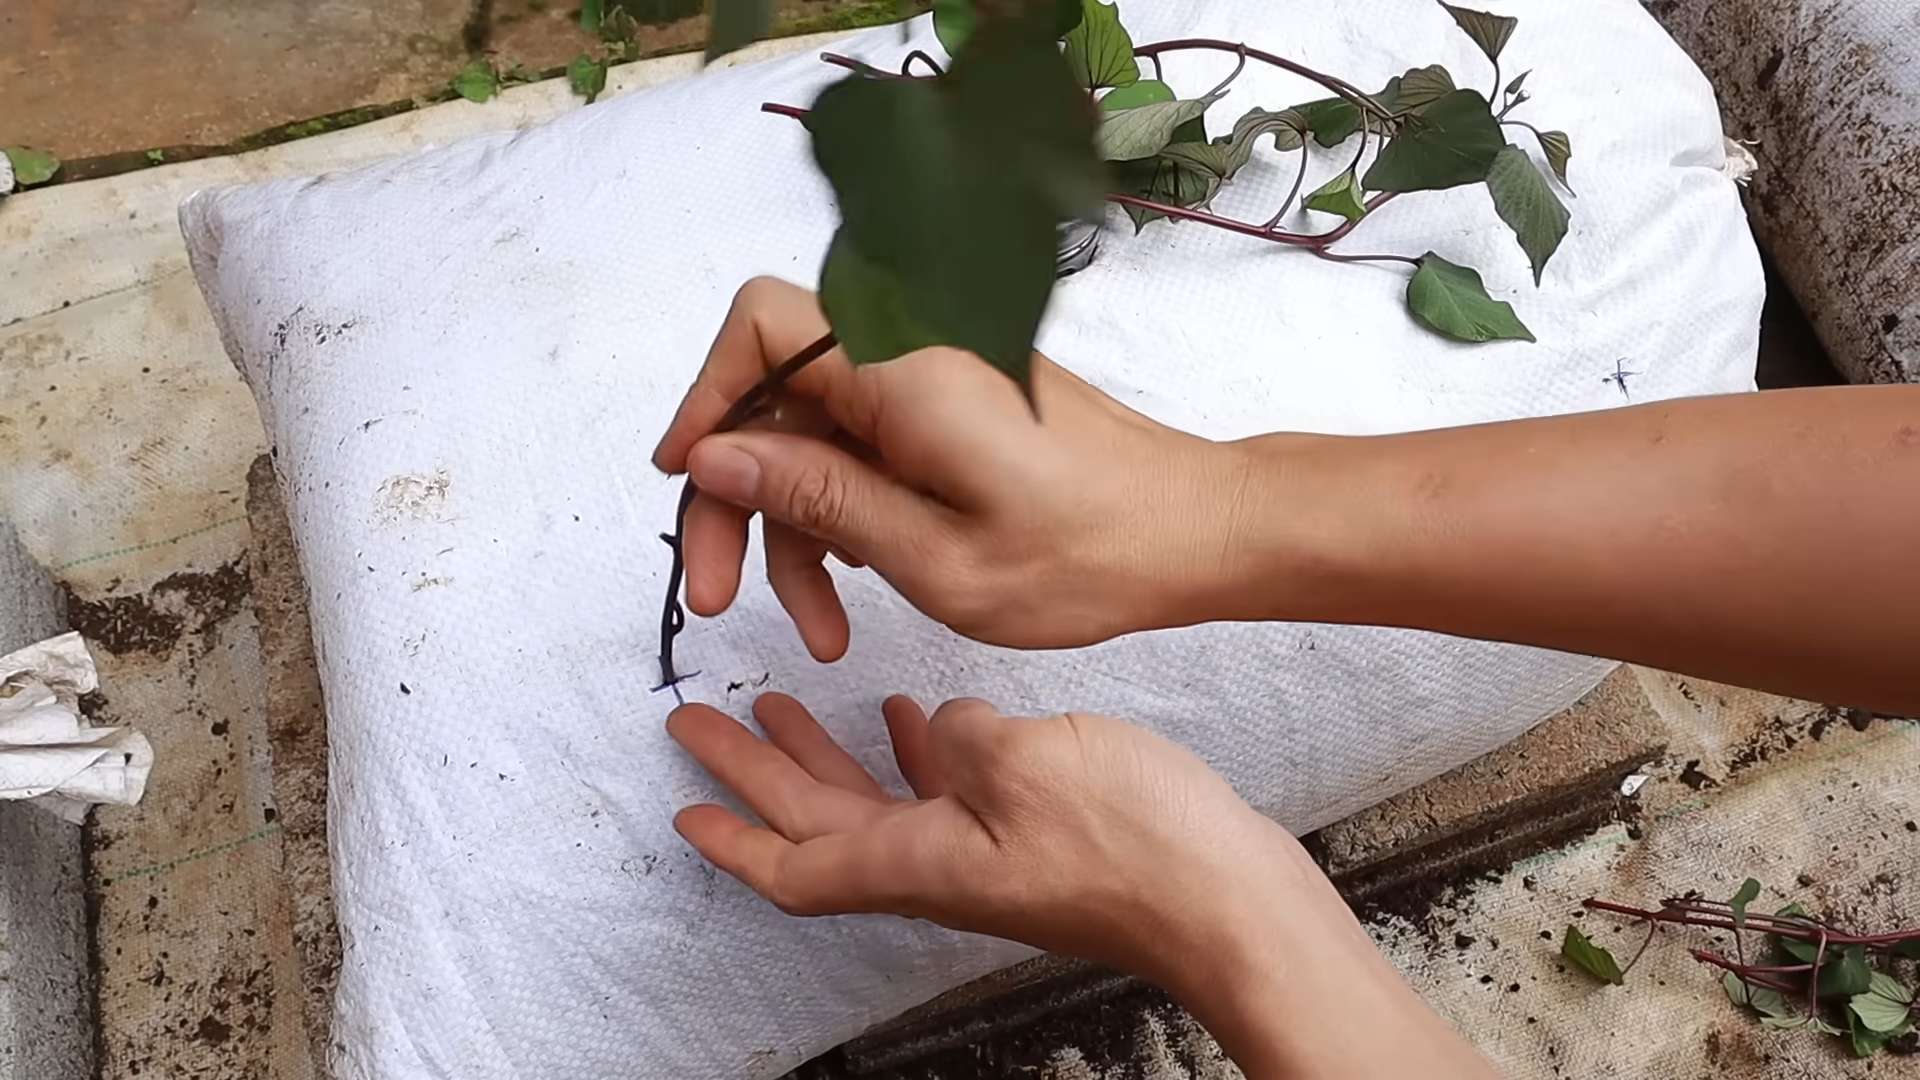
5. Root the Slips: Place the slips in a jar of water, making sure the bottom inch or two is submerged. In a few days, roots will start to form.
6. Plant the Slips: Once the roots are about an inch long, they’re ready to be planted in your containers.
Planting Your Sweet Potato Slips
Now for the exciting part – getting those slips into their new home!
1. Prepare the Containers: Fill your large containers with the well-draining potting mix, leaving a few inches of space at the top.
2. Water the Soil: Moisten the soil thoroughly before planting.
3. Plant the Slips: Dig small holes in the soil, about 4-6 inches apart. Gently place the sweet potato slips into the holes, burying the roots and the bottom part of the stem. Leave the top leaves exposed.
4. Water Again: Water the newly planted slips gently to help them settle in.
5. Mulch (Optional): Add a layer of mulch around the plants to help retain moisture and suppress weeds.
Caring for Your Sweet Potato Plants
Consistent care is essential for healthy sweet potato growth.
1. Watering: Sweet potatoes need consistent moisture, especially during the first few weeks after planting. Water deeply whenever the top inch of soil feels dry. Avoid overwatering, as this can lead to root rot.
2. Sunlight: Sweet potatoes thrive in full sun, so make sure your containers are placed in a location that receives at least 6-8 hours of sunlight per day.
3. Fertilizing: Fertilize your sweet potato plants every 2-3 weeks with a balanced fertilizer or one specifically formulated for root vegetables. Follow the instructions on the fertilizer package.
4. Weeding: Keep the containers free of weeds, as they can compete with the sweet potatoes for nutrients and water.
5. Pest Control: Keep an eye out for pests like aphids, flea beetles, and sweet potato weevils. Treat any infestations promptly with insecticidal soap or neem oil.
6. Vine Management: Sweet potato vines can get quite long and sprawling. You can let them trail over the sides of the containers or prune them back to keep them under control. Pruning won’t affect tuber production.
Harvesting Your Sweet Potatoes
The moment you’ve been waiting for! Harvesting sweet potatoes is a rewarding experience.
1. Timing: Sweet potatoes are typically ready to harvest about 90-120 days after planting. A good indicator is when the leaves start to turn yellow and the vines begin to die back.
2. Prepare to Harvest: Stop watering your sweet potato plants a week or two before harvesting. This will help the tubers cure and store better.
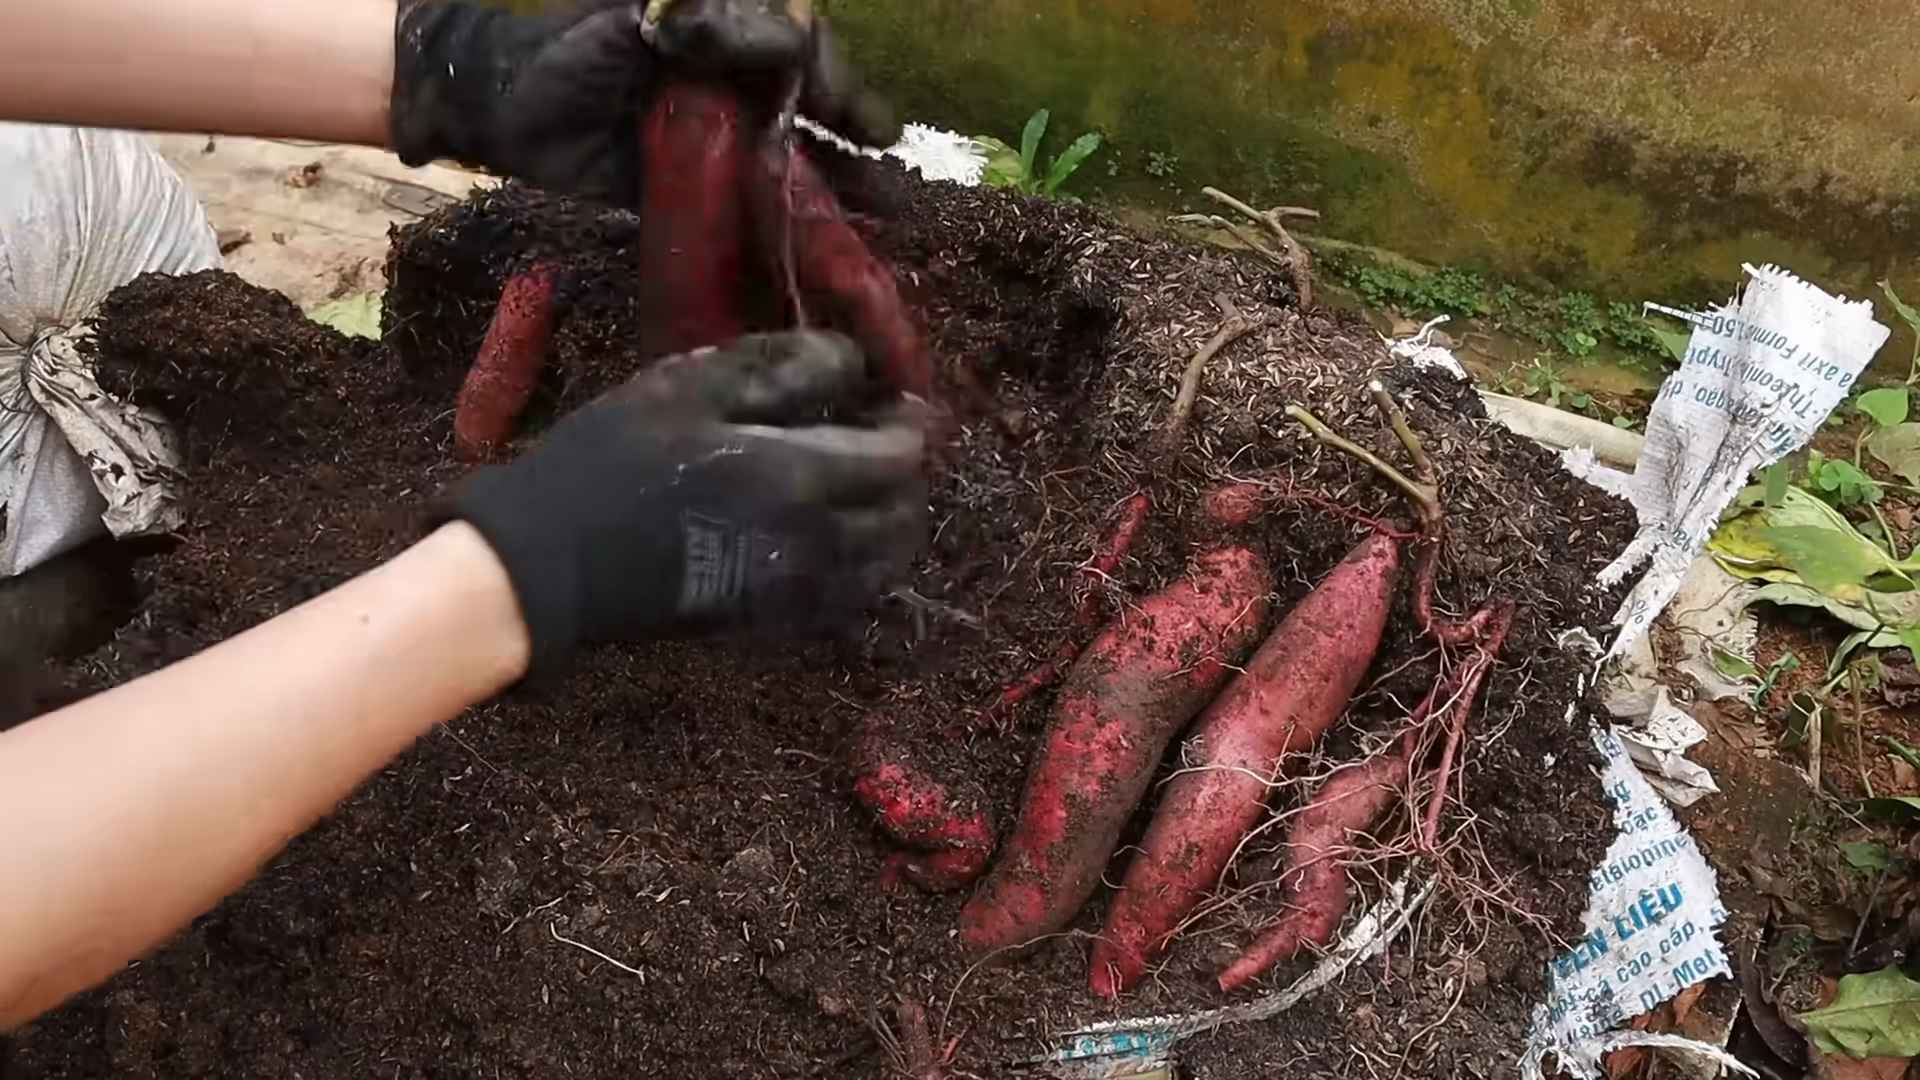
3. Harvesting: Gently tip the container onto its side and carefully remove the soil, being careful not to damage the sweet potatoes. You can also use a garden fork to loosen the soil and lift the sweet potatoes out.
4. Curing: Curing is an important step that improves the flavor and storage life of sweet potatoes. Brush off any excess soil and place the sweet potatoes in a warm, humid location (80-85°F and 85-90% humidity) for 7-10 days. A greenhouse or a warm, sunny room with a humidifier works well.
5. Storing: After curing, store your sweet potatoes in a cool, dry, and well-ventilated location (55-60°F). Avoid storing them in the refrigerator, as this can cause them to develop a hard core. Properly cured and stored sweet potatoes can last for several months.
Troubleshooting
Even with the best care, you might encounter some challenges. Here are a few common problems and how to address them:
* Yellowing Leaves: This could be a sign of nutrient deficiency, overwatering, or pest infestation. Check the soil moisture, fertilize if needed, and inspect the plants for pests.
* Slow Growth: This could be due to insufficient sunlight, poor soil, or lack of water. Make sure your plants are getting enough sunlight, water, and nutrients.
* Small Tubers: This could be caused by overcrowding, poor soil, or insufficient watering. Make sure your containers are large enough, the soil is well-draining, and you’re watering consistently.
* Root Rot: This is usually caused by overwatering. Make sure your containers have good drainage and avoid letting the soil stay soggy.
Choosing the Right Sweet Potato Variety
The variety of sweet potato you choose can impact your success. Here are a few popular and reliable varieties for container gardening:
* Beauregard: A classic variety with orange flesh and a sweet flavor. It’s known for its high yields and adaptability.
* Georgia Jet: A fast-maturing vari
Hey there, fellow gardening enthusiasts! Ever thought about growing your own sweet potatoes? It’s surprisingly easy, even if you don’t have a sprawling backyard. I’m going to walk you through how to cultivate these delicious and nutritious tubers right on your terrace in containers. Get ready to enjoy the fruits (or rather, vegetables!) of your labor.
What You’ll Need
Before we dive in, let’s gather our supplies. This is a crucial step to ensure a smooth and successful growing experience.
* Large Containers: Think big! Sweet potatoes need room to grow. I recommend containers that are at least 20 gallons in size. The bigger, the better, as it allows for more tuber development. Fabric pots are a great option because they allow for good drainage and air pruning of the roots.
* Well-Draining Potting Mix: This is key. Sweet potatoes don’t like soggy feet. A mix of compost, peat moss (or coco coir), and perlite works wonders. Avoid using garden soil, as it can compact and hinder growth.
* Sweet Potato Slips: These are sprouts grown from a sweet potato. You can buy them online, at your local nursery, or even grow your own (more on that later!).
* Watering Can or Hose: For, well, watering!
* Fertilizer: A balanced fertilizer (10-10-10) or one specifically formulated for root vegetables will give your sweet potatoes a boost.
* Trowel or Small Shovel: For planting.
* Mulch (Optional): Straw or wood chips can help retain moisture and suppress weeds.
* Gardening Gloves: To keep your hands clean and protected.
Growing Your Own Sweet Potato Slips (Optional but Recommended!)
If you’re feeling adventurous (and want to save some money), you can grow your own sweet potato slips. It’s a fun project and gives you more control over the variety you’re growing.
1. Choose a Sweet Potato: Select an organic sweet potato from the grocery store or farmer’s market. Organic is important to avoid any growth inhibitors.
2. Prepare the Sweet Potato: Wash the sweet potato thoroughly. You can either suspend it in a jar of water or bury it halfway in a container of moist potting mix.
* Water Method: Use toothpicks to suspend the sweet potato over a jar or glass filled with water, with the bottom half submerged. Place the jar in a warm, sunny location.
* Soil Method: Bury the sweet potato halfway in a container filled with moist potting mix. Keep the soil consistently moist.
3. Wait for Sprouts: In a few weeks, you should see sprouts (slips) emerging from the sweet potato. Keep the water fresh (if using the water method) and the soil moist (if using the soil method).
4. Harvest the Slips: Once the slips are 6-8 inches long, gently twist or cut them off the sweet potato.
5. Root the Slips: Place the slips in a jar of water, making sure the bottom inch or two is submerged. In a few days, roots will start to form.
6. Plant the Slips: Once the roots are about an inch long, they’re ready to be planted in your containers.
Planting Your Sweet Potato Slips
Now for the exciting part – getting those slips into their new home!
1. Prepare the Containers: Fill your large containers with the well-draining potting mix, leaving a few inches of space at the top.
2. Water the Soil: Moisten the soil thoroughly before planting.
3. Plant the Slips: Dig small holes in the soil, about 4-6 inches apart. Gently place the sweet potato slips into the holes, burying the roots and the bottom part of the stem. Leave the top leaves exposed.
4. Water Again: Water the newly planted slips gently to help them settle in.
5. Mulch (Optional): Add a layer of mulch around the plants to help retain moisture and suppress weeds.
Caring for Your Sweet Potato Plants
Consistent care is essential for healthy sweet potato growth.
1. Watering: Sweet potatoes need consistent moisture, especially during the first few weeks after planting. Water deeply whenever the top inch of soil feels dry. Avoid overwatering, as this can lead to root rot.
2. Sunlight: Sweet potatoes thrive in full sun, so make sure your containers are placed in a location that receives at least 6-8 hours of sunlight per day.
3. Fertilizing: Fertilize your sweet potato plants every 2-3 weeks with a balanced fertilizer or one specifically formulated for root vegetables. Follow the instructions on the fertilizer package.
4. Weeding: Keep the containers free of weeds, as they can compete with the sweet potatoes for nutrients and water.
5. Pest Control: Keep an eye out for pests like aphids, flea beetles, and sweet potato weevils. Treat any infestations promptly with insecticidal soap or neem oil.
6. Vine Management: Sweet potato vines can get quite long and sprawling. You can let them trail over the sides of the containers or prune them back to keep them under control. Pruning won’t affect tuber production.
Harvesting Your Sweet Potatoes
The moment you’ve been waiting for! Harvesting sweet potatoes is a rewarding experience.
1. Timing: Sweet potatoes are typically ready to harvest about 90-120 days after planting. A good indicator is when the leaves start to turn yellow and the vines begin to die back.
2. Prepare to Harvest: Stop watering your sweet potato plants a week or two before harvesting. This will help the tubers cure and store better.
3. Harvesting: Gently tip the container onto its side and carefully remove the soil, being careful not to damage the sweet potatoes. You can also use a garden fork to loosen the soil and lift the sweet potatoes out.
4. Curing: Curing is an important step that improves the flavor and storage life of sweet potatoes. Brush off any excess soil and place the sweet potatoes in a warm, humid location (80-85°F and 85-90% humidity) for 7-10 days. A greenhouse or a warm, sunny room with a humidifier works well.
5. Storing: After curing, store your sweet potatoes in a cool, dry, and well-ventilated location (55-60°F). Avoid storing them in the refrigerator, as this can cause them to develop a hard core. Properly cured and stored sweet potatoes can last for several months.
Troubleshooting
Even with the best care, you might encounter some challenges. Here are a few common problems and how to address them:
* Yellowing Leaves: This could be a sign of nutrient deficiency, overwatering, or pest infestation. Check the soil moisture, fertilize if needed, and inspect the plants for pests.
* Slow Growth: This could be due to insufficient sunlight, poor soil, or lack of water. Make sure your plants are getting enough sunlight, water, and nutrients.
* Small Tubers: This could be caused by overcrowding, poor soil, or insufficient watering. Make sure your containers are large enough, the soil is well-draining, and you’re watering consistently.
* Root Rot: This is usually caused by overwatering. Make sure your containers have good drainage and avoid letting the soil stay soggy.
Choosing the Right Sweet Potato Variety
The variety of sweet potato you choose can impact your success. Here are a few popular and reliable varieties for container gardening:
* Beauregard: A classic variety with orange flesh and a sweet flavor. It’s known for its high yields and adaptability.
* Georgia Jet: A fast-maturing variety with red skin and orange flesh. It’s a good choice for gardeners in cooler climates.
* Bush Porto Rico: A compact variety that’s well-suited for containers. It has copper skin and orange flesh.
* Centennial: An early-maturing variety with orange skin and flesh. It’s known for its disease resistance.
Tips for Success
Here are a few extra tips to help you grow the best sweet potatoes possible:
* Rotate Your Crops: Avoid planting sweet potatoes in the same containers year after year. Crop rotation helps prevent soilborne diseases and nutrient depletion.
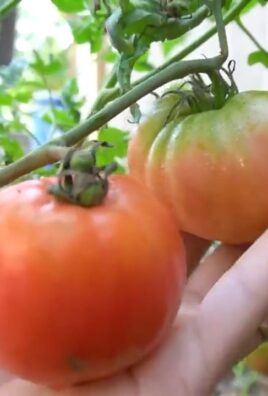
* Use Companion Plants: Plant companion plants like basil, thyme, or marigolds near your sweet potatoes to help deter pests.
* Monitor Soil pH: Sweet potatoes prefer a slightly acidic soil pH (6.0-6.5). You can test your soil pH with a soil testing kit and amend it if necessary.
* Be Patient: Sweet potatoes take time to grow, so don’t get discouraged if you don’t see
Conclusion
So, there you have it! Transforming your terrace into a thriving sweet potato patch is not only achievable, but incredibly rewarding. We’ve walked you through the process, highlighting the simplicity and cost-effectiveness of this DIY project. But why is this method a must-try?
Firstly, growing your own sweet potatoes offers unparalleled freshness and flavor. Forget the bland, mass-produced varieties at the grocery store. Imagine biting into a sweet potato you nurtured from sprout to harvest, bursting with natural sweetness and earthy goodness. The difference is truly remarkable.
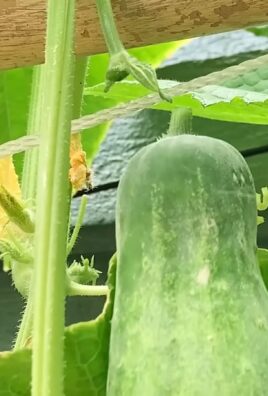
Secondly, this terrace sweet potato growing method is incredibly space-efficient. If you’re limited by a small yard or only have a terrace available, this is the perfect solution. Vertical gardening techniques, combined with container planting, maximize your yield without sacrificing precious space. You can enjoy a bountiful harvest even in the heart of the city.
Thirdly, it’s an incredibly sustainable and eco-friendly way to obtain your produce. You’re reducing your carbon footprint by eliminating transportation costs and packaging waste. Plus, you have complete control over the growing process, ensuring that your sweet potatoes are free from harmful pesticides and chemicals. You know exactly what you’re putting into your body.
But the benefits don’t stop there. Gardening is a therapeutic activity that can reduce stress, improve your mood, and connect you with nature. Nurturing your sweet potato plants and watching them flourish is an incredibly satisfying experience. It’s a hobby that’s both productive and enjoyable.
Ready to take your terrace sweet potato growing to the next level? Consider these variations:
* Experiment with different varieties: There are countless sweet potato varieties to choose from, each with its own unique flavor and texture. Try Beauregard, Jewel, or even Japanese sweet potatoes for a diverse harvest.
* Companion planting: Enhance your sweet potato patch by planting beneficial companion plants like beans, peas, or marigolds. These plants can help deter pests, improve soil health, and attract pollinators.
* Vertical gardening structures: Get creative with your vertical gardening structures. Use repurposed pallets, hanging baskets, or even old tires to create a unique and eye-catching sweet potato display.
* Soil Amendments: Consider adding compost tea or worm castings to your soil for an extra boost of nutrients.
We’re confident that you’ll be amazed by the results of this DIY project. It’s a simple, affordable, and rewarding way to grow your own delicious and nutritious sweet potatoes, even if you only have a small terrace.
So, what are you waiting for? Grab your supplies, follow our guide, and get ready to enjoy the fruits (or rather, the roots) of your labor. We encourage you to try this terrace sweet potato growing method and share your experiences with us! Post photos of your sweet potato patch, share your tips and tricks, and let us know how your harvest turns out. We can’t wait to see your success!
Frequently Asked Questions (FAQ)
What kind of containers are best for growing sweet potatoes on a terrace?
The ideal containers for terrace sweet potato growing are large, deep pots or raised beds. Sweet potatoes need plenty of room to develop their tubers, so aim for containers that are at least 12 inches deep and 12 inches wide. Fabric pots are also a great option, as they allow for better drainage and aeration. Avoid using dark-colored containers, as they can overheat in direct sunlight. Consider using lighter-colored plastic or terracotta pots. Remember to ensure that your containers have adequate drainage holes to prevent waterlogging.
How often should I water my sweet potato plants on the terrace?
Watering frequency depends on several factors, including the weather, the type of container you’re using, and the soil composition. Generally, you should water your sweet potato plants when the top inch of soil feels dry to the touch. During hot, dry weather, you may need to water them daily. Avoid overwatering, as this can lead to root rot. A good rule of thumb is to water deeply and less frequently, rather than shallowly and more often. Check the soil moisture regularly and adjust your watering schedule accordingly. Mulching around the base of the plants can help retain moisture and reduce the need for frequent watering.
What type of soil is best for growing sweet potatoes in containers?
Sweet potatoes thrive in well-draining, sandy loam soil that is rich in organic matter. Avoid heavy clay soils, as they can become waterlogged and inhibit tuber development. You can create your own potting mix by combining equal parts of garden soil, compost, and sand. Alternatively, you can purchase a pre-made potting mix specifically designed for vegetables. Ensure that the soil is slightly acidic, with a pH between 6.0 and 6.5. Adding compost or well-rotted manure to the soil will provide essential nutrients and improve drainage.
How much sunlight do sweet potato plants need on a terrace?
Sweet potato plants require at least 6-8 hours of direct sunlight per day to thrive. Choose a location on your terrace that receives ample sunlight throughout the day. If your terrace is partially shaded, try to position your containers in the sunniest spot. Insufficient sunlight can result in stunted growth and reduced tuber production. If you live in a particularly hot climate, you may need to provide some afternoon shade to prevent the plants from overheating.
How do I know when my sweet potatoes are ready to harvest?
Sweet potatoes are typically ready to harvest about 90-120 days after planting. A good indicator is when the leaves start to turn yellow and the vines begin to die back. You can also gently dig around the base of the plant to check the size of the tubers. They should be at least a few inches long. To harvest, carefully dig around the plant with a garden fork, being careful not to damage the tubers. Gently lift the plant from the soil and brush off any excess dirt. Cure the sweet potatoes for 7-10 days in a warm, humid place to allow the skins to harden and the sugars to develop.
What are some common pests and diseases that affect sweet potato plants, and how can I prevent them?
Common pests that can affect sweet potato plants include aphids, flea beetles, and sweet potato weevils. Diseases include fungal infections like stem rot and root rot. To prevent pests, inspect your plants regularly and remove any infested leaves or stems. You can also use insecticidal soap or neem oil to control pests. To prevent diseases, ensure that your plants have good air circulation and avoid overwatering. Use a well-draining potting mix and avoid planting sweet potatoes in the same location year after year. Crop rotation can help prevent soilborne diseases.
Can I grow sweet potatoes from slips purchased online or at a garden center?
Yes, you can definitely grow sweet potatoes from slips purchased online or at a garden center. Slips are small sprouts that grow from sweet potatoes. When you receive your slips, soak them in water for a few hours to rehydrate them. Then, plant them in your containers, burying the roots and the bottom portion of the stem. Water them well and keep the soil moist until they become established.
How do I store my harvested sweet potatoes?
After curing your sweet potatoes for 7-10 days, store them in a cool, dark, and dry place with good ventilation. The ideal
So, there you have it! Transforming your terrace into a thriving sweet potato patch is not only achievable, but incredibly rewarding. We’ve walked you through the process, highlighting the simplicity and cost-effectiveness of this DIY project. But why is this method a must-try?
Firstly, growing your own sweet potatoes offers unparalleled freshness and flavor. Forget the bland, mass-produced varieties at the grocery store. Imagine biting into a sweet potato you nurtured from sprout to harvest, bursting with natural sweetness and earthy goodness. The difference is truly remarkable.
Secondly, this terrace sweet potato growing method is incredibly space-efficient. If you’re limited by a small yard or only have a terrace available, this is the perfect solution. Vertical gardening techniques, combined with container planting, maximize your yield without sacrificing precious space. You can enjoy a bountiful harvest even in the heart of the city.
Thirdly, it’s an incredibly sustainable and eco-friendly way to obtain your produce. You’re reducing your carbon footprint by eliminating transportation costs and packaging waste. Plus, you have complete control over the growing process, ensuring that your sweet potatoes are free from harmful pesticides and chemicals. You know exactly what you’re putting into your body.
But the benefits don’t stop there. Gardening is a therapeutic activity that can reduce stress, improve your mood, and connect you with nature. Nurturing your sweet potato plants and watching them flourish is an incredibly satisfying experience. It’s a hobby that’s both productive and enjoyable.
Ready to take your terrace sweet potato growing to the next level? Consider these variations:
* Experiment with different varieties: There are countless sweet potato varieties to choose from, each with its own unique flavor and texture. Try Beauregard, Jewel, or even Japanese sweet potatoes for a diverse harvest.
* Companion planting: Enhance your sweet potato patch by planting beneficial companion plants like beans, peas, or marigolds. These plants can help deter pests, improve soil health, and attract pollinators.
* Vertical gardening structures: Get creative with your vertical gardening structures. Use repurposed pallets, hanging baskets, or even old tires to create a unique and eye-catching sweet potato display.
* Soil Amendments: Consider adding compost tea or worm castings to your soil for an extra boost of nutrients.
We’re confident that you’ll be amazed by the results of this DIY project. It’s a simple, affordable, and rewarding way to grow your own delicious and nutritious sweet potatoes, even if you only have a small terrace.
So, what are you waiting for? Grab your supplies, follow our guide, and get ready to enjoy the fruits (or rather, the roots) of your labor. We encourage you to try this terrace sweet potato growing method and share your experiences with us! Post photos of your sweet potato patch, share your tips and tricks, and let us know how your harvest turns out. We can’t wait to see your success!
Frequently Asked Questions (FAQ)
What kind of containers are best for growing sweet potatoes on a terrace?
The ideal containers for terrace sweet potato growing are large, deep pots or raised beds. Sweet potatoes need plenty of room to develop their tubers, so aim for containers that are at least 12 inches deep and 12 inches wide. Fabric pots are also a great option, as they allow for better drainage and aeration. Avoid using dark-colored containers, as they can overheat in direct sunlight. Consider using lighter-colored plastic or terracotta pots. Remember to ensure that your containers have adequate drainage holes to prevent waterlogging.
How often should I water my sweet potato plants on the terrace?
Watering frequency depends on several factors, including the weather, the type of container you’re using, and the soil composition. Generally, you should water your sweet potato plants when the top inch of soil feels dry to the touch. During hot, dry weather, you may need to water them daily. Avoid overwatering, as this can lead to root rot. A good rule of thumb is to water deeply and less frequently, rather than shallowly and more often. Check the soil moisture regularly and adjust your watering schedule accordingly. Mulching around the base of the plants can help retain moisture and reduce the need for frequent watering.
What type of soil is best for growing sweet potatoes in containers?
Sweet potatoes thrive in well-draining, sandy loam soil that is rich in organic matter. Avoid heavy clay soils, as they can become waterlogged and inhibit tuber development. You can create your own potting mix by combining equal parts of garden soil, compost, and sand. Alternatively, you can purchase a pre-made potting mix specifically designed for vegetables. Ensure that the soil is slightly acidic, with a pH between 6.0 and 6.5. Adding compost or well-rotted manure to the soil will provide essential nutrients and improve drainage.
How much sunlight do sweet potato plants need on a terrace?
Sweet potato plants require at least 6-8 hours of direct sunlight per day to thrive. Choose a location on your terrace that receives ample sunlight throughout the day. If your terrace is partially shaded, try to position your containers in the sunniest spot. Insufficient sunlight can result in stunted growth and reduced tuber production. If you live in a particularly hot climate, you may need to provide some afternoon shade to prevent the plants from overheating.
How do I know when my sweet potatoes are ready to harvest?
Sweet potatoes are typically ready to harvest about 90-120 days after planting. A good indicator is when the leaves start to turn yellow and the vines begin to die back. You can also gently dig around the base of the plant to check the size of the tubers. They should be at least a few inches long. To harvest, carefully dig around the plant with a garden fork, being careful not to damage the tubers. Gently lift the plant from the soil and brush off any excess dirt. Cure the sweet potatoes for 7-10 days in a warm, humid place to allow the skins to harden and the sugars to develop.
What are some common pests and diseases that affect sweet potato plants, and how can I prevent them?
Common pests that can affect sweet potato plants include aphids, flea beetles, and sweet potato weevils. Diseases include fungal infections like stem rot and root rot. To prevent pests, inspect your plants regularly and remove any infested leaves or stems. You can also use insecticidal soap or neem oil to control pests. To prevent diseases, ensure that your plants have good air circulation and avoid overwatering. Use a well-draining potting mix and avoid planting sweet potatoes in the same location year after year. Crop rotation can help prevent soilborne diseases.
Can I grow sweet potatoes from slips purchased online or at a garden center?
Yes, you can definitely grow sweet potatoes from slips purchased online or at a garden center. Slips are small sprouts that grow from sweet potatoes. When you receive your slips, soak them in water for a few hours to rehydrate them. Then, plant them in your containers, burying the roots and the bottom portion of the stem. Water them well and keep the soil moist until they become established.
How do I store my harvested sweet potatoes?
After curing your sweet potatoes for 7-10 days, store them in a cool, dark, and dry place with good ventilation. The ideal storage temperature is between 55-60°F (13-16°C). Avoid storing them in the refrigerator, as this can cause them to develop a hard core. Properly stored sweet potatoes can last for several months. Check them periodically for signs of spoilage and discard any that are soft or moldy.

Leave a Comment