
Styrofoam Bok Choy Garden Trick: Unlock the secrets to a thriving garden with this surprisingly simple DIY hack! Have you ever dreamed of harvesting fresh, crisp bok choy right from your own backyard, but felt intimidated by the complexities of gardening? Well, get ready to ditch those worries because I’m about to share a game-changing technique that will have you growing bok choy like a pro, even if you have limited space or experience.
Bok choy, a staple in Asian cuisine, has been cultivated for centuries, with its origins tracing back to ancient China. Its versatility and nutritional benefits have made it a beloved vegetable worldwide. But growing it can sometimes be tricky, especially in less-than-ideal conditions. That’s where our styrofoam bok choy garden trick comes in!
This ingenious method utilizes the insulating properties of styrofoam to create a mini-ecosystem that protects your bok choy from temperature fluctuations and helps retain moisture. Imagine enjoying delicious stir-fries and salads made with bok choy you grew yourself, knowing you bypassed common gardening challenges with a clever, budget-friendly solution. I’m excited to show you how this simple DIY project can transform your gardening experience and bring the joy of fresh, homegrown produce to your table. Let’s get started!
DIY Styrofoam Bok Choy Garden: A Beginner’s Guide
Hey there, fellow gardening enthusiasts! Ever dreamed of having fresh, crisp bok choy right outside your door, even if you’re short on space or dealing with less-than-ideal soil? Well, I’ve got a fantastic trick up my sleeve that I’m excited to share with you: growing bok choy in styrofoam! It’s surprisingly easy, budget-friendly, and a whole lot of fun. Let’s dive in!
Why Styrofoam?
You might be wondering, “Why styrofoam, of all things?” Here’s the scoop:
* Lightweight and Portable: Styrofoam containers are incredibly light, making them easy to move around your patio, balcony, or even indoors.
* Excellent Drainage: With a few modifications, styrofoam provides excellent drainage, preventing waterlogging, which bok choy hates.
* Insulation: Styrofoam offers some insulation, protecting the roots from extreme temperature fluctuations.
* Recycling Opportunity: Instead of tossing those styrofoam boxes, you’re giving them a new life!
* Cost-Effective: Styrofoam is often free (think packaging materials) or very inexpensive.
What You’ll Need
Before we get started, gather these supplies:
* Styrofoam Container: A large styrofoam box or cooler works best. Make sure it’s clean and free of any harmful chemicals. I usually use the ones that electronics come in.
* Potting Soil: Choose a high-quality potting mix that’s well-draining. Avoid using garden soil, as it can be too heavy and compact.
* Bok Choy Seeds or Seedlings: You can start from seeds or buy seedlings from your local nursery. I prefer seedlings for a quicker harvest.
* Drill or Screwdriver: For creating drainage holes.
* Landscape Fabric (Optional): To line the container and prevent soil from washing out.
* Watering Can or Hose: For watering your bok choy.
* Fertilizer (Optional): A balanced, water-soluble fertilizer to give your bok choy a boost.
* Gloves: To protect your hands.
Step-by-Step Instructions
Alright, let’s get our hands dirty!
1. Preparing the Styrofoam Container
This is a crucial step to ensure proper drainage and prevent root rot.
1. Clean the Container: Thoroughly clean the styrofoam container with soap and water to remove any dirt or residue. Rinse it well and let it dry completely.
2. Drill Drainage Holes: Using a drill or screwdriver, create drainage holes in the bottom of the container. Space them about 4-6 inches apart. I usually make about 10-12 holes in a large container. Make sure the holes are large enough to allow water to drain freely.
3. Line with Landscape Fabric (Optional): If you’re concerned about soil washing out through the drainage holes, line the container with landscape fabric. Cut the fabric to fit the inside of the container, leaving some extra to fold over the edges. This step is optional, but I find it helps keep the soil in place.
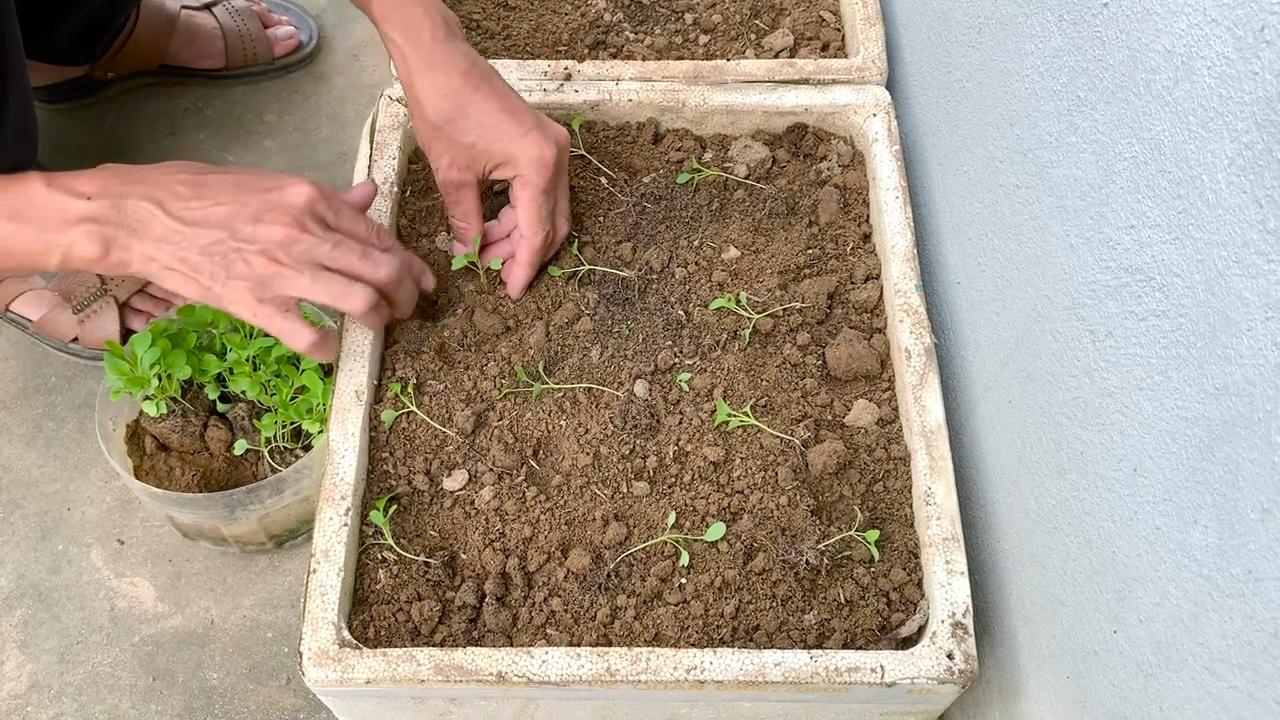
2. Planting Your Bok Choy
Now comes the fun part – planting your bok choy!
1. Fill with Potting Soil: Fill the styrofoam container with potting soil, leaving about 1-2 inches of space at the top. Gently pat down the soil to remove any air pockets.
2. Plant Seeds or Seedlings:
* From Seeds: Sow the bok choy seeds about 1/4 inch deep and 1-2 inches apart. Cover them lightly with soil and water gently.
* From Seedlings: Dig small holes in the soil, spacing them about 6-8 inches apart. Carefully remove the seedlings from their containers and place them in the holes. Gently backfill with soil and water thoroughly.
3. Water Thoroughly: After planting, water the soil thoroughly until water drains out of the drainage holes. This helps settle the soil and encourages root growth.
3. Caring for Your Bok Choy
Proper care is essential for healthy and productive bok choy plants.
1. Sunlight: Bok choy needs at least 4-6 hours of sunlight per day. Place your styrofoam container in a sunny location. If you’re growing indoors, use grow lights to supplement natural light.
2. Watering: Water your bok choy regularly, especially during hot and dry weather. Keep the soil consistently moist, but not waterlogged. Check the soil moisture by sticking your finger about an inch into the soil. If it feels dry, it’s time to water.
3. Fertilizing (Optional): Fertilize your bok choy every 2-3 weeks with a balanced, water-soluble fertilizer. Follow the instructions on the fertilizer package. I like to use a fertilizer that’s specifically formulated for leafy greens.
4. Pest Control: Keep an eye out for pests like aphids, slugs, and cabbage worms. Handpick any pests you see or use organic pest control methods like insecticidal soap or neem oil.
5. Weeding: Remove any weeds that pop up in the container. Weeds can compete with your bok choy for nutrients and water.
4. Harvesting Your Bok Choy
The best part – enjoying the fruits (or rather, vegetables) of your labor!
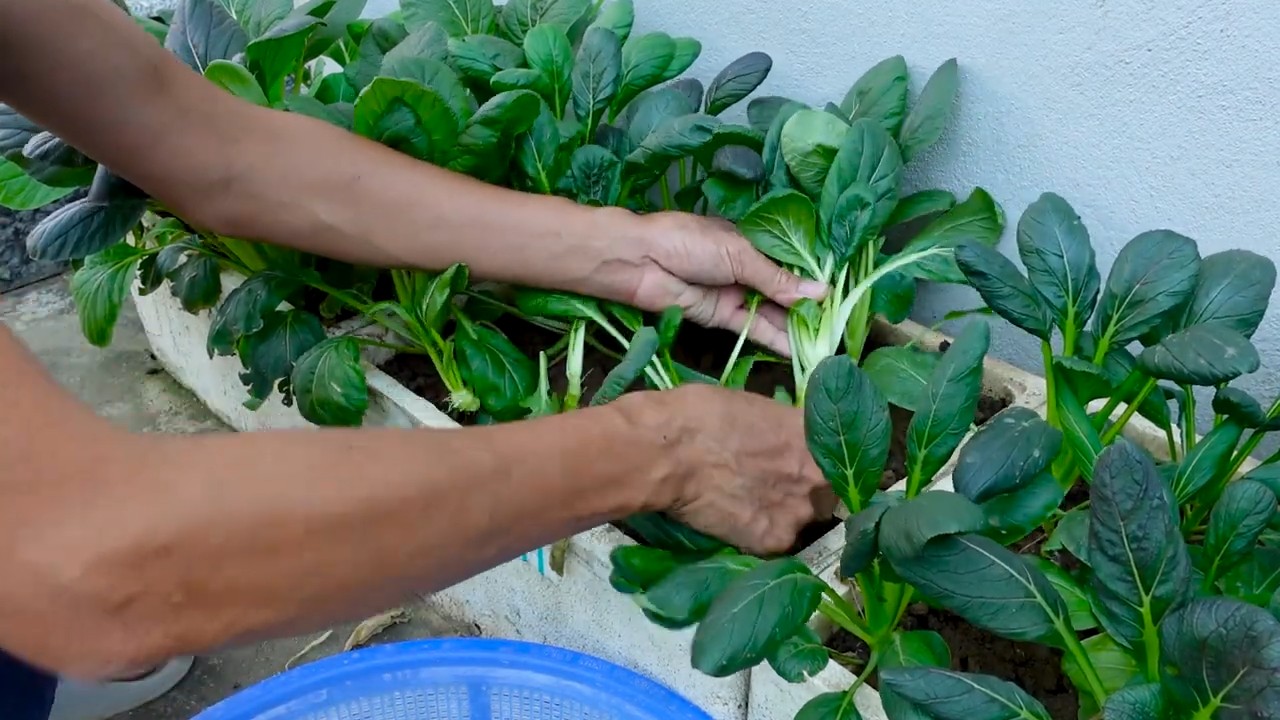
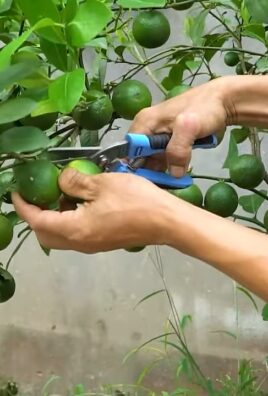
1. Harvest Time: Bok choy is typically ready to harvest in 45-60 days from planting seeds or 30-45 days from transplanting seedlings. You can harvest the entire plant at once or harvest individual leaves as needed.
2. Harvesting Method:
* Entire Plant: Use a sharp knife to cut the bok choy at the base of the plant.
* Individual Leaves: Harvest the outer leaves first, leaving the inner leaves to continue growing.
3. Storage: Store harvested bok choy in the refrigerator for up to a week. Wrap it in a damp paper towel and place it in a plastic bag.
Troubleshooting
Even with the best care, you might encounter some challenges. Here are a few common issues and how to address them:
* Yellowing Leaves: This could be a sign of overwatering, underwatering, or nutrient deficiency. Check the soil moisture and adjust your watering accordingly. Fertilize with a balanced fertilizer.
* Slow Growth: This could be due to insufficient sunlight or poor soil. Move your container to a sunnier location and make sure the soil is well-draining.
* Pest Infestation: Regularly inspect your plants for pests and take action immediately. Use organic pest control methods to avoid harming beneficial insects.
* Bolting (Premature Flowering): Bok choy can bolt in hot weather. Provide shade during the hottest part of the day and ensure consistent watering.
Tips for Success
Here are a few extra tips to help you succeed with your styrofoam bok choy garden:
* Choose the Right Variety: Some bok choy varieties are more heat-tolerant than others. Choose a variety that’s well-suited to your climate.
* Succession Planting: Plant new seeds or seedlings every few weeks to ensure a continuous harvest.
* Rotate Your Crops: If you’re growing bok choy in the same container year after year, rotate your crops to prevent soilborne diseases.
* Don’t Overcrowd: Give your bok choy plants enough space to grow. Overcrowding can lead to poor air circulation and increased risk of disease.
* Have Fun! Gardening should be enjoyable. Experiment with different varieties and techniques to find what works best for you.
Beyond Bok Choy: Other Vegetables to Grow in Styrofoam
The beauty of this method is that you’re not limited to just bok choy! Here are some other vegetables that thrive in styrofoam containers:
* Lettuce: Similar to bok choy, lettuce enjoys the cool temperatures and well-draining soil provided by styrofoam containers.
* Spinach: Another leafy green that’s easy to grow in styrofoam.
* Radishes: These fast-growing root vegetables are perfect for small spaces.
* Herbs: Many herbs, such as basil, mint, and parsley, do well in styrofoam containers.
* Strawberries: A delightful addition to any styrofoam garden.
So there you have it! Growing bok choy in styrofoam is a simple, rewarding, and eco-friendly way to enjoy fresh vegetables at home. I hope this guide has inspired you to give it a try. Happy gardening!
Conclusion
So, there you have it! The Styrofoam Bok Choy Garden Trick is more than just a clever gardening hack; it’s a game-changer for anyone looking to cultivate fresh, delicious bok choy, regardless of their space constraints or gardening experience. We’ve walked you through the simple steps, highlighting the benefits of this method – from improved drainage and insulation to reduced soil usage and portability.
But why is this DIY trick a must-try? Because it empowers you to take control of your food source, even in the smallest of apartments or balconies. Imagine stepping outside your door and harvesting crisp, vibrant bok choy for your stir-fries, soups, or salads. The satisfaction of growing your own food is unparalleled, and this method makes it incredibly accessible.
Beyond the basic setup, there’s plenty of room for experimentation and personalization. Consider adding companion plants like marigolds or basil to deter pests naturally. You could also explore different varieties of bok choy, from the classic green to the more colorful purple types. For those in colder climates, wrapping the Styrofoam container with burlap or bubble wrap can provide extra insulation during the winter months, extending your growing season. You can even paint the Styrofoam container to match your outdoor decor, turning your garden into a visually appealing feature.
The possibilities are truly endless! The key is to embrace the process, learn from your experiences, and adapt the technique to suit your specific needs and environment. This Styrofoam Bok Choy Garden Trick is not just about growing bok choy; it’s about fostering a connection with nature, promoting sustainable practices, and enjoying the rewards of your own hard work.
We wholeheartedly encourage you to give this DIY trick a try. It’s a fun, rewarding, and surprisingly easy way to bring fresh, healthy bok choy into your life. Don’t be afraid to experiment, get your hands dirty, and most importantly, have fun!
Once you’ve embarked on your Styrofoam bok choy gardening journey, we’d love to hear about your experiences. Share your photos, tips, and challenges in the comments section below. Let’s build a community of bok choy enthusiasts and learn from each other’s successes and failures. Together, we can unlock the full potential of this simple yet powerful gardening technique. Happy growing!
Frequently Asked Questions (FAQ)
What type of Styrofoam should I use?
It’s best to use recycled Styrofoam containers, such as those used for shipping produce or electronics. Make sure the Styrofoam is clean and free of any harmful chemicals or residues. Avoid using Styrofoam that has been treated with flame retardants, as these can leach into the soil and harm your plants. If you’re unsure, opt for food-grade Styrofoam. The thicker the Styrofoam, the better the insulation it will provide, especially in colder climates.
How big should the Styrofoam container be?
The size of the container will depend on the number of bok choy plants you want to grow. A good rule of thumb is to provide at least 6-8 inches of space between plants. A container that is approximately 12 inches deep and 18 inches wide should be sufficient for 3-4 bok choy plants. Remember that bok choy needs room for its roots to develop, so don’t overcrowd the container.
What kind of soil should I use?
Use a well-draining potting mix that is rich in organic matter. Avoid using garden soil, as it can be too heavy and compact, hindering drainage and root growth. You can also amend your potting mix with compost or other organic materials to improve its fertility and water-holding capacity. A slightly acidic to neutral pH (around 6.0-7.0) is ideal for bok choy.
How often should I water my bok choy plants?
Bok choy needs consistent moisture, but it doesn’t like to be waterlogged. Water your plants when the top inch of soil feels dry to the touch. Water deeply, ensuring that the water drains out of the drainage holes. Avoid overhead watering, as this can lead to fungal diseases. In hot weather, you may need to water your plants more frequently.
How much sunlight does bok choy need?
Bok choy thrives in full sun (6-8 hours of direct sunlight per day), but it can also tolerate partial shade (4-6 hours of sunlight). In hot climates, providing some afternoon shade can help prevent the leaves from scorching. If you’re growing your bok choy indoors, use grow lights to supplement natural sunlight.
How do I fertilize my bok choy plants?
Feed your bok choy plants with a balanced fertilizer every 2-3 weeks. You can use a liquid fertilizer or a slow-release granular fertilizer. Follow the instructions on the fertilizer packaging carefully. Avoid over-fertilizing, as this can lead to excessive leaf growth and reduced flavor. Organic fertilizers, such as compost tea or fish emulsion, are also excellent options.
What are some common pests and diseases that affect bok choy?
Common pests that affect bok choy include aphids, cabbage worms, and flea beetles. You can control these pests by handpicking them off the plants, using insecticidal soap, or applying neem oil. Common diseases that affect bok choy include downy mildew and clubroot. Prevent these diseases by providing good air circulation, avoiding overhead watering, and using disease-resistant varieties.
How do I harvest bok choy?
You can harvest bok choy when the leaves are about 6-8 inches long. You can harvest the entire plant at once, or you can harvest individual leaves as needed. To harvest the entire plant, cut it off at the base with a sharp knife. To harvest individual leaves, simply snap them off near the base of the plant.
Can I grow bok choy in the winter?
Yes, you can grow bok choy in the winter, especially in milder climates. Bok choy is a cool-season crop that can tolerate light frosts. In colder climates, you can protect your plants from frost by covering them with a frost blanket or moving them indoors.
How does the Styrofoam container help with growing bok choy?
The Styrofoam container provides several benefits for growing bok choy. It provides insulation, which helps to regulate soil temperature and protect the roots from extreme heat or cold. It also provides excellent drainage, preventing the soil from becoming waterlogged. Additionally, the Styrofoam container is lightweight and portable, making it easy to move your plants around as needed. The Styrofoam Bok Choy Garden Trick is a simple and effective way to grow healthy and delicious bok choy.
Leave a Comment