
Space Saving Storage Hacks are a game-changer, especially if you’re like me and find yourself constantly battling clutter in your home! Let’s face it, we all accumulate things, and sometimes our living spaces just can’t keep up. But what if I told you that you don’t need to move to a bigger house to feel like you have more room?
The desire for efficient storage isn’t new. Throughout history, cultures have developed ingenious ways to maximize limited spaces. From the intricate storage solutions in ancient Japanese homes to the clever built-ins of early American settlers, the need to make the most of what you have is a timeless human endeavor.
In today’s world, where many of us live in apartments or smaller homes, space saving storage hacks are more crucial than ever. They’re not just about tidiness; they’re about creating a more functional and peaceful living environment. Imagine coming home to a clutter-free space where you can actually relax and recharge. That’s the power of smart storage! This article is packed with DIY tricks and tips that will help you transform your home into an organized oasis, without breaking the bank. Get ready to declutter, optimize, and reclaim your space!

Growing Delicious Tomatoes at Home: A DIY Guide
Hey there, fellow gardening enthusiasts! I’m so excited to share my tried-and-true method for growing plump, juicy tomatoes right in your own backyard (or even on your balcony!). Forget those bland, store-bought tomatoes – nothing beats the taste of a homegrown beauty, bursting with flavor. This guide will walk you through every step, from seed to salsa, ensuring you have a bountiful harvest. Let’s get our hands dirty!
Choosing Your Tomato Varieties
Before we even think about planting, we need to decide what kind of tomatoes we want to grow. There are literally hundreds of varieties, each with its own unique characteristics. Here’s a quick rundown of some popular choices:
* **Determinate Tomatoes:** These are bush-type tomatoes that grow to a certain size and then stop. They produce most of their fruit all at once, making them ideal for canning or making large batches of sauce. Roma and Celebrity are popular determinate varieties.
* **Indeterminate Tomatoes:** These are vining tomatoes that keep growing and producing fruit throughout the season. They require staking or caging for support. Beefsteak, Cherry, and Heirloom tomatoes are often indeterminate.
* **Cherry Tomatoes:** Small, sweet, and perfect for snacking. They come in various colors, from red and yellow to even black.
* **Beefsteak Tomatoes:** Large, meaty tomatoes, perfect for slicing and putting on sandwiches.
* **Heirloom Tomatoes:** These are older varieties that have been passed down through generations. They often have unique flavors and colors. Brandywine and Cherokee Purple are popular heirloom choices.
My personal favorites are Roma for sauces and a mix of cherry tomatoes for snacking!
Starting Your Tomato Seeds (or Buying Seedlings)
You have two options here: start your own seeds indoors or buy seedlings from a local nursery. Starting from seed gives you more control over the varieties you grow and can be more cost-effective, but it requires a bit more time and effort.
Starting Seeds Indoors:
This is how I usually do it, and I find it incredibly rewarding!
1. **Gather Your Supplies:** You’ll need seed starting trays or small pots, seed starting mix (not regular potting soil!), tomato seeds, a spray bottle, and a grow light (optional, but highly recommended).
2. **Sow the Seeds:** Moisten the seed starting mix and fill your trays or pots. Sow the seeds about ¼ inch deep and gently cover them with more mix.
3. **Water Gently:** Use a spray bottle to mist the soil. You don’t want to overwater, just keep the soil consistently moist.
4. **Provide Warmth and Light:** Place the trays or pots in a warm location (around 70-75°F) and under a grow light if you have one. If you don’t have a grow light, a sunny windowsill will work, but you may need to rotate the trays regularly to prevent the seedlings from leaning towards the light.
5. **Keep the Soil Moist:** Check the soil daily and mist as needed to keep it moist.
6. **Thin the Seedlings:** Once the seedlings have their first true leaves (the second set of leaves that appear after the initial seed leaves), thin them out so that only one seedling remains in each cell or pot. Choose the strongest, healthiest-looking seedling.
7. **Harden Off the Seedlings:** About a week before you plan to transplant the seedlings outdoors, you need to “harden them off.” This means gradually exposing them to outdoor conditions to help them adjust. Start by placing them outside in a sheltered location for an hour or two each day, gradually increasing the amount of time they spend outdoors.
Buying Seedlings:
If you’re short on time or space, buying seedlings is a great option.
1. **Choose Healthy Seedlings:** Look for seedlings that are about 6-8 inches tall, with thick, green stems and no signs of disease or pests. Avoid seedlings that are leggy (tall and spindly) or have yellowing leaves.
2. **Check the Roots:** Gently remove a seedling from its pot and inspect the roots. They should be white and healthy-looking, not brown or root-bound (tightly circling the pot).
Preparing Your Garden Bed or Containers
Tomatoes need plenty of sunshine and well-drained soil. Choose a location that gets at least 6-8 hours of direct sunlight per day.
Preparing the Garden Bed:
1. **Clear the Area:** Remove any weeds, rocks, or debris from the area where you plan to plant your tomatoes.
2. **Amend the Soil:** Tomatoes thrive in rich, well-drained soil. Amend the soil with compost, aged manure, or other organic matter to improve its fertility and drainage. I usually add a generous amount of compost – it works wonders!
3. **Test the Soil pH:** Tomatoes prefer a soil pH of 6.0-6.8. You can test your soil pH with a soil testing kit. If the pH is too low, add lime to raise it. If the pH is too high, add sulfur to lower it.
Preparing Containers:
1. **Choose the Right Size Container:** Tomatoes need a large container to grow properly. A 5-gallon container is the minimum size for determinate varieties, while indeterminate varieties will need a 10-gallon container or larger.
2. **Use a High-Quality Potting Mix:** Don’t use garden soil in containers, as it can become compacted and poorly drained. Use a high-quality potting mix that is specifically formulated for containers.
3. **Ensure Good Drainage:** Make sure the container has drainage holes to prevent the soil from becoming waterlogged.
Transplanting Your Tomato Seedlings
Now comes the exciting part – planting your tomato seedlings!
1. **Choose a Cloudy Day:** Transplanting is best done on a cloudy day or in the late afternoon to avoid shocking the seedlings.
2. **Dig a Hole:** Dig a hole that is deep enough to bury the bottom third of the seedling’s stem. This will encourage the plant to develop more roots along the buried stem, resulting in a stronger, healthier plant.
3. **Add Fertilizer:** Add a small amount of slow-release fertilizer to the bottom of the hole.
4. **Plant the Seedling:** Gently remove the seedling from its pot and place it in the hole. Backfill with soil and gently firm it around the base of the plant.
5. **Water Thoroughly:** Water the seedling thoroughly after planting.
6. **Add Support:** If you’re growing indeterminate varieties, install stakes or cages at the time of planting to provide support for the plants as they grow. I prefer using tomato cages – they’re easy to set up and provide good support.
Caring for Your Tomato Plants
Once your tomato plants are in the ground, it’s important to provide them with proper care to ensure a bountiful harvest.
* **Watering:** Water your tomato plants deeply and regularly, especially during hot, dry weather. Aim to water at the base of the plant to avoid wetting the foliage, which can lead to disease.
* **Fertilizing:** Fertilize your tomato plants every 2-3 weeks with a balanced fertilizer.
* **Pruning:** Pruning is important for indeterminate tomato varieties. Remove suckers (the small shoots that grow between the main stem and the branches) to encourage the plant to focus its energy on producing fruit.
* **Pest and Disease Control:** Keep an eye out for pests and diseases, such as aphids, tomato hornworms, and blight. Treat any problems promptly with appropriate organic or chemical controls. I prefer using organic methods whenever possible.
* **Mulching:** Apply a layer of mulch around your tomato plants to help retain moisture, suppress weeds, and regulate soil temperature. Straw, wood chips, or shredded leaves are all good options.
Harvesting Your Tomatoes
The moment we’ve all been waiting for!
1. **Wait for Ripeness:** Tomatoes are ripe when they are fully colored and slightly soft to the touch.
2. **Harvest Gently:** Gently twist or cut the tomato from the vine.
3. **Enjoy!** Enjoy your homegrown tomatoes fresh, in salads, sauces, or any other way you like!
Pro Tip: Don’t refrigerate your tomatoes! Refrigeration can dull their flavor. Store them at room temperature for the best taste.
Troubleshooting Common Tomato Problems
Even with the best care, you may encounter some problems along the way. Here are a few common issues and how to address them:
* **Blossom End Rot:** This is caused by a calcium deficiency. Ensure consistent watering and add calcium to the soil.
* **Tomato Hornworms:** These large green caterpillars can quickly defoliate your tomato plants. Handpick them off the plants or use Bacillus thuringiensis (Bt), an organic insecticide.
* **Aphids:** These small insects can suck the sap from your tomato plants. Spray them with insecticidal soap or neem oil.
* **Early Blight:** This fungal disease causes dark spots on the leaves. Remove infected leaves and spray with a fungicide.
Extending Your Tomato Season
Want to enjoy fresh tomatoes
Conclusion
So, there you have it! These space-saving storage hacks aren’t just about tidying up; they’re about reclaiming your living space and creating a more functional and enjoyable home. We’ve covered everything from maximizing vertical space to repurposing everyday items into ingenious storage solutions. The beauty of these DIY tricks lies in their adaptability. They can be tailored to fit any room, any budget, and any personal style.
Why is this a must-try? Because in today’s world, where space often comes at a premium, these hacks offer a practical and affordable way to optimize your environment. Imagine the peace of mind that comes with knowing exactly where everything is, the satisfaction of a clutter-free countertop, and the freedom to move around your home without bumping into obstacles. These aren’t just storage solutions; they’re investments in your well-being.
Consider these variations to further personalize your space-saving journey. For the kitchen, explore magnetic strips for knives and spice jars, freeing up valuable drawer space. In the bedroom, think about under-bed storage containers with clear lids for easy visibility, or utilize the back of your closet door with an over-the-door organizer for shoes, accessories, or even cleaning supplies. For the living room, floating shelves can display books and decorative items while keeping the floor clear. Don’t be afraid to get creative and experiment with different combinations of these hacks to find what works best for your unique needs.
Remember, the key to successful space-saving is to declutter first. Before implementing any of these hacks, take the time to sort through your belongings and get rid of anything you no longer need or use. This will not only make the organization process easier but also prevent clutter from accumulating in the future.
We’re confident that these **space saving storage hacks** will transform your home into a more organized and efficient space. But don’t just take our word for it! We encourage you to try these DIY tricks and see the difference they can make. Share your experiences with us in the comments below. We’d love to hear about your successes, your challenges, and any creative variations you come up with. Let’s build a community of space-saving enthusiasts and inspire each other to create more functional and enjoyable homes. So, roll up your sleeves, gather your supplies, and get ready to transform your space! You’ll be amazed at what you can achieve with a little ingenuity and these simple yet effective storage solutions.
Frequently Asked Questions (FAQs)
Q: I live in a small apartment with very limited space. Will these hacks really make a difference?
A: Absolutely! These space-saving storage hacks are specifically designed to maximize even the smallest of spaces. The focus is on utilizing vertical space, repurposing existing items, and finding creative storage solutions in unexpected places. Even implementing just a few of these hacks can significantly improve the organization and functionality of your apartment. Think about using wall-mounted shelves instead of bulky floor-standing units, or utilizing the space under your bed for storage. Every little bit helps!
Q: I’m not very handy. Are these DIY tricks difficult to implement?
A: Not at all! Most of these hacks are relatively simple and require minimal DIY skills. Many involve repurposing items you already have around the house or using readily available and inexpensive materials. We’ve aimed to provide clear and easy-to-follow instructions for each hack. If you’re unsure about a particular step, there are plenty of online resources and tutorials available to guide you. Don’t be afraid to start with the simpler hacks and gradually work your way up to the more complex ones. The key is to take it one step at a time and be patient with yourself.
Q: What if I don’t have a lot of money to spend on storage containers and organizers?
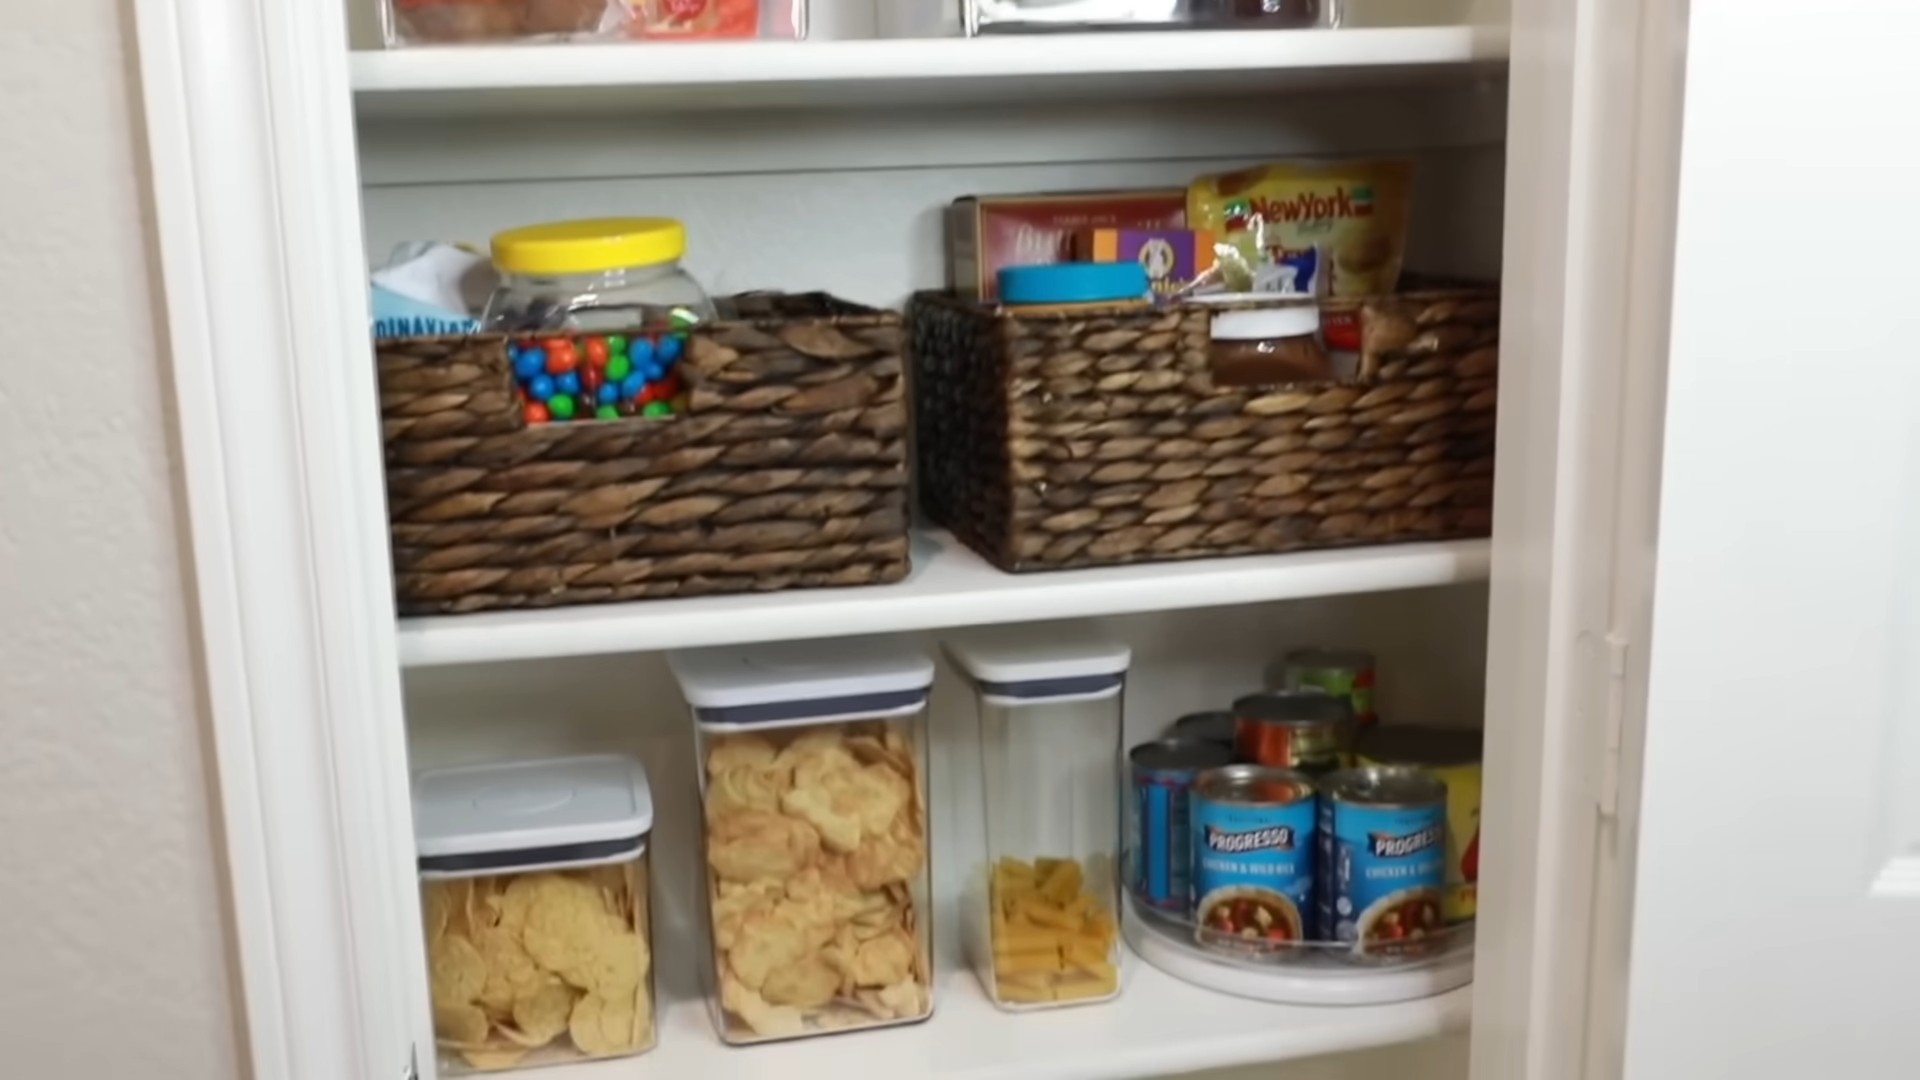
A: That’s perfectly fine! Many of these space-saving storage hacks can be implemented using items you already have at home. Think about repurposing old jars, boxes, and baskets into storage containers. You can also find inexpensive storage solutions at thrift stores, dollar stores, and online retailers. The key is to be creative and resourceful. Focus on finding solutions that are both functional and affordable. Remember, you don’t need to spend a fortune to create a more organized and efficient space.
Q: How do I prevent clutter from accumulating again after I’ve implemented these hacks?
A: Preventing clutter from accumulating is an ongoing process that requires conscious effort. The key is to develop good habits and routines. Regularly declutter your belongings and get rid of anything you no longer need or use. Implement a “one in, one out” rule, where you get rid of something every time you bring something new into your home. Make it a habit to put things away immediately after using them. Schedule regular cleaning and organizing sessions to maintain a clutter-free environment. By developing these habits, you can prevent clutter from accumulating and maintain a more organized and functional space.
Q: I have a lot of sentimental items that I don’t want to get rid of, but they’re taking up a lot of space. What should I do?
A: Sentimental items can be tricky to deal with, but there are ways to store them without sacrificing valuable space. Consider storing them in decorative boxes or containers that can be displayed on shelves or in closets. You can also create a memory box or scrapbook to preserve photos and other small items. Another option is to digitize photos and documents to reduce the amount of physical space they take up. The key is to find creative ways to store these items without letting them clutter your living space. Remember, you don’t have to get rid of everything, but you do need to be selective about what you keep and how you store it.
Q: Can these space saving storage hacks be used in a garage or shed?
A: Absolutely! These hacks are incredibly versatile and can be adapted for use in garages, sheds, and other outdoor storage spaces. Think about using vertical shelving to maximize wall space, hanging tools and equipment on pegboards, and utilizing overhead storage racks for seasonal items. You can also repurpose old pallets into storage solutions for gardening supplies or firewood. The key is to assess your storage needs and find creative ways to utilize the available space. Garages and sheds often become dumping grounds for clutter, so implementing these hacks can significantly improve their organization and functionality.
Q: What are some good resources for finding more space-saving storage ideas?
A: There are many great resources available online and in print for finding more space-saving storage ideas. Websites like Pinterest, Houzz, and Apartment Therapy are excellent sources of inspiration. You can also find helpful tips and tutorials on YouTube and other video-sharing platforms. Consider subscribing to home organization blogs and magazines for ongoing inspiration and advice. Don’t be afraid to experiment and try different ideas until you find what works best for you. The key is to stay curious and keep learning about new and innovative storage solutions.


Leave a Comment