
Soil bag pumpkin growing: Ever dreamt of having a giant, prize-winning pumpkin gracing your porch this fall, but thought you didn’t have the space or the green thumb? Well, dream no more! I’m about to let you in on a little secret – a super simple, surprisingly effective method that even the most novice gardener can master. Forget sprawling gardens and back-breaking tilling; we’re talking pumpkins grown right in the bag!
Pumpkins, symbols of autumn and harvest festivals, have a rich history dating back thousands of years. Originating in North America, they were a staple food for indigenous populations long before European settlers arrived. Today, they’re not just for pies and jack-o’-lanterns; they’re a source of immense gardening pride. But let’s face it, traditional pumpkin growing can be intimidating. That’s where this DIY trick comes in.
Why should you try soil bag pumpkin growing? Because it’s a game-changer! It’s perfect for small spaces like balconies, patios, or even just a sunny corner of your yard. It minimizes weeding, improves drainage, and provides a nutrient-rich environment for your pumpkin to thrive. Plus, it’s incredibly satisfying to watch a tiny seed transform into a massive gourd, all thanks to your ingenuity and a little bit of dirt. So, ditch the overwhelm and get ready to grow your own pumpkin patch, one bag at a time! I’m excited to share all the tips and tricks I’ve learned along the way.
Kürbisse im Erdsack ziehen: Eine DIY-Anleitung für Riesenerfolge
Hallo liebe Gartenfreunde! Habt ihr auch den Traum von einem riesigen Kürbis im eigenen Garten, aber wenig Platz oder schlechten Boden? Keine Sorge, ich zeige euch, wie ihr mit einem einfachen Erdsack eure eigenen Kürbis-Champions züchten könnt! Diese Methode ist nicht nur platzsparend, sondern auch super effektiv, da wir den Kürbissen genau das bieten, was sie brauchen. Lasst uns loslegen!
Was du brauchst:
* Einen großen Erdsack (mindestens 70 Liter, besser 100 Liter oder mehr – je größer, desto besser für den Kürbis!)
* Kürbissamen (am besten eine Riesenkürbissorte wie Atlantic Giant)
* Kompost
* Gartenboden
* Langzeitdünger (Kürbisse sind Vielfraße!)
* Gießkanne oder Schlauch
* Messer oder Schere
* Mulch (Stroh, Holzhackschnitzel oder Grasschnitt)
* Eventuell: Rankhilfe (wenn du wenig Platz hast und den Kürbis in die Höhe leiten möchtest)
* Geduld und Liebe (das Wichtigste!)
Vorbereitung des Erdsacks: Der Grundstein für deinen Kürbis-Erfolg
1. Den richtigen Standort wählen: Kürbisse lieben die Sonne! Sucht euch einen sonnigen Platz im Garten aus, der mindestens 6-8 Stunden direkte Sonneneinstrahlung pro Tag bietet. Der Standort sollte außerdem windgeschützt sein, da große Kürbispflanzen anfällig für Windbruch sind.
2. Den Erdsack vorbereiten: Legt den Erdsack an den gewählten Standort. Schneidet mit einem Messer oder einer Schere die Oberseite des Sacks auf. Achtung: Nicht zu tief schneiden, damit der Sack stabil bleibt.
3. Die Erde aufwerten: Kürbisse brauchen nährstoffreiche Erde. Mischt den Inhalt des Erdsacks mit Kompost und Gartenboden. Das Verhältnis sollte ungefähr 1:1:1 sein. Der Kompost sorgt für zusätzliche Nährstoffe, der Gartenboden für eine gute Struktur.
4. Dünger hinzufügen: Kürbisse sind Starkzehrer und brauchen viel Dünger. Mischt Langzeitdünger unter die Erde. Achtet auf die Dosierungsanleitung des Herstellers. Ich verwende gerne organischen Dünger, da er die Pflanzen schonend und nachhaltig versorgt.
5. Drainage verbessern: Kürbisse mögen keine Staunässe. Stecht mit einem Messer oder einer Schere einige Löcher in den Boden des Erdsacks, damit überschüssiges Wasser ablaufen kann.
Aussaat und Anzucht: Der Start ins Kürbis-Abenteuer
1. Samen vorquellen: Um die Keimung zu beschleunigen, könnt ihr die Kürbissamen vorquellen lassen. Legt sie dazu für 24 Stunden in ein Glas mit lauwarmem Wasser.
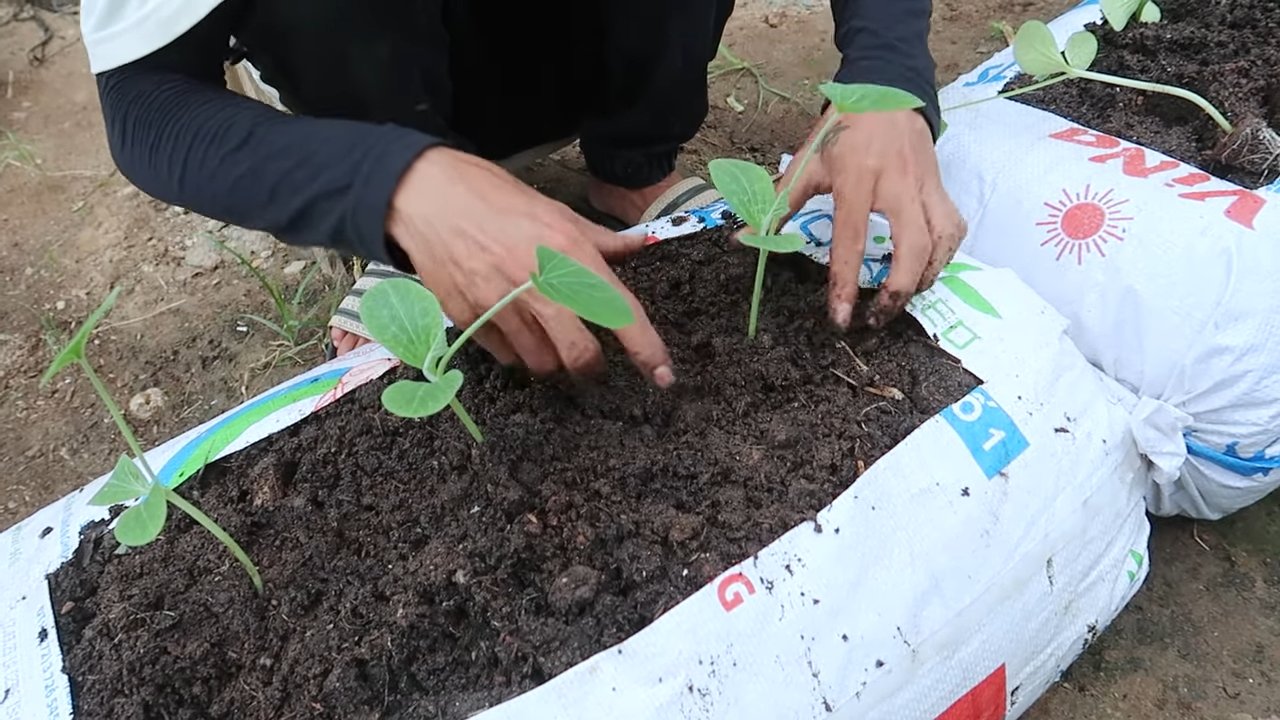
2. Aussaat: Drückt die Samen etwa 2-3 cm tief in die vorbereitete Erde. Pro Erdsack könnt ihr 2-3 Samen aussäen. Wenn alle Samen keimen, könnt ihr später den stärksten Sämling auswählen.
3. Angießen: Gießt die Erde vorsichtig an, sodass sie gut durchfeuchtet ist. Achtet darauf, dass die Erde nicht zu nass wird.
4. Warmhalten: Kürbisse brauchen Wärme zum Keimen. Stellt den Erdsack an einen warmen Ort oder deckt ihn mit einer Folie ab, um die Temperatur zu erhöhen.
5. Geduld haben: Die Keimung kann je nach Temperatur und Sorte einige Tage bis Wochen dauern. Habt Geduld und haltet die Erde feucht.
Pflege und Wachstum: Den Kürbis zum Riesen machen
1. Gießen: Kürbisse brauchen viel Wasser, besonders während der Wachstums- und Fruchtbildungsphase. Gießt regelmäßig und gründlich, am besten morgens oder abends. Vermeidet es, die Blätter zu gießen, um Pilzkrankheiten vorzubeugen.
2. Düngen: Düngt die Kürbispflanzen regelmäßig mit einem Flüssigdünger oder einem organischen Dünger. Achtet auf die Dosierungsanleitung des Herstellers. Ich dünge meine Kürbisse alle 1-2 Wochen.
3. Ausgeizen: Entfernt regelmäßig Seitentriebe, um die Kraft der Pflanze auf die Haupttriebe und die Früchte zu konzentrieren.
4. Bestäubung: Kürbisse sind auf die Bestäubung durch Bienen und andere Insekten angewiesen. Wenn es wenig Insekten gibt, könnt ihr die Blüten auch von Hand bestäuben. Nehmt dazu den Pollen einer männlichen Blüte und streicht ihn auf die Narbe einer weiblichen Blüte. Weibliche Blüten erkennt man an dem kleinen Fruchtansatz unterhalb der Blüte.
5. Früchte schützen: Wenn die Kürbisse größer werden, solltet ihr sie vor direkter Sonneneinstrahlung schützen, um Sonnenbrand zu vermeiden. Legt dazu Stroh oder andere Materialien unter die Früchte.
6. Mulchen: Mulcht den Boden um die Kürbispflanzen mit Stroh, Holzhackschnitzeln oder Grasschnitt. Das Mulchmaterial hält die Feuchtigkeit im Boden, unterdrückt Unkraut und schützt die Wurzeln vor extremen Temperaturen.
7. Rankhilfe (optional): Wenn ihr wenig Platz habt, könnt ihr die Kürbispflanzen an einer Rankhilfe hochleiten. Achtet darauf, dass die Rankhilfe stabil genug ist, um das Gewicht der Pflanze und der Früchte zu tragen.
Ernte: Der Lohn für deine Mühe
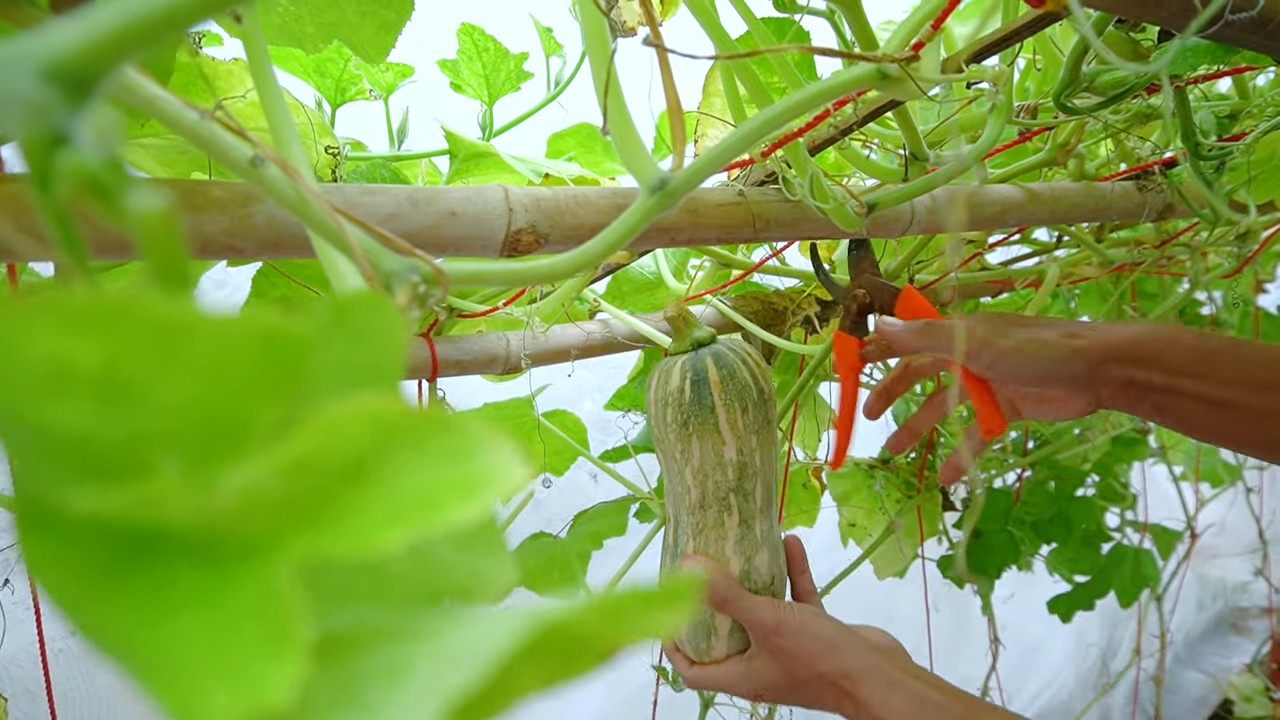
1. Reife erkennen: Kürbisse sind reif, wenn sie eine harte Schale haben und beim Abklopfen hohl klingen. Der Stiel sollte trocken und verholzt sein.
2. Ernten: Schneidet den Kürbis mit einem scharfen Messer oder einer Säge vom Stiel ab. Lasst dabei einen etwa 10 cm langen Stiel am Kürbis.
3. Lagern: Lagert die Kürbisse an einem kühlen, trockenen und gut belüfteten Ort. So halten sie sich mehrere Monate.
Zusätzliche Tipps für Riesenkürbisse:
* Eine Frucht pro Pflanze: Wenn ihr einen Riesenkürbis züchten wollt, solltet ihr nur eine Frucht pro Pflanze zulassen. Entfernt alle anderen Früchte, damit die Pflanze ihre ganze Kraft in den einen Kürbis stecken kann.
* Regelmäßig wiegen: Wiegt den Kürbis regelmäßig, um sein Wachstum zu überwachen.
* Spezialdünger: Es gibt spezielle Dünger für Riesenkürbisse, die besonders reich an Kalium und Phosphor sind.
* Schutz vor Schädlingen: Achtet auf Schädlinge wie Schnecken und Blattläuse und bekämpft sie bei Bedarf.
* Geduld und Ausdauer: Die Zucht von Riesenkürbissen erfordert Geduld und Ausdauer. Lasst euch nicht entmutigen, wenn es nicht gleich klappt.
Häufige Probleme und Lösungen:
* Schlechte Keimung: Ursachen können zu kalte Temperaturen, zu feuchte Erde oder alte Samen sein. Sorgt für optimale Bedingungen und verwendet frische Samen.
* Pilzkrankheiten: Pilzkrankheiten wie Mehltau können auftreten, wenn die Blätter zu feucht sind. Sorgt für eine gute Belüftung und vermeidet es, die Blätter zu gießen. Bei Bedarf könnt ihr ein Fungizid einsetzen.
* Schädlinge: Schnecken und Blattläuse können die Kürbispflanzen befallen. Bekämpft sie mit geeigneten Mitteln.
* Fruchtfäule: Fruchtfäule kann auftreten, wenn die Früchte auf feuchtem Boden liegen. Legt Stroh oder andere Materialien unter die Früchte, um sie vor Feuchtigkeit zu schützen.
Ich hoffe, diese Anleitung hilft euch dabei, eure eigenen Kürbis-Champions im Erdsack zu züchten! Viel Erfolg und viel Spaß beim Gärtnern!
Conclusion
So, there you have it! Transforming a simple soil bag into a thriving pumpkin patch is not just a fun project; it’s a game-changer for gardeners of all levels. Whether you’re short on space, battling poor soil conditions, or simply looking for a unique and rewarding gardening experience, this DIY soil bag pumpkin growing method is an absolute must-try.
Think about it: no more back-breaking tilling, no more wrestling with rocky or clay-heavy soil. Just a readily available bag of nutrient-rich soil, perfectly contained and ready to nurture your pumpkin dreams. The convenience alone is enough to make this technique a winner, but the benefits extend far beyond that. The elevated growing environment promotes better drainage, reduces the risk of soilborne diseases, and allows for easier weed control. Plus, the dark color of the bag absorbs heat, giving your pumpkins a head start in cooler climates.
But the beauty of this method lies in its adaptability. Feel free to experiment with different pumpkin varieties. From the classic Jack O’ Lantern to the adorable miniature pumpkins, the possibilities are endless. You can also tailor the soil mix to your specific needs. Consider adding compost, aged manure, or other organic amendments to further enrich the growing medium. For those aiming for truly gigantic pumpkins, incorporating specialized pumpkin-growing fertilizers can provide the extra boost needed to break records.
Don’t be afraid to get creative with your setup. You can place the soil bags directly on your lawn, patio, or even a balcony. Just make sure they receive plenty of sunlight and have adequate support as your pumpkins grow. As the vines spread, you might want to provide a trellis or other structure to keep the pumpkins off the ground and prevent rot.
We’re confident that you’ll be amazed by the results you can achieve with this simple yet effective technique. Imagine the satisfaction of harvesting your own homegrown pumpkins, knowing that you nurtured them from seed to magnificent gourd, all within the confines of a humble soil bag.
So, what are you waiting for? Grab a bag of soil, gather your pumpkin seeds, and embark on this exciting gardening adventure. We encourage you to document your progress, share your tips and tricks, and inspire others to discover the joys of soil bag pumpkin growing. Let’s create a community of pumpkin enthusiasts who are passionate about sustainable, space-saving gardening.
Don’t forget to share your photos and stories with us! We can’t wait to see the amazing pumpkins you grow. Happy gardening!
Frequently Asked Questions (FAQ)
What type of soil should I use for soil bag pumpkin growing?
The best type of soil to use is a high-quality potting mix or garden soil that is rich in organic matter. Look for a mix that contains ingredients like compost, peat moss, or aged manure. Avoid using heavy clay soil, as it can become compacted and restrict drainage. A well-draining soil is crucial for healthy pumpkin growth. You can also amend your existing soil with compost or other organic materials to improve its texture and fertility.
How many pumpkin plants can I grow in one soil bag?
It depends on the size of the soil bag and the variety of pumpkin you’re growing. For standard-sized pumpkins, it’s generally recommended to grow only one plant per bag. This will ensure that each plant has enough space and nutrients to thrive. For smaller pumpkin varieties, such as miniature pumpkins or gourds, you may be able to grow two plants per bag. However, be sure to monitor their growth and provide adequate support as needed. Overcrowding can lead to stunted growth and reduced yields.
How often should I water my soil bag pumpkins?
Watering frequency will depend on the weather conditions and the type of soil you’re using. Generally, you should water your pumpkins deeply whenever the top inch of soil feels dry to the touch. During hot, dry weather, you may need to water them daily. Be careful not to overwater, as this can lead to root rot. Ensure that the soil bag has adequate drainage to prevent water from pooling around the roots. A good way to check if your pumpkins need water is to stick your finger into the soil near the base of the plant. If it feels dry, it’s time to water.
Do I need to fertilize my soil bag pumpkins?
Yes, pumpkins are heavy feeders and require regular fertilization to produce large, healthy fruits. Start by incorporating a slow-release fertilizer into the soil mix at planting time. Then, supplement with liquid fertilizer every two to three weeks throughout the growing season. Look for a fertilizer that is high in phosphorus and potassium, as these nutrients are essential for fruit development. You can also use organic fertilizers, such as compost tea or fish emulsion. Be sure to follow the instructions on the fertilizer label carefully to avoid over-fertilizing, which can damage the plants.
How do I prevent pests and diseases from attacking my soil bag pumpkins?
Prevention is key when it comes to pests and diseases. Start by choosing disease-resistant pumpkin varieties. Inspect your plants regularly for signs of pests or diseases, such as aphids, squash bugs, or powdery mildew. If you spot any problems, take action immediately. You can use organic pest control methods, such as insecticidal soap or neem oil, to control pests. For diseases, ensure good air circulation around the plants and avoid overhead watering. You can also use fungicides to prevent or treat fungal diseases. Crop rotation and proper sanitation can also help to reduce the risk of pests and diseases.
How do I support the growing pumpkins in the soil bag?
As your pumpkins grow larger, they may need additional support to prevent them from breaking off the vine. You can use slings made from fabric or netting to support the pumpkins. Tie the slings to a sturdy trellis or stake. You can also place the pumpkins on wooden boards or straw to keep them off the ground and prevent rot. Be careful when handling the pumpkins, as they can be heavy and easily damaged.
Can I grow pumpkins in soil bags in a small space, like a balcony?
Yes, absolutely! One of the biggest advantages of soil bag pumpkin growing is its suitability for small spaces. Balconies, patios, and even small yards can be transformed into thriving pumpkin patches. Just make sure that the soil bags receive at least six hours of sunlight per day. You may also need to provide additional support for the vines, such as a trellis or railing. Choose smaller pumpkin varieties that are well-suited for container gardening.
What do I do with the soil bag after the pumpkin harvest?
After you’ve harvested your pumpkins, you can reuse the soil bag for other gardening projects. The soil will likely be depleted of nutrients, so you’ll need to amend it with compost or other organic materials. You can use the soil to grow other vegetables, flowers, or herbs. Alternatively, you can empty the soil bag into your garden beds or compost pile. The plastic bag itself can be recycled or reused for other purposes.

Leave a Comment