
Small pot onion growing might seem like a challenge reserved for seasoned gardeners with sprawling acres, but I’m here to tell you it’s totally achievable, even if your “garden” is a sunny windowsill! Forget those expensive grocery store onions – imagine snipping fresh, flavorful chives or pulling up a perfectly sized onion right from your own little container.
For centuries, onions have been a staple in cuisines worldwide, dating back to ancient civilizations. They were even revered in ancient Egypt, symbolizing eternity! While traditionally grown in fields, the beauty of modern gardening is its adaptability. We can now bring the bounty of the earth to our smallest spaces.
Why should you try small pot onion growing? Well, beyond the sheer satisfaction of growing your own food, it’s incredibly practical. Think about it: no more wasted onion halves wilting in the fridge! You harvest exactly what you need, when you need it. Plus, it’s a fantastic way to introduce kids to gardening and teach them about where their food comes from. This DIY guide will provide you with simple, step-by-step instructions and clever hacks to ensure your small pot onion growing adventure is a resounding success. Get ready to enjoy the freshest, most flavorful onions you’ve ever tasted, all thanks to your own green thumb!
Growing Onions in Small Pots: A Beginner’s Guide
Hey there, fellow gardening enthusiasts! Ever dreamt of snipping fresh onion greens right from your windowsill? Well, you absolutely can! Growing onions in small pots is a surprisingly easy and rewarding DIY project, perfect for apartment dwellers or anyone with limited garden space. I’m going to walk you through everything you need to know, from choosing the right onion to harvesting your flavorful bounty. Let’s get started!
Choosing Your Onion Type
Before we dive into the nitty-gritty, let’s talk onions. Not all onions are created equal, especially when it comes to container gardening. Here’s a breakdown of the best options:
* Green Onions (Scallions): These are the absolute easiest to grow in pots. They’re fast-growing, require minimal space, and you can harvest the green tops continuously.
* Shallots: These have a milder, sweeter flavor than regular onions and thrive in containers. They tend to multiply, giving you a bigger harvest.
* Bulbing Onions (like Yellow or Red): While possible, growing full-sized bulbing onions in small pots is more challenging. You’ll need larger pots and more patience. Choose smaller varieties like ‘Walla Walla Sweet’ or ‘Red Burgundy’ for better success.
* Onion Sets: These are small, immature onion bulbs that are already partially grown. They’re a great option for beginners as they get a head start.
Materials You’ll Need
Okay, time to gather your supplies! Here’s what you’ll need to grow onions in small pots:
* Pots: Choose pots that are at least 6 inches in diameter and 6 inches deep for green onions or shallots. For bulbing onions, go for 8-10 inches in diameter and depth. Make sure your pots have drainage holes!
* Potting Mix: Use a high-quality, well-draining potting mix. Avoid using garden soil, as it can compact in pots and hinder drainage. I like to use a mix specifically formulated for vegetables.
* Onion Starts: You can use onion sets, seedlings from a nursery, or even regrow onions from scraps (more on that later!).
* Watering Can: A gentle watering can is essential to avoid disturbing the soil and delicate onion roots.
* Fertilizer (Optional): A balanced liquid fertilizer can help boost growth, especially for bulbing onions.
* Scissors or Pruning Shears: For harvesting green onions.
Step-by-Step Planting Guide
Alright, let’s get our hands dirty! Here’s a detailed guide to planting your onions:
1. Prepare Your Pots: Fill your pots with potting mix, leaving about an inch of space at the top. Gently tap the pot to settle the soil.
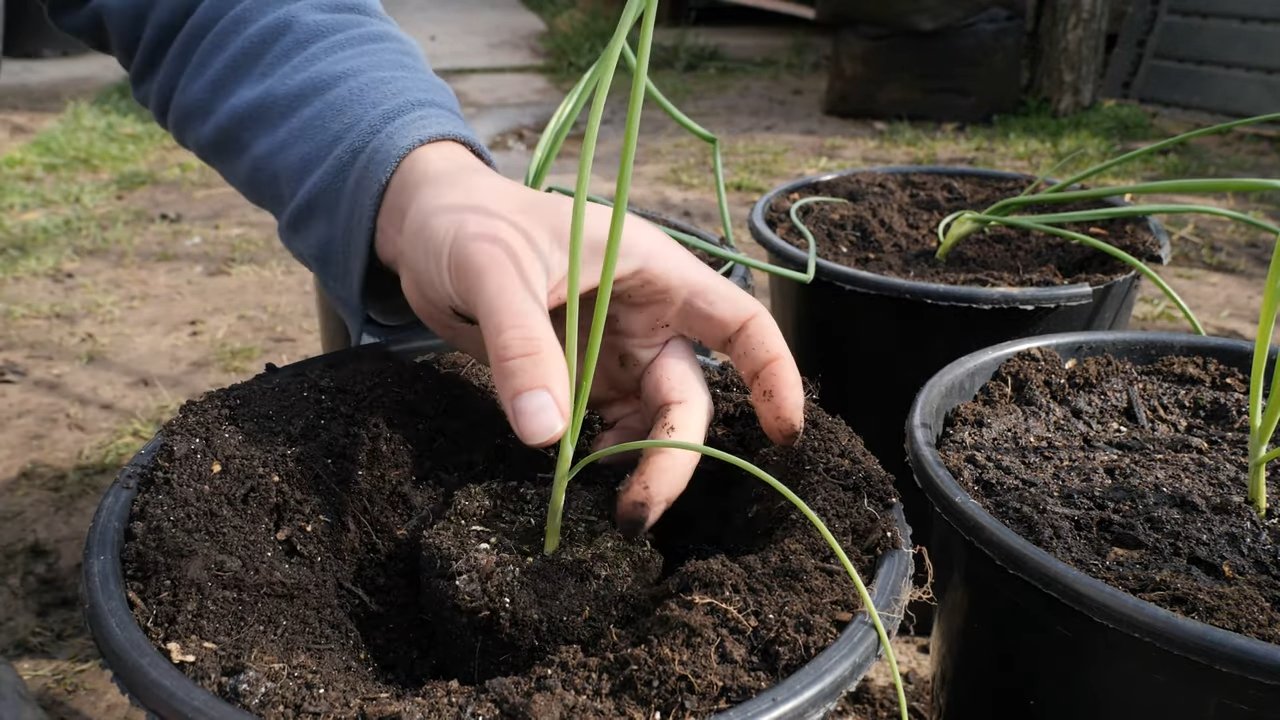
2. Planting Onion Sets or Seedlings:
* For onion sets, plant them about 1 inch deep, with the pointed end facing up. Space them about 2-3 inches apart.
* For seedlings, gently loosen the roots and plant them at the same depth they were growing in their original container. Space them similarly to onion sets.
3. Planting Shallots: Plant shallots about 2 inches deep, with the pointed end facing up. Space them about 4-6 inches apart, as they tend to multiply.
4. Water Thoroughly: After planting, water your onions thoroughly until water drains out of the bottom of the pot. This helps settle the soil and encourages root growth.
5. Location, Location, Location: Place your pots in a sunny location that receives at least 6-8 hours of direct sunlight per day. A south-facing windowsill or balcony is ideal.
6. Watering Schedule: Keep the soil consistently moist, but not soggy. Water when the top inch of soil feels dry to the touch. Overwatering can lead to root rot, so be careful!
7. Fertilizing (Optional): If you’re using fertilizer, start feeding your onions about 2-3 weeks after planting. Use a balanced liquid fertilizer diluted to half strength, and apply it every 2-3 weeks.
Regrowing Onions from Scraps: A Fun Experiment!
Did you know you can regrow onions from the scraps you usually throw away? It’s a fun and sustainable way to get a head start on your onion crop. Here’s how:
1. Save the Root End: When you’re using an onion in your cooking, save the bottom inch or two that contains the roots.
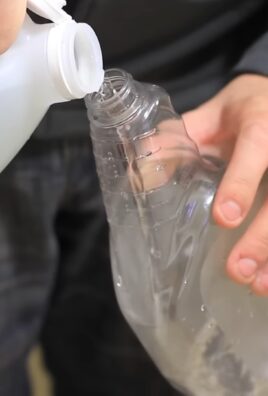
2. Place in Water: Place the root end in a small glass or jar with just enough water to cover the roots.
3. Wait for Growth: Place the glass in a sunny location and change the water every 1-2 days. You should start to see new green shoots emerging from the top within a few days.
4. Plant in Pot: Once the roots are well-developed and the green shoots are a few inches tall, you can plant the onion in a pot filled with potting mix, following the instructions above.
Caring for Your Onions
Now that your onions are planted, it’s time to give them some TLC. Here are some tips for keeping them happy and healthy:
* Sunlight: As mentioned before, onions need plenty of sunlight. If you don’t have a sunny spot, consider using a grow light.
* Watering: Monitor the soil moisture regularly and water as needed. Avoid letting the soil dry out completely, especially during hot weather.
* Fertilizing: Continue fertilizing every 2-3 weeks if you’re using fertilizer.
* Weeding: Keep your pots free of weeds, as they can compete with your onions for nutrients and water.
* Pest Control: Onions are generally pest-resistant, but keep an eye out for common garden pests like aphids or thrips. If you spot any pests, treat them with an organic insecticide like neem oil.
* Rotation: If you’re growing onions in the same pots year after year, consider rotating the soil to prevent nutrient depletion.
Harvesting Your Onions
The best part! Harvesting time depends on the type of onion you’re growing:
* Green Onions (Scallions): You can start harvesting green onions as soon as the tops are about 6 inches tall. Simply snip off the green tops with scissors, leaving about an inch of the white base intact. The onions will continue to grow, and you can harvest them repeatedly.
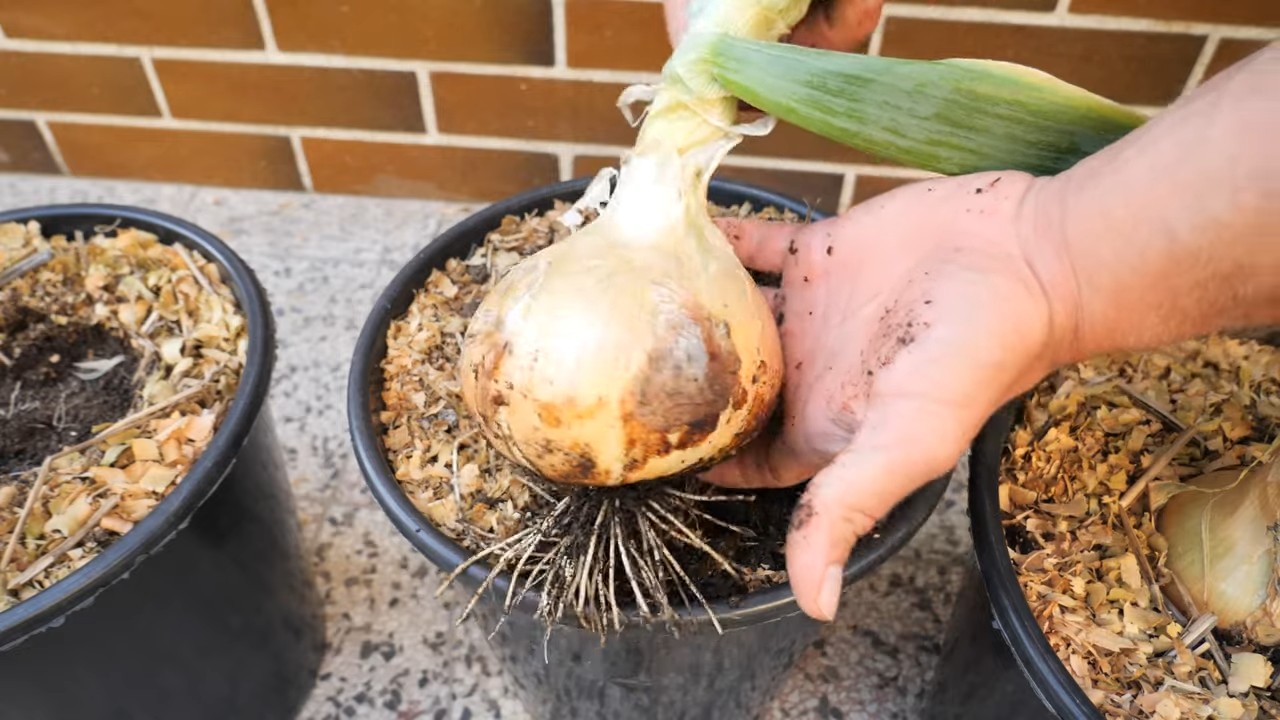
* Shallots: Harvest shallots when the tops start to turn yellow and fall over. Gently dig up the bulbs and let them cure in a warm, dry place for a few days before storing them.
* Bulbing Onions: Harvest bulbing onions when the tops start to turn yellow and fall over. Dig up the bulbs and let them cure in a warm, dry place for several weeks until the outer skins are papery and dry.
Troubleshooting Common Problems
Even with the best care, you might encounter some problems along the way. Here are some common issues and how to fix them:
* Yellowing Leaves: This could be a sign of overwatering, underwatering, or nutrient deficiency. Check the soil moisture and adjust your watering schedule accordingly. If you suspect a nutrient deficiency, try fertilizing with a balanced liquid fertilizer.
* Slow Growth: This could be due to lack of sunlight, poor soil, or pests. Make sure your onions are getting enough sunlight and that your soil is well-draining and nutrient-rich. Check for pests and treat them accordingly.
* Root Rot: This is caused by overwatering and poor drainage. Make sure your pots have drainage holes and avoid overwatering. If you suspect root rot, you may need to repot your onions in fresh potting mix.
* Pests: Keep an eye out for common garden pests like aphids, thrips, or onion maggots. Treat them with an organic insecticide like neem oil or insecticidal soap.
Enjoy Your Homegrown Onions!
And there you have it! Growing onions in small pots is a simple and rewarding way to enjoy fresh, flavorful onions right at home. With a little care and attention, you’ll be snipping green onions for your salads and cooking up delicious meals with your homegrown shallots in no time. Happy gardening!
Conclusion
So, there you have it! Transforming a humble small pot into a thriving onion patch is not only achievable but surprisingly rewarding. We’ve walked through the simple steps, highlighting the ease and accessibility of this DIY project. But why should you dedicate a small corner of your home to growing onions in a pot? The answer lies in the unparalleled freshness, the cost savings, and the sheer satisfaction of nurturing your own food.
Imagine snipping fresh chives or scallions directly from your windowsill to garnish your favorite dishes. Picture the robust flavor of homegrown onions enhancing your soups, stews, and stir-fries. This isn’t just about growing onions; it’s about elevating your culinary experience and connecting with the natural world, even in a limited space.
Beyond the immediate benefits, growing onions in a small pot is an excellent way to reduce food waste. Instead of discarding onion scraps, you can repurpose them to cultivate new growth. It’s a sustainable practice that aligns with a more eco-conscious lifestyle.
Variations and Enhancements:
Don’t be afraid to experiment! While we’ve focused on a basic method, there are numerous ways to customize your small pot onion growing project.
* Variety is the Spice of Life: Try different onion varieties! Red onions, white onions, shallots, and even scallions can all be successfully grown in pots. Each offers a unique flavor profile to explore.
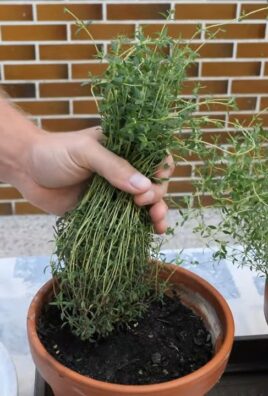
* Companion Planting: Consider planting herbs like basil, parsley, or thyme alongside your onions. These herbs can deter pests and enhance the overall health of your mini-garden.
* Vertical Gardening: If space is truly limited, explore vertical gardening options. Stackable planters or hanging baskets can maximize your growing area and add visual appeal.
* Soil Amendments: Enhance your potting mix with compost or worm castings for added nutrients. These organic amendments will promote healthy growth and robust flavor.
* Fertilizing: While not always necessary, a diluted liquid fertilizer can provide a boost during the growing season. Choose a fertilizer specifically formulated for vegetables.
A Call to Action:
We wholeheartedly encourage you to embark on this small pot onion growing adventure. It’s a simple, rewarding, and sustainable way to enhance your culinary life and connect with nature. Don’t be intimidated by the prospect of gardening; this project is designed for beginners and seasoned gardeners alike.
Once you’ve experienced the joy of harvesting your own homegrown onions, we’d love to hear about your journey. Share your photos, tips, and experiences in the comments section below. Let’s create a community of small pot onion growers and inspire others to embrace the magic of homegrown food. Happy gardening!
Frequently Asked Questions (FAQ)
Q1: What is the best type of onion to grow in a small pot?
A1: While many onion varieties can thrive in pots, some are better suited than others. Scallions (also known as green onions) are an excellent choice due to their shallow root systems and rapid growth. Bulb onions, such as red onions, white onions, and yellow onions, can also be grown successfully, but they may require a larger pot to accommodate their larger bulbs. Shallots are another good option, offering a milder flavor and compact growth habit. Ultimately, the best type of onion to grow depends on your personal preferences and the size of your pot.
Q2: How much sunlight do onions need when grown in a pot?
A2: Onions are sun-loving plants and require at least 6-8 hours of direct sunlight per day to thrive. When growing onions in a pot, choose a location that receives ample sunlight, such as a sunny windowsill, balcony, or patio. If you don’t have access to enough natural light, you can supplement with grow lights. Rotate the pot regularly to ensure that all sides of the plant receive equal exposure to sunlight.
Q3: What type of soil is best for growing onions in a small pot?
A3: Onions prefer well-draining, fertile soil that is rich in organic matter. A good potting mix specifically formulated for vegetables is an excellent choice. You can also create your own potting mix by combining equal parts of compost, peat moss (or coconut coir), and perlite or vermiculite. Avoid using garden soil, as it can be too heavy and may not drain well in a pot.
Q4: How often should I water my onions grown in a pot?
A4: Onions need consistent moisture to thrive, but they don’t like to sit in soggy soil. Water your onions when the top inch of soil feels dry to the touch. Water deeply, ensuring that the water drains out of the bottom of the pot. Avoid overwatering, as this can lead to root rot. During hot, dry weather, you may need to water more frequently.
Q5: Do I need to fertilize my onions grown in a pot?
A5: While not always necessary, fertilizing your onions can promote healthy growth and larger bulbs. Use a diluted liquid fertilizer specifically formulated for vegetables, following the instructions on the label. Fertilize every 2-3 weeks during the growing season. You can also amend your potting mix with compost or worm castings for added nutrients.
Q6: How do I know when my onions are ready to harvest from a small pot?
A6: The harvesting time for onions depends on the variety and your desired use. Scallions can be harvested when they reach a desired size, typically around 6-8 inches tall. Bulb onions are ready to harvest when the tops begin to fall over and turn yellow or brown. You can also gently dig around the base of the plant to check the size of the bulb.
Q7: Can I grow onions from scraps in a small pot?
A7: Yes, you can absolutely grow onions from scraps! This is a great way to reduce food waste and cultivate new growth. To grow onions from scraps, simply place the root end of an onion (the part with the roots attached) in a glass of water, ensuring that the bottom is submerged. Place the glass in a sunny location and change the water every day or two. After a few days, you should see new roots and green shoots emerging. Once the roots are well-developed, you can transplant the onion into a pot filled with potting mix.
Q8: What are some common pests and diseases that affect onions grown in pots?
A8: Onions can be susceptible to various pests and diseases, including onion maggots, thrips, and fungal diseases like downy mildew and onion rot. To prevent these problems, choose disease-resistant varieties, practice good sanitation, and avoid overwatering. You can also use organic pest control methods, such as insecticidal soap or neem oil, to control pests.
Q9: Can I grow onions indoors in a small pot?
A9: Yes, you can grow onions indoors in a small pot, but it’s important to provide them with adequate light. Place the pot in a sunny windowsill or supplement with grow lights. Indoor onions may not grow as large as those grown outdoors, but you can still harvest the green tops for use as chives or scallions.
Q10: How do I store my harvested onions from a small pot?
A10: The storage method for onions depends on the type and your intended use. Scallions are best used fresh and can be stored in the refrigerator for a few days. Bulb onions can be stored in a cool, dry, and well-ventilated place for several months. Before storing bulb onions, allow them to cure for a week or two by spreading them out in a single layer in a dry, sunny location. This will help to dry out the outer layers and prevent spoilage.
Leave a Comment