
Pet hair removal tips – are you tired of battling a never-ending blizzard of fur in your home? I know I am! As a devoted pet parent, I adore my furry companions, but sometimes I feel like I’m living in a giant tumbleweed of their shed hair. It’s on the furniture, clinging to my clothes, and even floating in the air!
The struggle against pet hair is a tale as old as time (or at least as old as domestication!). Ancient civilizations, from the Egyptians with their beloved cats to the Romans with their loyal dogs, likely faced similar challenges. While they might not have had vacuum cleaners, I bet they had their own clever methods for managing the fur.
That’s why I’ve compiled this ultimate guide to DIY pet hair removal tricks and hacks. Because let’s face it, constantly buying expensive lint rollers and specialized cleaning products can really add up. Plus, who doesn’t love a good DIY project that saves money and makes life easier? These simple, effective solutions will help you reclaim your home from the furry invasion and finally enjoy a cleaner, more comfortable living space. You’ll be amazed at how easy it is to tackle even the most stubborn pet hair with these pet hair removal tips!
DIY Pet Hair Removal: Conquer the Furpocalypse!
Okay, fellow pet parents, let’s be honest: we adore our furry companions, but the shedding? Not so much. It’s a constant battle against a tide of fur that seems to cling to everything we own. But fear not! I’m here to share my tried-and-true DIY methods for banishing pet hair from your home, without breaking the bank or resorting to harsh chemicals. Get ready to reclaim your furniture, clothes, and sanity!
The Arsenal: Essential Tools for Pet Hair Warfare
Before we dive into the specific techniques, let’s gather our weapons. These are the tools I find myself reaching for time and time again:
* Rubber Gloves: The humble rubber glove is a surprisingly powerful pet hair magnet.
* Microfiber Cloths: These are fantastic for dusting and wiping down surfaces.
* Squeegee: Yes, the kind you use on windows! It works wonders on carpets and upholstery.
* Vacuum Cleaner with Attachments: A good vacuum is essential, especially with a pet hair attachment.
* Lint Roller: A classic for a reason! Keep one handy for quick touch-ups.
* Spray Bottle: For creating our DIY cleaning solutions.
* Baking Soda: A natural deodorizer and cleaning agent.
* White Vinegar: Another cleaning powerhouse, great for loosening hair and removing odors.
* Fabric Softener: Helps to loosen hair from fabrics.
* Old Toothbrush: Perfect for getting into tight corners and crevices.
* Pumice Stone: Sounds crazy, but it works wonders on some fabrics! (Test in an inconspicuous area first!)
Tackling Upholstery: Sofas, Chairs, and More!
Upholstery is a prime target for pet hair. Here’s my step-by-step guide to getting your furniture fur-free:
1. Vacuum Thoroughly: Start by vacuuming your upholstery with a pet hair attachment. Pay close attention to seams, crevices, and areas where your pet likes to hang out. Go over each area multiple times, using different angles to loosen embedded hair.
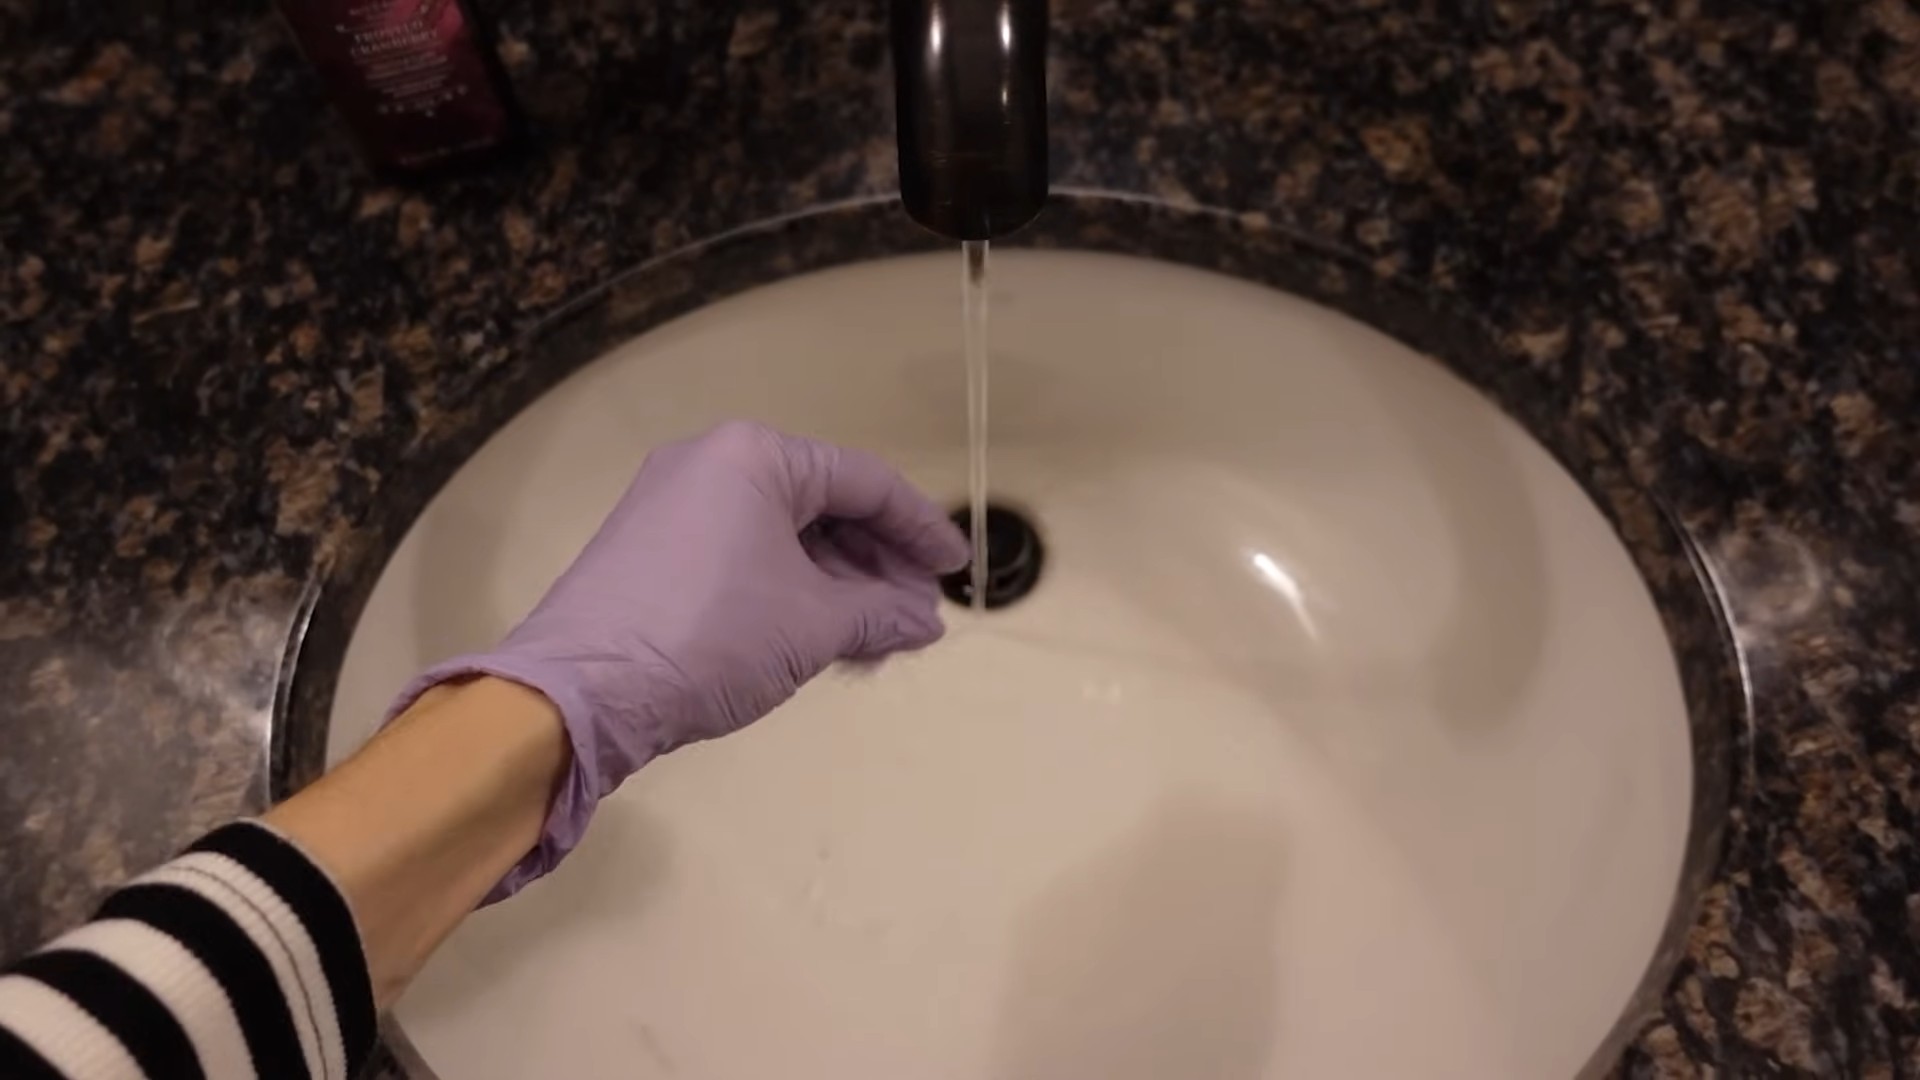
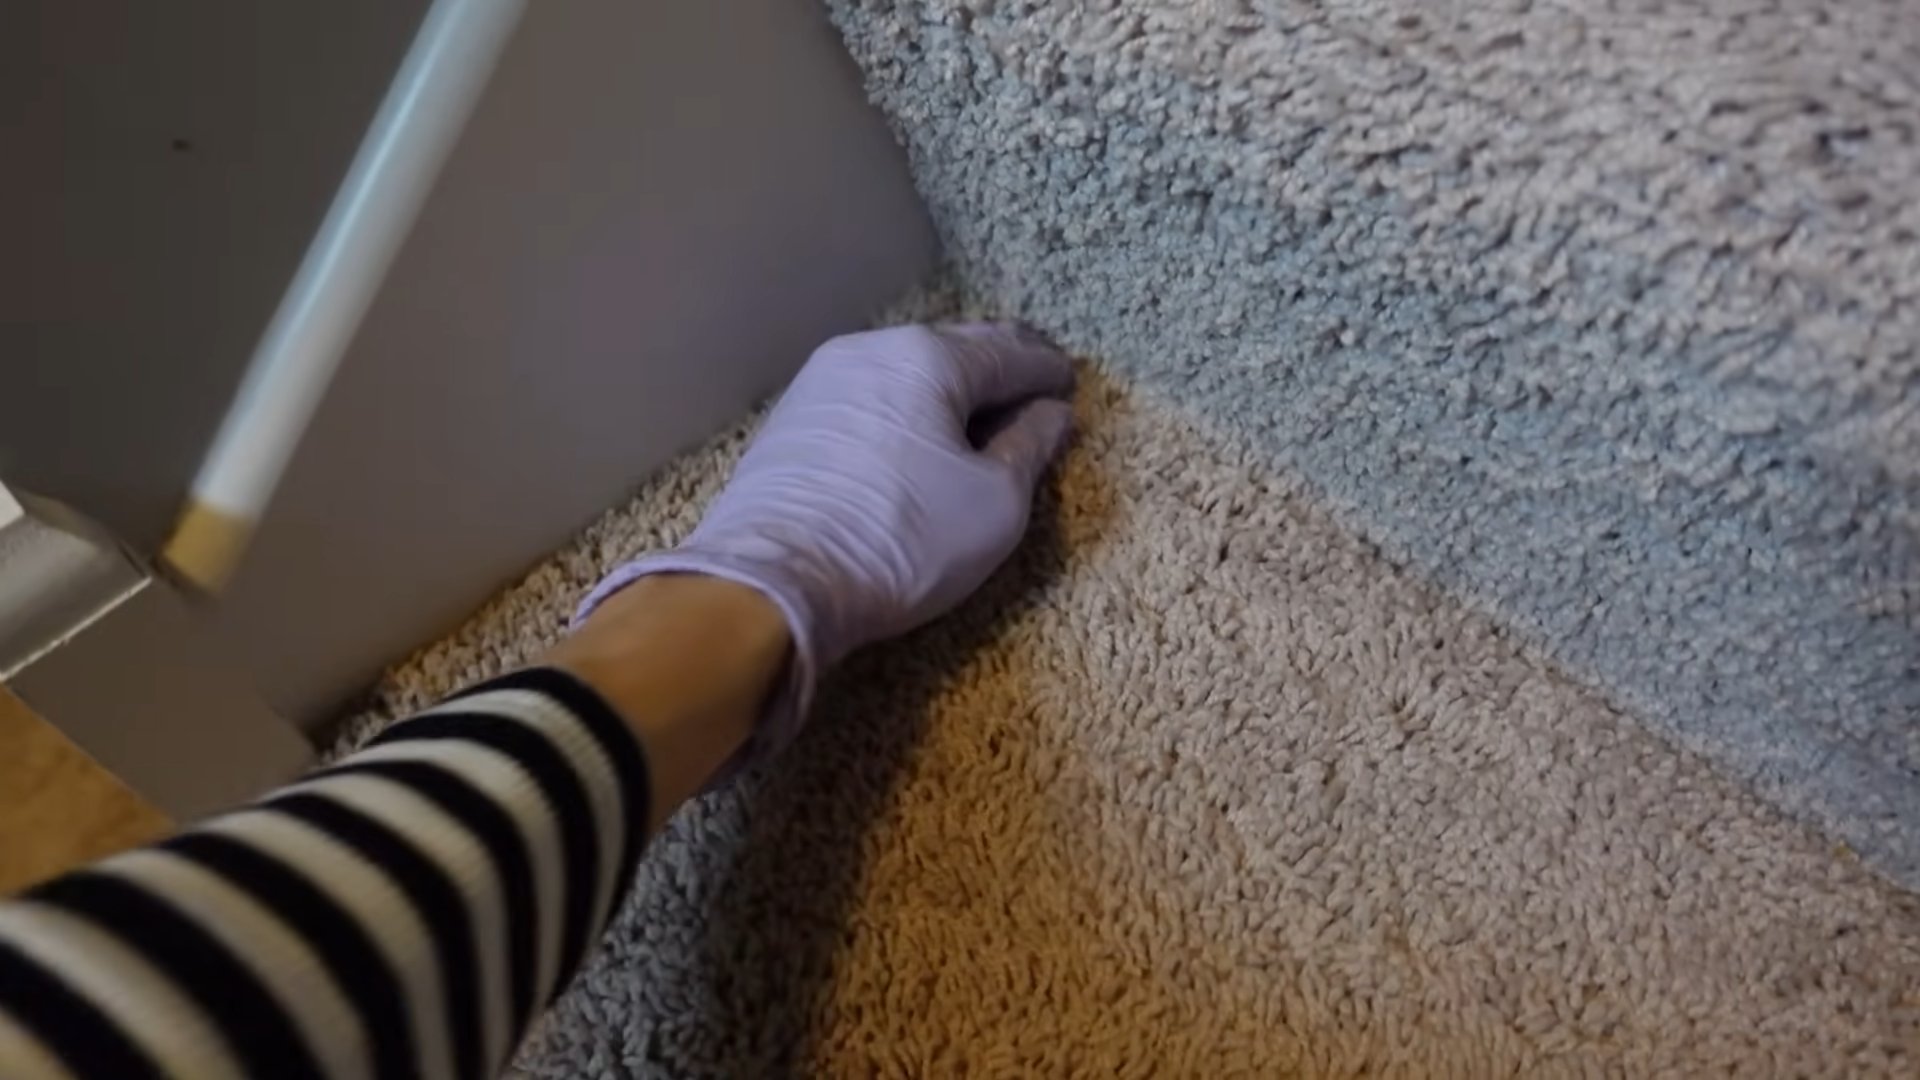
2. Rubber Glove Magic: Put on a pair of rubber gloves (the kind you use for washing dishes works perfectly). Lightly dampen the gloves with water. Now, run your gloved hands over the upholstery in a sweeping motion. The rubber will create static electricity, attracting the pet hair and clumping it together.
3. Collect and Discard: As the hair clumps up, pick it off the gloves and discard it. You might be surprised at how much hair you collect!
4. Squeegee Power: For stubborn hair that the gloves can’t grab, try using a squeegee. Drag the squeegee across the upholstery in short, firm strokes. The rubber blade will lift the hair to the surface, making it easier to vacuum or pick up.
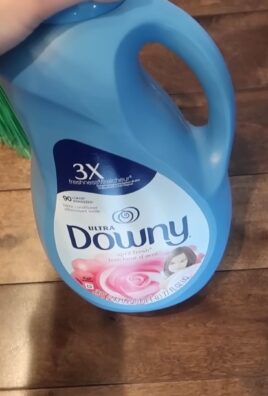
5. Fabric Softener Spray (Optional): In a spray bottle, mix 1 part fabric softener with 3 parts water. Lightly mist the upholstery with the solution. Let it sit for a few minutes, then wipe it down with a clean, damp microfiber cloth. This will help to loosen the remaining hair and leave your furniture smelling fresh.
6. Final Vacuum: Give your upholstery one last vacuum to remove any remaining loose hair.
Conquering Carpets and Rugs: A Deep Clean Approach
Carpets and rugs are notorious for trapping pet hair deep within their fibers. Here’s how I tackle this challenge:
1. Baking Soda Treatment: Sprinkle a generous amount of baking soda over your carpet or rug. Let it sit for at least 30 minutes, or even overnight for heavily soiled areas. The baking soda will help to absorb odors and loosen the hair.
2. Vacuum Like a Pro: Vacuum the carpet or rug thoroughly, paying close attention to high-traffic areas and areas where your pet spends the most time. Use a vacuum with a strong suction and a rotating brush head. Go over each area multiple times, using overlapping strokes.
3. Squeegee Again: Just like with upholstery, a squeegee can work wonders on carpets and rugs. Drag the squeegee across the surface in short, firm strokes to lift embedded hair. Vacuum up the loose hair.
4. DIY Carpet Deodorizer (Optional): For extra odor control, mix equal parts baking soda and borax. Sprinkle the mixture over your carpet or rug, let it sit for 30 minutes, and then vacuum thoroughly.
5. Steam Cleaning (Periodically): For a deep clean, consider steam cleaning your carpets and rugs every few months. This will help to remove embedded dirt, allergens, and pet hair. You can rent a steam cleaner or hire a professional.
Clothing and Bedding: Hair-Free Fashion and Sleep
Pet hair on clothing and bedding is a common problem. Here are my tips for keeping your wardrobe and bed fur-free:
1. Shake It Out: Before washing, shake your clothes and bedding vigorously to remove as much loose hair as possible. Do this outside to avoid spreading the hair around your house.
2. Lint Roller Power: Use a lint roller to remove surface hair from your clothes and bedding. Keep a lint roller handy for quick touch-ups before you leave the house.
3. Dryer Sheet Trick: Toss your clothes and bedding in the dryer with a dryer sheet for about 10 minutes on a low heat setting. The dryer sheet will help to loosen the hair and trap it in the lint trap. Clean the lint trap after each use.
4. White Vinegar Rinse: Add 1/2 cup of white vinegar to the rinse cycle of your washing machine. The vinegar will help to loosen the hair and remove odors.
5. Specialized Laundry Bags: Consider using specialized laundry bags designed to trap pet hair during washing. These bags are made of a mesh material that allows water and detergent to flow through while trapping hair inside.
6. Pumice Stone (Use with Caution!): For certain fabrics like sweaters or blankets, a pumice stone can be surprisingly effective. Gently rub the pumice stone over the fabric in a circular motion. The rough surface will grab the hair. Test this in an inconspicuous area first to make sure it doesn’t damage the fabric.
Hard Surfaces: Floors, Furniture, and More!
Pet hair can also accumulate on hard surfaces like floors, furniture, and countertops. Here’s how I keep these surfaces clean:
1. Vacuum or Sweep Regularly: Vacuum or sweep your hard floors regularly to remove loose hair. Pay close attention to corners, baseboards, and areas under furniture.
2. Microfiber Mop: Use a microfiber mop to clean your hard floors. Microfiber cloths are excellent at trapping dust and hair.
3. DIY Cleaning Solution: Mix equal parts white vinegar and water in a spray bottle. Spray the solution onto hard surfaces and wipe clean with a microfiber cloth. This solution is safe for most hard surfaces and will help to remove dirt, grime, and pet odors.
4. Furniture Polish: Use furniture polish to clean and protect your wooden furniture. The polish will help to repel dust and hair.
5. Old Toothbrush for Tight Spots: An old toothbrush is perfect for cleaning pet hair from tight corners, crevices, and around furniture legs.
Preventative Measures: Staying Ahead of the Shedding Game
While these cleaning techniques are effective, the best way to deal with pet hair is to prevent it from accumulating in the first place. Here are some preventative measures I take:
* Regular Grooming: Brush your pet regularly to remove loose hair before it has a chance to shed. The frequency of brushing will depend on your pet’s breed and coat type.
* Proper Diet: A healthy diet can help to reduce shedding. Make sure your pet is eating a high-quality food that is rich in essential fatty acids.
* Designated Pet Areas: If possible, designate specific areas of your home for your pet. This will help to contain the shedding to a smaller area.
* Wash Pet Bedding Regularly: Wash your pet’s bedding regularly to remove accumulated hair and odors.
* Air Purifier: Consider using an air purifier with a HEPA filter to remove pet dander and hair from the air.
* Furniture Covers: Use furniture covers to protect your upholstery from pet hair and scratches.
Dealing with Stubborn Pet Hair: Advanced Techniques
Sometimes, despite our best efforts, pet hair can be incredibly stubborn. Here are some advanced techniques I use for those particularly challenging situations:
* Static Electricity Spray: You can purchase static electricity sprays designed to reduce static cling and prevent pet hair from sticking to surfaces.
* Professional Cleaning: For heavily soiled carpets and upholstery, consider hiring a professional cleaning service. They have specialized equipment and cleaning solutions that can effectively remove embedded pet hair.
* Enzyme Cleaners: Enzyme cleaners are designed to break down organic matter, including pet urine and odors. These cleaners
Conclusion
So, there you have it! This simple, yet incredibly effective DIY pet hair removal trick is a game-changer for any pet owner battling the never-ending fur storm. We’ve all been there, covered head-to-toe in a layer of love (and shed fur), constantly vacuuming, and still finding tumbleweeds of hair lurking in every corner. But with this easy solution, those days of frustration can be a thing of the past.
Why is this a must-try? Because it’s cost-effective, using materials you likely already have at home. It’s quick, taking only minutes to prepare and use. And most importantly, it’s remarkably effective, lifting pet hair from upholstery, carpets, and even clothing with minimal effort. Forget expensive lint rollers and specialized pet hair removal tools; this DIY method delivers professional-level results without breaking the bank.
But don’t just take our word for it! We encourage you to experiment and find what works best for you. For example, if you’re dealing with particularly stubborn pet hair embedded in a thick rug, try dampening the sponge or cloth slightly before using it. This can help to loosen the hair and make it easier to lift. Alternatively, for delicate fabrics, use a softer sponge or microfiber cloth to avoid any damage. You can also add a few drops of your favorite essential oil to the water for a fresh, clean scent. Lavender or lemon are excellent choices for neutralizing pet odors.
This DIY pet hair removal solution is truly a lifesaver. Imagine spending less time cleaning and more time cuddling with your furry friend. Think of the money you’ll save on expensive cleaning products. Envision a home that’s consistently clean and inviting, even with a shedding pet. This is all within reach with this simple trick.
We’re confident that once you try this DIY pet hair removal method, you’ll wonder how you ever lived without it. It’s a simple, effective, and affordable solution to a common problem faced by pet owners everywhere. So, ditch the frustration and embrace the fur-free life!
Now it’s your turn! Give this DIY trick a try and let us know what you think. Share your experiences, tips, and variations in the comments below. We’re eager to hear how this method works for you and any creative adaptations you come up with. Together, we can conquer the pet hair battle and enjoy cleaner, happier homes. Don’t forget to share this article with your fellow pet-loving friends and family – they’ll thank you for it! Let’s spread the word and help everyone enjoy a fur-free (or at least fur-reduced) existence.
Frequently Asked Questions (FAQ)
Q: What kind of sponge or cloth should I use for this DIY pet hair removal trick?
A: The best type of sponge or cloth to use depends on the surface you’re cleaning. For upholstery and carpets, a slightly abrasive sponge or a textured microfiber cloth works well to grab onto the pet hair. For more delicate fabrics like clothing or curtains, opt for a softer sponge or a smooth microfiber cloth to avoid damaging the material. Avoid using anything too rough, like steel wool, as it could scratch or tear the fabric. Experiment with different textures to find what works best for your specific needs. A slightly damp sponge or cloth often works best, but be sure to test it in an inconspicuous area first to ensure it doesn’t stain or damage the fabric.
Q: Will this DIY pet hair removal method work on all types of pet hair?
A: This method is generally effective on most types of pet hair, including short, fine hair and long, thick hair. However, the effectiveness may vary depending on the type of fabric and the amount of hair embedded in the material. For particularly stubborn pet hair, you may need to repeat the process several times or use a slightly more abrasive sponge or cloth. You can also try using a vacuum cleaner with a pet hair attachment before using the DIY method to loosen the hair. Remember to always test the method in a small, inconspicuous area first to ensure it doesn’t damage the fabric.
Q: Is this DIY pet hair removal trick safe for all types of fabrics?
A: While this method is generally safe for most fabrics, it’s always a good idea to test it in a small, inconspicuous area first to ensure it doesn’t cause any damage or discoloration. Avoid using abrasive sponges or cloths on delicate fabrics like silk or velvet. If you’re unsure about the safety of the method on a particular fabric, consult the manufacturer’s care instructions or consider taking the item to a professional cleaner. When in doubt, err on the side of caution and use a gentler approach.
Q: How often should I use this DIY pet hair removal method?
A: The frequency of use depends on how much your pet sheds and how often you clean. If your pet sheds heavily, you may need to use this method several times a week to keep your home free of pet hair. If your pet sheds less, you may only need to use it once a week or even less frequently. Regular use of this method can help to prevent pet hair from building up and becoming more difficult to remove. Incorporating this into your regular cleaning routine will make a significant difference.
Q: Can I use this DIY pet hair removal trick on my car’s interior?
A: Yes, this method can be used on your car’s interior, including the seats, carpets, and upholstery. However, be sure to use a soft sponge or microfiber cloth to avoid scratching or damaging the surfaces. You may also want to use a vacuum cleaner with a crevice tool to remove pet hair from hard-to-reach areas. Test the method in an inconspicuous area first to ensure it doesn’t damage the material. A slightly damp cloth can be particularly effective for lifting pet hair from car upholstery.
Q: What if the pet hair is really stuck and difficult to remove?
A: If you’re dealing with particularly stubborn pet hair, there are a few things you can try. First, try dampening the sponge or cloth slightly before using it. This can help to loosen the hair and make it easier to lift. You can also try using a vacuum cleaner with a pet hair attachment to loosen the hair before using the DIY method. Another option is to use a rubber glove to rub the surface, which can help to create static electricity and attract the hair. Finally, you can try using a commercial pet hair removal product, but be sure to test it in an inconspicuous area first to ensure it doesn’t damage the fabric.
Q: How do I clean the sponge or cloth after using it to remove pet hair?
A: After using the sponge or cloth to remove pet hair, simply rinse it under running water to remove the accumulated hair. You may need to use your fingers to gently pull off any stubborn clumps of hair. For sponges, you can also squeeze out the excess water and allow it to air dry. For cloths, you can wash them in the washing machine with your regular laundry. Avoid using fabric softener, as it can reduce the effectiveness of the cloth in attracting pet hair. Make sure the sponge or cloth is completely dry before storing it to prevent mildew growth.
Q: Can I add anything to the water to make this DIY pet hair removal trick even more effective?
A: Yes, you can add a few drops of your favorite essential oil to the water for a fresh, clean scent. Lavender or lemon are excellent choices for neutralizing pet odors. You can also add a small amount of white vinegar to the water, which can help to loosen the pet hair and disinfect the surface. However, be sure to use vinegar sparingly, as it can damage some fabrics. Always test any added ingredients in an inconspicuous area first to ensure they don’t cause any discoloration or damage.
Q: Is this DIY pet hair removal method safe for pets?
A: Yes, this method is generally safe for pets, as it doesn’t involve the use of any harsh chemicals or toxic substances. However, it’s always a good idea to keep your pet away from the area while you’re cleaning to prevent them from ingesting any of the water or accidentally damaging the surfaces. If you’re using essential oils, be sure to choose pet-safe options and use them in moderation. Always consult with your veterinarian if you have any concerns about the safety of this method for your pet.


Leave a Comment