
Patio Summer Squash Growing: Imagine stepping onto your patio and harvesting fresh, vibrant summer squash, ready to be transformed into a delicious meal. Sounds idyllic, right? Well, it’s more achievable than you might think! For centuries, cultivating food close to home has been a cornerstone of many cultures, from ancient Roman courtyard gardens to the modern-day victory gardens of wartime. This deep-rooted connection to growing our own food speaks to a fundamental human desire for self-sufficiency and a connection to nature.
But let’s be honest, not everyone has acres of land to dedicate to a sprawling vegetable garden. That’s where the magic of patio gardening comes in! And that’s why I’m so excited to share these simple, yet effective, DIY tricks and hacks for successful patio summer squash growing. Whether you’re a seasoned gardener or a complete beginner, these tips will help you maximize your yield, minimize common problems, and enjoy the satisfaction of harvesting your own homegrown squash, even in the smallest of spaces.
Why do you need these tricks? Because growing summer squash in containers presents unique challenges. From choosing the right pot size to managing pests and diseases, there are a few key things to keep in mind. But don’t worry, I’ve got you covered! Let’s dive in and unlock the secrets to a bountiful patio squash harvest!
Growing Summer Squash in Containers: A Patio Gardener’s Dream
Hey there, fellow garden enthusiasts! I’m so excited to share my experience with growing summer squash in containers. If you’re like me and have limited space, a patio, balcony, or even just a sunny spot, you can still enjoy the deliciousness of homegrown squash. It’s easier than you think, and the rewards are incredibly satisfying. Let’s dive in!
Choosing the Right Squash Variety
First things first, not all squash varieties are created equal when it comes to container gardening. You’ll want to opt for bush varieties, which are more compact and manageable than their sprawling vine counterparts. Here are a few of my favorites:
* Spaghetti Squash: A great choice for smaller spaces.
* Zucchini (Bush Varieties): Look for varieties specifically labeled as “bush” or “compact.” Black Beauty and Gold Rush are popular choices.
* Yellow Crookneck Squash: These are also generally well-suited for containers.
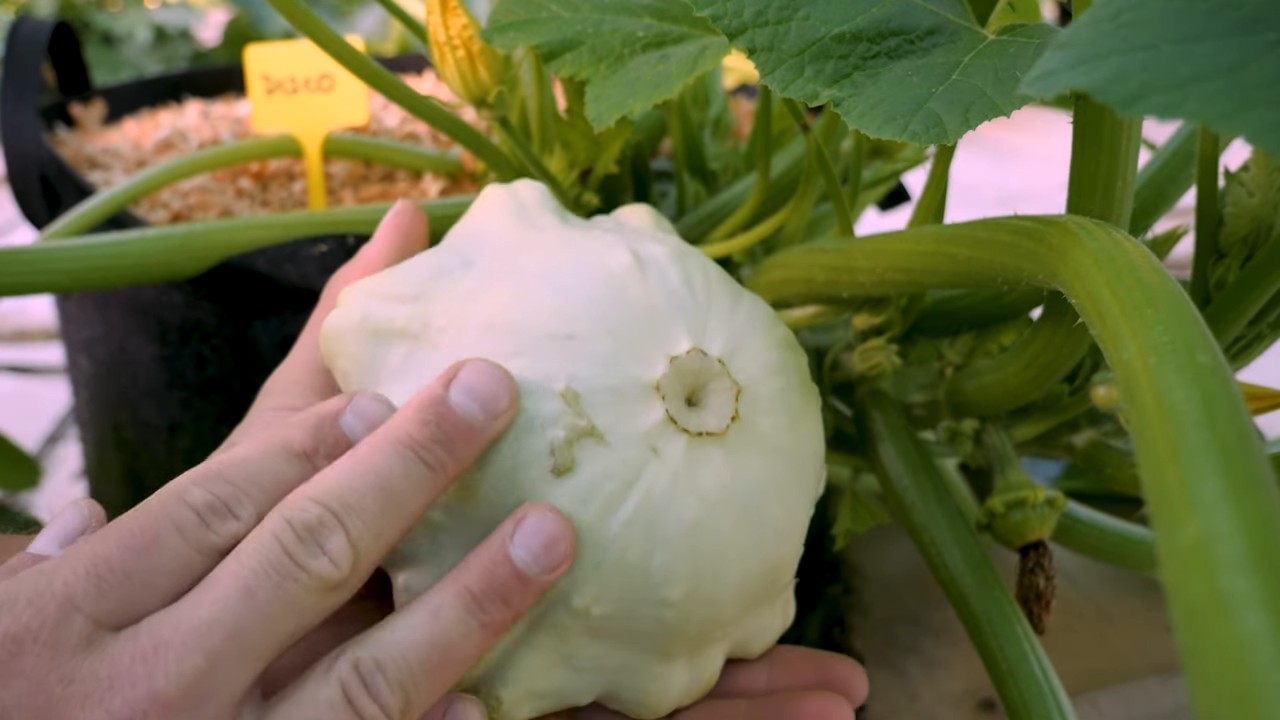
* Patty Pan Squash: These cute, saucer-shaped squash are relatively compact and productive.
Preparing Your Container
The right container is crucial for success. Squash plants need plenty of room for their roots to grow.
* Container Size: Aim for a container that’s at least 24 inches in diameter and 12 inches deep. A 5-gallon bucket can work in a pinch, but bigger is always better. I personally prefer using large resin planters, as they’re lightweight and durable.
* Drainage: Excellent drainage is essential to prevent root rot. Make sure your container has plenty of drainage holes. If not, drill some! I like to add a layer of gravel or broken pottery at the bottom of the container to further improve drainage.
* Potting Mix: Don’t use garden soil in your containers! It’s too heavy and doesn’t drain well. Instead, use a high-quality potting mix specifically formulated for containers. I usually mix in some compost for added nutrients.
Planting Your Squash
Now for the fun part! You can either start your squash seeds indoors or direct sow them in your container. I usually prefer direct sowing, as it avoids transplant shock.
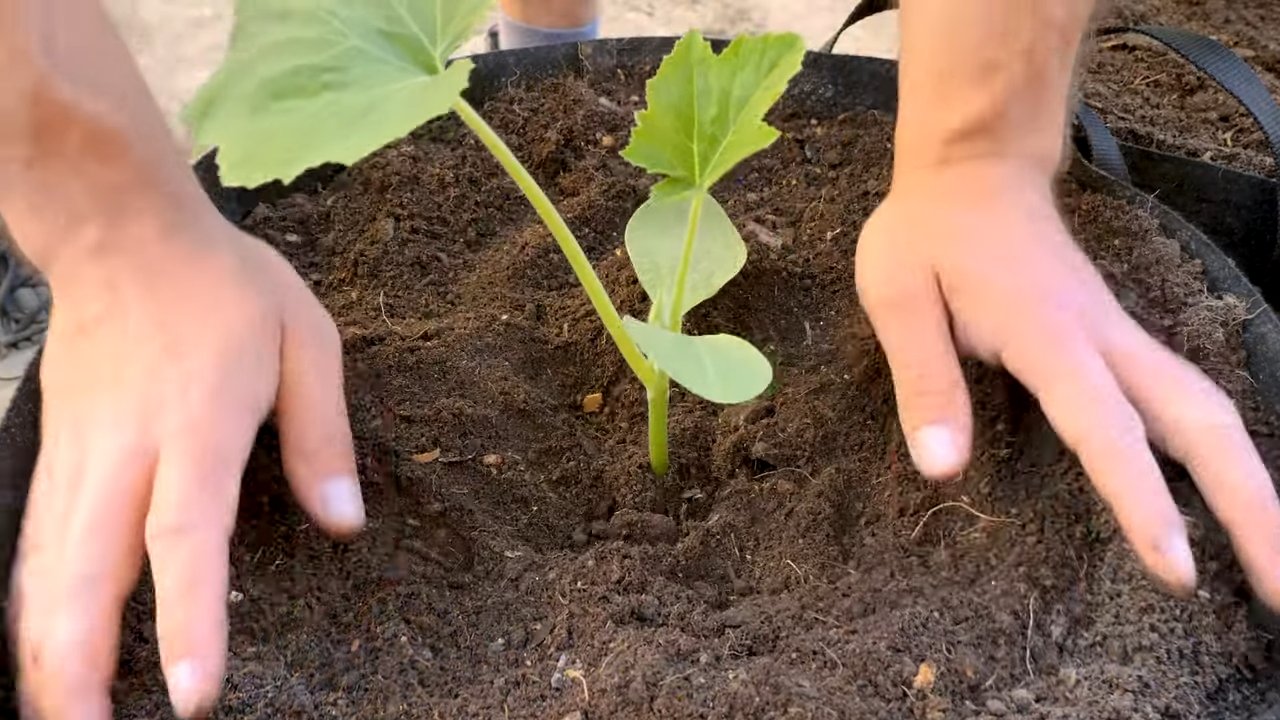
* Starting Seeds Indoors (Optional): If you choose to start seeds indoors, begin about 3-4 weeks before the last expected frost. Sow the seeds in small pots filled with potting mix, and keep them warm and moist. Once the seedlings have developed a few true leaves, you can transplant them into your container after the danger of frost has passed.
* Direct Sowing: Wait until the soil has warmed up to at least 60°F (15°C). Sow the seeds directly into your container, about 1 inch deep. I usually plant 2-3 seeds per container and then thin them out to the strongest seedling once they’ve sprouted.
* Spacing: If you’re planting multiple squash plants in a large container, space them at least 18 inches apart.
Caring for Your Squash Plants
Proper care is essential for a bountiful harvest. Here’s what you need to know:
* Sunlight: Squash plants need at least 6-8 hours of sunlight per day. Choose a sunny location for your container.
* Watering: Water deeply and regularly, especially during hot, dry weather. Squash plants are thirsty! Check the soil moisture regularly, and water when the top inch feels dry. Avoid overhead watering, as this can lead to fungal diseases. I prefer to water at the base of the plant.
* Fertilizing: Squash plants are heavy feeders. Fertilize them regularly with a balanced fertilizer. I like to use a liquid fertilizer diluted to half strength, applied every 2-3 weeks. You can also amend the soil with compost tea.
* Pollination: Squash plants have separate male and female flowers. The female flowers need to be pollinated in order to produce fruit. If you’re not seeing any fruit develop, you may need to hand-pollinate the flowers. To do this, simply use a small paintbrush to transfer pollen from the male flower to the female flower. The male flower has a long stem and the female flower has a small fruit at the base.
* Pest Control: Keep an eye out for common squash pests, such as squash bugs, squash vine borers, and aphids. Inspect your plants regularly, and take action if you see any signs of infestation. I like to use organic pest control methods, such as insecticidal soap or neem oil.
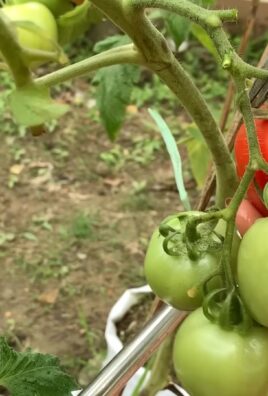
* Support: While bush varieties are more compact, they can still benefit from some support, especially when the fruits start to develop. You can use a tomato cage or a sturdy stake to support the plant.
Harvesting Your Squash
The best part! Summer squash is typically ready to harvest about 50-60 days after planting.
* Harvesting Time: Harvest your squash when it’s young and tender. The skin should be smooth and easily punctured with your fingernail. Overripe squash can become tough and seedy.
* Harvesting Technique: Use a sharp knife or pruning shears to cut the squash from the plant. Leave a short stem attached to the squash.
* Storage: Summer squash doesn’t store well, so it’s best to use it soon after harvesting. You can store it in the refrigerator for a few days.
Troubleshooting
Even with the best care, you may encounter some problems along the way. Here are a few common issues and how to address them:
* Yellowing Leaves: This could be a sign of overwatering, underwatering, nutrient deficiency, or pest infestation. Check the soil moisture, fertilize your plants, and inspect them for pests.
* Powdery Mildew: This fungal disease can cause a white, powdery coating on the leaves. Improve air circulation, avoid overhead watering, and treat with a fungicide if necessary.
* Blossom End Rot: This is caused by a calcium deficiency and results in a dark, sunken spot on the blossom end of the fruit. Ensure consistent watering and fertilize with a calcium-rich fertilizer.
* Lack of Fruit Production: This could be due to poor pollination, nutrient deficiency, or stress. Hand-pollinate the flowers, fertilize your plants, and ensure they’re getting enough sunlight and water.
Extra Tips for Success
Here are a few extra tips to help you grow the best summer squash possible:
* Succession Planting: Plant new squash seeds every few weeks to extend your harvest season.
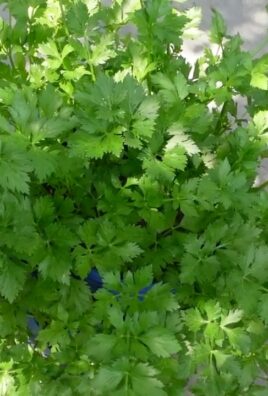
* Companion Planting: Plant squash alongside beneficial companion plants, such as marigolds, nasturtiums, and basil. These plants can help to deter pests and attract pollinators.
* Mulching: Apply a layer of mulch around your squash plants to help retain moisture, suppress weeds, and regulate soil temperature.
* Record Keeping: Keep track of your planting dates, watering schedule, and fertilizer applications. This will help you to identify any problems and improve your gardening practices in the future.
Enjoying Your Harvest
Now that you’ve harvested your delicious summer squash, it’s time to enjoy it! There are endless ways to prepare squash. Here are a few of my favorites:
* Grilled Squash: Slice the squash lengthwise, brush with olive oil, and grill until tender.
* Sautéed Squash: Dice the squash and sauté it with onions, garlic, and other vegetables.
* Roasted Squash: Toss the squash with olive oil, herbs, and spices, and roast it in the oven until tender.
* Squash Bread: Grate the squash and use it to make a moist and delicious bread.
* Zucchini Noodles (Zoodles): Use a spiralizer to create zucchini noodles, and then toss them with your favorite sauce.
Growing summer squash in containers is a rewarding experience that anyone can enjoy. With a little bit of planning and care, you can have a bountiful harvest of fresh, delicious squash right on your patio. Happy gardening!
Conclusion
So, there you have it! Growing summer squash on your patio is not only achievable, but it’s also incredibly rewarding. Imagine stepping outside your door and harvesting fresh, vibrant zucchini or yellow squash, ready to be transformed into delicious meals. This DIY trick, utilizing container gardening, opens up the possibility of homegrown goodness even if you lack a traditional garden space.
Why is this a must-try? Because it empowers you to control the quality of your food, reduces your reliance on grocery stores, and connects you with the natural world in a tangible way. Plus, the sheer satisfaction of nurturing a plant from seed to harvest is an experience unlike any other. Think of the vibrant green foliage adding a touch of beauty to your patio, and the anticipation as those first tiny squash begin to form.
But the benefits don’t stop there. Growing your own patio summer squash allows for experimentation and customization. Want to try a different variety? Go for it! Consider bush varieties like ‘Spacemiser’ zucchini or ‘Sunburst’ patty pan squash for compact growth. You can also tailor your growing conditions to optimize flavor and yield. Add companion plants like marigolds to deter pests, or basil to enhance the flavor of your squash.
Beyond the standard zucchini and yellow squash, explore the world of heirloom varieties. ‘Costata Romanesco’ zucchini, with its nutty flavor and ridged skin, is a delightful alternative. Or try ‘Eight Ball’ zucchini, a round, compact variety perfect for stuffing. The possibilities are endless!
Don’t be intimidated by the prospect of gardening. With the right container, soil, sunlight, and a little bit of care, you can successfully grow summer squash on your patio. Remember to water consistently, fertilize regularly, and keep an eye out for pests.
We encourage you to embrace this DIY trick and experience the joy of homegrown summer squash. It’s a simple, sustainable, and satisfying way to add fresh, healthy produce to your diet. And who knows, you might just discover a new passion for gardening!
So, grab your seeds, prepare your containers, and get ready to embark on a rewarding gardening adventure. We’re confident that you’ll be amazed by the results.
Now, we want to hear from you! Have you tried growing summer squash on your patio? What varieties did you choose? What challenges did you face, and how did you overcome them? Share your experiences, tips, and photos in the comments below. Let’s create a community of patio gardeners and inspire others to embrace the joys of homegrown goodness. Your insights could be invaluable to someone just starting out. Let’s make patio summer squash growing a shared success!
Frequently Asked Questions (FAQ)
What is the best size container for growing summer squash on a patio?
A container that is at least 24 inches in diameter and 12 inches deep is recommended. Summer squash plants need ample space for their roots to grow and develop. Smaller containers may restrict growth and reduce yield. Larger containers also retain moisture better, which is crucial for these thirsty plants. Consider using a fabric pot, as they allow for better aeration and drainage.
How much sunlight does patio summer squash need?
Summer squash requires at least 6-8 hours of direct sunlight per day to thrive. Choose a location on your patio that receives ample sunlight throughout the day. If you live in a particularly hot climate, some afternoon shade may be beneficial to prevent the plants from overheating. Observe your patio throughout the day to determine the sunniest spot.
What type of soil should I use for container-grown summer squash?
Use a high-quality potting mix that is well-draining and rich in organic matter. Avoid using garden soil, as it can become compacted in containers and hinder drainage. Look for a potting mix that contains ingredients like peat moss, perlite, and vermiculite. You can also amend the potting mix with compost or aged manure to provide additional nutrients.
How often should I water my patio summer squash?
Water your summer squash plants deeply and regularly, especially during hot, dry weather. Check the soil moisture daily by sticking your finger about an inch into the soil. If the soil feels dry to the touch, it’s time to water. Avoid overwatering, as this can lead to root rot. Water at the base of the plant to avoid wetting the foliage, which can increase the risk of fungal diseases.
What kind of fertilizer should I use for patio summer squash?
Summer squash plants are heavy feeders and require regular fertilization. Use a balanced fertilizer with an NPK ratio of 10-10-10 or 14-14-14. Apply the fertilizer according to the package instructions, typically every 2-3 weeks. You can also use organic fertilizers like compost tea or fish emulsion. Avoid over-fertilizing, as this can burn the roots.
How do I deal with pests and diseases on my patio summer squash?
Inspect your plants regularly for signs of pests and diseases. Common pests include squash bugs, squash vine borers, and aphids. You can control these pests with insecticidal soap, neem oil, or by handpicking them off the plants. Common diseases include powdery mildew and squash mosaic virus. Prevent these diseases by providing good air circulation, avoiding overhead watering, and using disease-resistant varieties.
When should I harvest my patio summer squash?
Harvest your summer squash when they are young and tender, typically when they are 6-8 inches long. Overripe squash can become tough and seedy. Use a sharp knife to cut the squash from the plant, leaving a short stem attached. Harvest regularly to encourage continued production.
Can I grow different varieties of summer squash in the same container?
It’s generally not recommended to grow multiple summer squash plants in the same container, as they can compete for resources. However, you can grow companion plants like marigolds, basil, or nasturtiums in the same container to deter pests and attract pollinators.
How do I pollinate my summer squash if I don’t see any bees?
If you’re not seeing many bees in your area, you may need to hand-pollinate your summer squash. Identify the male and female flowers. The male flowers have a long, thin stem, while the female flowers have a small squash growing behind the flower. Use a small paintbrush to collect pollen from the male flower and transfer it to the stigma of the female flower. Do this in the morning, when the pollen is most viable.
What do I do with my summer squash plants at the end of the season?
Once your summer squash plants stop producing, you can remove them from the container and compost them. Clean the container thoroughly before storing it for the winter. You can also use the container to grow other vegetables or flowers in the fall or winter.
Leave a Comment