
Neglected bean plants flowers can be a disheartening sight for any gardener, especially after all the effort you’ve put in! But don’t despair, because this DIY guide is here to help you revive those beauties and get them back on track to producing a bountiful harvest. I know the feeling – that sinking sensation when you see your plants looking less than their best.
Beans have a rich history, dating back thousands of years and playing a vital role in diets across the globe. From ancient civilizations in South America to traditional European cuisine, beans have been a staple food source. They’re not just nutritious; they’re also relatively easy to grow, making them a popular choice for home gardeners. But even the hardiest plants can suffer from neglect, and that’s where these DIY tricks come in handy.
Why do you need these hacks? Well, a few simple adjustments to your gardening routine can make all the difference. Whether it’s understanding the importance of proper watering, addressing nutrient deficiencies, or tackling common pests, these tips will empower you to transform your neglected bean plants flowers into thriving, productive plants. I’ll walk you through each step, providing easy-to-follow instructions and practical advice that you can implement right away. Let’s get those beans blooming again!
Verwandle vernachlässigte Bohnenpflanzen in blühende Schönheiten: Eine DIY-Anleitung
Hallo liebe Gartenfreunde! Habt ihr auch manchmal das Gefühl, dass eure Bohnenpflanzen etwas Liebe und Aufmerksamkeit vermissen? Keine Sorge, das passiert den Besten von uns! Ich zeige euch heute, wie ihr eure vernachlässigten Bohnenpflanzen wieder auf Vordermann bringt und sie zu üppigen, blühenden Schönheiten verwandelt. Lasst uns gemeinsam loslegen!
Die Diagnose: Was ist los mit meinen Bohnen?
Bevor wir mit der Rettungsaktion beginnen, müssen wir erst einmal herausfinden, was genau das Problem ist. Hier sind einige häufige Ursachen für vernachlässigte Bohnenpflanzen:
* Wassermangel: Bohnen brauchen regelmäßige Bewässerung, besonders während der Blütezeit.
* Nährstoffmangel: Ein Mangel an wichtigen Nährstoffen wie Stickstoff, Phosphor und Kalium kann das Wachstum und die Blütenbildung beeinträchtigen.
* Schädlinge und Krankheiten: Blattläuse, Spinnmilben oder Pilzkrankheiten können eure Bohnen schwächen.
* Falscher Standort: Bohnen brauchen viel Sonne, mindestens 6 Stunden pro Tag.
* Verunkrautung: Unkraut konkurriert mit den Bohnen um Wasser und Nährstoffe.
* Mangelnde Unterstützung: Kletterbohnen brauchen eine Rankhilfe, um richtig zu wachsen.
Die Rettungsaktion: Schritt für Schritt zu blühenden Bohnen
Jetzt, wo wir die möglichen Ursachen kennen, können wir mit der eigentlichen Rettungsaktion beginnen. Keine Panik, es ist einfacher als es aussieht!
1. Der Gesundheitscheck: Eine gründliche Untersuchung
Bevor wir irgendetwas unternehmen, müssen wir uns die Pflanzen genau ansehen.
1. Blätter inspizieren: Sind die Blätter gelb, braun oder fleckig? Gibt es Anzeichen von Schädlingen wie Blattläusen oder Spinnmilben?
2. Stängel überprüfen: Sind die Stängel stark und gesund oder schwach und brüchig?
3. Bodenuntersuchung: Ist der Boden trocken, feucht oder sogar staunass? Wie sieht die Bodenstruktur aus?
4. Wurzeln (wenn möglich) begutachten: Wenn ihr die Pflanze vorsichtig aus dem Topf nehmen könnt, schaut euch die Wurzeln an. Sind sie weiß und gesund oder braun und verfault?
2. Die Bewässerung: Durst löschen
Wassermangel ist oft die Ursache für vernachlässigte Bohnen.
1. Gießen: Gießt die Bohnen gründlich, bis das Wasser aus den Abzugslöchern des Topfes läuft.
2. Regelmäßigkeit: Überprüft den Boden täglich und gießt, wenn er sich trocken anfühlt. Vermeidet Staunässe!
3. Gießzeitpunkt: Gießt am besten früh morgens oder spät abends, um Verdunstung zu vermeiden.
3. Die Nährstoffversorgung: Energie für Wachstum und Blüte
Bohnen brauchen die richtigen Nährstoffe, um zu gedeihen.
1. Dünger auswählen: Verwendet einen ausgewogenen Dünger für Gemüse, der Stickstoff (N), Phosphor (P) und Kalium (K) enthält. Ein Verhältnis von 10-10-10 oder 5-10-5 ist gut geeignet.
2. Düngen: Befolgt die Anweisungen auf der Düngerverpackung. Überdüngung kann schädlich sein! Ich bevorzuge einen organischen Flüssigdünger, den ich alle zwei Wochen anwende.
3. Bodenverbesserung: Kompost oder gut verrotteter Mist können dem Boden zusätzliche Nährstoffe zuführen und die Bodenstruktur verbessern.
4. Schädlingsbekämpfung: Unliebsame Gäste vertreiben
Schädlinge können eure Bohnen schwächen und die Blütenbildung beeinträchtigen.
1. Blattläuse: Sprüht die Pflanzen mit einem starken Wasserstrahl ab oder verwendet eine Lösung aus Wasser und Spülmittel (ein paar Tropfen Spülmittel auf einen Liter Wasser). Marienkäfer sind natürliche Feinde von Blattläusen!
2. Spinnmilben: Erhöht die Luftfeuchtigkeit um die Pflanzen herum. Besprüht die Blätter regelmäßig mit Wasser. Bei starkem Befall könnt ihr ein spezielles Insektizid verwenden.
3. Pilzkrankheiten: Sorgt für gute Belüftung und vermeidet Staunässe. Entfernt befallene Blätter. Bei Bedarf könnt ihr ein Fungizid verwenden. Ich versuche es immer zuerst mit einer Mischung aus Wasser und Natron (ein Teelöffel Natron auf einen Liter Wasser).
5. Der richtige Standort: Sonne tanken
Bohnen brauchen viel Sonne, um zu wachsen und zu blühen.
1. Standortwahl: Stellt die Bohnen an einen sonnigen Standort, der mindestens 6 Stunden Sonne pro Tag bekommt.
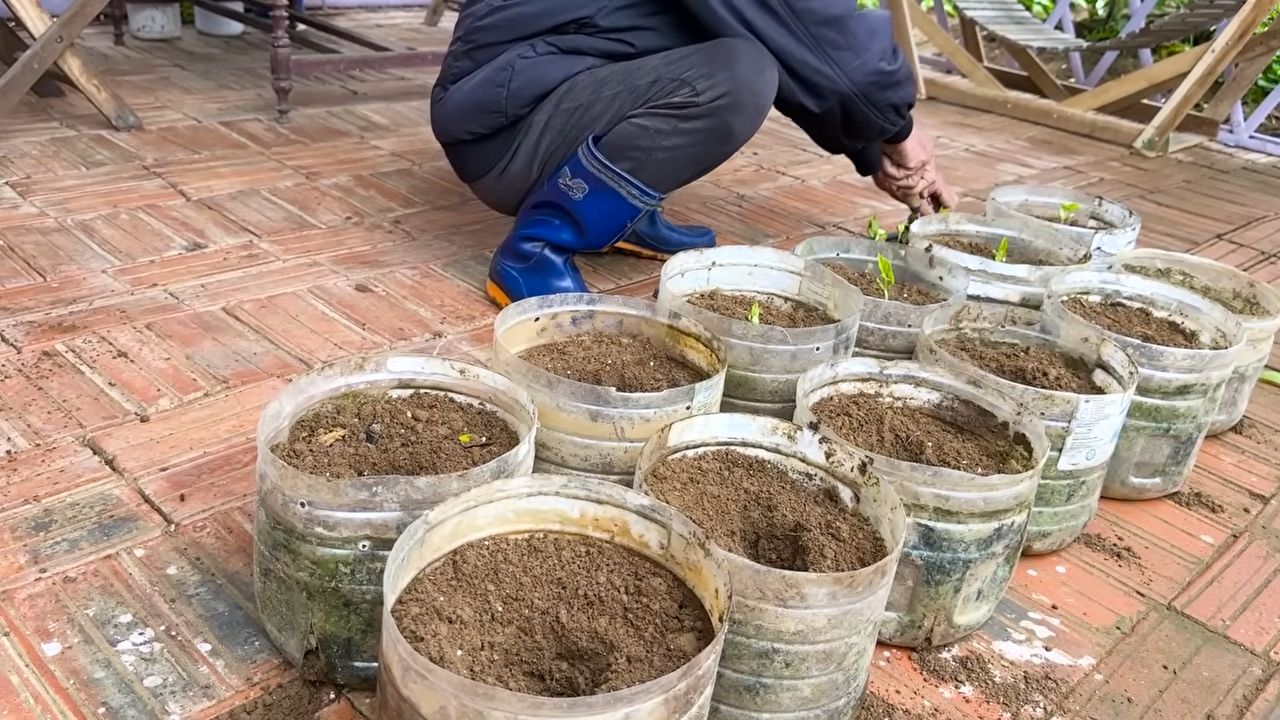
2. Umpflanzen (wenn nötig): Wenn die Bohnen an einem schattigen Standort stehen, pflanzt sie vorsichtig um. Achtet darauf, die Wurzeln nicht zu beschädigen.
6. Unkrautbekämpfung: Konkurrenz ausschalten
Unkraut konkurriert mit den Bohnen um Wasser und Nährstoffe.
1. Jäten: Entfernt regelmäßig Unkraut um die Bohnen herum.
2. Mulchen: Eine Schicht Mulch (z.B. Stroh oder Holzhackschnitzel) kann helfen, Unkrautwachstum zu unterdrücken und den Boden feucht zu halten.
7. Unterstützung: Kletterhilfe anbieten
Kletterbohnen brauchen eine Rankhilfe, um richtig zu wachsen.
1. Rankhilfe installieren: Stellt eine Rankhilfe auf, an der die Bohnen hochklettern können. Das kann ein Spalier, ein Zaun oder ein selbstgebautes Gerüst sein.
2. Anbinden: Bindet die Bohnen an die Rankhilfe, wenn sie noch klein sind. Sie werden dann von selbst weiterklettern.
Die Nachsorge: Damit die Bohnen weiterhin blühen
Nachdem wir die Bohnen gerettet haben, ist es wichtig, sie weiterhin gut zu pflegen.
* Regelmäßige Bewässerung: Überprüft den Boden täglich und gießt, wenn er sich trocken anfühlt.
* Regelmäßige Düngung: Düngt die Bohnen alle zwei Wochen mit einem ausgewogenen Dünger.
* Schädlingskontrolle: Überprüft die Pflanzen regelmäßig auf Schädlinge und Krankheiten.
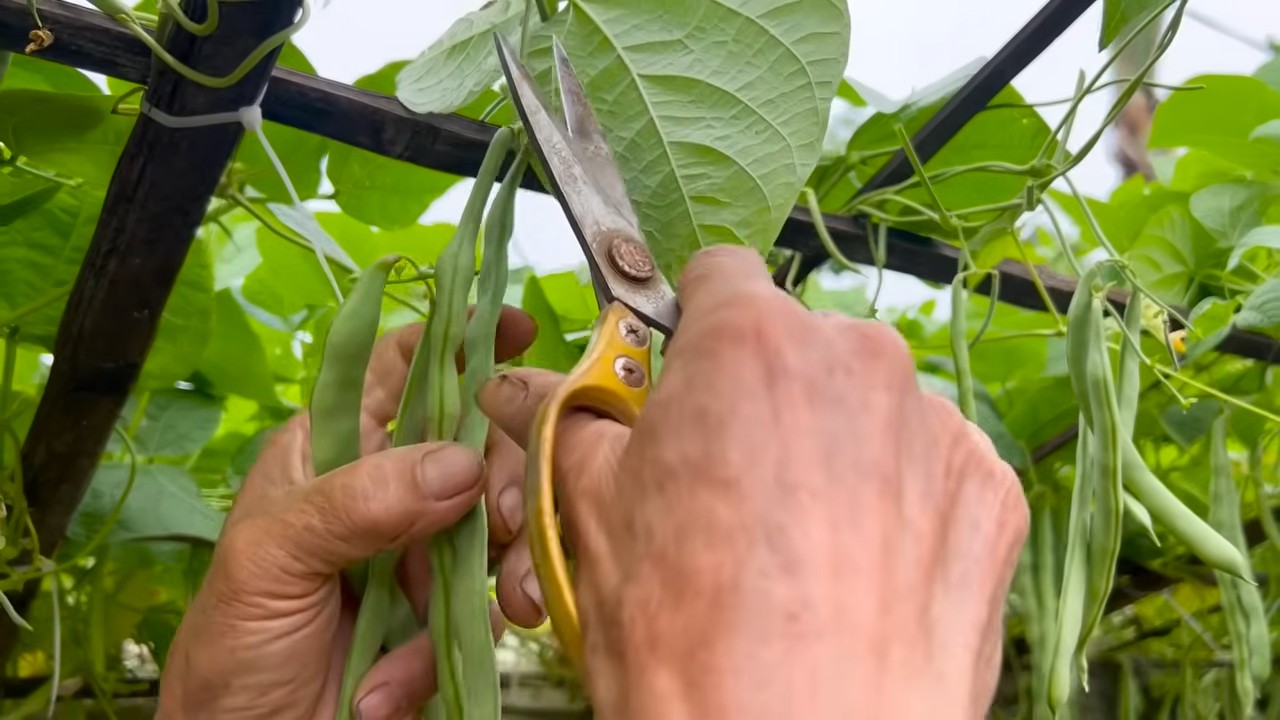
* Ernte: Erntet die Bohnen regelmäßig, um die Blütenbildung anzuregen. Je mehr ihr erntet, desto mehr Bohnen werden nachwachsen!
Zusätzliche Tipps für üppige Blüten
Hier sind noch ein paar zusätzliche Tipps, die euch helfen können, eure Bohnen zum Blühen zu bringen:
* Bohnen beschneiden: Entfernt gelbe oder braune Blätter, um die Pflanze zu entlasten und die Luftzirkulation zu verbessern.
* Bienen anlocken: Pflanzt blühende Pflanzen in der Nähe der Bohnen, um Bienen anzulocken. Bienen bestäuben die Bohnenblüten und sorgen für eine bessere Ernte.
* Geduld haben: Manchmal dauert es einfach ein bisschen, bis die Bohnen wieder aufblühen. Gebt nicht auf und pflegt sie weiterhin gut!
Fazit: Mit Liebe und Geduld zum Erfolg
Mit ein wenig Liebe, Geduld und den richtigen Maßnahmen könnt ihr eure vernachlässigten Bohnenpflanzen wieder zu üppigen, blühenden Schönheiten verwandeln. Ich hoffe, diese Anleitung hat euch geholfen! Viel Spaß beim Gärtnern! Und denkt daran: Jede Pflanze ist einzigartig und braucht individuelle Pflege. Beobachtet eure Bohnen genau und passt eure Maßnahmen entsprechend an. Viel Erfolg!
Conclusion
So, there you have it! Transforming neglected bean plants flowers into a vibrant, blooming spectacle isn’t just a possibility; it’s a rewarding reality within your reach. We’ve explored the simple yet effective DIY trick of strategic pruning, nutrient boosting, and environmental optimization, all designed to coax those stubborn bean plants into finally producing the beautiful flowers you’ve been waiting for.
Why is this a must-try? Because it’s more than just about getting flowers. It’s about understanding your plants, responding to their needs, and witnessing the incredible resilience of nature. It’s about turning a potential gardening disappointment into a triumphant success story. It’s about saving money by revitalizing existing plants instead of buying new ones. And, let’s be honest, there’s a certain satisfaction in proving that even the most neglected plants can be brought back to life with a little TLC and the right knowledge.
This DIY trick is particularly valuable because it’s adaptable. Feel free to experiment with different types of organic fertilizers. Some gardeners swear by compost tea, while others prefer a diluted seaweed extract. The key is to observe your plants closely and adjust your approach accordingly. If you notice yellowing leaves, it might indicate a nutrient deficiency. If the leaves are drooping, it could be a sign of overwatering or underwatering.
Consider these variations to personalize your approach:
* Vertical Gardening Boost: If your bean plants are climbing, ensure their support structure is adequate. A sturdy trellis or netting will encourage healthy growth and allow for better air circulation, reducing the risk of fungal diseases.
* Companion Planting Power: Introduce companion plants like marigolds or nasturtiums to deter pests naturally. These vibrant flowers not only add beauty to your garden but also protect your bean plants from common infestations.
* Hydroponic Adaptation: While this guide primarily focuses on soil-based bean plants, the principles of nutrient optimization and environmental control can be adapted for hydroponic systems. Ensure your hydroponic solution is properly balanced and that your plants receive adequate light.
Ultimately, the success of this DIY trick hinges on your willingness to experiment and learn. Don’t be afraid to make mistakes – they’re valuable learning opportunities. The most important thing is to be patient and persistent. It may take a few weeks or even months to see significant results, but the reward of witnessing your neglected bean plants flowers bloom is well worth the effort.
We are confident that this guide will empower you to transform your neglected bean plants into thriving, flower-filled specimens. Now, it’s your turn! We wholeheartedly encourage you to try this DIY trick and share your experience with us. Post pictures of your revitalized bean plants on social media using the hashtag #BeanPlantRescue. Tell us about your successes, your challenges, and any variations you tried. Let’s create a community of gardeners who are passionate about rescuing neglected plants and celebrating the beauty of nature. Your insights could inspire others and contribute to a collective knowledge base that benefits everyone. So, grab your gardening gloves, gather your supplies, and get ready to witness the amazing transformation of your neglected bean plants flowers!
Frequently Asked Questions (FAQ)
What are the most common reasons why bean plants don’t flower?
Several factors can prevent bean plants from flowering. The most common include:
* Insufficient Sunlight: Bean plants need at least 6-8 hours of direct sunlight per day to produce flowers. If they’re in a shady location, they may not have enough energy to bloom.
* Nutrient Imbalance: Too much nitrogen can promote leafy growth at the expense of flowering. Bean plants need a balanced fertilizer with a higher phosphorus content to encourage bloom production.
* Overwatering or Underwatering: Both extremes can stress the plant and inhibit flowering. The soil should be consistently moist but not waterlogged.
* Poor Soil Quality: Bean plants prefer well-draining soil that is rich in organic matter. Compacted or nutrient-poor soil can hinder growth and flowering.
* Pest Infestations: Pests like aphids, spider mites, and whiteflies can weaken the plant and prevent it from flowering.
* Temperature Stress: Extreme temperatures (too hot or too cold) can also inhibit flowering.
* Lack of Pollination: While many bean varieties are self-pollinating, some may benefit from insect pollination. If you’re not seeing any bees or other pollinators in your garden, you may need to hand-pollinate the flowers.
How do I know if my bean plant has a nutrient deficiency?
The appearance of your bean plant can provide clues about potential nutrient deficiencies:
* Yellowing Leaves (Chlorosis): This can indicate a nitrogen deficiency, especially if the older leaves are affected first. It can also be a sign of iron or magnesium deficiency.
* Stunted Growth: A general lack of growth can be a sign of various nutrient deficiencies, including nitrogen, phosphorus, and potassium.
* Purple Leaves: This can indicate a phosphorus deficiency, especially if the undersides of the leaves are affected.
* Brown or Scorched Leaf Edges: This can indicate a potassium deficiency.
* Small, Pale Leaves: This can indicate an iron deficiency.
A soil test can provide a more accurate assessment of nutrient levels.
What type of fertilizer is best for encouraging bean plants to flower?
A fertilizer with a higher phosphorus content (the middle number in the N-P-K ratio) is ideal for promoting flowering. Look for a fertilizer labeled for “bloom boosting” or “flowering plants.” Organic options like bone meal or rock phosphate are also excellent sources of phosphorus. Avoid fertilizers that are high in nitrogen, as they can encourage excessive leafy growth at the expense of flowering.
How often should I water my bean plants?
Water your bean plants deeply whenever the top inch of soil feels dry to the touch. Avoid overwatering, as this can lead to root rot. The frequency of watering will depend on the weather, soil type, and the size of your plants. During hot, dry weather, you may need to water daily.
How can I protect my bean plants from pests?
Several strategies can help protect your bean plants from pests:
* Companion Planting: Plant marigolds, nasturtiums, or other pest-repelling plants near your bean plants.
* Regular Inspection: Check your plants regularly for signs of pests.
* Handpicking: Remove pests by hand and drop them into a bucket of soapy water.
* Insecticidal Soap: Spray your plants with insecticidal soap to control aphids, spider mites, and other soft-bodied pests.
* Neem Oil: Neem oil is a natural insecticide that can be effective against a wide range of pests.
* Beneficial Insects: Introduce beneficial insects like ladybugs and lacewings to your garden to prey on pests.
How long does it take for bean plants to flower after implementing these DIY tricks?
The time it takes for bean plants to flower after implementing these DIY tricks can vary depending on the severity of the initial neglect, the specific variety of bean, and the environmental conditions. Generally, you can expect to see noticeable improvements within 2-4 weeks. However, it may take longer for the plants to fully recover and produce abundant flowers. Be patient and continue to provide consistent care, and you should eventually see positive results.
Can I use this DIY trick on all types of bean plants?
Yes, the principles of this DIY trick can be applied to most types of bean plants, including bush beans, pole beans, and runner beans. However, keep in mind that different varieties may have slightly different needs. Research the specific requirements of your bean variety to ensure you’re providing the optimal care.
What if I’ve tried everything and my bean plants still aren’t flowering?
If you’ve tried all of the above and your bean plants still aren’t flowering, there may be an underlying issue that’s preventing them from blooming. Consider these possibilities:
* Disease: Check your plants for signs of disease, such as leaf spots, wilting, or mold. Treat any diseases promptly with appropriate fungicides.
* Rootbound: If your bean plants are growing in containers, they may be rootbound. Transplant them into larger containers to give their roots more room to grow.
* Old Age: Bean plants have a limited lifespan. If your plants are very old, they may simply be past their prime and no longer capable of flowering.
* Incorrect Variety: Some bean varieties are bred primarily for their foliage and may not produce many flowers.
If you’re still unsure why your bean plants aren’t flowering, consult with a local gardening expert or extension agent for further assistance.


Leave a Comment