
Nail polish tricks and tips are about to become your new best friend! Have you ever been frustrated by a chipped manicure just hours after leaving the salon, or struggled to open a stubborn nail polish bottle? Well, fret no more! This isn’t just another article about pretty colors; we’re diving deep into the world of nail polish hacks that will save you time, money, and a whole lot of frustration.
The history of nail polish dates back thousands of years, with evidence of early forms found in ancient China and Egypt. Back then, it was a symbol of status and wealth. While we’ve come a long way from using ingredients like beeswax and egg whites, the desire for beautiful, well-maintained nails remains a constant.
Let’s face it, a flawless manicure can instantly boost your confidence. But maintaining that flawless look can be a challenge. That’s where these nail polish tricks and tips come in. I’m going to share some simple, yet incredibly effective DIY solutions to common nail polish problems. From quick-drying techniques to clever storage solutions, these hacks will transform your nail care routine and leave you with salon-worthy results, all from the comfort of your own home. Get ready to unlock the secrets to longer-lasting, chip-resistant, and absolutely stunning nails!
Nail Polish Hacks That Will Change Your Manicure Game!
Hey there, fellow nail polish enthusiasts! I’m so excited to share some of my absolute favorite nail polish hacks that have seriously leveled up my at-home manicure game. Forget those expensive salon trips – with these tips and tricks, you’ll be rocking flawless, long-lasting manicures in no time!
Getting Started: Essential Tools and Prep Work
Before we dive into the fun stuff, let’s make sure we have all the necessary tools and prep our nails properly. This is crucial for a smooth and lasting manicure.
* Nail Polish Remover: Acetone-based is best for removing stubborn polish, but non-acetone is gentler if you have brittle nails.
* Cotton Balls or Pads: For removing polish.
* Nail Clippers: To trim your nails to your desired length.
* Nail File: To shape and smooth the edges of your nails. I prefer a glass file, as it’s gentler on the nails.
* Cuticle Pusher: Metal or wooden, for gently pushing back your cuticles.
* Cuticle Nipper (Optional): Only use if you have hangnails or excess cuticle skin. Be very careful not to cut too much!
* Base Coat: This protects your nails from staining and helps the polish adhere better.
* Your Favorite Nail Polish Colors: The stars of the show!
* Top Coat: This seals in your polish, adds shine, and helps prevent chipping.
* Orange Wood Stick or Toothpick: For cleaning up any mistakes.
* Small Dish of Warm Water: For softening your cuticles.
* Hand Lotion or Cuticle Oil: To moisturize your hands and cuticles after your manicure.
Step-by-Step Manicure Prep: The Foundation for Flawless Nails
1. Remove Old Polish: Soak a cotton ball in nail polish remover and press it onto your nail for a few seconds. Then, swipe downwards to remove the polish. Repeat until all polish is gone.
2. Trim and Shape Your Nails: Use nail clippers to trim your nails to your desired length. Then, use a nail file to shape them. File in one direction to prevent splitting. I personally love a rounded square shape, but feel free to experiment!
3. Soak Your Nails (Optional): Soak your fingertips in a small dish of warm water for a few minutes to soften your cuticles. This makes them easier to push back.
4. Push Back Your Cuticles: Gently push back your cuticles with a cuticle pusher. Be careful not to push too hard, as this can damage the nail bed.
5. Trim Hangnails (Optional): If you have any hangnails, carefully trim them with a cuticle nipper. Again, be very careful not to cut too much skin.
6. Clean Your Nail Plate: Use nail polish remover on a cotton pad to remove any oils or residue from your nail plate. This will help the base coat adhere better.
Hack #1: The Perfect Application Technique
Applying nail polish flawlessly can be tricky, but with a few simple techniques, you can achieve salon-worthy results.
* Thin Coats are Key: Avoid applying thick coats of polish, as they are more likely to bubble and chip. Instead, apply thin, even coats.
* The Three-Stroke Method: Dip your brush into the polish and wipe off any excess on the neck of the bottle. Start by placing the brush in the center of your nail, close to the cuticle, but not touching it. Push the brush towards the cuticle, leaving a tiny gap. Then, pull the brush down in a straight line to the tip of your nail. Repeat on each side of the center line, creating three strokes.
* Let Each Coat Dry Completely: This is crucial! Allow each coat of polish to dry completely before applying the next. This will prevent smudging and ensure a smooth finish. I usually wait about 2-3 minutes between coats.
* Don’t Forget the Top Coat: A good top coat is essential for sealing in your polish, adding shine, and preventing chipping. Apply a generous layer of top coat after your final coat of polish has dried.
Hack #2: Quick Drying Secrets
Waiting for your nail polish to dry can feel like an eternity! Here are a few tricks to speed up the process:
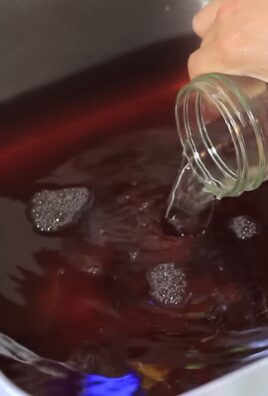
* Cold Water Dip: After applying your top coat, wait a minute or two, then dip your fingertips into a bowl of ice-cold water for 2-3 minutes. The cold water helps to harden the polish.
* Quick-Dry Drops or Spray: These products contain ingredients that help to evaporate the solvents in the polish, speeding up the drying process. I love using quick-dry drops – they’re so convenient!
* Thin Coats (Again!): Remember, thin coats dry much faster than thick coats.
* Hair Dryer (Cool Setting): Use a hair dryer on the cool setting to gently blow air over your nails. Be careful not to hold the dryer too close, as this can cause the polish to bubble.
Hack #3: Chip-Proofing Your Manicure
Chipped nail polish is the bane of every manicure lover’s existence! Here’s how to make your manicure last longer:
* Wrap the Tips: When applying your base coat, polish, and top coat, be sure to “wrap” the tips of your nails. This means applying a thin layer of polish to the very edge of your nail. This helps to seal the polish and prevent chipping.
* Avoid Hot Water: Hot water can cause your nail polish to expand and contract, leading to chipping. Wear gloves when washing dishes or doing other tasks that involve hot water.
* Moisturize Your Hands and Cuticles: Dry nails are more prone to chipping. Keep your hands and cuticles moisturized with lotion or cuticle oil.
* Reapply Top Coat Every Other Day: This will help to keep your manicure looking fresh and prevent chipping.
* Wear Gloves When Gardening or Cleaning: Protect your nails from harsh chemicals and physical damage by wearing gloves when gardening or cleaning.
Hack #4: Reviving Thick or Gloopy Nail Polish
Has your favorite nail polish become thick and gloopy? Don’t throw it away! Here’s how to revive it:
* Nail Polish Thinner: This is the best solution for thinning out nail polish. Add a few drops of nail polish thinner to the bottle and shake well. Be careful not to add too much, as this can make the polish too thin.
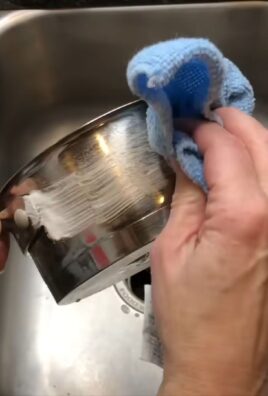
* Warm Water Bath: Place the bottle of nail polish in a bowl of warm water for a few minutes. This will help to loosen up the polish.
* Avoid Acetone: Never use acetone or nail polish remover to thin out nail polish. This will damage the polish and make it more likely to chip.
Hack #5: Easy Clean-Up Tips
Even with the best application technique, mistakes happen! Here’s how to clean up any stray polish:
* Orange Wood Stick or Toothpick: Dip an orange wood stick or toothpick into nail polish remover and carefully clean up any polish that has gotten on your skin.
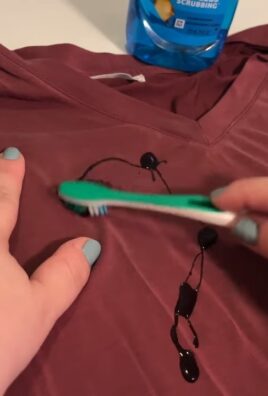
* Small Brush: Use a small, angled brush dipped in nail polish remover to clean up around your cuticles. This is especially helpful for removing dark or glittery polishes.
* Prevention is Key: Apply a thin layer of petroleum jelly around your cuticles before applying polish. This will create a barrier that prevents the polish from sticking to your skin.
Hack #6: Creating Nail Art with Household Items
You don’t need fancy tools to create stunning nail art! Here are a few ideas using items you probably already have at home:
* Dotting Tool (Toothpick or Bobby Pin): Use a toothpick or the rounded end of a bobby pin to create dots, swirls, and other designs.
* Tape: Use tape to create stripes, geometric shapes, and other patterns. Simply apply the tape to your nails, paint over it, and then carefully peel off the tape.
* Sponges: Use a makeup sponge to create ombre or gradient effects. Apply different colors of polish to the sponge and then dab it onto your nails.
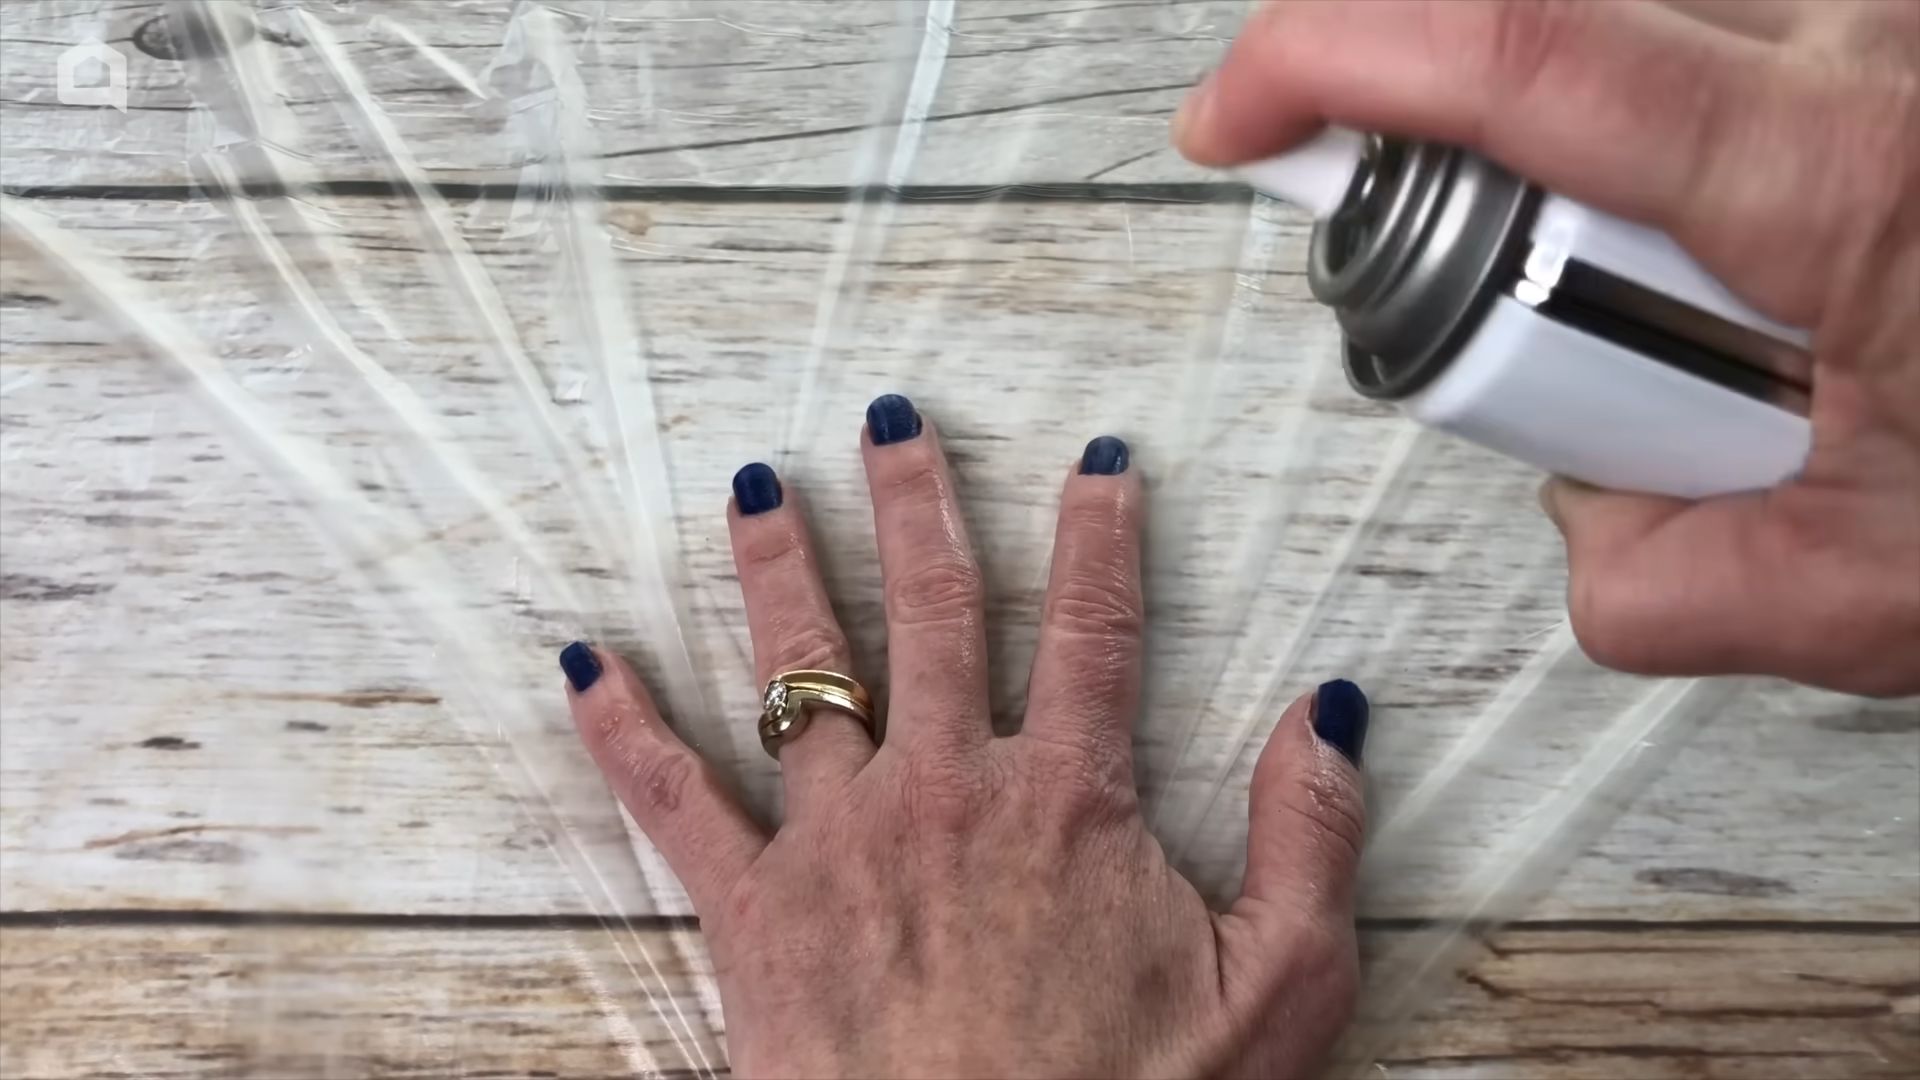
* Plastic Wrap: Crumple up a piece of plastic wrap and press it onto your wet polish to create a textured effect.
Hack #7: Removing Glitter Polish Like a Pro
Glitter polish is gorgeous, but removing it can be a nightmare! Here’s a trick that makes it much easier:
1. Soak Cotton Balls: Saturate ten cotton balls with nail polish remover.
2. Place on Nails: Place a cotton ball on each nail, covering the entire surface.
3. Wrap in Foil: Wrap each fingertip in a small piece of aluminum foil to hold the cotton ball in place.
4. Wait 5-10 Minutes: Let the cotton balls soak on

Conclusion
So, there you have it! Mastering these simple yet effective nail polish tricks and tips can truly revolutionize your at-home manicure game. No more settling for chipped polish after just a day or two, or struggling with messy application. These techniques, from proper base coat application to the ingenious ice water trick, are designed to extend the life of your manicure, enhance its appearance, and save you time and money in the long run.
Why is this a must-try? Because it empowers you to achieve salon-quality results without the salon price tag. Imagine the satisfaction of flawlessly painted nails that last, all thanks to a few clever adjustments to your routine. It’s not just about aesthetics; it’s about taking pride in your self-care and expressing your personal style with confidence. Plus, think of all the money you’ll save by reducing trips to the nail salon!
But the beauty of these nail polish tricks and tips lies in their adaptability. Feel free to experiment with variations to suit your individual needs and preferences. For example, if you find that the ice water trick is too intense for your sensitive skin, try using very cold tap water instead. Or, if you prefer a matte finish, apply a matte top coat after your color is completely dry. You can even create your own custom nail art designs using the toothpick technique for intricate details.
Consider using different types of base coats and top coats to see which ones work best with your preferred nail polish brands. Some people swear by gel-like top coats for extra shine and durability, while others prefer quick-drying formulas for convenience. Don’t be afraid to mix and match to find the perfect combination for your nails.
Don’t underestimate the power of proper nail preparation. Before you even reach for the nail polish, make sure your nails are clean, dry, and properly shaped. Push back your cuticles gently and buff the surface of your nails to create a smooth canvas for the polish. This will not only help the polish adhere better but also prevent chipping and peeling.
We wholeheartedly encourage you to try these nail polish tricks and tips and see the difference they can make. Start with one or two techniques and gradually incorporate them into your routine. Pay attention to how your nails respond and adjust accordingly. The key is to find what works best for you and your unique nail type.
Once you’ve mastered these techniques, we’d love to hear about your experience! Share your before-and-after photos, your favorite tips and tricks, and any variations you’ve discovered in the comments section below. Let’s create a community of nail polish enthusiasts who are passionate about achieving beautiful, long-lasting manicures at home. Your insights could inspire others and help them elevate their own nail game. So go ahead, give these nail polish tricks and tips a try, and let us know what you think! We’re confident that you’ll be amazed by the results.
Frequently Asked Questions (FAQ)
Q: How long should I wait between coats of nail polish?
A: Patience is key! Allow each coat of nail polish to dry completely before applying the next. This typically takes about 2-3 minutes for thin coats. If you apply the next coat too soon, the polish will be more likely to smudge, bubble, or peel. A good way to test if a coat is dry enough is to gently touch the surface of the nail. If it feels tacky or sticky, it’s not ready yet. Using a quick-drying top coat can significantly reduce drying time.
Q: What if I don’t have ice water for the ice water trick?
A: While ice water is ideal for quickly setting the nail polish, you can still achieve similar results with very cold tap water. The key is to lower the temperature of the polish to help it harden faster. If you don’t have ice, simply run cold water over your nails for a few minutes after applying the top coat. You can also try placing your hands in the freezer for a minute or two, but be careful not to leave them in for too long, as this can be uncomfortable.
Q: My nail polish always bubbles. What am I doing wrong?
A: Bubbling in nail polish can be caused by several factors. One common cause is applying thick coats of polish. Instead, apply thin, even coats and allow each coat to dry completely before applying the next. Another cause can be shaking the nail polish bottle vigorously, which creates air bubbles. Instead, gently roll the bottle between your hands to mix the polish. Temperature can also play a role; avoid applying nail polish in a hot or humid environment. Finally, make sure your nails are clean and free of oils or lotions before applying polish.
Q: How can I prevent my nail polish from chipping so quickly?
A: Chipping is a common frustration, but there are several things you can do to prevent it. Start with proper nail preparation, including cleaning, shaping, and buffing your nails. Always use a base coat to create a smooth surface for the polish to adhere to. Apply thin, even coats of polish and allow each coat to dry completely. Seal the edges of your nails with each coat of polish, including the top coat. Wear gloves when doing household chores or activities that could damage your nails. And finally, reapply top coat every few days to maintain the shine and protect the polish.
Q: What’s the best way to remove glitter nail polish?
A: Glitter nail polish can be notoriously difficult to remove. One effective method is the cotton ball and foil technique. Soak cotton balls in nail polish remover (acetone works best) and place them on your nails. Wrap each nail with a small piece of aluminum foil to hold the cotton ball in place. Let it sit for about 5-10 minutes, then remove the foil and cotton ball. The glitter should come off much more easily. You may need to gently scrub any remaining glitter with a cotton ball soaked in nail polish remover.
Q: Can I use these nail polish tricks and tips with gel polish?
A: While some of these nail polish tricks and tips can be adapted for gel polish, others are specifically designed for regular nail polish. For example, the ice water trick is not necessary for gel polish, as it cures under a UV or LED lamp. However, proper nail preparation and thin, even coats are still important for gel manicures. Always follow the manufacturer’s instructions for your specific gel polish system.
Q: What are some good alternatives to using a toothpick for nail art?
A: While toothpicks are a readily available tool for nail art, there are other options you can use. Dotting tools, which come in various sizes, are specifically designed for creating dots and other designs on nails. Fine-tipped paintbrushes can be used for more intricate details. You can also use a needle or a pin for very small dots or lines. Experiment with different tools to find what works best for you and the designs you want to create.
Q: How do I choose the right base coat and top coat for my nails?
A: Choosing the right base coat and top coat depends on your nail type and desired results. For weak or brittle nails, look for a strengthening base coat that contains ingredients like calcium or keratin. For ridges or uneven surfaces, a ridge-filling base coat can create a smoother canvas. For top coats, consider your desired finish (glossy, matte, or quick-drying) and level of durability. Gel-like top coats offer extra shine and protection, while quick-drying formulas are ideal for those who are short on time. Experiment with different brands and formulas to find what works best for your nails.
Leave a Comment