
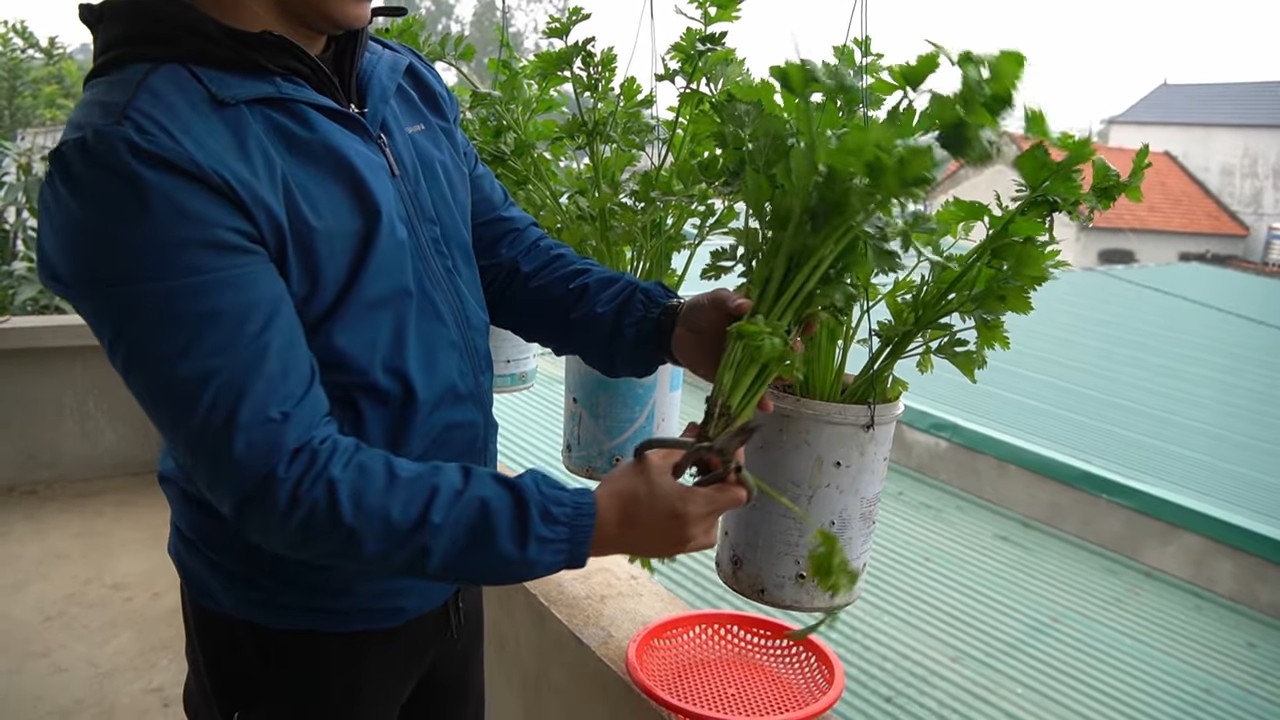
Harvest Celery Backyard: Imagine stepping into your backyard, not just for a breath of fresh air, but to gather crisp, flavorful celery you’ve nurtured yourself. Forget those limp, store-bought stalks! This isn’t just a dream; it’s an achievable reality with a few simple tricks and a little DIY spirit. For centuries, cultivating our own food has been a source of sustenance and pride. From ancient Roman gardens to the victory gardens of wartime, growing your own produce connects us to a rich history of self-sufficiency.
But let’s be honest, sometimes the idea of gardening feels overwhelming. That’s where these DIY hacks come in! I’m here to show you how to successfully harvest celery backyard, even if you’re a complete beginner. We’ll break down the process into easy-to-follow steps, ensuring you get the most out of your celery plants.
Why is this important? Because fresh, homegrown celery tastes infinitely better than anything you can buy at the grocery store. Plus, you’ll know exactly what went into growing it – no mystery pesticides or questionable practices. So, are you ready to ditch the store-bought celery and embrace the joy of harvesting your own? Let’s get started!
Sellerie aus dem eigenen Garten ernten: Eine Schritt-für-Schritt-Anleitung
Hallo liebe Gartenfreunde! Ich freue mich, euch heute zu zeigen, wie ihr euren selbst angebauten Sellerie ernten könnt. Es ist ein unglaublich befriedigendes Gefühl, Gemüse aus dem eigenen Garten zu ernten und zu wissen, woher es kommt. Sellerie ist da keine Ausnahme! Mit dieser Anleitung wird die Ernte zum Kinderspiel.
Wann ist der richtige Zeitpunkt für die Sellerie-Ernte?
Der richtige Zeitpunkt ist entscheidend für den Geschmack und die Qualität eures Selleries. Hier sind einige Anzeichen, auf die ihr achten solltet:
* Größe: Die Sellerieknolle sollte einen Durchmesser von etwa 7-10 cm haben. Das ist ein guter Richtwert, aber es hängt auch von der Sorte ab.
* Reifezeit: Die meisten Selleriesorten sind etwa 120-140 Tage nach der Aussaat erntereif. Beachtet die Angaben auf eurer Saatgutpackung.
* Festigkeit: Die Knolle sollte sich fest anfühlen, wenn ihr sie leicht drückt.
* Blätter: Die äußeren Blätter können gelblich werden, das ist normal und kein Grund zur Sorge.
Was ihr für die Sellerie-Ernte benötigt
Bevor wir loslegen, stellt sicher, dass ihr alles griffbereit habt:
* Eine Grabegabel oder ein Spaten: Damit lockern wir den Boden um die Sellerieknolle.
* Ein scharfes Messer: Zum Abschneiden der Blätter und Wurzeln.
* Gartenhandschuhe: Zum Schutz eurer Hände.
* Eine Bürste: Zum Reinigen der Knolle.
* Ein Eimer oder eine Schubkarre: Zum Transport des geernteten Selleries.
Schritt-für-Schritt-Anleitung zur Sellerie-Ernte
Jetzt geht’s ans Eingemachte! Folgt diesen Schritten, um euren Sellerie erfolgreich zu ernten:
1. Vorbereitung: Zieht eure Gartenhandschuhe an. Es kann etwas schmutzig werden!
2. Boden lockern: Stecht mit der Grabegabel oder dem Spaten vorsichtig um die Sellerieknolle herum. Achtet darauf, die Knolle nicht zu beschädigen. Ich empfehle, einen Abstand von etwa 15-20 cm zur Knolle einzuhalten.
3. Sellerie anheben: Hebelt die Knolle vorsichtig mit der Grabegabel oder dem Spaten an. Versucht, sie nicht zu zerbrechen. Manchmal ist es hilfreich, die Knolle mit der Hand festzuhalten, während ihr sie anhebt.
4. Sellerie herausziehen: Sobald die Knolle locker ist, könnt ihr sie vorsichtig aus der Erde ziehen. Schüttelt überschüssige Erde ab.
5. Blätter und Wurzeln entfernen: Schneidet mit dem scharfen Messer die Blätter etwa 2-3 cm oberhalb der Knolle ab. Entfernt auch die feinen Wurzeln an der Unterseite der Knolle.
6. Reinigung: Bürstet die Knolle unter fließendem Wasser ab, um restliche Erde zu entfernen.
7. Lagerung: Der geerntete Sellerie kann im Kühlschrank gelagert werden. Wickelt ihn am besten in ein feuchtes Tuch oder eine Plastiktüte, um ihn frisch zu halten.
Sellerie-Ernte in verschiedenen Phasen
Manchmal ist es sinnvoll, die Ernte in Phasen zu unterteilen, besonders wenn ihr eine größere Menge Sellerie angebaut habt.
Phase 1: Die ersten Sellerieknollen ernten
Wenn ihr nur wenige Sellerieknollen benötigt, könnt ihr die größten und reifsten zuerst ernten. So haben die kleineren Knollen mehr Platz zum Wachsen.
Phase 2: Die Haupternte
Wenn der Großteil eures Selleries die gewünschte Größe erreicht hat, könnt ihr mit der Haupternte beginnen. Achtet darauf, alle Knollen vor dem ersten Frost zu ernten.
Phase 3: Die letzten Sellerieknollen ernten
Auch die kleineren Sellerieknollen können noch geerntet werden. Sie sind zwar nicht so groß, aber trotzdem lecker und aromatisch.
Tipps und Tricks für eine erfolgreiche Sellerie-Ernte
Hier sind noch ein paar zusätzliche Tipps, die euch bei der Sellerie-Ernte helfen können:
* Ernte bei trockenem Wetter: Wenn möglich, erntet den Sellerie an einem trockenen Tag. So ist die Erde nicht so schwer und die Knollen lassen sich leichter reinigen.
* Beschädigungen vermeiden: Geht vorsichtig vor, um die Knollen nicht zu beschädigen. Beschädigte Knollen sind anfälliger für Fäulnis.
* Blätter nicht wegwerfen: Die Sellerieblätter sind essbar und können in Suppen, Eintöpfen oder als Gewürz verwendet werden.
* Sellerie lagern: Um den Sellerie länger frisch zu halten, könnt ihr ihn auch einfrieren. Schneidet ihn dazu in kleine Stücke und blanchiert ihn kurz in kochendem Wasser.
* Boden verbessern: Nach der Ernte solltet ihr den Boden mit Kompost oder anderem organischen Material verbessern. So ist er für die nächste Pflanzsaison gut vorbereitet.
Was tun, wenn der Sellerie nicht so groß geworden ist?
Keine Sorge, das passiert! Manchmal spielen das Wetter oder der Boden nicht mit. Auch kleinere Sellerieknollen sind essbar und können verwendet werden. Vielleicht habt ihr auch zu spät mit der Aussaat begonnen oder der Sellerie hatte nicht genügend Nährstoffe. Analysiert die Situation und lernt daraus für die nächste Saison.
Sellerie richtig lagern: So bleibt er länger frisch
Die richtige Lagerung ist entscheidend, damit euer geernteter Sellerie lange frisch und knackig bleibt. Hier sind einige Tipps:
* Kühlschrank: Wickelt den Sellerie in ein feuchtes Tuch oder eine Plastiktüte und lagert ihn im Gemüsefach des Kühlschranks. So hält er sich bis zu zwei Wochen.
* Einfrieren: Schneidet den Sellerie in kleine Stücke und blanchiert ihn kurz in kochendem Wasser. Anschließend könnt ihr ihn einfrieren. So hält er sich mehrere Monate.
* Keller: Wenn ihr einen kühlen und dunklen Keller habt, könnt ihr den Sellerie auch dort lagern. Legt ihn in eine Kiste mit feuchtem Sand.
Verwendungsmöglichkeiten für euren geernteten Sellerie
Sellerie ist unglaublich vielseitig und kann in vielen verschiedenen Gerichten verwendet werden. Hier sind einige Ideen:
* Roh: Sellerie kann roh als Snack gegessen werden, zum Beispiel mit Hummus oder Erdnussbutter.
* Salate: Sellerie ist eine tolle Ergänzung zu Salaten. Er verleiht ihnen eine knackige Textur und einen frischen Geschmack.
* Suppen und Eintöpfe: Sellerie ist ein wichtiger Bestandteil vieler Suppen und Eintöpfe. Er sorgt für einen würzigen Geschmack.
* Gemüsepfannen: Sellerie kann in Gemüsepfannen mit anderen Gemüsesorten gebraten werden.
* Smoothies: Sellerie kann auch in Smoothies verwendet werden. Er ist reich an Vitaminen und Mineralstoffen.
* Selleriesaft: Selleriesaft ist ein beliebter Gesundheitstrend. Er soll entzündungshemmend und verdauungsfördernd wirken.
Fazit
Ich hoffe, diese Anleitung hat euch geholfen, euren Sellerie erfolgreich zu ernten. Es ist ein tolles Gefühl, Gemüse aus dem eigenen Garten zu ernten und zu wissen, woher es kommt. Viel Spaß beim Gärtnern und guten Appetit!

Conclusion
So, there you have it! Mastering the art of regrowing celery from kitchen scraps is not just a fun experiment; it’s a sustainable practice that can significantly reduce your grocery bills and bring a touch of green into your home. We’ve walked you through the simple steps, from carefully cutting the celery base to nurturing its growth in water and finally transplanting it into soil. The beauty of this DIY trick lies in its accessibility – anyone can do it, regardless of their gardening experience. It’s a fantastic way to involve children in the growing process, teaching them about plant life cycles and the importance of reducing food waste.
But why is this a must-try? Beyond the obvious cost savings and environmental benefits, regrowing celery offers a unique sense of accomplishment. Watching a discarded celery base sprout new life and eventually yield fresh stalks is incredibly rewarding. It’s a tangible connection to the food we consume and a reminder of nature’s resilience. Plus, freshly harvested celery from your own backyard (or windowsill!) boasts a flavor that surpasses anything you can find in a supermarket. The crispness and intensity are simply unmatched.
Looking for variations? Absolutely! Consider experimenting with different types of celery. While standard green celery is the most common, you can also try regrowing red celery or even celeriac (celery root). The process remains the same, but the results will vary slightly in terms of flavor and texture. Another fun variation is to use the regrown celery leaves in different ways. They make a fantastic addition to soups, salads, and stir-fries, adding a burst of fresh, herbaceous flavor. You can even dry the leaves and grind them into a celery salt for a homemade seasoning blend.
Don’t be afraid to experiment with different soil types and watering schedules to find what works best for your environment. Some gardeners have had success using hydroponic systems for regrowing celery, while others prefer traditional potting soil. The key is to observe your plant closely and adjust your care accordingly. Remember, gardening is a learning process, and even experienced gardeners encounter challenges along the way.
We wholeheartedly encourage you to give this DIY trick a try. It’s a simple, sustainable, and satisfying way to enjoy fresh celery. Once you’ve harvested your first batch of homegrown celery, we’d love to hear about your experience! Share your photos, tips, and challenges in the comments section below. Let’s create a community of celery regrowers and inspire others to embrace this eco-friendly practice. Your insights could be invaluable to someone just starting out. So, grab that celery base, get your hands dirty, and experience the joy of regrowing your own food! Let us know how your **harvest celery backyard** project goes!
Frequently Asked Questions (FAQ)
1. How long does it take to regrow celery from a base?
The time it takes to regrow celery from a base can vary depending on several factors, including temperature, sunlight, and the overall health of the celery base. Generally, you can expect to see new growth within 5-7 days of placing the base in water. After about 2-3 weeks, the celery should be ready to transplant into soil. From there, it can take another 2-3 months for the celery to mature and be ready for harvest. Be patient and consistent with your care, and you’ll be rewarded with fresh, homegrown celery.
2. What kind of water should I use to regrow celery?
Tap water is generally fine for regrowing celery, but it’s best to let it sit out for a few hours to allow any chlorine to dissipate. Alternatively, you can use filtered water or rainwater. Avoid using distilled water, as it lacks the minerals that plants need to thrive. Change the water every 1-2 days to prevent bacterial growth and keep the celery base healthy.
3. How much sunlight does regrowing celery need?
Regrowing celery requires plenty of sunlight, especially after it has been transplanted into soil. Aim for at least 6-8 hours of direct sunlight per day. If you don’t have a sunny spot in your garden, consider using grow lights to supplement the natural light. Insufficient sunlight can lead to leggy growth and a less flavorful harvest.
4. What kind of soil is best for regrowing celery?
Celery prefers well-draining, nutrient-rich soil. A good potting mix amended with compost or other organic matter is ideal. The soil should be slightly acidic to neutral, with a pH of around 6.0 to 7.0. Avoid heavy clay soils, as they can retain too much moisture and lead to root rot.
5. How often should I water regrown celery?
Celery needs consistent moisture to thrive. Water deeply whenever the top inch of soil feels dry to the touch. Avoid overwatering, as this can also lead to root rot. During hot weather, you may need to water more frequently. Mulching around the base of the plant can help retain moisture and suppress weeds.
6. Can I regrow celery indoors?
Yes, you can regrow celery indoors, especially if you don’t have a garden. Choose a sunny windowsill or use grow lights to provide adequate light. Make sure the pot you use has drainage holes to prevent waterlogging. Indoor-grown celery may not grow as large as outdoor-grown celery, but it will still provide you with fresh, flavorful stalks.
7. What are some common problems when regrowing celery, and how can I fix them?
Some common problems when regrowing celery include:
* **Yellowing leaves:** This can be caused by overwatering, underwatering, nutrient deficiencies, or insufficient sunlight. Adjust your watering schedule, fertilize with a balanced fertilizer, and ensure the plant is getting enough light.
* **Root rot:** This is caused by overwatering and poor drainage. Make sure the soil is well-draining and avoid letting the plant sit in standing water.
* **Pests:** Celery can be susceptible to pests such as aphids and slugs. Inspect your plants regularly and treat any infestations promptly with insecticidal soap or other appropriate methods.
8. Can I harvest celery more than once from the same base?
While you can harvest celery multiple times from the same base, the subsequent harvests will likely be smaller and less robust than the initial harvest. The plant’s energy will be depleted after the first harvest, so it may not produce as many new stalks. However, you can still enjoy a few smaller harvests before the plant eventually stops producing.
9. What can I do with the celery leaves?
Celery leaves are often discarded, but they are actually quite flavorful and versatile. You can use them in soups, salads, stir-fries, and other dishes. They can also be dried and ground into a celery salt for a homemade seasoning blend. Celery leaves are a great source of vitamins and minerals, so don’t let them go to waste!
10. Is regrowing celery from a base organic?
Whether or not regrowing celery from a base is organic depends on the celery you initially purchased and the methods you use to grow it. If you started with organic celery and use organic soil, fertilizer, and pest control methods, then your regrown celery will be organic. However, if you started with non-organic celery or use non-organic products, then your regrown celery will not be considered organic.


Leave a Comment