
Growing sweet peppers at home can be incredibly rewarding, transforming your garden or even a sunny balcony into a vibrant source of fresh, flavorful produce. Imagine biting into a juicy, homegrown sweet pepper, bursting with sunshine and far superior in taste to anything you’d find at the grocery store! But let’s be honest, sometimes getting those peppers to thrive can feel like a real challenge. That’s where a few clever DIY tricks and hacks come in handy.
For centuries, peppers have been cultivated across the globe, originating in South America and spreading through trade routes to become a staple in cuisines worldwide. From the fiery heat of chili peppers to the mild sweetness of bell peppers, they’ve added flavor and vibrancy to our plates. Now, you can bring that rich history and deliciousness right to your own backyard!
Why do you need these DIY tricks? Well, growing sweet peppers at home isn’t always as straightforward as planting a seed and waiting. Pests, diseases, and nutrient deficiencies can all threaten your precious pepper plants. But don’t worry, I’m here to share some simple, effective, and budget-friendly solutions that will help you overcome these obstacles and enjoy a bountiful harvest. I’ll show you how to create the perfect growing environment, deter pests naturally, and boost your pepper plants’ health, all with readily available materials and a little bit of know-how. Get ready to unlock the secrets to sweet pepper success!
Growing Sweet Peppers: A Beginner’s Guide to a Bountiful Harvest
Hey there, fellow gardening enthusiasts! I’m so excited to share my tried-and-true method for growing sweet peppers right in your own backyard (or even on your balcony!). There’s nothing quite like the taste of a freshly picked, sun-ripened pepper, and trust me, it’s easier than you think to achieve a fantastic harvest. Let’s dive in!
Choosing Your Pepper Varieties
First things first, let’s talk peppers! The world of sweet peppers is vast and delicious. Here are a few of my personal favorites and some things to consider when making your choice:
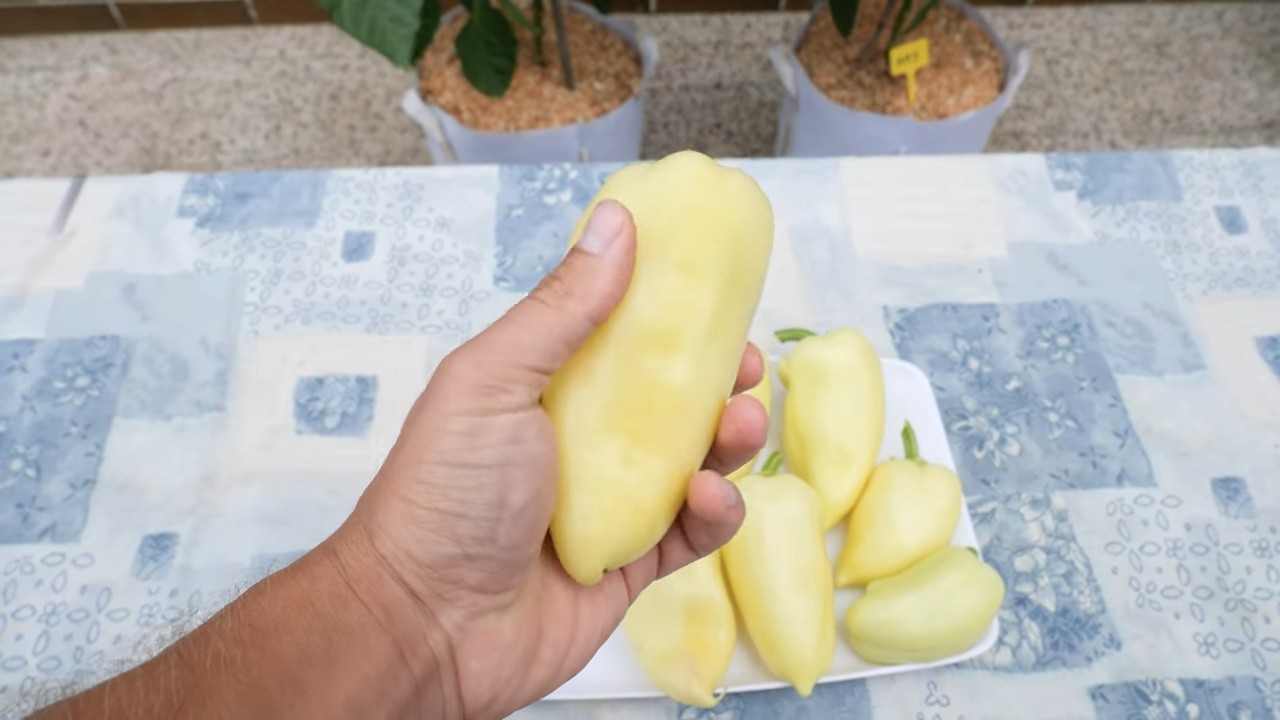
* Bell Peppers: The classic choice! They come in a rainbow of colors – green, red, yellow, orange, and even purple. Green bell peppers are the least ripe and have a slightly bitter taste, while the colored ones are sweeter and more flavorful. Look for varieties like ‘California Wonder’ (reliable and productive) or ‘Jupiter’ (large and blocky).
* Banana Peppers: These long, slender peppers have a mild, slightly tangy flavor. They’re great for pickling, grilling, or adding to salads. ‘Sweet Banana’ is a popular and easy-to-grow variety.
* Pimiento Peppers: These heart-shaped peppers are sweet, mild, and perfect for stuffing or roasting. ‘Pimiento L’Espagnol’ is a classic choice.
* Mini Sweet Peppers: These bite-sized peppers are incredibly sweet and come in a mix of colors. They’re perfect for snacking, adding to lunchboxes, or using in stir-fries.
* Consider your climate: Some pepper varieties are better suited to warmer climates than others. Check the seed packet or plant label for information on the pepper’s heat tolerance and growing season.
* Think about your space: If you’re growing in containers, choose compact varieties that won’t get too large.
Getting Started: From Seed to Seedling
Okay, now that you’ve chosen your pepper varieties, it’s time to get those seeds started! I usually start my pepper seeds indoors about 8-10 weeks before the last expected frost. This gives them a head start and ensures a longer growing season.
1. Gather Your Supplies:
* Pepper seeds
* Seed starting trays or small pots
* Seed starting mix (a light, sterile mix specifically designed for seedlings)
* Spray bottle
* Heat mat (optional, but helpful for germination)
* Grow lights (optional, but highly recommended for strong, healthy seedlings)
2. Sow the Seeds:
* Moisten the seed starting mix thoroughly.
* Fill the seed starting trays or pots with the moistened mix.
* Sow the pepper seeds about ¼ inch deep, placing 2-3 seeds per cell or pot.
* Gently cover the seeds with more seed starting mix.
* Lightly mist the surface with water.
3. Provide Warmth and Light:
* Place the seed starting trays or pots on a heat mat (if using) to maintain a soil temperature of around 75-85°F (24-29°C).
* Cover the trays or pots with a clear plastic dome or plastic wrap to create a humid environment.
* Place the trays or pots under grow lights, keeping the lights a few inches above the soil surface. If you don’t have grow lights, place them in a sunny window, but be aware that the seedlings may become leggy (tall and spindly) without supplemental light.
4. Maintain Moisture:
* Check the soil moisture daily and mist with water as needed to keep the soil consistently moist but not soggy.
* Remove the plastic dome or plastic wrap once the seeds have germinated.
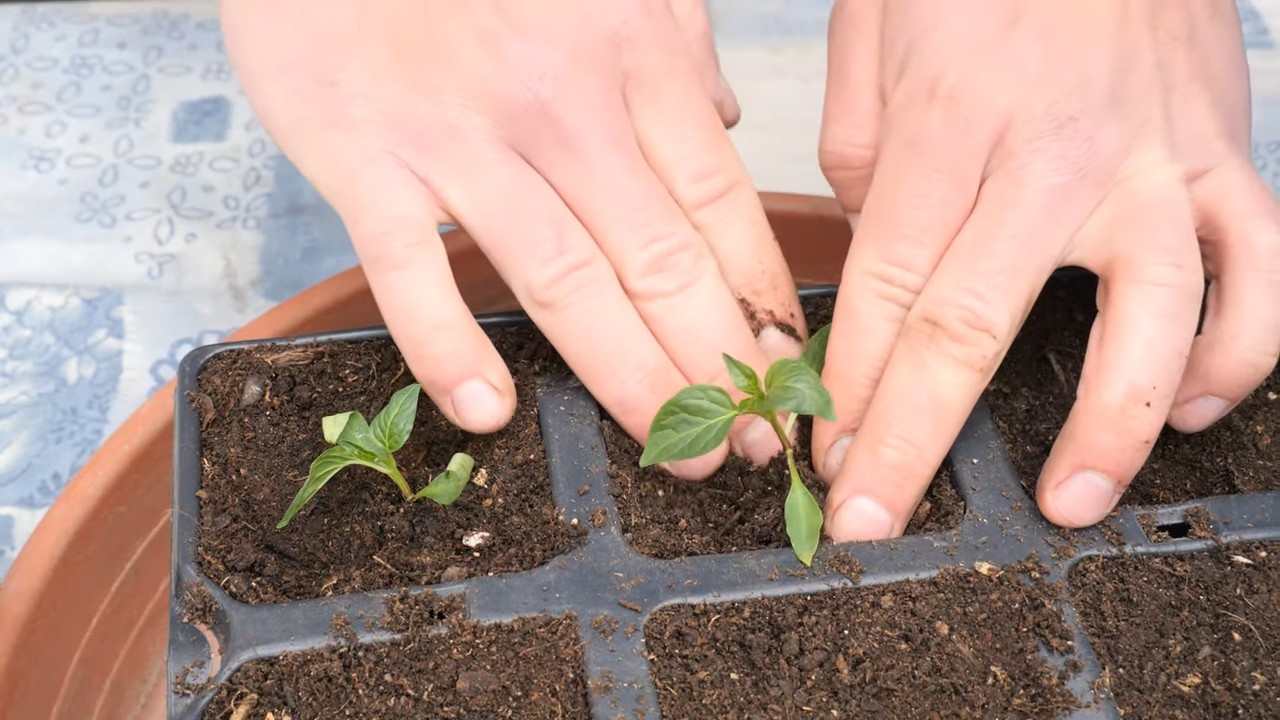
5. Thin the Seedlings:
* Once the seedlings have developed their first true leaves (the leaves that appear after the initial seed leaves), thin them to one seedling per cell or pot. Choose the strongest, healthiest seedling and snip off the others at the soil line.
6. Harden Off the Seedlings:
* About a week before you plan to transplant the seedlings outdoors, you’ll need to “harden them off.” This process gradually acclimates the seedlings to outdoor conditions, preventing shock when they’re transplanted.
* Start by placing the seedlings outdoors in a sheltered location for an hour or two each day, gradually increasing the amount of time they spend outdoors each day.
* Protect the seedlings from direct sunlight and strong winds during the hardening-off process.
Transplanting Your Pepper Seedlings
Once the danger of frost has passed and the soil has warmed up, it’s time to transplant your pepper seedlings into their permanent home!
1. Choose a Sunny Location:
* Peppers need at least 6-8 hours of sunlight per day to thrive. Choose a location in your garden that receives plenty of sunshine.
2. Prepare the Soil:
* Peppers prefer well-drained, fertile soil. Amend the soil with compost or other organic matter to improve drainage and fertility.
* The ideal soil pH for peppers is between 6.0 and 7.0.
3. Space the Plants:
* Space pepper plants about 18-24 inches apart in rows that are 24-36 inches apart. This will give them enough room to grow and allow for good air circulation.
4. Transplant Carefully:
* Dig a hole that is slightly larger than the root ball of the seedling.
* Gently remove the seedling from its pot, being careful not to damage the roots.
* Place the seedling in the hole and backfill with soil, gently firming the soil around the base of the plant.
* Water the newly transplanted seedlings thoroughly.
5. Add Support (Optional):
* Some pepper varieties, especially those with heavy fruit, may benefit from staking or caging. This will help prevent the plants from falling over and breaking.
Caring for Your Pepper Plants
Now that your pepper plants are in the ground, it’s time to provide them with the care they need to thrive.
1. Watering:
* Water pepper plants regularly, especially during hot, dry weather. Aim to keep the soil consistently moist but not soggy.
* Water deeply and infrequently, rather than shallowly and frequently. This will encourage the roots to grow deeper and make the plants more drought-tolerant.
* Avoid getting water on the leaves, as this can promote fungal diseases.
2. Fertilizing:
* Fertilize pepper plants every 2-3 weeks with a balanced fertilizer.
* Look for a fertilizer that is specifically formulated for vegetables or tomatoes.
* Follow the instructions on the fertilizer label carefully.
3. Mulching:
* Apply a layer of mulch around the base of the pepper plants to help retain moisture, suppress weeds, and regulate soil temperature.
* Organic mulches, such as straw, wood chips, or shredded leaves, are a good choice.
4. Pest and Disease Control:
* Keep an eye out for pests and diseases, such as aphids, flea beetles, and blossom end rot.
* Inspect your plants regularly and take action promptly if you notice any problems.
* Use organic pest control methods whenever possible, such as insecticidal soap or neem oil.
* Ensure good air circulation around the plants to help prevent fungal diseases.
5. Pruning (Optional):
* Pruning pepper plants can help improve air circulation and encourage bushier growth.
* Remove any suckers (small shoots that grow from the base of the plant) to direct the plant’s energy towards fruit production.
* You can also remove some of the lower leaves to improve air circulation and prevent soil-borne diseases.
Harvesting Your Sweet Peppers
The moment you’ve been waiting for! Harvesting your sweet peppers is the most rewarding part of the process.
1. When to Harvest:
* Sweet peppers are typically ready to harvest when they have reached their mature size and color.
* Green bell peppers can be harvested when they are firm and have reached a good size, but they will be sweeter and more flavorful if you allow them to ripen to their mature color (red, yellow, orange, etc.).
* Banana peppers are typically harvested when they are yellow or light green.
* Pimiento peppers are harvested when they are red and fully ripe.
2. How to Harvest:
* Use a sharp knife or pruning shears to cut the peppers from the plant, leaving a short stem attached.
* Avoid pulling the peppers off the plant, as this can damage the plant.
3. Storing Your Harvest:
* Sweet
Conclusion
So, there you have it! Growing sweet peppers at home, while it might seem daunting at first, is incredibly rewarding and surprisingly achievable with a little know-how and dedication. We’ve explored the key steps, from selecting the right varieties and starting seeds indoors to transplanting, providing optimal care, and finally, harvesting your vibrant, flavorful peppers.
But why should you embark on this journey of homegrown goodness? The answer is multifaceted. First and foremost, the taste of a freshly picked, sun-ripened sweet pepper from your own garden is simply unparalleled. It’s a world away from the often bland, commercially grown peppers you find in supermarkets. You’ll experience a sweetness and vibrancy that will elevate your culinary creations to new heights.
Beyond the superior flavor, growing your own sweet peppers gives you complete control over the growing process. You can choose to use organic methods, avoiding harmful pesticides and herbicides, ensuring that you’re feeding your family the healthiest possible produce. This peace of mind is invaluable in today’s world.
Furthermore, gardening is a therapeutic and fulfilling activity. It connects you with nature, reduces stress, and provides a sense of accomplishment as you watch your plants thrive under your care. The simple act of nurturing a seed into a bountiful pepper plant is incredibly satisfying.
Don’t be afraid to experiment with different varieties of sweet peppers. Try growing bell peppers in a rainbow of colors – red, yellow, orange, and even purple! Explore the world of Italian sweet peppers like Marconi or Corno di Toro, known for their elongated shape and exceptional sweetness. For a touch of heat, consider growing pimientos or banana peppers, which offer a mild warmth that complements their sweetness.
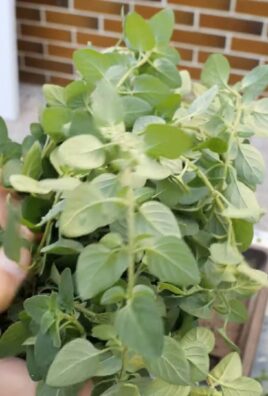
Consider companion planting to further enhance your pepper growing experience. Basil, for example, is a great companion plant for peppers, as it repels pests and improves the flavor of the peppers. Marigolds are another excellent choice, as they deter nematodes and other soil-borne pests.
If you live in an area with a short growing season, you can extend the harvest by using row covers or a greenhouse. These protective structures will shield your pepper plants from frost and cold temperatures, allowing you to enjoy fresh peppers for a longer period.
Growing sweet peppers at home is not just about the peppers themselves; it’s about the entire experience – the joy of nurturing life, the satisfaction of harvesting your own food, and the peace of mind that comes with knowing exactly where your food comes from.
So, what are you waiting for? Grab some seeds, prepare your soil, and get ready to embark on a rewarding journey of homegrown sweet pepper goodness. We encourage you to try this DIY trick and share your experiences with us. Let us know what varieties you’re growing, what challenges you’ve faced, and what successes you’ve achieved. Share your photos and tips in the comments below. Let’s create a community of passionate sweet pepper growers!
Frequently Asked Questions (FAQ)
What is the best time to start sweet pepper seeds indoors?
The ideal time to start sweet pepper seeds indoors is typically 6-8 weeks before the last expected frost in your area. This allows the seedlings to develop a strong root system and be ready for transplanting outdoors once the weather warms up. Check your local frost dates to determine the appropriate timing for your region. Starting too early can result in leggy, weak seedlings, while starting too late may delay your harvest.
How much sunlight do sweet pepper plants need?
Sweet pepper plants thrive in full sun, requiring at least 6-8 hours of direct sunlight per day. Insufficient sunlight can lead to stunted growth, reduced fruit production, and smaller, less flavorful peppers. Choose a planting location that receives ample sunlight throughout the day. If you’re growing peppers indoors, supplement with grow lights to ensure they receive adequate light.
What is the best type of soil for growing sweet peppers?
Sweet peppers prefer well-draining, fertile soil that is rich in organic matter. Amend your soil with compost, aged manure, or other organic amendments to improve its drainage, fertility, and water-holding capacity. The ideal soil pH for sweet peppers is between 6.0 and 6.8. You can test your soil pH using a soil testing kit and adjust it accordingly. Avoid heavy clay soils, as they can become waterlogged and inhibit root growth.
How often should I water my sweet pepper plants?
Water your sweet pepper plants regularly, especially during hot, dry weather. Aim to keep the soil consistently moist but not waterlogged. Water deeply and less frequently, rather than shallowly and more often. This encourages the roots to grow deeper into the soil, making the plants more drought-tolerant. Mulching around the base of the plants can help retain moisture and suppress weeds.
What are some common pests and diseases that affect sweet pepper plants?
Sweet pepper plants can be susceptible to various pests and diseases, including aphids, spider mites, pepper weevils, blossom-end rot, and fungal diseases. Regularly inspect your plants for signs of pests or diseases and take appropriate action. Use organic pest control methods, such as insecticidal soap or neem oil, to control pests. Prevent blossom-end rot by ensuring consistent watering and providing adequate calcium to the plants. Improve air circulation around the plants to prevent fungal diseases.
How do I prevent blossom-end rot in my sweet peppers?
Blossom-end rot is a common problem in sweet peppers, characterized by a dark, leathery spot on the bottom of the fruit. It is caused by a calcium deficiency, which can be exacerbated by inconsistent watering. To prevent blossom-end rot, ensure consistent watering, especially during fruit development. Amend your soil with calcium-rich amendments, such as bone meal or crushed eggshells. You can also spray the plants with a calcium chloride solution.
When should I harvest my sweet peppers?
Harvest your sweet peppers when they have reached their mature size and color. The exact timing will depend on the variety of pepper you are growing. Bell peppers are typically harvested when they are fully colored and firm to the touch. Italian sweet peppers can be harvested when they are green or allowed to ripen to red for a sweeter flavor. Use pruning shears or a sharp knife to cut the peppers from the plant, leaving a small stem attached.
Can I grow sweet peppers in containers?
Yes, sweet peppers can be successfully grown in containers. Choose a large container that is at least 12 inches in diameter and has drainage holes. Use a high-quality potting mix that is well-draining and rich in organic matter. Water the plants regularly and fertilize them with a balanced fertilizer. Place the container in a location that receives at least 6-8 hours of direct sunlight per day.
How do I store sweet peppers after harvesting?
Store sweet peppers in the refrigerator for up to a week. Place them in a plastic bag or container to prevent them from drying out. You can also freeze sweet peppers for longer storage. Wash and dry the peppers, then slice or dice them and freeze them in a single layer on a baking sheet. Once frozen, transfer them to a freezer bag or container.
What are some creative ways to use homegrown sweet peppers?
Homegrown sweet peppers can be used in a variety of culinary applications. They can be eaten raw in salads, grilled, roasted, stuffed, or added to stir-fries, soups, and stews. They can also be pickled, canned, or made into sauces and relishes. Experiment with different recipes and flavor combinations to discover your favorite ways to enjoy your homegrown sweet peppers.
Leave a Comment