
Growing Purple Kohlrabi Secret: Unlocking the vibrant potential of your garden has never been easier! Have you ever dreamt of adding a splash of color and a burst of unique flavor to your meals, straight from your backyard? Well, get ready to turn that dream into reality! This isn’t just another gardening article; it’s your personal guide to mastering the art of cultivating stunning purple kohlrabi, a vegetable that’s as visually appealing as it is delicious.
Kohlrabi, sometimes called a German turnip, has a rich history, dating back to the Roman Empire. While green varieties are more common, the purple kohlrabi offers a delightful twist, both in appearance and subtly sweeter taste. For centuries, gardeners have cherished kohlrabi for its versatility and ease of growth, and now, I’m going to share some insider secrets to help you succeed, even if you’re a complete beginner.
Why do you need these DIY tricks? Because growing purple kohlrabi doesn’t have to be a daunting task! Many gardeners shy away from this unique vegetable, thinking it’s too difficult to cultivate. But with the right knowledge and a few simple hacks, you can enjoy a bountiful harvest of these beautiful bulbs. Imagine impressing your friends and family with salads, slaws, and stir-fries featuring your own homegrown purple kohlrabi. Plus, knowing exactly where your food comes from and how it’s grown is incredibly rewarding. Let’s dive in and unlock the secrets to a thriving purple kohlrabi patch!
Lila Kohlrabi Anbauen: Mein Geheimnis für eine reiche Ernte
Hey Gartenfreunde! Ich liebe es, ungewöhnliche und farbenfrohe Gemüsesorten anzubauen, und lila Kohlrabi gehört definitiv zu meinen Favoriten. Nicht nur ist er super lecker, sondern er ist auch ein echter Hingucker im Garten und auf dem Teller. Ich habe über die Jahre einige Tricks gelernt, um eine wirklich reiche Ernte zu erzielen, und ich teile sie heute gerne mit euch. Lasst uns gemeinsam in die Welt des lila Kohlrabi eintauchen!
Warum Lila Kohlrabi?
Bevor wir loslegen, kurz warum ich so begeistert von lila Kohlrabi bin:
* Optik: Die leuchtend lila Farbe ist einfach wunderschön und macht jedes Gericht zu etwas Besonderem.
* Geschmack: Er schmeckt ähnlich wie weißer Kohlrabi, aber oft etwas milder und süßer.
* Nährstoffe: Lila Kohlrabi ist reich an Vitaminen, Mineralien und Antioxidantien.
* Anbau: Er ist relativ einfach anzubauen, auch für Anfänger.
Die richtige Sorte wählen
Die Wahl der richtigen Sorte ist entscheidend für den Erfolg. Hier sind einige meiner Favoriten:
* ‘Azur Star’: Eine frühe Sorte mit einer intensiven lila Farbe und einem milden Geschmack.
* ‘Purple Vienna’: Eine klassische Sorte, die zuverlässig große Knollen produziert.
* ‘Kolibri’: Eine relativ neue Sorte, die besonders resistent gegen Krankheiten sein soll.
Aussaat und Voranzucht
Ich ziehe meine Kohlrabi-Pflanzen gerne vor, um ihnen einen Vorsprung zu verschaffen.
* Zeitpunkt: Beginnt mit der Voranzucht etwa 4-6 Wochen vor dem letzten erwarteten Frost.
* Aussaatgefäße: Verwendet kleine Töpfe oder Anzuchtschalen.
* Aussaaterde: Füllt die Gefäße mit Anzuchterde.
* Aussaat: Legt 1-2 Samen pro Topf etwa 1 cm tief in die Erde.
* Gießen: Gießt die Erde vorsichtig an und haltet sie feucht.
* Standort: Stellt die Gefäße an einen hellen und warmen Ort (ca. 18-20°C).
* Keimung: Die Keimung dauert in der Regel 5-10 Tage.
* Pikieren: Sobald die Sämlinge ihre ersten richtigen Blätter haben, könnt ihr sie in größere Töpfe pikieren, falls ihr mehrere Samen pro Topf gesät habt.
Vorbereitung des Beetes
Kohlrabi braucht einen sonnigen Standort und einen gut vorbereiteten Boden.
* Standort: Wählt einen sonnigen Standort mit mindestens 6 Stunden Sonne pro Tag.
* Boden: Kohlrabi bevorzugt einen lockeren, humusreichen und gut drainierten Boden.
* Bodenverbesserung: Arbeitet vor dem Pflanzen Kompost oder gut verrotteten Mist in den Boden ein. Das verbessert die Bodenstruktur und liefert wichtige Nährstoffe.
* pH-Wert: Der ideale pH-Wert liegt zwischen 6,0 und 7,5.
* Unkraut entfernen: Entfernt gründlich alle Unkräuter.
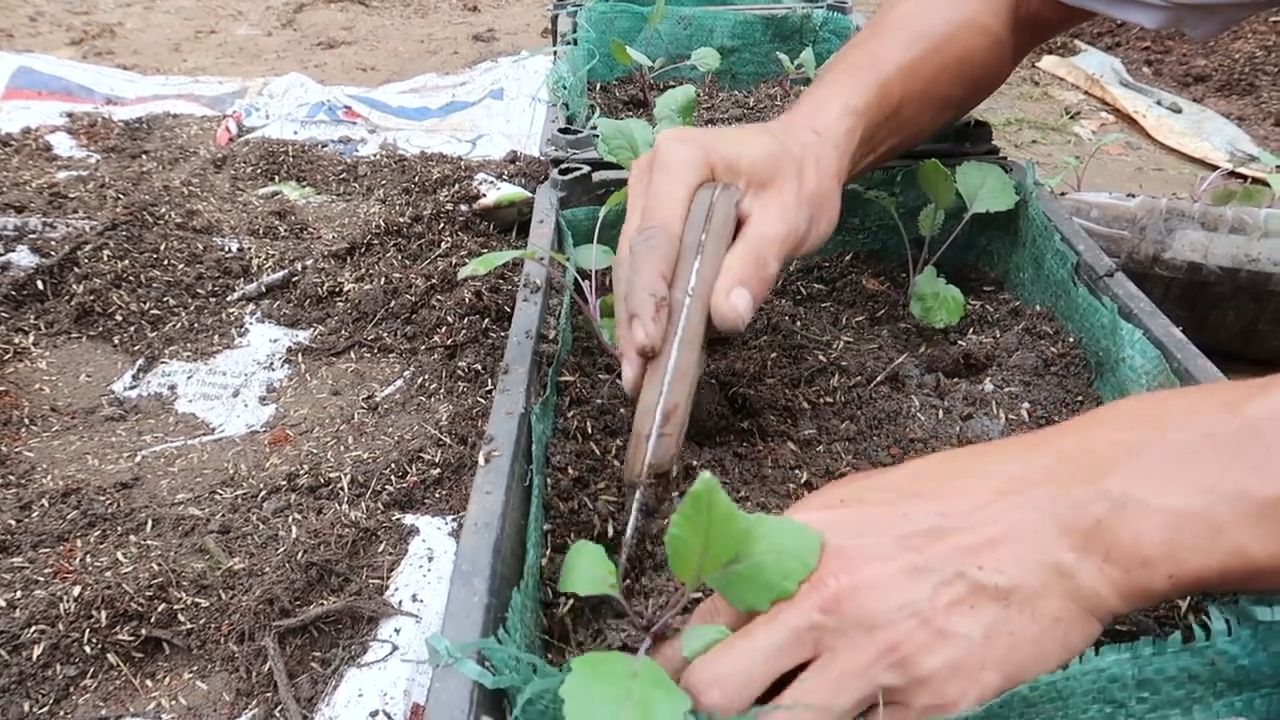
Das Auspflanzen
Sobald die Frostgefahr vorüber ist und die Sämlinge kräftig genug sind, können sie ins Freiland gepflanzt werden.
* Zeitpunkt: Pflanzt die Kohlrabi-Pflanzen erst aus, wenn keine Frostgefahr mehr besteht.
* Abhärten: Gewöhnt die Pflanzen vor dem Auspflanzen langsam an die Bedingungen im Freien (Abhärten). Stellt sie dazu tagsüber für einige Stunden ins Freie und holt sie abends wieder rein.
* Pflanzabstand: Haltet einen Pflanzabstand von etwa 20-30 cm zwischen den Pflanzen und 30-40 cm zwischen den Reihen ein.
* Pflanzloch: Grabt ein Loch, das etwas größer ist als der Wurzelballen.
* Einsetzen: Setzt die Pflanze so tief ein, wie sie zuvor im Topf gestanden hat.
* Angießen: Gießt die Pflanzen nach dem Einsetzen gründlich an.
Pflege während des Wachstums
Damit eure Kohlrabi-Pflanzen optimal wachsen, ist eine gute Pflege wichtig.
* Gießen: Kohlrabi braucht regelmäßig Wasser, besonders während trockener Perioden. Achtet darauf, dass der Boden immer leicht feucht ist.
* Düngen: Düngt die Pflanzen regelmäßig mit einem organischen Gemüsedünger. Ich verwende gerne Brennnesseljauche oder Komposttee.
* Unkrautbekämpfung: Haltet das Beet unkrautfrei, um die Konkurrenz um Nährstoffe und Wasser zu minimieren.
* Schutz vor Schädlingen: Kohlrabi kann von verschiedenen Schädlingen befallen werden, wie z.B. Kohlfliegen, Erdflöhen oder Raupen. Kontrolliert die Pflanzen regelmäßig und greift bei Bedarf mit geeigneten Maßnahmen ein. Ich verwende gerne Netze, um die Pflanzen vor Schädlingen zu schützen.
* Häufeln: Häufelt die Pflanzen regelmäßig an, um die Stabilität zu erhöhen und die Knollenbildung zu fördern.
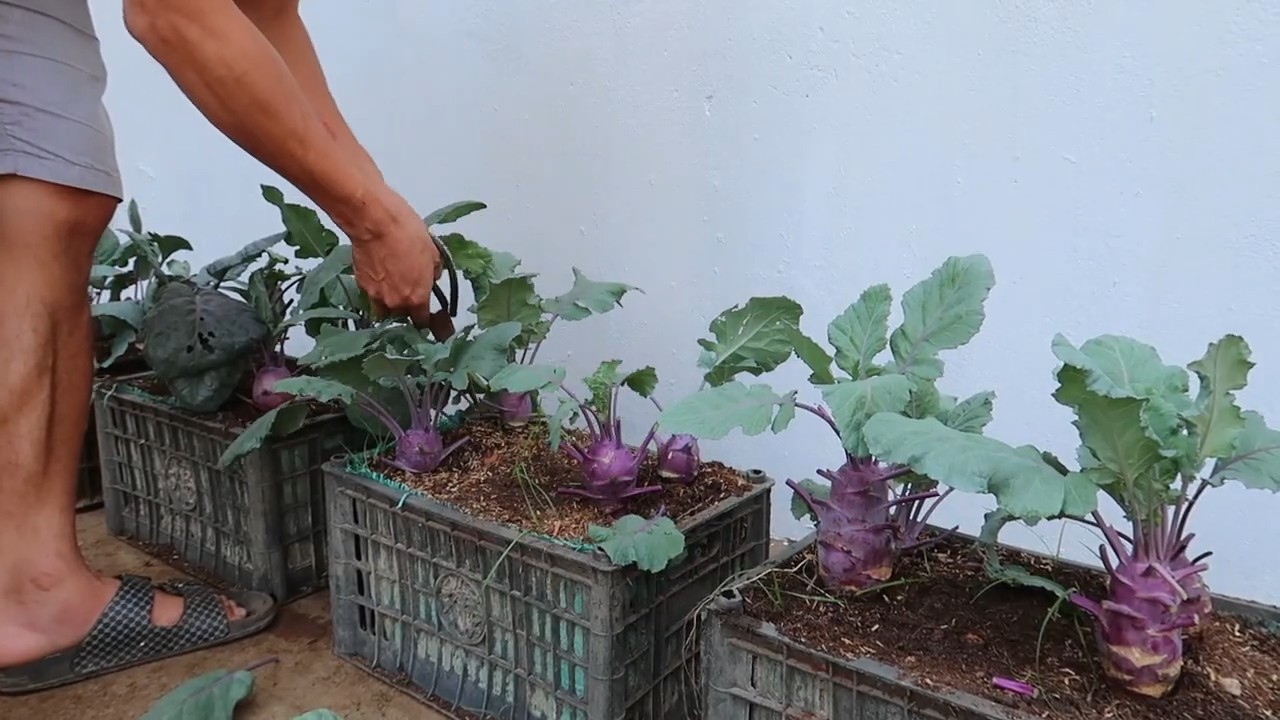
Die Ernte
Der Zeitpunkt der Ernte ist entscheidend für den Geschmack.
* Zeitpunkt: Erntet den Kohlrabi, wenn die Knollen etwa die Größe eines Tennisballs haben. Zu große Knollen können holzig werden.
* Ernte: Schneidet die Knolle knapp über dem Boden ab.
* Lagerung: Kohlrabi kann im Kühlschrank einige Tage gelagert werden.
Häufige Probleme und Lösungen
Auch beim Kohlrabi-Anbau können Probleme auftreten. Hier sind einige der häufigsten und meine Lösungen:
* Kohlfliege: Die Larven der Kohlfliege fressen an den Wurzeln und können die Pflanzen zum Absterben bringen.
* Lösung: Schützt die Pflanzen mit Netzen oder verwendet Nematoden zur Bekämpfung der Larven.
* Erdflöhe: Erdflöhe fressen kleine Löcher in die Blätter.
* Lösung: Haltet den Boden feucht und verwendet Netze oder Insektizide.
* Raupen: Raupen fressen an den Blättern und können die Pflanzen stark schädigen.
* Lösung: Sammelt die Raupen ab oder verwendet Bacillus thuringiensis (Bt) zur Bekämpfung.
* Platzen der Knollen: Bei unregelmäßiger Wasserversorgung können die Knollen platzen.
* Lösung: Achtet auf eine gleichmäßige Wasserversorgung.
* Holzige Knollen: Zu spät geerntete Knollen können holzig werden.
* Lösung: Erntet den Kohlrabi rechtzeitig.
Meine Geheimtipps für eine reiche Ernte
Hier sind noch ein paar meiner persönlichen Geheimtipps, die mir geholfen haben, eine reiche Kohlrabi-Ernte zu erzielen:
* Fruchtfolge beachten: Baut Kohlrabi nicht jedes Jahr am selben Standort an. Wechselt die Kulturen, um Krankheiten und Schädlingen vorzubeugen.
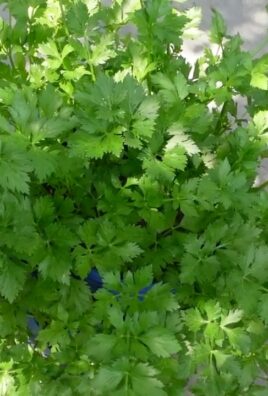
* Mischkultur: Pflanzt Kohlrabi in Mischkultur mit anderen Gemüsesorten, wie z.B. Salat, Radieschen oder Ringelblumen. Das kann helfen, Schädlinge abzuhalten und den Boden zu verbessern.
* Mulchen: Mulcht das Beet mit Stroh oder Rasenschnitt, um den Boden feucht zu halten und Unkraut zu unterdrücken.
* Regelmäßig hacken: Lockert den Boden regelmäßig auf, um die Belüftung zu verbessern und die Wasseraufnahme zu fördern.
* Beobachten: Beobachtet eure Pflanzen regelmäßig und achtet auf Anzeichen von Krankheiten oder Schädlingen. Je früher ihr handelt, desto besser.
Kohlrabi in der Küche
Lila Kohlrabi ist unglaublich vielseitig in der Küche. Hier sind ein paar meiner Lieblingsrezepte:
* Roh: Schälen und in Stifte schneiden, als Snack oder im Salat.
* Gekocht: Als Beilage, in Suppen oder Eintöpfen.
* Gefüllt: A
Conclusion
So, there you have it! Unlocking the secret to successfully growing purple kohlrabi isn’t about magic; it’s about understanding its needs and providing the right environment. From selecting the perfect seeds to warding off common pests, every step we’ve covered is designed to maximize your yield and ensure those vibrant, delicious bulbs grace your table.
But why is this DIY trick a must-try? Because it empowers you to take control of your food source, offering fresher, more flavorful kohlrabi than you’ll likely find in any store. Plus, growing your own produce is incredibly rewarding, connecting you to the natural world and providing a sense of accomplishment that’s hard to beat.
Beyond the basics, there’s plenty of room for experimentation. Consider companion planting with herbs like dill or chamomile to deter pests and attract beneficial insects. You could also try succession planting, sowing seeds every few weeks to ensure a continuous harvest throughout the growing season. For those in warmer climates, exploring heat-tolerant varieties of purple kohlrabi can extend your growing window. And if you’re feeling adventurous, why not try pickling your kohlrabi for a tangy, crunchy treat that will last for months?
The key takeaway here is that growing purple kohlrabi is an achievable goal for any gardener, regardless of experience level. With a little planning, attention to detail, and a willingness to learn, you can enjoy a bountiful harvest of this unique and nutritious vegetable.
We wholeheartedly encourage you to give this DIY trick a try. Don’t be afraid to get your hands dirty, experiment with different techniques, and adapt the process to suit your specific growing conditions. And most importantly, share your experience with us! We’d love to hear about your successes, challenges, and any unique tips you discover along the way. Post photos of your purple kohlrabi harvest, share your favorite recipes, and let’s build a community of passionate kohlrabi growers. Your insights could inspire others to embark on their own gardening journey and discover the joy of growing their own food. Remember, the best way to learn is by doing, so grab your seeds, prepare your soil, and get ready to experience the satisfaction of harvesting your very own homegrown purple kohlrabi. Happy gardening!
Frequently Asked Questions (FAQ)
What exactly is purple kohlrabi, and why should I grow it?
Purple kohlrabi is a member of the Brassica family, related to cabbage, broccoli, and kale. It’s characterized by its bulbous stem, which grows above ground, and its vibrant purple skin. The flesh inside is typically pale green or white and has a mild, slightly sweet flavor, often compared to a turnip or radish but much milder.
You should grow it because it’s a nutritional powerhouse, packed with vitamins C and B6, potassium, and fiber. It’s also incredibly versatile in the kitchen, perfect for eating raw in salads, roasting, stir-frying, or even pickling. Plus, the purple variety adds a beautiful splash of color to your garden and your plate. Growing your own ensures you get the freshest, most flavorful kohlrabi possible, free from pesticides and other harmful chemicals.
How much sunlight does purple kohlrabi need?
Purple kohlrabi thrives in full sun, meaning it needs at least 6 hours of direct sunlight per day. However, in hotter climates, some afternoon shade can be beneficial to prevent the bulbs from bolting (going to seed prematurely). If you’re growing kohlrabi indoors under grow lights, ensure the lights are positioned close enough to the plants and provide sufficient intensity to mimic natural sunlight. Insufficient sunlight can result in leggy growth and smaller bulbs.
What kind of soil is best for growing purple kohlrabi?
Kohlrabi prefers well-drained, fertile soil that is rich in organic matter. The ideal soil pH is between 6.0 and 7.5. Before planting, amend your soil with compost or well-rotted manure to improve its fertility and drainage. Avoid heavy clay soils, as they can become waterlogged and hinder bulb development. If you have clay soil, consider growing kohlrabi in raised beds or containers with a well-draining potting mix.
How often should I water my purple kohlrabi plants?
Consistent watering is crucial for growing healthy purple kohlrabi. Keep the soil consistently moist, but not waterlogged. Water deeply whenever the top inch of soil feels dry to the touch. During hot, dry weather, you may need to water more frequently. Mulching around the plants can help retain moisture in the soil and reduce the need for frequent watering. Avoid overhead watering, as it can increase the risk of fungal diseases.
What are some common pests and diseases that affect purple kohlrabi, and how can I prevent them?
Common pests that attack purple kohlrabi include cabbage worms, aphids, flea beetles, and root maggots. To prevent these pests, consider using row covers to protect your plants, handpicking pests off the plants, and introducing beneficial insects like ladybugs and lacewings. Crop rotation can also help prevent pest infestations.
Common diseases include clubroot, black rot, and downy mildew. To prevent these diseases, ensure good air circulation around your plants, avoid overhead watering, and practice crop rotation. If you notice signs of disease, remove affected leaves immediately and treat the plants with an appropriate fungicide.
When is the best time to harvest purple kohlrabi?
Purple kohlrabi is typically ready to harvest 50-60 days after planting. The ideal size for harvesting is when the bulbs are about 2-3 inches in diameter. Larger bulbs can become tough and woody. To harvest, simply cut the bulb from the stem just above the soil line. You can also harvest the leaves, which are edible and can be used like kale or collard greens.
Can I grow purple kohlrabi in containers?
Yes, purple kohlrabi can be successfully grown in containers. Choose a container that is at least 12 inches deep and wide to allow enough room for the bulb to develop. Use a well-draining potting mix and ensure the container has drainage holes. Water regularly and fertilize every few weeks with a balanced fertilizer. Container-grown kohlrabi may need more frequent watering than those grown in the ground.
What are some creative ways to use purple kohlrabi in cooking?
Purple kohlrabi is incredibly versatile in the kitchen. You can eat it raw in salads, thinly sliced or grated. It’s also delicious roasted, stir-fried, or added to soups and stews. The leaves can be cooked like kale or collard greens. Try pickling kohlrabi for a tangy, crunchy snack or side dish. You can also use it to make kohlrabi fries or mash it like potatoes. The possibilities are endless!
How do I store purple kohlrabi after harvesting?
After harvesting, remove the leaves from the bulb and store them separately. The bulbs can be stored in the refrigerator for several weeks. Wrap them in a damp paper towel and place them in a plastic bag to prevent them from drying out. The leaves can be stored in the refrigerator for a few days, wrapped in a damp paper towel.
What if my purple kohlrabi bolts (goes to seed prematurely)?
Bolting can occur when kohlrabi plants are exposed to stress, such as extreme temperatures or inconsistent watering. Once a plant bolts, the bulb becomes tough and bitter. To prevent bolting, choose bolt-resistant varieties, provide consistent watering, and protect plants from extreme temperatures. If your kohlrabi bolts, you can still harvest the leaves, which may still be edible.

Leave a Comment