
Growing Purple Bush Beans might sound like something only seasoned gardeners can achieve, but trust me, it’s easier than you think! Have you ever dreamt of strolling through your own backyard, plucking vibrant, jewel-toned beans straight from the vine? Imagine the delight of adding a splash of color and nutrition to your meals, all thanks to your own green thumb. This isn’t just about growing vegetables; it’s about creating a little edible art in your garden.
Beans, in general, have a rich history, dating back thousands of years. They’ve been a staple food in cultures around the world, providing essential protein and nutrients. But purple bush beans? They add a modern twist to this ancient tradition. They are not only visually appealing but also packed with antioxidants, making them a healthy and delicious addition to your diet.
So, why should you try this DIY gardening project? Well, for starters, growing purple bush beans is incredibly rewarding. It’s a fantastic way to connect with nature, reduce your grocery bill, and enjoy fresh, organic produce. Plus, these beans are relatively low-maintenance, making them perfect for beginner gardeners. I’m going to share some simple tricks and hacks that will help you cultivate a thriving crop of purple bush beans, even if you’ve never grown anything before. Get ready to impress your friends and family with your colorful and bountiful harvest!

Growing Purple Bush Beans: A DIY Guide to a Vibrant Harvest
Okay, so you want to grow purple bush beans? Awesome choice! They’re not only delicious but also add a beautiful pop of color to your garden. Plus, they’re relatively easy to grow, making them perfect for beginner gardeners. I’m going to walk you through everything you need to know, from prepping the soil to harvesting your bountiful crop. Let’s get started!
Choosing the Right Variety
First things first, let’s talk about varieties. While we’re focusing on purple bush beans, there are a few different types you can choose from. Here are a couple of my favorites:
* Royal Burgundy: This is a classic choice. The beans are a deep, vibrant purple and turn green when cooked. They’re known for their excellent flavor and high yields.
* Purple Queen: Another great option, Purple Queen beans are slightly longer and more slender than Royal Burgundy. They also have a lovely purple hue and a sweet, mild flavor.
Preparing Your Garden Bed
Bush beans need plenty of sunshine and well-drained soil. Here’s how to get your garden bed ready:
* Sunlight: Choose a spot in your garden that gets at least 6-8 hours of direct sunlight per day. More is always better!
* Soil: Bush beans prefer well-drained soil that’s rich in organic matter. If your soil is heavy clay or sandy, you’ll need to amend it.
* Soil Testing: Ideally, you should test your soil’s pH. Bush beans thrive in soil with a pH between 6.0 and 7.0. You can buy a soil testing kit at most garden centers.
* Amending the Soil:
* Clay Soil: Add plenty of compost, aged manure, or other organic matter to improve drainage and aeration.
* Sandy Soil: Add compost, peat moss, or other organic matter to help retain moisture and nutrients.
* Fertilizing: Bush beans don’t need a lot of fertilizer, but a little boost can help. Before planting, work in a balanced fertilizer (like 10-10-10) according to the package directions. Alternatively, you can use a fertilizer specifically formulated for beans and legumes.
Planting Your Purple Bush Beans
Now for the fun part – planting! Here’s a step-by-step guide:
1. Timing is Key: Bush beans are warm-season crops, so you need to wait until the danger of frost has passed before planting. The soil temperature should be at least 60°F (16°C). Check your local weather forecast and planting guides to determine the best time to plant in your area.
2. Direct Sowing: Bush beans are best direct-sown, meaning you plant the seeds directly into the garden bed. They don’t transplant well.
3. Spacing: Sow the seeds about 1 inch deep and 2-3 inches apart in rows. Space the rows about 18-24 inches apart.
4. Watering: After planting, water the soil gently but thoroughly. Keep the soil consistently moist until the seeds germinate.
5. Germination: Bush bean seeds typically germinate in 5-10 days, depending on the soil temperature and moisture levels.
Caring for Your Purple Bush Beans
Once your beans have sprouted, it’s important to provide them with proper care to ensure a healthy and productive harvest.
* Watering: Water your bean plants regularly, especially during dry spells. Aim to keep the soil consistently moist, but avoid overwatering, which can lead to root rot. Water deeply and less frequently, rather than shallowly and often.
* Weeding: Keep your garden bed free of weeds, which can compete with your bean plants for nutrients and water. Hand-pull weeds regularly or use a hoe to cultivate the soil around the plants.
* Mulching: Apply a layer of mulch around your bean plants to help retain moisture, suppress weeds, and regulate soil temperature. Straw, shredded leaves, or wood chips are all good options.
* Fertilizing (Side-dressing): About 3-4 weeks after planting, you can side-dress your bean plants with a nitrogen-rich fertilizer to encourage growth. Sprinkle the fertilizer along the rows of plants and gently work it into the soil. Water thoroughly after fertilizing.
* Pest Control: Keep an eye out for common bean pests, such as aphids, bean beetles, and spider mites.
* Aphids: These tiny insects suck the sap from plants, causing them to weaken and distort. You can control aphids by spraying them with a strong stream of water, insecticidal soap, or neem oil.
* Bean Beetles: These beetles can defoliate bean plants, causing significant damage. Hand-pick the beetles and their larvae from the plants or use an insecticide specifically labeled for bean beetles.
* Spider Mites: These tiny pests thrive in hot, dry conditions and can cause leaves to become stippled and yellow. Increase humidity around the plants by misting them with water or using a humidifier. You can also use insecticidal soap or neem oil to control spider mites.
* Disease Prevention: Bush beans are susceptible to several fungal diseases, such as powdery mildew and bean rust.
* Powdery Mildew: This fungal disease causes a white, powdery coating to form on the leaves. Improve air circulation around the plants by spacing them properly and pruning away any crowded foliage. You can also use a fungicide specifically labeled for powdery mildew.
* Bean Rust: This fungal disease causes small, reddish-brown pustules to form on the leaves. Remove and destroy any infected leaves. You can also use a fungicide specifically labeled for bean rust.
Harvesting Your Purple Bush Beans
The moment you’ve been waiting for! Harvesting your purple bush beans is a rewarding experience.
1. Timing: Bush beans are typically ready to harvest about 50-60 days after planting. The pods should be firm, plump, and about 4-6 inches long.
2. Harvesting Technique: Gently snap the bean pods off the plant, being careful not to damage the stems or leaves. Harvest regularly, every few days, to encourage continued production.
3. Color Change: Remember that Royal Burgundy beans will turn green when cooked. Don’t be alarmed! This is perfectly normal.
4. Overripe Beans: Avoid letting the beans become overripe, as they will become tough and stringy. If you miss a few beans and they become too mature, you can still use them as dried beans. Simply shell the beans and dry them thoroughly before storing them in an airtight container.
Extending Your Harvest
Want to keep those purple beans coming? Here are a few tips for extending your harvest:
* Succession Planting: Plant a new batch of bean seeds every 2-3 weeks to ensure a continuous harvest throughout the growing season.
* Deadheading: Remove any spent flowers or pods to encourage the plant to produce more beans.
* Proper Watering and Fertilizing: Continue to water and fertilize your bean plants regularly to keep them healthy and productive.
Storing Your Purple Bush Beans
So, you’ve got a mountain of purple bush beans. What now? Here are a few ways to store them:
* Refrigerating: Freshly harvested bush beans can be stored in the refrigerator for up to a week. Place them in a plastic bag or container and store them in the crisper drawer.
* Freezing: Freezing is a great way to preserve your bean harvest for longer. Blanch the beans in boiling water for 2-3 minutes, then plunge them into ice water to stop the cooking process. Drain the beans thoroughly and freeze them in a single layer on a baking sheet. Once frozen, transfer them to a freezer bag or container.
* Canning: You can also can your bush beans using a pressure canner. Follow a tested canning recipe to ensure that the beans are properly processed and safe to eat.
Troubleshooting
Even with the best care, you might encounter a few problems along the way. Here are some common issues and how to address them:
* Poor Germination: If your bean seeds aren’t germinating, it could be due to several factors, such as cold soil, poor-quality seeds, or overwatering. Make sure the soil temperature is at least 60°F (16°C) before planting. Use fresh, high-quality seeds. Avoid overwatering the soil, which can cause the seeds to rot.
* Yellowing Leaves: Yellowing leaves can be a sign of nutrient deficiency, overwatering, or disease. Check the soil pH and nutrient levels. Make sure the soil is well-drained and avoid overwatering. Inspect the plants for signs of disease and treat accordingly.
* Lack of Bean Production: If your bean plants are growing well but not producing beans, it could be due to lack
Conclusion
So, there you have it! Growing purple bush beans isn’t just about adding a vibrant splash of color to your garden; it’s about experiencing the joy of cultivating your own food, enjoying superior flavor, and reaping the nutritional benefits of these unique legumes. We’ve walked you through the process, from selecting the right seeds and preparing your soil to nurturing your plants and harvesting your bountiful crop.
But why is this DIY trick a must-try? Because it empowers you to take control of your food source, reduces your reliance on commercially grown produce (often treated with pesticides), and connects you with the natural world in a deeply satisfying way. Plus, let’s be honest, the sheer novelty of serving up a plate of vibrant purple beans is a conversation starter in itself!
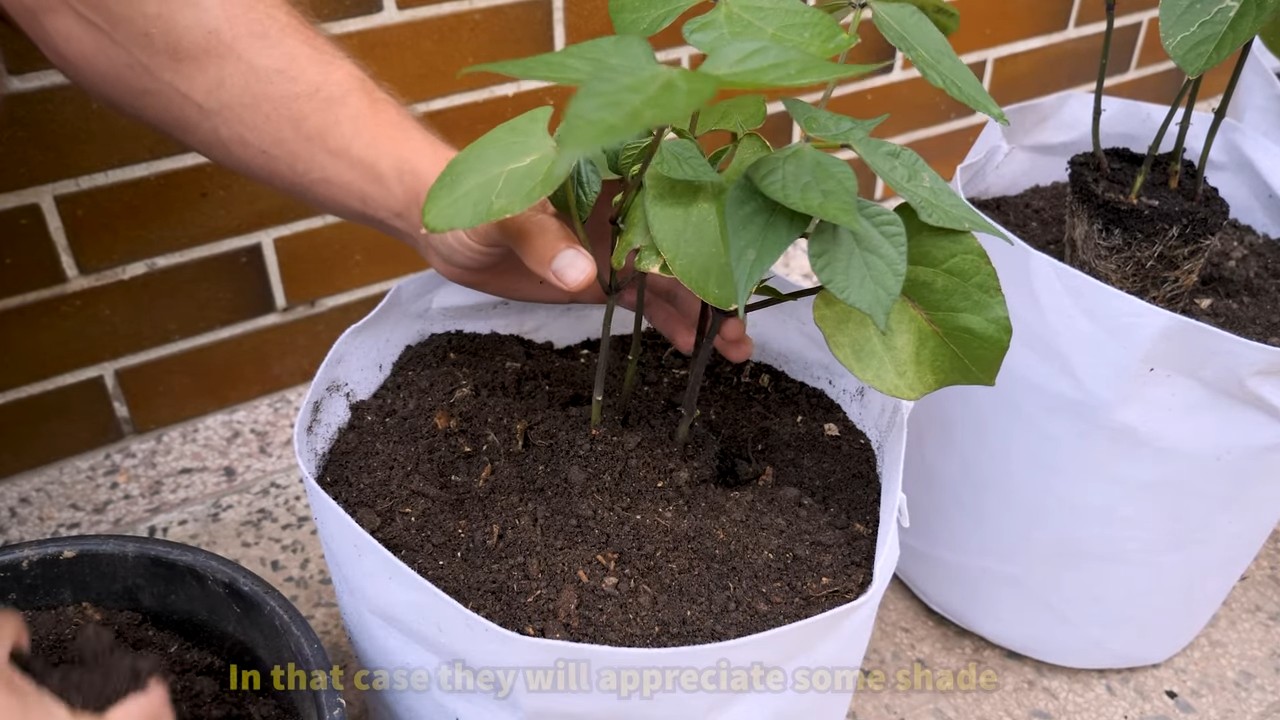
Beyond the basic method, there are plenty of ways to experiment and personalize your purple bush bean growing experience. Consider companion planting. Marigolds, for example, can help deter pests, while herbs like rosemary and thyme can enhance the flavor of your beans. You could also try succession planting, sowing new seeds every few weeks to ensure a continuous harvest throughout the growing season. For those with limited space, growing purple bush beans in containers is a fantastic option. Just be sure to choose a pot that’s at least 12 inches deep and wide to accommodate their root system.
And don’t forget about the variations in bean varieties themselves! While we’ve focused on purple bush beans, there are many different cultivars available, each with its own unique characteristics. Some are more resistant to disease, while others offer a slightly different flavor profile. Experiment with different varieties to find your personal favorite.
Ultimately, the best way to learn is by doing. So, grab some seeds, get your hands dirty, and embark on your own purple bush bean growing adventure. We’re confident that you’ll be amazed by the results.
We encourage you to try this DIY trick and share your experiences with us! Post photos of your purple bush bean harvest on social media using #PurpleBushBeanMagic or leave a comment below sharing your tips and tricks. Let’s create a community of passionate gardeners who are dedicated to growing their own delicious and nutritious food. Happy gardening!
Frequently Asked Questions (FAQ)
What are the benefits of growing purple bush beans compared to other types of beans?
Purple bush beans offer several advantages. First, their vibrant color makes them visually appealing and adds a unique touch to your meals. More importantly, the purple hue indicates a higher concentration of anthocyanins, powerful antioxidants that can help protect your body against cell damage and reduce the risk of chronic diseases. They also tend to be sweeter and more tender than some green bean varieties. Finally, growing your own beans allows you to control the growing process, ensuring that they are free from harmful pesticides and herbicides.
How much sunlight do purple bush beans need?
Purple bush beans thrive in full sun, which means they need at least 6-8 hours of direct sunlight per day. Insufficient sunlight can lead to leggy plants with reduced yields. If you’re growing them indoors or in a partially shaded area, consider using grow lights to supplement the natural sunlight.
What kind of soil is best for growing purple bush beans?
Purple bush beans prefer well-drained soil that is rich in organic matter. Before planting, amend your soil with compost or well-rotted manure to improve its fertility and drainage. The ideal soil pH for purple bush beans is between 6.0 and 7.0. You can test your soil pH using a soil testing kit available at most garden centers.
How often should I water my purple bush beans?
Water your purple bush beans regularly, especially during hot, dry weather. Aim to keep the soil consistently moist but not waterlogged. Overwatering can lead to root rot, while underwatering can stress the plants and reduce their yield. A good rule of thumb is to water deeply whenever the top inch of soil feels dry to the touch. Mulching around the plants can help retain moisture and suppress weeds.
When is the best time to harvest purple bush beans?
Purple bush beans are typically ready to harvest about 50-60 days after planting. The pods should be firm, plump, and about the size of your finger. Harvest them regularly to encourage continued production. Overripe beans will become tough and stringy.
What are some common pests and diseases that affect purple bush beans, and how can I prevent them?
Common pests that can affect purple bush beans include aphids, bean beetles, and spider mites. Diseases include bean rust, powdery mildew, and anthracnose. To prevent these problems, practice good garden hygiene, such as removing weeds and debris that can harbor pests and diseases. Use insecticidal soap or neem oil to control pests, and choose disease-resistant varieties whenever possible. Ensure good air circulation around the plants to prevent fungal diseases. Crop rotation can also help prevent soilborne diseases from building up.
Can I grow purple bush beans in containers?
Yes, purple bush beans can be successfully grown in containers. Choose a pot that is at least 12 inches deep and wide to accommodate their root system. Use a well-draining potting mix and provide regular watering and fertilization. Place the container in a sunny location that receives at least 6-8 hours of direct sunlight per day.
How do I store purple bush beans after harvesting?
Freshly harvested purple bush beans can be stored in the refrigerator for up to a week. To store them for longer, you can blanch them in boiling water for 2-3 minutes, then freeze them in airtight containers or freezer bags. You can also pickle or can purple bush beans for long-term storage.
Are purple bush beans nitrogen fixers?
Yes, like other legumes, purple bush beans are nitrogen fixers. They have a symbiotic relationship with bacteria in the soil that convert atmospheric nitrogen into a form that plants can use. This means that growing purple bush beans can actually improve the fertility of your soil.
What are some creative ways to use purple bush beans in cooking?
Purple bush beans can be used in a variety of dishes. They can be steamed, sautéed, roasted, or grilled. They are a delicious addition to salads, stir-fries, and soups. Their vibrant color makes them a visually appealing ingredient in any dish. Try them in a bean salad with a lemon vinaigrette, or sauté them with garlic and olive oil for a simple and flavorful side dish. You can also use them in a hearty vegetable stew or add them to a colorful stir-fry with other vegetables and tofu. The possibilities are endless!


Leave a Comment