
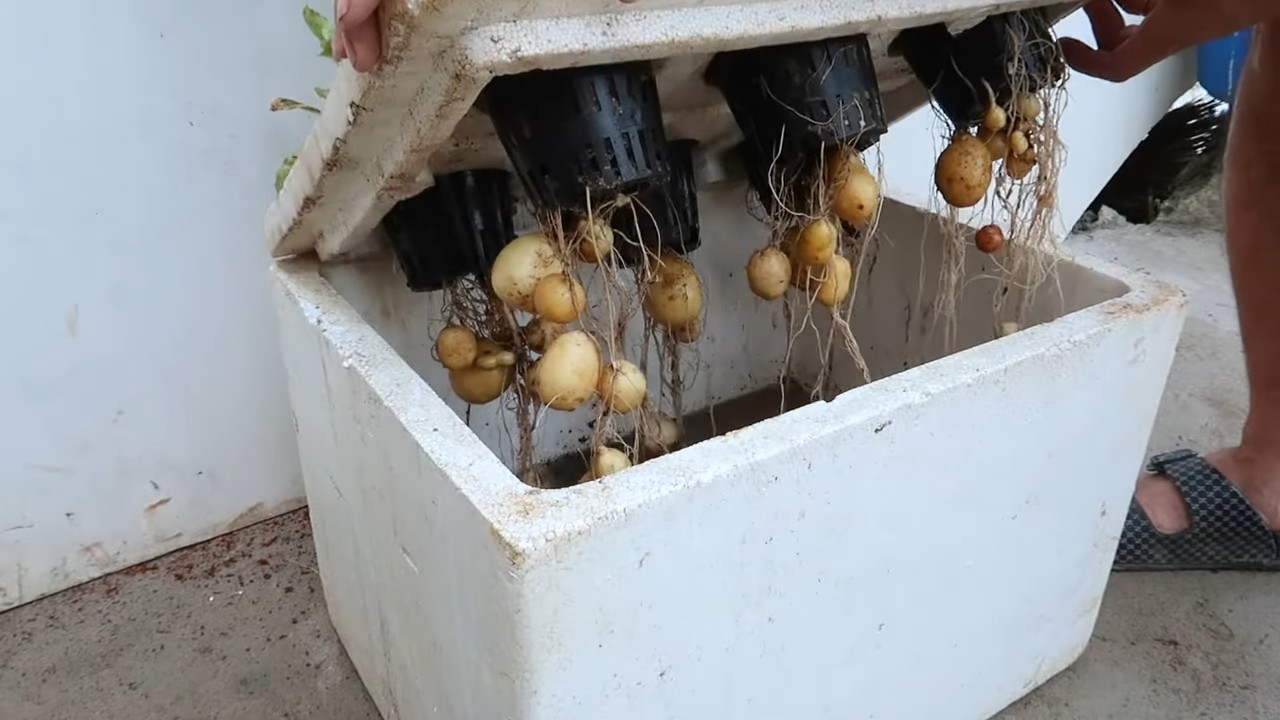
Growing Potatoes in Water might sound like something out of a science fiction novel, but trust me, it’s a surprisingly simple and incredibly rewarding home gardening trick! Forget acres of farmland; we’re talking about bringing the joy of fresh, homegrown potatoes right to your kitchen counter.
For centuries, humans have cultivated potatoes in soil, relying on the earth’s nutrients to nourish these starchy staples. But did you know that the concept of hydroponics, growing plants without soil, has been around for just as long? From the Hanging Gardens of Babylon to ancient Aztec floating gardens, people have been experimenting with alternative growing methods for ages. Now, we’re taking that ingenuity and applying it to something as comforting and familiar as the humble potato.
Why should you try growing potatoes in water? Well, for starters, it’s perfect for those of us with limited space. No garden? No problem! Plus, it’s a fantastic way to recycle those potatoes that have started to sprout in your pantry. Instead of tossing them, you can give them a new lease on life and enjoy a fresh harvest. Imagine the satisfaction of plucking baby potatoes straight from a jar on your windowsill! It’s a fun, educational project for kids and adults alike, and it’s a great way to reduce food waste. So, let’s dive in and discover how to grow your own little potato paradise, one glass of water at a time!
Kartoffeln im Wasser ziehen: Ein DIY-Guide für den urbanen Gärtner
Hallo liebe Gartenfreunde! Habt ihr Lust auf ein spannendes Gartenexperiment? Ich zeige euch heute, wie ihr Kartoffeln ganz einfach im Wasser ziehen könnt. Ja, richtig gelesen! Kein Garten, keine Erde – nur Wasser und ein bisschen Geduld. Das ist nicht nur super platzsparend, sondern auch eine tolle Möglichkeit, den Kreislauf der Natur zu beobachten und vielleicht sogar ein paar kleine Kartoffelchen zu ernten. Los geht’s!
Was du brauchst:
* Eine oder mehrere Bio-Kartoffeln (am besten mit “Augen”, also kleinen Trieben)
* Ein sauberes Glas, eine Vase oder ein anderes Gefäß
* Zahnstocher oder Schaschlikspieße
* Wasser (am besten abgestandenes Leitungswasser oder Regenwasser)
* Ein heller Standort (aber nicht in direkter Sonneneinstrahlung)
Schritt-für-Schritt-Anleitung:
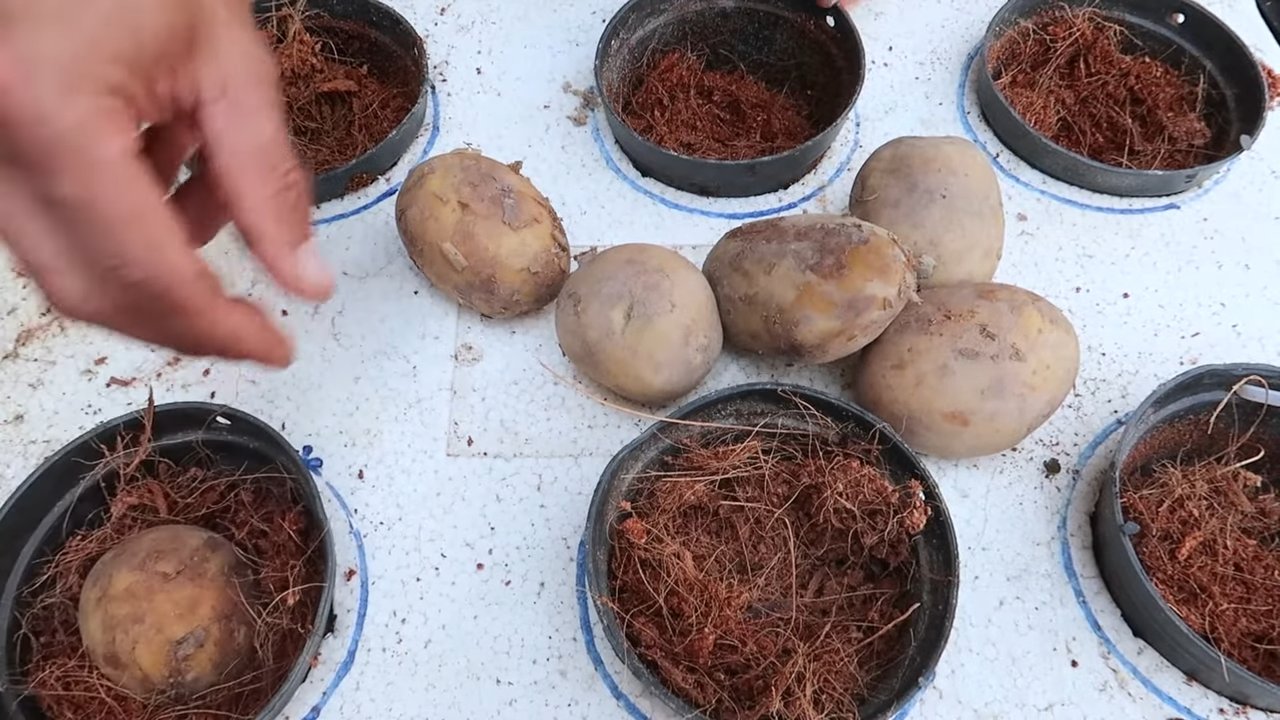
1. Die Kartoffel vorbereiten: Sucht euch eine Kartoffel aus, die schon ein paar “Augen” hat. Das sind die kleinen Knubbel, aus denen später die Triebe wachsen. Wenn eure Kartoffel keine Augen hat, könnt ihr sie ein paar Tage an einem warmen, hellen Ort lagern, um die Keimung anzuregen.
2. Die Zahnstocher anbringen: Jetzt kommt der knifflige Teil. Nehmt eure Zahnstocher oder Schaschlikspieße und steckt sie vorsichtig in die Kartoffel. Sie sollten gleichmäßig verteilt sein und etwa in der Mitte der Kartoffel sitzen. Achtet darauf, die Kartoffel nicht zu beschädigen! Die Zahnstocher dienen dazu, die Kartoffel im Glas zu stabilisieren und zu verhindern, dass sie komplett im Wasser versinkt.
3. Das Glas vorbereiten: Füllt euer Glas oder eure Vase mit Wasser. Achtet darauf, dass das Wasser nicht zu kalt ist. Zimmertemperatur ist ideal.
4. Die Kartoffel ins Wasser setzen: Platziert die Kartoffel nun vorsichtig auf dem Glasrand, sodass die Zahnstocher sie halten. Die untere Hälfte der Kartoffel sollte im Wasser sein, die obere Hälfte bleibt trocken. Es ist wichtig, dass die Augen nicht unter Wasser sind, da sie sonst faulen könnten.
5. Den richtigen Standort finden: Stellt das Glas mit der Kartoffel an einen hellen Ort, aber vermeidet direkte Sonneneinstrahlung. Ein Fensterbrett, das nach Osten oder Westen ausgerichtet ist, ist perfekt.
6. Das Wasser regelmäßig wechseln: Das Wasser sollte alle paar Tage gewechselt werden, um die Bildung von Algen und Bakterien zu verhindern. Achtet darauf, dass die Kartoffel immer genügend Wasser hat, aber nicht komplett untergetaucht ist.
7. Geduld haben: Jetzt heißt es warten! Nach ein paar Tagen oder Wochen (je nach Kartoffelsorte und Umgebungstemperatur) sollten sich die ersten Wurzeln und Triebe zeigen.
Was passiert jetzt? Die Entwicklung beobachten
Sobald die Kartoffel Wurzeln und Triebe bildet, könnt ihr beobachten, wie sie wächst und gedeiht. Die Triebe werden immer länger und entwickeln Blätter. Die Wurzeln werden immer dichter und verzweigter. Es ist faszinierend zu sehen, wie aus einer einfachen Kartoffel eine kleine Pflanze entsteht.
Optionale Schritte für Fortgeschrittene:
* Düngen: Wenn ihr möchtet, könnt ihr das Wasser ab und zu mit einem milden Flüssigdünger für Zimmerpflanzen anreichern. Das fördert das Wachstum der Pflanze. Aber Vorsicht: Nicht überdüngen!
* Umtopfen in Erde: Wenn die Pflanze zu groß für das Glas wird, könnt ihr sie vorsichtig in einen Topf mit Erde umtopfen. Achtet darauf, die Wurzeln nicht zu beschädigen.
* Kartoffeln ernten: Mit etwas Glück und Geduld könnt ihr sogar ein paar kleine Kartoffeln ernten. Diese bilden sich an den Wurzeln der Pflanze. Allerdings ist die Ausbeute in der Regel nicht sehr groß.
Häufige Probleme und Lösungen:
* Die Kartoffel fault: Wenn die Kartoffel fault, liegt das meistens daran, dass sie zu viel Wasser abbekommen hat oder dass das Wasser nicht sauber ist. Wechselt das Wasser regelmäßig und achtet darauf, dass die Augen nicht unter Wasser sind.
* Die Triebe werden gelb: Gelbe Triebe können ein Zeichen für zu wenig Licht oder Nährstoffmangel sein. Stellt die Kartoffel an einen helleren Ort und düngt das Wasser gegebenenfalls.
* Es bilden sich Algen im Wasser: Algenbildung ist ein Zeichen für zu viel Licht oder Nährstoffe im Wasser. Wechselt das Wasser regelmäßig und stellt die Kartoffel an einen etwas schattigeren Ort.
Warum das Ganze? Die Vorteile des Kartoffel-Experiments
* Es ist ein tolles Experiment für Kinder: Kinder können den Kreislauf der Natur hautnah erleben und lernen, wie Pflanzen wachsen.
* Es ist platzsparend: Ihr braucht keinen Garten, um Kartoffeln zu ziehen. Ein Fensterbrett reicht aus.
* Es ist dekorativ: Die Kartoffelpflanze im Glas ist ein echter Hingucker.
* Es ist nachhaltig: Ihr könnt eure eigenen Kartoffeln ziehen und müsst keine kaufen.
* Es macht einfach Spaß!
Noch ein paar Tipps und Tricks:
* Verschiedene Kartoffelsorten ausprobieren: Probiert verschiedene Kartoffelsorten aus, um herauszufinden, welche am besten im Wasser wachsen.
* Mehrere Kartoffeln gleichzeitig ziehen: Zieht mehrere Kartoffeln gleichzeitig, um die Erfolgschancen zu erhöhen.
* Die Kartoffelpflanze fotografieren: Macht regelmäßig Fotos von eurer Kartoffelpflanze, um ihre Entwicklung zu dokumentieren.
* Die Kartoffelpflanze verschenken: Verschenkt eure Kartoffelpflanze an Freunde oder Familie.
Fazit:
Kartoffeln im Wasser zu ziehen ist ein einfaches und spannendes Gartenexperiment, das jeder ausprobieren kann. Es ist eine tolle Möglichkeit, den Kreislauf der Natur zu beobachten, etwas Grün in die Wohnung zu bringen und vielleicht sogar ein paar kleine Kartoffelchen zu ernten. Also, worauf wartet ihr noch? Holt euch eine Kartoffel und legt los! Ich wünsche euch viel Spaß beim Gärtnern!
Conclusion
So, there you have it! Growing potatoes in water is not just a quirky gardening experiment; it’s a genuinely rewarding and surprisingly simple way to cultivate your own fresh produce, even without a traditional garden. We’ve explored the step-by-step process, from selecting the right potatoes to providing the optimal environment for growth. But why should you actually try this?
Firstly, it’s incredibly accessible. Forget about tilling soil, weeding, and dealing with pests that plague traditional potato patches. This method minimizes the mess and maximizes the convenience, making it perfect for apartment dwellers, urban gardeners, or anyone looking for a low-maintenance gardening project.
Secondly, it’s a fantastic educational opportunity. Watching the roots sprout and the leafy greens emerge from a humble potato is a captivating experience, especially for children. It’s a tangible lesson in botany and the wonders of nature, right in your own home.
Thirdly, and perhaps most importantly, it’s about fresh, homegrown flavor. While you might not get a massive harvest, the potatoes you do harvest will be bursting with flavor, far superior to anything you’ll find in the supermarket. Imagine the satisfaction of serving a meal featuring potatoes you nurtured from start to finish!
But don’t stop there! Experiment with different varieties of potatoes to see which ones thrive best in your environment. Try adding a diluted liquid fertilizer to the water every few weeks to boost growth. Consider using different containers – clear glass jars allow you to observe the root development, while opaque containers can help prevent algae growth. You can even try growing sweet potatoes in water using a similar method!
Ready to embark on your own aquatic potato adventure? We wholeheartedly encourage you to give this DIY trick a try. It’s a fun, educational, and ultimately delicious way to connect with nature and enjoy the fruits (or rather, tubers) of your labor.
And most importantly, we want to hear about your experiences! Share your photos, tips, and challenges in the comments below. Let’s create a community of water potato growers and learn from each other. What variety did you use? What challenges did you face? What tips do you have for fellow growers? Your insights could be invaluable to someone just starting out. So, grab a potato, a jar, and some water, and get growing! You might be surprised at just how easy and rewarding it is to grow your own potatoes in water.
Frequently Asked Questions (FAQ)
What kind of potatoes work best for growing in water?
Generally, any type of potato can be grown in water, but some varieties tend to be more successful than others. Opt for organic potatoes whenever possible, as they are less likely to have been treated with sprout inhibitors. Russet potatoes, Yukon Gold potatoes, and red potatoes are all popular choices. Smaller potatoes tend to be easier to manage in smaller containers. Experimenting with different varieties is part of the fun! Just remember that the success rate can vary depending on the specific potato and your growing conditions.
How long does it take to grow potatoes in water?
The time it takes to grow potatoes in water can vary depending on factors such as the potato variety, the amount of light it receives, and the temperature. Generally, you can expect to see sprouts within a week or two. It can take several weeks to months for the plant to mature and produce small potatoes. Be patient and provide the plant with the optimal conditions for growth. Remember, this method is more about the experience and the fresh greens than a massive potato harvest.
Do I need to change the water regularly?
Yes, changing the water regularly is crucial for preventing the growth of algae and bacteria, which can harm the potato plant. Change the water every few days, or at least once a week. Use filtered or dechlorinated water to avoid exposing the plant to harmful chemicals. When changing the water, gently rinse the potato to remove any accumulated debris.
How much light do potatoes grown in water need?
Potatoes grown in water need plenty of bright, indirect sunlight. Place the container near a sunny window, but avoid direct sunlight, which can scorch the leaves. If you don’t have access to enough natural light, you can supplement with artificial grow lights. Aim for at least 6-8 hours of light per day.
Can I use tap water?
While you can use tap water, it’s best to let it sit out for 24 hours to allow the chlorine to evaporate. Alternatively, you can use filtered water or dechlorinated water. Chlorine can be harmful to the potato plant and inhibit its growth.
Do I need to add fertilizer?
While not strictly necessary, adding a diluted liquid fertilizer can help boost the growth of your potato plant. Use a balanced fertilizer and dilute it to half strength. Add the fertilizer to the water every few weeks. Be careful not to over-fertilize, as this can damage the plant.
What do I do if the potato starts to rot?
If the potato starts to rot, it’s important to take action immediately to prevent the rot from spreading. Remove the potato from the water and carefully cut away any rotten parts. Rinse the remaining potato and place it in fresh water. If the rot is extensive, it’s best to discard the potato and start with a new one. Ensure that you are changing the water regularly and providing the plant with adequate light and ventilation to prevent future rot.
Can I eat the potatoes that grow in water?
Yes, you can eat the potatoes that grow in water, but they will likely be smaller than potatoes grown in soil. The flavor will also be slightly different, but still delicious. Harvest the potatoes when they are about the size of golf balls. Be sure to wash them thoroughly before eating.
Can I grow potatoes in water indefinitely?
While you can continue to grow potatoes in water for an extended period, the plant will eventually exhaust its resources. To keep the plant healthy and productive, it’s best to harvest the potatoes and start with a new potato. You can also try transplanting the plant to soil, which will provide it with more nutrients and support its continued growth.
What are some common problems when growing potatoes in water?
Some common problems when growing potatoes in water include algae growth, rot, and nutrient deficiencies. Algae growth can be prevented by changing the water regularly and using an opaque container. Rot can be prevented by ensuring that the potato is not submerged in water and by providing adequate ventilation. Nutrient deficiencies can be addressed by adding a diluted liquid fertilizer to the water.
Can I grow potatoes in water without sunlight?
While potatoes need light to grow, they can survive with minimal sunlight if you use artificial grow lights. Place the grow lights close to the plant and provide at least 6-8 hours of light per day. However, natural sunlight is always the best option, so try to provide as much natural light as possible.
Is growing potatoes in water a good way to get a large harvest?
Growing potatoes in water is more of a fun experiment and a way to get fresh greens than a method for producing a large harvest. You’ll likely only get a few small potatoes per plant. If you’re looking for a large potato harvest, you’re better off growing them in soil. However, growing potatoes in water is a great way to enjoy fresh, homegrown potatoes even if you don’t have a garden.
Leave a Comment