
Growing pineapples at home might sound like an exotic dream reserved for tropical climates, but I’m here to tell you it’s totally achievable, even if you’re miles away from Hawaii! Forget those expensive grocery store pineapples; imagine plucking a juicy, sun-ripened pineapple straight from your own backyard (or balcony!).
Pineapples have a rich history, symbolizing hospitality and luxury. In colonial America, displaying a pineapple was a sign of wealth and welcome. While we might not be using them to impress guests in quite the same way today, the joy of nurturing and harvesting your own pineapple is a deeply satisfying experience.
But why should you bother with this DIY project? Well, for starters, store-bought pineapples can be pricey, and often lack the intense flavor of a truly ripe, homegrown fruit. Plus, there’s something incredibly rewarding about transforming a simple pineapple top into a thriving plant. This DIY guide will provide you with all the essential growing pineapples at home tricks and hacks you need to succeed, from preparing the pineapple crown to ensuring proper drainage and sunlight. I’ll walk you through each step, making it easy and fun, even for beginners. So, let’s ditch the store-bought fruit and embark on this exciting gardening adventure together!
Growing Pineapples Yourself: A Tropical Dream for Your Home
Hey everyone! Have you ever wondered what it would be like to grow your own pineapple? I’ve tried it and it’s easier than you think! It does take some patience, but the result is incredibly satisfying—and super delicious! Here, I’ll show you step-by-step how to grow your own pineapple at home.
What you need:
- A ripe pineapple (with a green, healthy crown)
- A sharp knife
- A container with water (a glass or a bowl)
- Toothpicks (optional)
- A pot (approx. 20-25 cm / 8-10 inches in diameter)
- Potting soil or a mixture of potting soil, sand, and perlite
- A sunny location
- Patience!
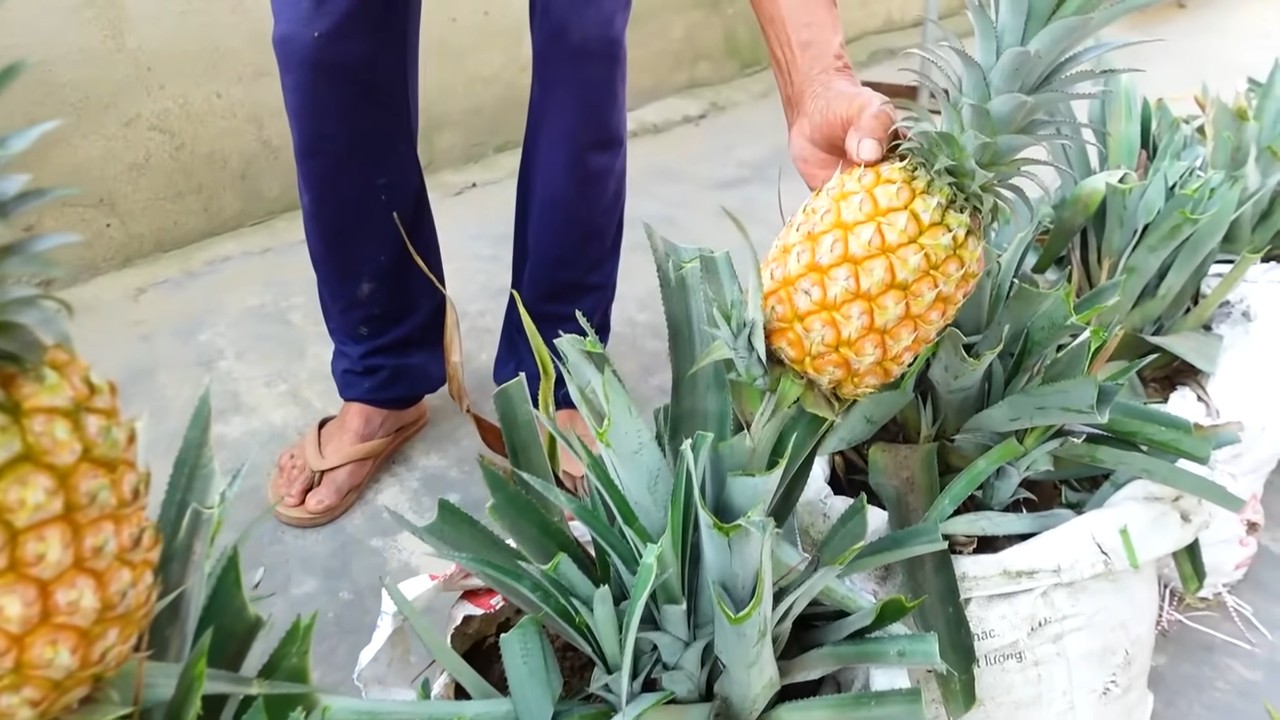
Choosing the Right Pineapple:
Before we get started, it’s important to choose the right pineapple. Make sure the pineapple is ripe, but not overripe. The leaves of the crown should look green and healthy, without any brown or wilted spots. A firm, golden-yellow fruit is a good sign.
Instructions: Preparing the Pineapple Crown
- Cut off the crown: Take your sharp knife and cut off the crown of the pineapple with about 2-3 cm (1 inch) of fruit flesh attached. Make sure to make a clean cut.
- Remove the fruit flesh: Carefully remove the remaining fruit flesh from the crown. This is important because the flesh can otherwise rot and hinder root formation. You can scrape off the flesh with a knife or carefully pull it off.
- Remove the lower leaves: Remove the bottom leaves of the crown (about 2-3 cm / 1 inch worth) to expose the stem. This is where the roots will later grow. Simply pull the leaves off carefully downwards.
- Let it dry (optional): Let the crown dry for 1-2 days in a dry, well-ventilated place. This helps to prevent rot. I have sometimes done this and sometimes not, and both have worked.
Rooting the Pineapple Crown
- Place the crown in water: Fill your container with water. The crown should only be in the water deep enough to cover the exposed stem. The leaves should not be in the water, as they could rot.
- Use toothpicks (optional): If you like, you can use toothpicks to stabilize the crown and prevent it from slipping too deep into the water. Simply insert the toothpicks around the stem and rest them on the rim of the container.
- Place in a bright spot: Put the container with the crown in a bright place, but not in direct sunlight. A windowsill is ideal.
- Change the water: Change the water every 2-3 days to keep it clean and to encourage root formation.
- Be patient: It can take several weeks for roots to form. Be patient and don’t give up! You will see small, white roots growing from the stem.
Planting the Pineapple Crown
Once the roots are about 2-3 cm (1 inch) long, it’s time to plant the crown.
- Prepare the pot: Fill your pot with potting soil or a mixture of potting soil, sand, and perlite. The soil should be well-draining so that water can run off easily.
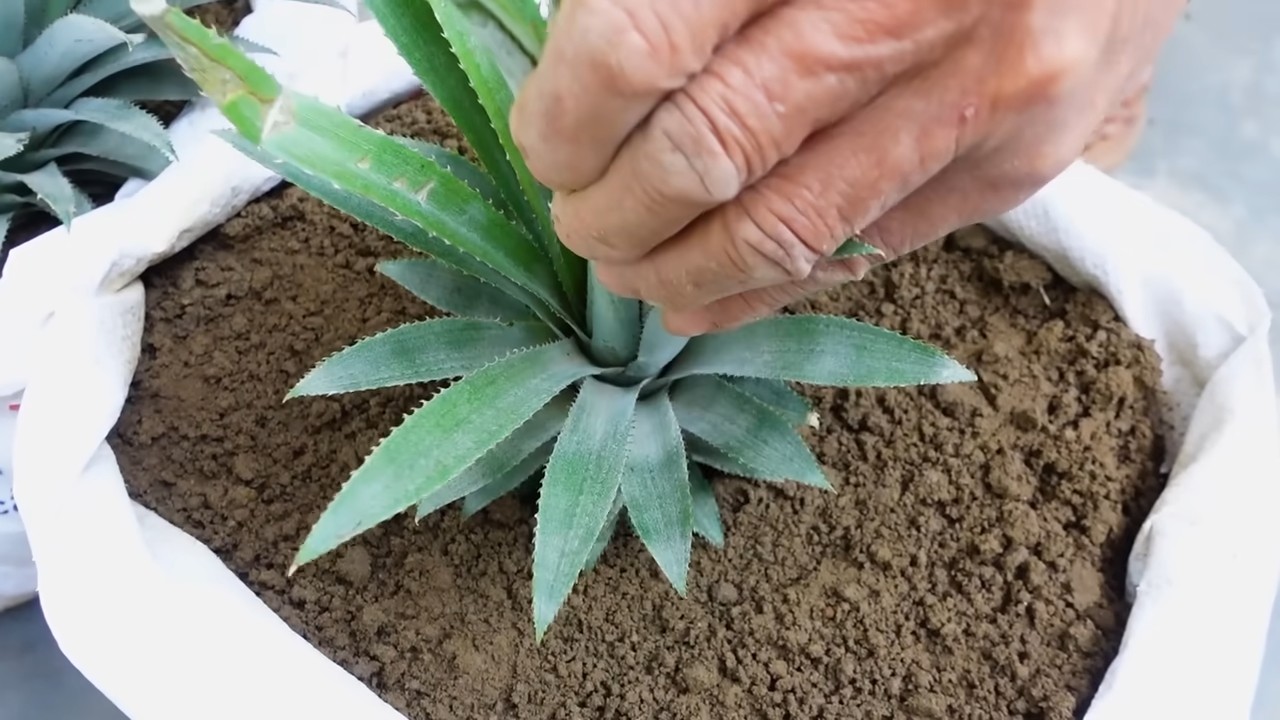
- Dig a hole: Dig a hole in the center of the pot that is large enough to accommodate the roots of the crown.
- Plant the crown: Carefully place the crown in the hole and cover the roots with soil. Press the soil down lightly.
- Water: Water the pineapple crown thoroughly until the soil is moist.
Caring for the Pineapple
- Location: Place the pot in a sunny location. Pineapples love warmth and light. A south-facing window is ideal.
- Watering: Water the pineapple regularly, but avoid waterlogging. The soil should always be slightly moist. Let the soil dry out slightly between waterings.
- Fertilizing: Fertilize the pineapple every 2-3 months with a liquid fertilizer for houseplants. Follow the instructions on the fertilizer packaging.
- Temperature: Pineapples prefer warm temperatures between 20 and 30 degrees Celsius (68-86°F). Protect the plant from frost.
- Humidity: Pineapples like high humidity. You can increase the humidity by regularly spraying the plant with water or by placing the pot on a tray with damp pebbles.
- Repotting: When the pineapple becomes too large for its pot, you can repot it into a larger one.
When does the pineapple bear fruit?
That’s the big question! It can take 2-3 years for your pineapple to bear fruit. Patience is the key! When the plant is mature, you can encourage fruit formation with an ethylene treatment. However, this is not strictly necessary.
Ethylene Treatment (optional)
Ethylene is a plant hormone that can stimulate fruit formation. You can treat the pineapple with ethylene by placing an apple in a plastic bag along with the pineapple plant. The apple releases ethylene. Seal the bag and leave it for a few days. Repeat the process every few weeks.
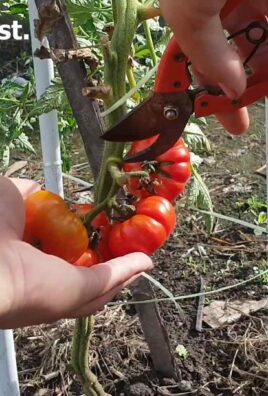
Harvest Time
When the pineapple is ripe, it will change color from green to yellow or orange. It will also have a sweet scent. The harvest time has come when the fruit gives slightly when you press it. Cut the pineapple with a sharp knife.
Additional Tips and Tricks:
- Patience is important: Pineapple cultivation takes time. Don’t give up if it doesn’t work right away.
- The right soil: Use a well-draining soil to avoid waterlogging.
- Sunny location: Pineapples love the sun. Place the plant in the sunniest possible spot.
- Regular watering: Water the pineapple regularly, but avoid waterlogging.
- Fertilizing: Fertilize the pineapple regularly to promote growth.
- Pests: Watch out for pests like spider mites or mealybugs. If necessary, combat them with a suitable pesticide.
- Overwintering: In colder regions, you will need to bring the pineapple indoors for the winter. Place it in a bright, cool location and water it less.
Troubleshooting:
- Brown leaves: Brown leaves can be a sign of too much or too little water. Check the soil moisture and adjust the watering accordingly.
- No root formation: If no roots form after a few weeks, it could be due to too little light or too high humidity. Move the crown to a brighter location and ensure better ventilation.
- Rot: If the crown is rotting, you probably left too much fruit flesh on the crown or placed it too deep in the water. Cut off the rotten parts and repeat the process.
I hope this guide helps you grow your own pineapple. It’s a great feeling to harvest a tropical fruit in your own home! Good luck and have fun gardening! Let me know how it goes for you! I am excited to hear about your experiences.
Conclusion
So, there you have it! Growing pineapples at home isn’t just a fun gardening project; it’s a rewarding experience that brings a touch of the tropics right to your backyard or even your windowsill. Forget the store-bought fruit, often picked before it’s truly ripe and shipped across vast distances. Imagine the unparalleled sweetness and satisfaction of biting into a pineapple you nurtured from a simple crown.
This DIY trick is a must-try for several compelling reasons. First, it’s incredibly cost-effective. Instead of tossing the pineapple crown, you’re essentially getting a free plant! Second, it’s an eco-friendly way to reduce food waste and connect with nature. Third, it’s surprisingly easy. With a little patience and the right conditions, even beginner gardeners can successfully grow their own pineapples.
But the best reason to embark on this pineapple-growing adventure is the sheer joy of watching something grow. From the initial rooting to the eventual emergence of that spiky, delicious fruit, the process is fascinating and deeply satisfying. It’s a tangible reminder of the power of nature and the rewards of perseverance.
Don’t be afraid to experiment with variations! Try different potting mixes to see what works best in your climate. Some gardeners swear by a mix of perlite, peat moss, and vermiculite, while others prefer a more organic blend. You can also explore different pineapple varieties. While the smooth Cayenne is the most common, other varieties like the Sugarloaf or the Red Spanish offer unique flavors and textures. Consider the size of your growing space when choosing a variety, as some can grow quite large.
For those living in colder climates, growing pineapples in containers is an excellent option. This allows you to bring the plant indoors during the winter months, ensuring it receives the warmth and sunlight it needs to thrive. Just be sure to provide adequate drainage and avoid overwatering.
We wholeheartedly encourage you to give this DIY trick a try. It’s a fantastic project for families, a great way to teach children about plant life cycles, and a truly unique conversation starter. Plus, who wouldn’t want to impress their friends with a homegrown pineapple?
Once you’ve successfully grown your own pineapple, we’d love to hear about your experience! Share your tips, tricks, and photos in the comments below. Let’s create a community of pineapple enthusiasts and inspire others to embark on this tropical adventure. Remember, patience is key, and the reward is well worth the wait. Happy growing!
Frequently Asked Questions (FAQ)
How long does it take to grow a pineapple from a crown?
This is one of the most common questions, and the answer is: patience is key! Generally, it takes anywhere from 2 to 3 years for a pineapple plant to mature and produce fruit. The exact timeframe depends on several factors, including the variety of pineapple, the climate, the amount of sunlight the plant receives, and the overall care it receives. Don’t be discouraged if it takes longer than expected. The wait is definitely worth it! Remember to fertilize regularly and provide adequate water, but avoid overwatering, which can lead to root rot.
What kind of soil is best for growing pineapples?
Pineapples thrive in well-draining, slightly acidic soil. A good potting mix for pineapples should be light and airy, allowing for good root aeration. A mixture of equal parts perlite, peat moss, and vermiculite is a popular choice. You can also add some compost or well-rotted manure to provide extra nutrients. Avoid heavy clay soils, as they tend to retain too much water and can lead to root rot. Ensure your pot has drainage holes to prevent waterlogging.
How much sunlight do pineapples need?
Pineapples are sun-loving plants and require at least 6 hours of direct sunlight per day. If you’re growing your pineapple indoors, place it near a south-facing window where it can receive ample sunlight. If you don’t have enough natural light, you can supplement with a grow light. Insufficient sunlight can result in slow growth and reduced fruit production. Rotate the plant regularly to ensure all sides receive equal exposure to sunlight.
How often should I water my pineapple plant?
Water your pineapple plant when the top inch of soil feels dry to the touch. During the growing season (spring and summer), you may need to water more frequently than during the dormant season (fall and winter). Avoid overwatering, as this can lead to root rot. Ensure the pot has good drainage to prevent water from sitting at the bottom. You can also mist the leaves occasionally to increase humidity, especially in dry climates.
What kind of fertilizer should I use for my pineapple plant?
Pineapples are heavy feeders and benefit from regular fertilization. Use a balanced fertilizer with a ratio of 10-10-10 or 14-14-14. Apply the fertilizer according to the package instructions, typically every 2-3 months during the growing season. You can also use a liquid fertilizer diluted to half strength and apply it more frequently. Avoid over-fertilizing, as this can burn the roots. Look for fertilizers specifically formulated for bromeliads, as they are often a good choice for pineapples.
How do I know when my pineapple is ripe?
Determining when a pineapple is ripe can be tricky, but there are a few telltale signs. The pineapple should have a vibrant color, ranging from green to yellow, depending on the variety. The fruit should also have a sweet, fragrant aroma. Gently tug on one of the leaves near the top of the pineapple. If it comes out easily, the pineapple is likely ripe. You can also tap the pineapple; a ripe pineapple will have a dull, solid sound. Don’t wait too long to harvest, as overripe pineapples can become mushy and attract pests.
Can I grow a pineapple indoors?
Yes, you can absolutely grow a pineapple indoors, especially if you live in a colder climate. Choose a pot that is large enough to accommodate the plant’s root system and ensure it has good drainage. Place the pot near a south-facing window where it can receive ample sunlight. Supplement with a grow light if necessary. Maintain a consistent temperature and humidity level. Water regularly, but avoid overwatering. With proper care, you can successfully grow a pineapple indoors and enjoy the fruits of your labor.
What are some common problems when growing pineapples, and how can I fix them?
Some common problems include root rot, mealybugs, and scale. Root rot is caused by overwatering and can be prevented by ensuring good drainage and allowing the soil to dry out between waterings. Mealybugs and scale are sap-sucking insects that can weaken the plant. They can be treated with insecticidal soap or neem oil. Regularly inspect your plant for signs of pests and diseases and take action promptly to prevent them from spreading. Yellowing leaves can indicate nutrient deficiencies, so be sure to fertilize regularly.
My pineapple plant has flowered, but no fruit is developing. What should I do?
Sometimes, pineapple plants may flower but fail to produce fruit due to a lack of pollination or other environmental factors. You can try hand-pollinating the flowers by using a small brush to transfer pollen from one flower to another. You can also try covering the plant with a plastic bag for a few days to increase humidity and encourage fruit development. Ensure the plant is receiving adequate sunlight and nutrients. Patience is key, as it can take several months for the fruit to develop after flowering.
Can I grow a pineapple from a store-bought pineapple?
Yes, you can absolutely grow a pineapple from a store-bought pineapple! This is the basis of the DIY trick we’ve been discussing. Just make sure the pineapple is ripe and healthy. Follow the steps outlined in the article for preparing the crown and planting it. With a little care and patience, you’ll be well on your way to growing your own tropical treat. Remember to choose a pineapple that looks fresh and has healthy-looking leaves.


Leave a Comment