
Growing onions in plastic bottles might sound like something out of a science fiction movie, but trust me, it’s a surprisingly effective and rewarding way to cultivate these flavorful bulbs right in your own home! Are you tired of buying onions from the store, only to have them sprout or go bad before you can use them all? Or perhaps you’re limited on garden space but still dream of harvesting your own fresh produce? Well, you’re in the right place!
Onions have been a staple in cuisines around the world for centuries, dating back to ancient civilizations. From the Egyptians who revered them to the Romans who carried them on their military campaigns, onions have always been valued for their flavor and medicinal properties. Now, you can continue this rich history in your own small way, even without a sprawling garden.
This DIY guide will walk you through the simple steps of growing onions in plastic bottles, transforming discarded containers into mini-gardens. It’s an eco-friendly, space-saving, and budget-friendly solution for anyone who wants to enjoy the taste of homegrown onions. I’m excited to share this clever trick with you, so let’s get started and turn those plastic bottles into a thriving onion patch!
Zwiebeln ziehen in Plastikflaschen: Eine DIY-Anleitung für den kleinen Garten
Hallo liebe Gartenfreunde! Habt ihr auch nur einen kleinen Balkon oder eine winzige Terrasse, aber trotzdem Lust auf frische, selbstgezogene Zwiebeln? Dann habe ich hier genau das Richtige für euch: Zwiebeln ziehen in Plastikflaschen! Das ist nicht nur super platzsparend, sondern auch eine tolle Möglichkeit, Plastikmüll wiederzuverwerten. Ich zeige euch, wie es geht!
Was ihr braucht:
* Plastikflaschen: Am besten eignen sich 1,5- oder 2-Liter-Flaschen. Je größer, desto besser für die Zwiebeln. Achtet darauf, dass sie sauber sind.
* Erde: Normale Blumenerde oder Gartenerde ist perfekt. Ihr könnt auch eine Mischung aus Erde, Kompost und etwas Sand verwenden.
* Zwiebeln: Entweder Steckzwiebeln oder Zwiebeln, die schon ausgetrieben haben. Letztere sind ideal, um sie nicht wegzuwerfen.
* Messer oder Schere: Zum Zuschneiden der Flaschen.
* Bohrer oder Nagel: Für die Drainagelöcher.
* Gießkanne: Zum Bewässern.
* Optional: Kleine Steine oder Tonscherben für die Drainage.
Vorbereitung der Plastikflaschen
Bevor wir mit dem Pflanzen loslegen können, müssen wir die Plastikflaschen vorbereiten. Das ist aber ganz einfach, versprochen!
1. Reinigung: Zuerst solltet ihr die Plastikflaschen gründlich reinigen. Entfernt alle Etiketten und spült sie mit warmem Wasser und etwas Spülmittel aus. Achtet darauf, dass keine Spülmittelreste zurückbleiben.
2. Zuschneiden: Jetzt kommt der spannende Teil: das Zuschneiden der Flaschen. Es gibt verschiedene Möglichkeiten, je nachdem, wie viele Zwiebeln ihr pro Flasche pflanzen möchtet.
* Variante 1: Einzelne Zwiebeln: Schneidet die Flasche etwa 10-15 cm unterhalb des Flaschenhalses ab. Den oberen Teil (mit dem Flaschenhals) könnt ihr später als kleinen Trichter zum Gießen verwenden.
* Variante 2: Mehrere Zwiebeln: Schneidet ein großes Rechteck oder Quadrat aus der Seite der Flasche. Lasst dabei einen Rand von etwa 5-7 cm am Boden stehen. So entsteht eine Art “Balkonkasten” aus der Flasche.
* Variante 3: Turm-System: Hier schneidet ihr mehrere Löcher (ca. 8-10 cm Durchmesser) in die Seiten der Flasche, versetzt übereinander. So könnt ihr die Flasche später mit Erde füllen und in jedes Loch eine Zwiebel setzen.
3. Drainagelöcher: Ganz wichtig: Damit das Wasser gut ablaufen kann und die Zwiebeln nicht faulen, müsst ihr Drainagelöcher in den Boden der Flasche bohren oder mit einem Nagel stechen. 4-5 Löcher sollten reichen.
4. Optional: Drainage-Schicht: Wer auf Nummer sicher gehen möchte, kann eine kleine Schicht aus Steinen oder Tonscherben auf den Boden der Flasche legen, bevor die Erde eingefüllt wird. Das verbessert die Drainage zusätzlich.
Das Pflanzen der Zwiebeln
Jetzt kommt der spaßige Teil: das Pflanzen der Zwiebeln!
1. Erde einfüllen: Füllt die vorbereiteten Flaschen mit Erde. Lasst dabei etwa 2-3 cm Platz bis zum Rand. Die Erde sollte locker und nicht zu fest angedrückt sein.
2. Zwiebeln setzen:
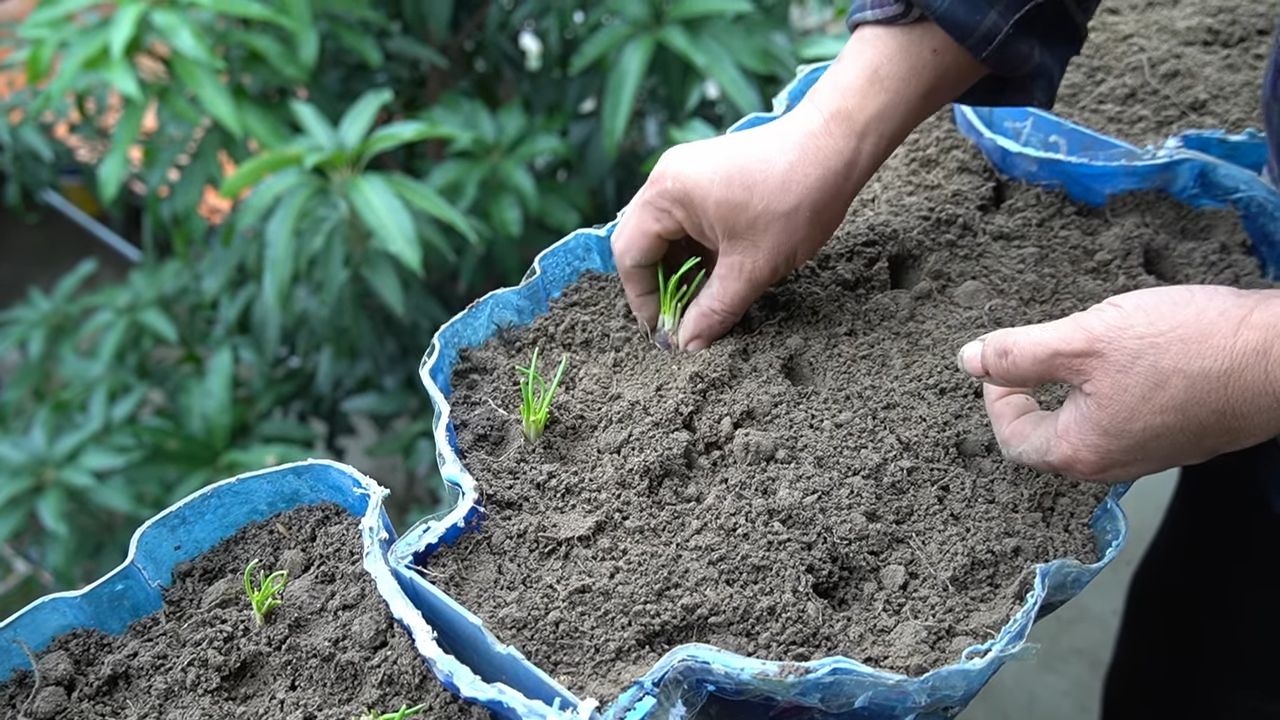
* Steckzwiebeln: Drückt die Steckzwiebeln etwa 2-3 cm tief in die Erde. Achtet darauf, dass die Spitze der Zwiebel nach oben zeigt. Der Abstand zwischen den Zwiebeln sollte etwa 5-7 cm betragen, wenn ihr mehrere in eine Flasche pflanzt.
* Ausgetriebene Zwiebeln: Diese Zwiebeln könnt ihr etwas tiefer in die Erde setzen, sodass nur noch die Spitze des grünen Triebs herausschaut.
3. Angießen: Gießt die Zwiebeln nach dem Pflanzen vorsichtig an. Die Erde sollte gut durchfeuchtet sein, aber nicht im Wasser stehen.
Pflege der Zwiebeln in Plastikflaschen
Damit eure Zwiebeln gut wachsen und gedeihen, ist die richtige Pflege wichtig. Aber keine Sorge, es ist wirklich nicht schwer!
1. Standort: Zwiebeln lieben die Sonne! Stellt eure Plastikflaschen an einen sonnigen Standort, am besten auf dem Balkon, der Terrasse oder im Garten.
2. Bewässerung: Gießt die Zwiebeln regelmäßig, aber nicht zu viel. Die Erde sollte immer leicht feucht sein, aber nicht nass. Achtet darauf, dass das Wasser gut ablaufen kann, damit die Zwiebeln nicht faulen. An heißen Tagen müsst ihr möglicherweise öfter gießen.
3. Düngung: Zwiebeln sind keine Starkzehrer, aber eine gelegentliche Düngung tut ihnen gut. Ihr könnt alle paar Wochen einen Flüssigdünger für Gemüse ins Gießwasser geben. Alternativ könnt ihr auch organischen Dünger wie Kompost oder Hornspäne verwenden.
4. Schutz vor Schädlingen: Zwiebeln können von verschiedenen Schädlingen befallen werden, wie z.B. Zwiebelfliegen oder Lauchmotten. Kontrolliert eure Pflanzen regelmäßig und entfernt befallene Blätter oder Zwiebeln. Bei starkem Befall könnt ihr biologische Schädlingsbekämpfungsmittel einsetzen.
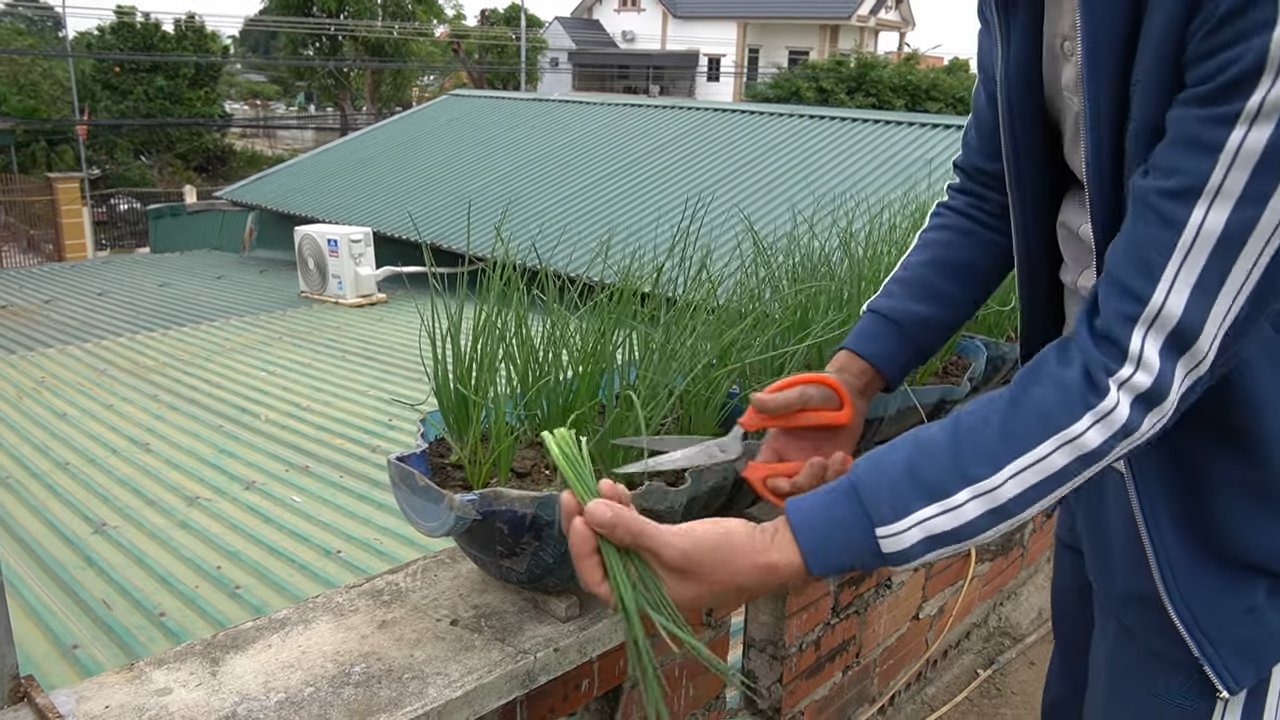
5. Ernte: Je nach Sorte und Standort sind die Zwiebeln nach etwa 3-4 Monaten erntereif. Ihr erkennt es daran, dass das Laub gelb wird und umknickt. Zieht die Zwiebeln vorsichtig aus der Erde und lasst sie an einem trockenen, luftigen Ort trocknen, bevor ihr sie lagert.
Spezielle Tipps für das Turm-System
Das Turm-System ist besonders platzsparend und sieht auch noch toll aus! Hier noch ein paar zusätzliche Tipps:
1. Stabilität: Damit der Turm stabil steht, solltet ihr die unterste Flasche mit etwas Kies oder Steinen beschweren.
2. Befüllung: Füllt die Flasche schichtweise mit Erde und setzt in jedes Loch eine Zwiebel. Achtet darauf, dass die Erde gut verteilt ist und die Zwiebeln fest sitzen.
3. Bewässerung: Gießt den Turm von oben, sodass das Wasser durch alle Schichten sickert.
Weitere Ideen und Variationen
* Verschiedene Zwiebelsorten: Probiert verschiedene Zwiebelsorten aus, wie z.B. rote Zwiebeln, Schalotten oder Knoblauch.
* Kräuter dazu: Pflanzt zwischen die Zwiebeln noch ein paar Kräuter wie Schnittlauch oder Petersilie. Das sieht nicht nur schön aus, sondern hält auch Schädlinge fern.
* Beschriftung: Beschriftet die Flaschen mit den jeweiligen Zwiebelsorten, damit ihr den Überblick behaltet.
* Upcycling: Verwendet auch andere Plastikbehälter wie Joghurtbecher oder Eisdosen für die Anzucht von Zwiebeln.
Ich hoffe, diese Anleitung hat euch gefallen und inspiriert, eure eigenen Zwiebeln in Plastikflaschen zu ziehen. Es ist wirklich eine einfache und lohnende Möglichkeit, frisches Gemüse anzubauen und gleichzeitig etwas für die Umwelt zu tun. Viel Spaß beim Gärtnern!
Conclusion
So, there you have it! Growing onions in plastic bottles isn’t just a quirky gardening experiment; it’s a genuinely effective way to maximize your space, recycle materials, and enjoy a continuous supply of fresh onions right at your fingertips. We’ve walked you through the process, from preparing your bottles and soil to planting and caring for your miniature onion patch.
Why is this DIY trick a must-try? Because it addresses several common gardening challenges. Limited space? No problem! Plastic bottles are incredibly space-efficient, allowing you to grow onions on balconies, patios, or even windowsills. Concerned about waste? This method gives those discarded plastic bottles a new lease on life, turning them into productive little gardens. And let’s not forget the sheer satisfaction of harvesting your own homegrown onions, knowing you nurtured them from tiny seedlings to flavorful additions to your favorite dishes.
But the beauty of this method lies in its adaptability. Feel free to experiment with different onion varieties. Shallots, scallions, or even smaller bulb onions can thrive in these bottle gardens. You can also adjust the soil mix to suit your specific climate and onion type. Consider adding some slow-release fertilizer to the soil for an extra nutrient boost, or interplant with companion herbs like basil or chamomile to deter pests and enhance flavor.
For a fun variation, try painting your plastic bottles with bright colors or decorative patterns. This not only adds a touch of personality to your garden but can also help reflect sunlight and keep the soil cooler in warmer climates. You could even create a vertical onion garden by stacking the bottles on top of each other, creating a visually stunning and highly productive display.
The key to success with this method is consistent care. Regular watering is essential, especially during hot weather. Make sure the soil remains moist but not waterlogged. Monitor your onions for any signs of pests or diseases and take appropriate action promptly. And don’t forget to rotate your bottles periodically to ensure even sunlight exposure.
We are confident that once you try growing onions in plastic bottles, you’ll be amazed by the results. It’s a rewarding, sustainable, and incredibly fun way to connect with nature and enjoy the fruits (or rather, vegetables) of your labor.
So, grab some plastic bottles, gather your supplies, and get ready to embark on your own onion-growing adventure! We encourage you to share your experiences with us. Post photos of your bottle gardens, share your tips and tricks, and let us know how this method has worked for you. Together, we can create a community of resourceful gardeners who are passionate about growing their own food in innovative and sustainable ways. Happy gardening!
Frequently Asked Questions (FAQ)
What type of plastic bottles are best for growing onions?
Ideally, you should use sturdy, food-grade plastic bottles. Two-liter soda bottles or larger water bottles work well. Avoid using bottles that have contained harsh chemicals or pesticides, as these could contaminate your soil and onions. Make sure to thoroughly clean the bottles with soap and water before using them. Clear or translucent bottles are preferable as they allow you to monitor the soil moisture levels.
What kind of soil should I use for growing onions in plastic bottles?
A well-draining potting mix is essential. You can use a commercially available potting mix or create your own by combining equal parts of garden soil, compost, and perlite or vermiculite. The compost provides nutrients, while the perlite or vermiculite improves drainage and aeration. Avoid using heavy clay soil, as it can become waterlogged and suffocate the onion roots.
How often should I water my onions grown in plastic bottles?
Watering frequency depends on the climate, the type of soil, and the size of the bottle. Generally, you should water your onions whenever the top inch of soil feels dry to the touch. Water thoroughly until excess water drains out of the drainage holes. Avoid overwatering, as this can lead to root rot. During hot weather, you may need to water more frequently.
How much sunlight do onions need when grown in plastic bottles?
Onions need at least 6-8 hours of direct sunlight per day to thrive. Place your bottle gardens in a sunny location, such as a south-facing window, balcony, or patio. If you don’t have enough natural sunlight, you can supplement with grow lights. Rotate the bottles regularly to ensure that all sides of the onions receive equal sunlight exposure.
How do I fertilize onions grown in plastic bottles?
Onions are heavy feeders, so regular fertilization is important. You can use a balanced liquid fertilizer diluted to half strength every 2-3 weeks. Alternatively, you can incorporate slow-release fertilizer granules into the soil at planting time. Avoid over-fertilizing, as this can burn the roots. Look for fertilizers specifically formulated for vegetables or onions.
When is the best time to plant onions in plastic bottles?
The best time to plant onions depends on your climate. In colder climates, start your onions indoors 6-8 weeks before the last expected frost. Transplant them into the plastic bottles once the weather warms up. In warmer climates, you can plant onions directly into the bottles in the fall or early winter for a spring harvest.
How do I prevent pests and diseases from affecting my onions?
Regularly inspect your onions for any signs of pests or diseases. Common onion pests include aphids, thrips, and onion maggots. You can control these pests with insecticidal soap or neem oil. Diseases such as onion rot and downy mildew can be prevented by ensuring good air circulation and avoiding overwatering. Remove any infected leaves or plants immediately to prevent the spread of disease. Companion planting with herbs like basil or chamomile can also help deter pests.
How long does it take for onions to mature when grown in plastic bottles?
The time it takes for onions to mature depends on the variety and growing conditions. Generally, it takes about 90-120 days for bulb onions to mature. Scallions and shallots can be harvested earlier, usually within 60-70 days. You can harvest onions when the tops start to fall over and turn yellow.
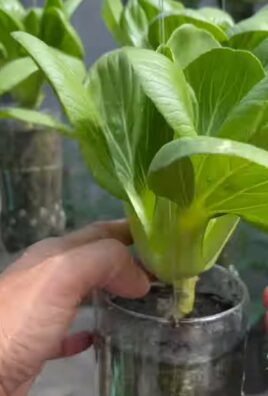
Can I grow other vegetables in plastic bottles besides onions?
Yes, you can grow a variety of other vegetables in plastic bottles, including herbs, lettuce, spinach, radishes, and even tomatoes (smaller varieties). The key is to choose vegetables that have shallow root systems and don’t require a lot of space. Make sure to provide adequate drainage and nutrients for each type of vegetable.
What do I do with the plastic bottles after I harvest the onions?
After harvesting your onions, you can reuse the plastic bottles for another planting season. Simply clean them thoroughly and replenish the soil. Alternatively, you can recycle the bottles or repurpose them for other gardening projects, such as seed starting or composting.
Leave a Comment