
Growing Kale in Containers: Unlock the secrets to a thriving, leafy green garden, even without a sprawling backyard! Have you ever dreamt of snipping fresh, vibrant kale leaves right outside your kitchen door? I know I have! This DIY guide will empower you to cultivate your own personal kale oasis, no matter how limited your space might be.
Kale, a nutritional powerhouse, has a rich history dating back to ancient Greece and Rome, where it was a staple food. Over centuries, it has spread across the globe, becoming a beloved ingredient in countless cuisines. But beyond its culinary appeal, growing your own kale offers a unique connection to nature and a sense of self-sufficiency.
In today’s fast-paced world, access to fresh, healthy produce can be a challenge. Store-bought kale, while convenient, often lacks the vibrant flavor and nutritional value of homegrown varieties. That’s where growing kale in containers comes in! This simple yet effective method allows you to bypass the grocery store and enjoy the freshest, most flavorful kale imaginable. Plus, it’s incredibly rewarding to nurture a plant from seed to harvest, knowing you’re providing yourself and your loved ones with wholesome, homegrown goodness. Let’s dive in and discover how easy it is to transform your balcony, patio, or even a sunny windowsill into a flourishing kale garden!
Growing Kale in Containers: A Beginner’s Guide
Hey there, fellow gardening enthusiasts! I’m so excited to share my experience with growing kale in containers. It’s surprisingly easy, even if you don’t have a huge backyard. Fresh, homegrown kale is packed with nutrients and tastes amazing in salads, smoothies, and stir-fries. So, let’s dive in and get our hands dirty!
Choosing the Right Container and Soil
Before we even think about seeds, we need to set the stage for success. The right container and soil are crucial for happy, healthy kale plants.
* Container Size: Kale needs room to grow, especially its roots. I recommend a container that’s at least 12 inches in diameter and 12 inches deep. A 5-gallon bucket works perfectly! Bigger is generally better, as it gives the roots more space to spread out.
* Drainage: This is non-negotiable! Make sure your container has drainage holes at the bottom. Kale hates sitting in soggy soil, which can lead to root rot. If your container doesn’t have holes, you can drill some yourself.
* Material: Plastic, terracotta, or even fabric pots will work. I personally prefer plastic because they retain moisture better, which is helpful in hot weather. Terracotta pots are beautiful, but they dry out faster.
* Potting Mix: Don’t use garden soil! It’s too heavy and compacts easily, which can suffocate the roots. Instead, opt for a high-quality potting mix specifically designed for containers. Look for a mix that contains peat moss, perlite, and vermiculite. These ingredients help with drainage and aeration. I also like to add some compost to my potting mix for extra nutrients.
Selecting Your Kale Variety
There are so many different types of kale to choose from! It can be a little overwhelming, but that’s part of the fun. Here are a few of my favorites:
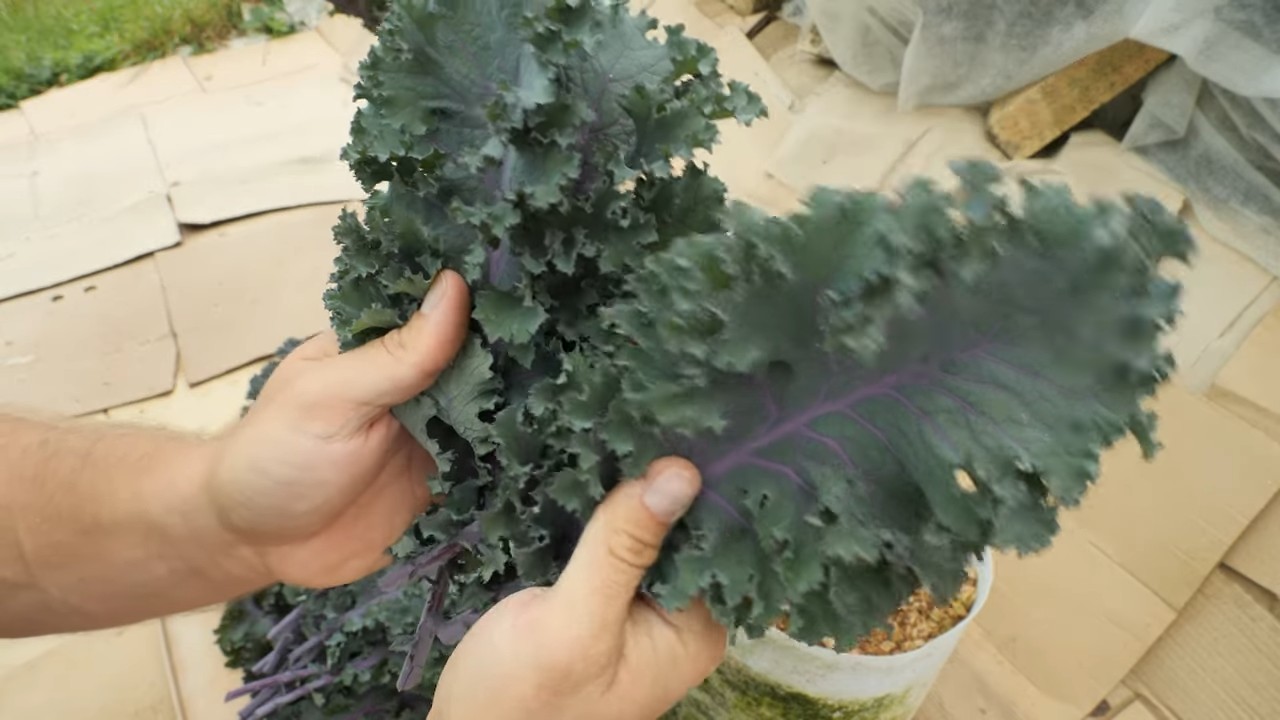
* Lacinato (Dinosaur) Kale: This is my go-to kale. It has dark, bumpy leaves and a slightly sweeter flavor than other varieties. It’s also very productive.
* Curly Kale: This is the classic kale you see in the grocery store. It has frilly, curly leaves and a slightly bitter taste.
* Red Russian Kale: This kale has flat, fringed leaves with purple stems. It’s very cold-hardy and has a mild, slightly sweet flavor.
* Redbor Kale: This is a beautiful kale with deep purple, frilly leaves. It’s more ornamental than other varieties, but it’s still delicious.
Consider your climate and personal preferences when choosing your kale variety. Some varieties are more heat-tolerant than others, while some are better suited for cold weather.
Planting Your Kale
Now for the exciting part – planting! You can either start kale from seeds or buy seedlings from a nursery. I’ve done both, and both methods work well.
Starting from Seeds:
1. Timing: Kale is a cool-season crop, so it’s best to plant it in early spring or late summer. In my area, I usually start my seeds indoors about 6-8 weeks before the last expected frost in spring, or directly sow them in late summer for a fall harvest.
2. Sowing Seeds: Fill your container with potting mix, leaving about an inch of space at the top. Moisten the soil thoroughly. Sow the seeds about 1/4 inch deep and 1 inch apart. Gently cover the seeds with soil and water again.
3. Germination: Keep the soil consistently moist but not soggy. The seeds should germinate in about 5-10 days.
4. Thinning: Once the seedlings have a few true leaves, thin them out so that they are about 6-8 inches apart. This will give them enough room to grow. You can transplant the thinned seedlings into other containers or give them away to friends.
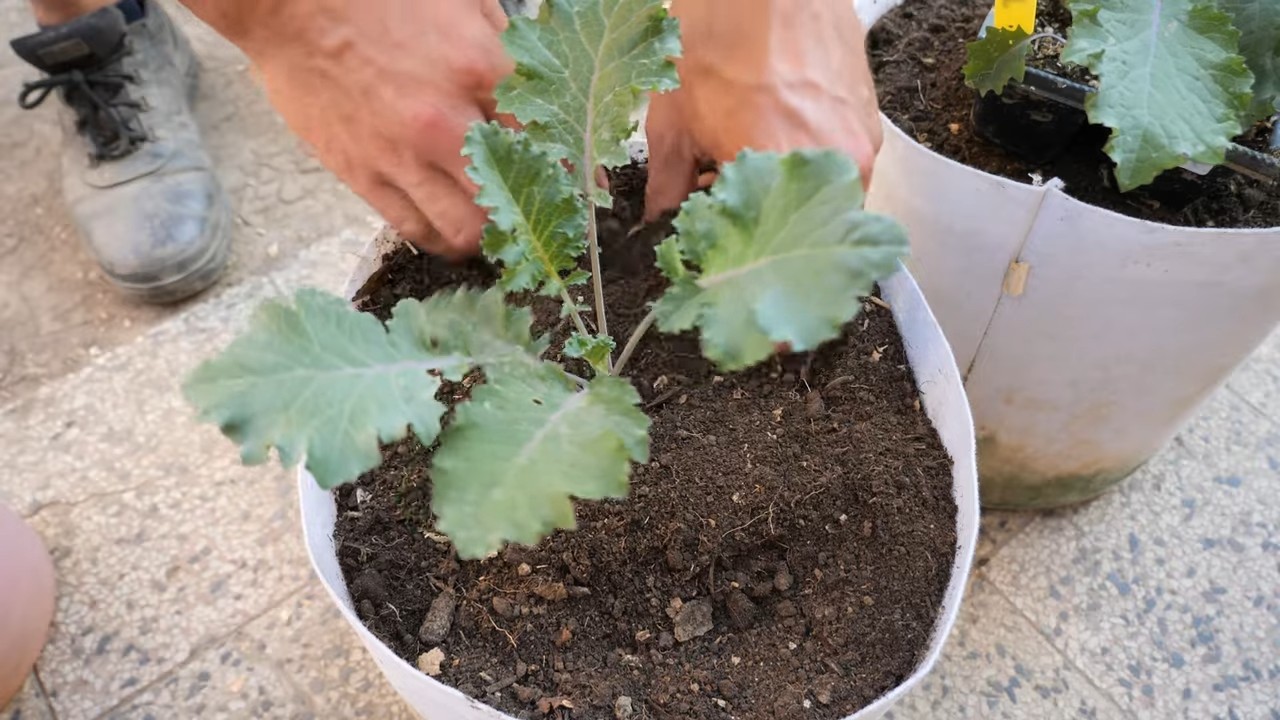
Planting Seedlings:
1. Preparing the Container: Fill your container with potting mix, leaving about an inch of space at the top.
2. Removing Seedlings: Gently remove the seedlings from their nursery pots. If the roots are pot-bound (tightly circling the pot), gently loosen them before planting.
3. Planting: Dig a hole in the potting mix that is large enough to accommodate the root ball. Place the seedling in the hole and gently backfill with soil. Make sure the top of the root ball is level with the soil surface.
4. Watering: Water the seedlings thoroughly after planting.
Caring for Your Kale Plants
Once your kale plants are established, it’s important to provide them with the care they need to thrive.
* Sunlight: Kale needs at least 6 hours of sunlight per day. Place your container in a sunny location. If you live in a very hot climate, you may need to provide some afternoon shade to prevent the leaves from scorching.
* Watering: Water your kale plants regularly, especially during hot, dry weather. The soil should be consistently moist but not soggy. Check the soil moisture by sticking your finger into the soil. If the top inch of soil is dry, it’s time to water.
* Fertilizing: Kale is a heavy feeder, so it needs regular fertilization. I like to use a balanced liquid fertilizer every 2-3 weeks. You can also add compost to the soil to provide slow-release nutrients.
* Pest Control: Kale is susceptible to a few pests, such as aphids, cabbage worms, and flea beetles. Check your plants regularly for signs of infestation. You can control these pests with insecticidal soap, neem oil, or by hand-picking them off the plants.
* Weeding: Keep your container free of weeds. Weeds compete with kale plants for nutrients and water.
Harvesting Your Kale
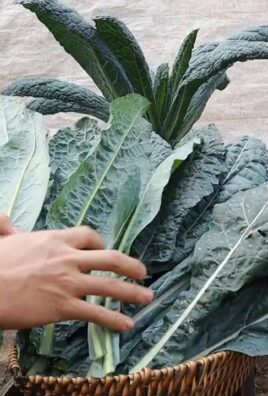
The best part of growing kale is harvesting it! You can start harvesting kale leaves when they are about 4-6 inches long.
* Harvesting Technique: Harvest the outer leaves first, leaving the inner leaves to continue growing. This will allow you to harvest kale continuously throughout the growing season.
* Cutting: Use a sharp knife or scissors to cut the leaves off the plant. Cut the leaves close to the stem.
* Storage: Freshly harvested kale can be stored in the refrigerator for up to a week. Wrap the leaves in a damp paper towel and place them in a plastic bag.
Troubleshooting
Even with the best care, you might encounter some problems while growing kale. Here are a few common issues and how to address them:
* Yellowing Leaves: This can be caused by overwatering, underwatering, or nutrient deficiencies. Check the soil moisture and adjust your watering schedule accordingly. Fertilize your plants with a balanced fertilizer.
* Holes in Leaves: This is usually caused by pests, such as cabbage worms or flea beetles. Inspect your plants for pests and treat them with insecticidal soap or neem oil.
* Bolting: Bolting is when the plant starts to produce flowers and seeds. This usually happens when the weather gets too hot. Once a plant bolts, the leaves become bitter. To prevent bolting, plant kale in early spring or late summer. You can also provide some afternoon shade during hot weather.
* Root Rot: This is caused by overwatering and poor drainage. Make sure your container has drainage holes and avoid overwatering. If you suspect root rot, you can try transplanting the plant into a new container with fresh potting mix.
Extending the Harvest
To get the most out of your kale plants, here are a few tips for extending the harvest:
* Succession Planting: Plant new kale seeds or seedlings every few weeks to ensure a continuous supply of fresh kale.
* Cold Frames: If you live in a cold climate, you can use a cold frame to protect your kale plants from frost and extend the growing season.
* Overwintering: Kale is a very cold-hardy plant and can often survive the winter in mild climates. Mulch around the base of the plant to protect the roots from freezing.
Enjoying Your Homegrown Kale
Now that you’ve successfully grown your own kale, it’s time to enjoy the fruits (or rather, leaves) of your labor! Here are a few of my favorite ways to use homegrown kale:
* Salads: Massage kale leaves with olive oil and lemon juice to make them more tender. Add your favorite toppings, such as nuts, seeds, dried fruit, and cheese.
* Smoothies: Add a handful of kale to your favorite smoothie recipe for a boost of nutrients.
* Stir-fries: Add kale to stir-fries for a healthy and delicious meal.
* Soups: Add kale to soups for extra flavor and nutrients.
* Kale Chips: Toss kale leaves with olive oil and salt, then bake them in the oven until crispy.
Growing kale in containers is a rewarding experience that
Conclusion
So, there you have it! Growing kale in containers isn’t just a possibility; it’s a rewarding and accessible way to enjoy fresh, nutritious greens right at your fingertips. We’ve walked through the essential steps, from selecting the right container and soil to nurturing your kale plants and harvesting their vibrant leaves. But why is this DIY trick a must-try?
Firstly, container gardening offers unparalleled convenience. Whether you have a sprawling backyard or a tiny balcony, you can cultivate your own kale patch. It’s perfect for urban dwellers, renters, or anyone with limited space. Secondly, you have complete control over the growing environment. You can tailor the soil composition, watering schedule, and sun exposure to optimize your kale’s growth. This level of control minimizes the risk of pests and diseases, leading to healthier and more abundant harvests. Thirdly, growing your own kale is incredibly cost-effective. Think about it: a single packet of kale seeds costs just a few dollars, yet it can yield a continuous supply of greens for months. Compare that to the price of buying kale at the grocery store, and the savings quickly add up.
But the benefits extend beyond convenience, control, and cost savings. There’s something deeply satisfying about nurturing a plant from seed to harvest. It’s a connection to nature that can be incredibly grounding and therapeutic. Plus, you’ll have the peace of mind knowing exactly where your food comes from and how it was grown. No more worrying about pesticides or long-distance transportation.
Ready to take your container gardening to the next level? Consider these variations:
* Experiment with different kale varieties: From the curly leaves of Scotch kale to the flat leaves of Lacinato (dinosaur) kale, there’s a variety to suit every taste and preference.
* Companion planting: Plant herbs like rosemary, thyme, or sage alongside your kale to deter pests and enhance flavor. Marigolds are also excellent companion plants for their pest-repelling properties.
* Succession planting: Sow new kale seeds every few weeks to ensure a continuous harvest throughout the growing season.
* Vertical gardening: If space is truly limited, explore vertical gardening options like hanging baskets or stacked planters.
Growing kale in containers is more than just a gardening project; it’s an investment in your health, well-being, and connection to nature. It’s a chance to learn new skills, experiment with different techniques, and enjoy the satisfaction of harvesting your own homegrown food.
So, what are you waiting for? Grab a container, some soil, and a packet of kale seeds, and get started today! We’re confident that you’ll be amazed by the results. And once you’ve harvested your first batch of homegrown kale, be sure to share your experience with us. We’d love to hear your tips, tricks, and favorite kale recipes. Share your photos and stories on social media using [Your Hashtag Here] and inspire others to join the container gardening revolution. Happy growing!
Frequently Asked Questions (FAQ)
What size container is best for growing kale?
The ideal container size for growing kale depends on the variety and how many plants you want to grow in a single container. Generally, a container that is at least 12 inches in diameter and 12 inches deep is recommended for a single kale plant. Larger containers, such as those that are 18 inches or more in diameter, can accommodate multiple plants. The key is to provide enough space for the roots to develop properly. Smaller containers can lead to stunted growth and reduced yields. If you’re planning to grow multiple kale plants in one container, ensure there’s adequate spacing between them (at least 6-8 inches) to allow for proper air circulation and sunlight penetration.
What type of soil should I use for container-grown kale?
Kale thrives in well-draining, nutrient-rich soil. Avoid using garden soil directly in containers, as it can become compacted and doesn’t drain well. Instead, opt for a high-quality potting mix specifically designed for container gardening. Look for a mix that contains ingredients like peat moss, perlite, vermiculite, and compost. These ingredients provide good drainage, aeration, and nutrient retention. You can also amend your potting mix with additional compost or aged manure to boost its fertility. A slightly acidic to neutral pH (around 6.0 to 7.0) is ideal for kale.
How often should I water my container kale plants?
Watering frequency depends on several factors, including the weather, the size of the container, and the type of soil you’re using. As a general rule, water your kale plants when the top inch of soil feels dry to the touch. During hot, dry weather, you may need to water daily, while during cooler, wetter periods, you may only need to water every few days. Avoid overwatering, as this can lead to root rot. Ensure that your container has drainage holes to allow excess water to escape. When watering, water deeply until water drains out of the bottom of the container. This encourages deep root growth.
How much sunlight does kale need?
Kale needs at least 6 hours of direct sunlight per day to thrive. Choose a location for your container garden that receives ample sunlight. If you live in a particularly hot climate, some afternoon shade can be beneficial to prevent the leaves from scorching. If you don’t have access to a sunny location, you can supplement with grow lights. Position the grow lights a few inches above the plants and provide 12-14 hours of light per day.
What are some common pests and diseases that affect kale, and how can I prevent them?
Common pests that affect kale include aphids, cabbage worms, flea beetles, and slugs. To prevent pest infestations, inspect your plants regularly and remove any pests you find by hand. You can also use organic pest control methods, such as insecticidal soap, neem oil, or diatomaceous earth. Row covers can also be used to protect your plants from pests. Common diseases that affect kale include black rot, clubroot, and downy mildew. To prevent diseases, ensure good air circulation around your plants, avoid overwatering, and practice crop rotation. If you notice any signs of disease, remove the affected leaves immediately and treat the plant with an appropriate fungicide.
How do I harvest kale from a container garden?
You can start harvesting kale leaves once they reach about 4-6 inches in length. Harvest the outer leaves first, leaving the inner leaves to continue growing. This is known as “cut-and-come-again” harvesting. Avoid harvesting more than one-third of the plant at a time, as this can stress the plant. To harvest, simply snip the leaves off at the base of the stem with a sharp knife or scissors. Harvest in the morning, when the leaves are crisp and hydrated.
Can I grow kale in containers during the winter?
Yes, kale is a cold-hardy vegetable that can be grown in containers during the winter in many climates. In mild climates, you may be able to grow kale outdoors year-round. In colder climates, you can protect your plants from frost by moving them to a sheltered location, such as a garage or greenhouse, or by covering them with a frost blanket. Kale actually tastes sweeter after a frost, as the cold temperatures convert starches into sugars.
How do I fertilize my container-grown kale plants?
Kale is a heavy feeder and benefits from regular fertilization. Start by incorporating compost or aged manure into your potting mix at planting time. Then, fertilize your plants every 2-3 weeks with a balanced liquid fertilizer or a slow-release granular fertilizer. Follow the instructions on the fertilizer package for application rates. You can also use organic fertilizers, such as fish emulsion or seaweed extract. Avoid over-fertilizing, as this can lead to excessive leaf growth and reduced flavor.
Can I grow different varieties of kale in the same container?
While it’s possible to grow different varieties of kale in the same container, it’s generally best to stick to one variety per container, especially if you’re a beginner. Different varieties of kale may have different growth habits and nutrient requirements, which can make it challenging to manage them in the same container. If you do decide to grow multiple varieties in the same container, ensure that they have similar growth habits and nutrient requirements, and provide adequate spacing between them.

Leave a Comment