
Growing Kailan for Bigger Harvests doesn’t have to be a daunting task! Imagine stepping into your backyard and harvesting vibrant, leafy greens that are bursting with flavor and nutrients. Sounds dreamy, right? Well, it’s totally achievable, even if you don’t have a green thumb (yet!). For centuries, kailan, also known as Chinese kale, has been a staple in Asian cuisine, revered not only for its delicious taste but also for its impressive health benefits. From stir-fries to steamed dishes, this versatile vegetable has nourished families and communities for generations.
But let’s be honest, sometimes getting those picture-perfect, bountiful harvests feels like an uphill battle. That’s where these DIY tricks and hacks come in! I’m going to share some simple, yet effective, strategies that will help you unlock the full potential of your kailan plants. Whether you’re a seasoned gardener or just starting out, these tips will empower you to cultivate thriving kailan right in your own backyard. Why spend money at the grocery store when you can enjoy fresh, homegrown goodness? Plus, there’s nothing quite as satisfying as nurturing a plant from seed to table. So, let’s dive in and discover the secrets to growing kailan for bigger harvests and enjoying a garden overflowing with delicious, healthy greens!

Growing Kailan for Bigger Harvests: My Foolproof DIY Guide
Hey there, fellow gardening enthusiasts! I’m so excited to share my secrets for growing kailan (also known as Chinese kale) that yields bigger, healthier harvests. I’ve experimented with different techniques over the years, and I’ve finally nailed down a method that works wonders. Get ready to have your own kailan overflowing!
Choosing the Right Kailan Variety and Starting Seeds
Before we dive into the nitty-gritty, let’s talk about choosing the right kailan variety and getting those seeds started. This is crucial for a successful harvest.
* Variety Selection: I’ve found that ‘Green Lance’ and ‘Chinese Broccoli’ are excellent choices for beginners. They’re relatively easy to grow and produce delicious, tender leaves. ‘White Flowering’ is another popular option, known for its slightly sweeter flavor. Consider your local climate and growing season when making your selection.
* Seed Starting vs. Direct Sowing: While you *can* direct sow kailan seeds, I highly recommend starting them indoors, especially if you live in an area with a short growing season. This gives your plants a head start and protects them from early pests and diseases.
* Timing is Key: Start your seeds about 4-6 weeks before the last expected frost in your area. This will give them enough time to develop into strong seedlings before transplanting them outdoors.
Now, let’s get those seeds germinating!
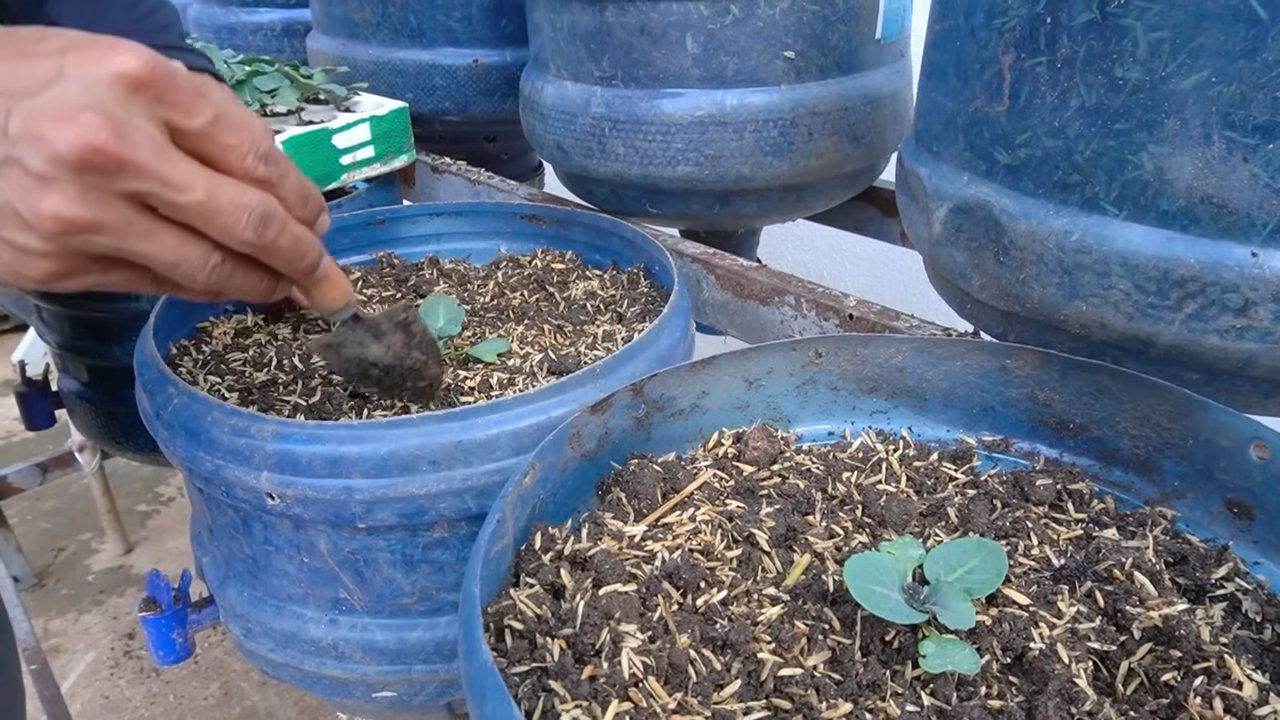
1. Prepare Your Seed Starting Trays: I use seed starting trays with individual cells filled with a seed starting mix. This mix is lightweight and well-draining, which is essential for healthy seedling development. Moisten the mix thoroughly before planting.
2. Sow the Seeds: Plant 2-3 seeds per cell, about ¼ inch deep. Gently cover the seeds with the seed starting mix and lightly water again.
3. Create a Humid Environment: Cover the seed starting tray with a clear plastic dome or plastic wrap to create a humid environment. This will help the seeds germinate faster.
4. Provide Warmth: Place the tray in a warm location, ideally between 70-75°F (21-24°C). A heat mat can be helpful if your home is cooler.
5. Monitor Germination: Keep the seed starting mix moist but not soggy. Once the seeds germinate (usually within 5-10 days), remove the plastic dome or wrap.
6. Provide Light: Once the seedlings emerge, they need plenty of light. Place them under grow lights or in a sunny windowsill. If using a windowsill, rotate the tray regularly to prevent the seedlings from leaning towards the light.
7. Thin the Seedlings: Once the seedlings have their first true leaves (the second set of leaves), thin them to one seedling per cell. Choose the strongest, healthiest seedling and gently snip off the others at the soil line.
8. Harden Off the Seedlings: About a week before transplanting, start hardening off the seedlings. This means gradually exposing them to outdoor conditions. Start by placing them outside for an hour or two each day, gradually increasing the time over the course of the week. Protect them from direct sunlight and strong winds during this process.
Preparing the Garden Bed for Kailan
Kailan thrives in well-drained, fertile soil. Proper soil preparation is key to a bountiful harvest.
* Sunlight: Kailan needs at least 6 hours of sunlight per day. Choose a location in your garden that receives plenty of sunshine.
* Soil Testing: I always recommend testing your soil before planting anything. This will tell you the pH level and nutrient content of your soil. Kailan prefers a slightly acidic to neutral soil pH of 6.0-7.0.
* Soil Amendment: Amend your soil with plenty of organic matter, such as compost, well-rotted manure, or leaf mold. This will improve drainage, fertility, and water retention. I usually add a generous layer of compost (about 2-3 inches) to the garden bed and work it into the soil.
* Fertilizing: Kailan is a heavy feeder, so it needs plenty of nutrients. Before planting, I incorporate a slow-release organic fertilizer into the soil. Look for a fertilizer that is high in nitrogen, which promotes leafy growth.
Follow these steps to get your garden bed ready for kailan:
1. Clear the Area: Remove any weeds, rocks, or debris from the garden bed.
2. Loosen the Soil: Use a garden fork or tiller to loosen the soil to a depth of at least 12 inches. This will improve drainage and allow the roots to penetrate the soil easily.
3. Incorporate Organic Matter: Spread a 2-3 inch layer of compost or other organic matter over the soil and work it in thoroughly.
4. Add Fertilizer: Incorporate a slow-release organic fertilizer into the soil according to the package directions.
5. Rake the Soil: Rake the soil smooth and level.
Transplanting and Spacing Kailan Seedlings
Now that your seedlings are hardened off and your garden bed is prepared, it’s time to transplant your kailan seedlings.
* Timing: Transplant your seedlings on a cloudy day or in the late afternoon to minimize transplant shock.
* Spacing: Space the seedlings 12-18 inches apart in rows that are 18-24 inches apart. This will give them enough room to grow and develop.
Here’s how I transplant my kailan seedlings:
1. Dig Holes: Dig holes in the prepared garden bed that are slightly larger than the root balls of the seedlings.
2. Remove Seedlings from Trays: Gently remove the seedlings from the seed starting trays. Be careful not to damage the roots. If the seedlings are root-bound, gently loosen the roots before planting.
3. Plant the Seedlings: Place the seedlings in the holes and backfill with soil. Gently firm the soil around the base of the plants.
4. Water Thoroughly: Water the seedlings thoroughly after planting.
5. Mulch: Apply a layer of mulch around the plants to help retain moisture, suppress weeds, and regulate soil temperature. I like to use straw or shredded leaves as mulch.
Caring for Your Kailan Plants
Once your kailan plants are established, it’s important to provide them with proper care to ensure a healthy and productive harvest.
* Watering: Kailan needs consistent moisture, especially during hot, dry weather. Water deeply and regularly, aiming to keep the soil consistently moist but not soggy. I usually water my kailan plants every 2-3 days, depending on the weather.
* Fertilizing: Side-dress your kailan plants with a nitrogen-rich fertilizer every 2-3 weeks. You can use a liquid fertilizer, such as fish emulsion or compost tea, or a granular fertilizer. Follow the package directions for application rates.
* Weeding: Keep the garden bed free of weeds, which can compete with the kailan plants for nutrients and water. Hand-pull weeds regularly or use a hoe to cultivate the soil.
* Pest Control: Kailan can be susceptible to pests such as aphids, cabbage worms, and flea beetles. Monitor your plants regularly for signs of infestation. If you find pests, you can use organic pest control methods, such as insecticidal soap, neem oil, or Bacillus thuringiensis (Bt).
* Bolting Prevention: Kailan can bolt (go to seed) in hot weather. To prevent bolting, provide shade for your plants during the hottest part of the day. You can use shade cloth or plant them in a location that receives afternoon shade.
Harvesting Your Kailan
The best part of growing kailan is, of course, harvesting it!
* Timing: You can start harvesting kailan leaves about 50-60 days after planting. Harvest the outer leaves first, leaving the inner leaves to continue growing.
* Harvesting Technique: Use a sharp knife or scissors to cut the leaves off the plant. Cut the leaves close to the stem.
* Continuous Harvest: Kailan is a cut-and-come-again crop, meaning you can harvest leaves continuously throughout the growing season. As you harvest the outer leaves, the plant will continue to produce new leaves from the center.
* Flowering Stems: If your kailan plants start to produce flowering stems, you can harvest these as well. The flowering stems are tender and delicious, similar to broccoli.
Troubleshooting Common Kailan Problems
Even with the best care, you may encounter some problems when growing kailan. Here are some common issues and how to address them:
* Yellowing Leaves: Yellowing leaves can be a sign of nutrient deficiency, overwatering, or underwatering. Check the soil moisture and nutrient levels and adjust your watering and fertilizing accordingly.
* Holes in
Conclusion
So, there you have it! Mastering the art of growing kailan for bigger harvests isn’t about complex techniques or expensive equipment. It’s about understanding the plant’s needs and implementing a few simple, yet effective, DIY tricks. We’ve explored the power of strategic pruning, the benefits of homemade nutrient solutions, and the importance of consistent pest control using natural methods. These aren’t just suggestions; they’re game-changers that can transform your kailan patch from a modest yield to a bountiful harvest.
Why is this DIY approach a must-try? Because it empowers you to take control of your garden’s success. You’re not relying on commercial fertilizers with unknown ingredients or harsh pesticides that can harm beneficial insects. Instead, you’re nurturing your kailan with love, attention, and sustainable practices. The result? Healthier plants, bigger harvests, and the satisfaction of knowing you’re contributing to a more eco-friendly food system.
But don’t stop there! Experiment with variations to personalize your kailan growing journey. Try different types of organic matter in your soil mix, such as composted leaves or aged manure. Explore companion planting with herbs like basil or marigolds to naturally deter pests. Consider succession planting, sowing new seeds every few weeks, to ensure a continuous supply of fresh kailan throughout the growing season. You can even try growing different varieties of kailan, each with its unique flavor and texture.
The key is to observe your plants closely and adapt your techniques based on their specific needs. Are the leaves turning yellow? Adjust your nutrient solution. Are you noticing signs of pests? Implement your natural pest control methods promptly. Growing kailan is a dynamic process, and the more you engage with it, the more successful you’ll be.
We’re confident that these DIY tricks will significantly improve your kailan harvests. But the real magic happens when you put them into practice. So, grab your gardening gloves, gather your supplies, and get ready to witness the transformation. Start small, experiment, and don’t be afraid to make mistakes. Every challenge is an opportunity to learn and grow, both as a gardener and as an individual.
And most importantly, we want to hear about your experience! Share your successes, your challenges, and your unique variations in the comments below. Let’s create a community of kailan enthusiasts who are passionate about growing their own food and sharing their knowledge with others. Together, we can unlock the full potential of this amazing vegetable and enjoy the rewards of a truly abundant harvest. Let us know how these tips helped you in growing kailan for bigger harvests.
Frequently Asked Questions (FAQ)
What is the best time of year to plant kailan?
The best time to plant kailan depends on your local climate. In general, kailan thrives in cooler weather, so it’s ideal to plant it in early spring or late summer/early fall. This allows the plants to mature before the hottest or coldest parts of the year. If you live in a region with mild winters, you may even be able to grow kailan year-round. Check your local gardening resources for specific planting recommendations based on your area’s climate.
How much sunlight does kailan need?
Kailan requires at least 6 hours of direct sunlight per day to thrive. While it can tolerate some partial shade, insufficient sunlight will result in leggy growth and reduced yields. Choose a planting location that receives ample sunlight throughout the day. If you’re growing kailan indoors, use grow lights to supplement natural sunlight.
What type of soil is best for growing kailan?
Kailan prefers well-drained, fertile soil that is rich in organic matter. The ideal soil pH is between 6.0 and 7.5. Before planting, amend your soil with compost, aged manure, or other organic materials to improve its fertility and drainage. You can also add a slow-release fertilizer to provide essential nutrients throughout the growing season.
How often should I water kailan?
Kailan needs consistent moisture to thrive, especially during hot weather. Water deeply and regularly, ensuring that the soil remains consistently moist but not waterlogged. Check the soil moisture level regularly by sticking your finger into the soil. If the top inch feels dry, it’s time to water. Avoid overhead watering, as this can increase the risk of fungal diseases.
What are some common pests and diseases that affect kailan?
Common pests that affect kailan include aphids, cabbage worms, flea beetles, and slugs. Common diseases include downy mildew, clubroot, and black rot. To prevent pest and disease problems, practice good garden hygiene, such as removing plant debris and weeds regularly. Use organic pest control methods, such as insecticidal soap, neem oil, or diatomaceous earth, to control pests. Choose disease-resistant varieties of kailan and practice crop rotation to prevent soilborne diseases.
How do I harvest kailan?
You can begin harvesting kailan leaves when they are about 6-8 inches long. Harvest the outer leaves first, leaving the inner leaves to continue growing. This will encourage the plant to produce more leaves. Use a sharp knife or scissors to cut the leaves cleanly from the stem. Avoid tearing the leaves, as this can damage the plant.
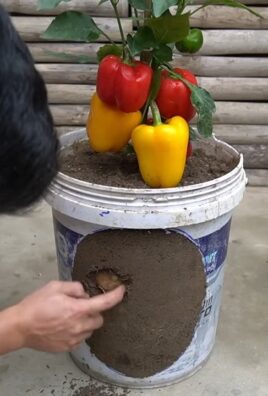
Can I grow kailan in containers?
Yes, kailan can be successfully grown in containers. Choose a container that is at least 12 inches deep and wide to provide enough space for the roots to grow. Use a high-quality potting mix that is well-draining and rich in organic matter. Water regularly and fertilize every few weeks with a balanced fertilizer. Place the container in a location that receives at least 6 hours of direct sunlight per day.
How can I improve the flavor of my kailan?
The flavor of kailan can be influenced by several factors, including the variety, growing conditions, and harvest time. To improve the flavor, choose a variety that is known for its good taste. Ensure that the plants receive adequate sunlight, water, and nutrients. Harvest the leaves when they are young and tender, as older leaves can become bitter. You can also blanch the leaves briefly in boiling water before cooking to reduce bitterness.
What are some ways to use kailan in cooking?
Kailan is a versatile vegetable that can be used in a variety of dishes. It can be steamed, stir-fried, boiled, or added to soups and stews. It pairs well with garlic, ginger, soy sauce, and other Asian flavors. You can also use kailan in salads, smoothies, or as a side dish. Experiment with different recipes to find your favorite ways to enjoy this nutritious vegetable.
How do I store kailan after harvesting?
To store kailan after harvesting, wash the leaves thoroughly and dry them with a salad spinner or paper towels. Wrap the leaves loosely in a damp paper towel and store them in a plastic bag in the refrigerator. Kailan will typically last for about 3-5 days in the refrigerator. You can also freeze kailan for longer storage. Blanch the leaves in boiling water for 2-3 minutes, then cool them in ice water. Drain the leaves and pack them into freezer bags or containers. Frozen kailan will last for up to 6 months.

Leave a Comment