
Growing grape tree from seed might sound like a daunting task reserved for seasoned horticulturalists, but trust me, with a little patience and these DIY tricks, you can cultivate your very own grapevine from the humble beginnings of a seed! Imagine plucking juicy, sun-ripened grapes straight from your backyard – the satisfaction is unparalleled.
Grapevines have a rich history, deeply intertwined with civilizations for millennia. From ancient Egypt, where grapes were depicted in hieroglyphics, to the Roman Empire, where viticulture flourished, grapes have symbolized abundance, celebration, and connection. Today, the allure of growing your own grapes remains strong, offering a tangible link to this historical legacy.
But why embark on this DIY adventure? Well, for starters, growing grape tree from seed allows you to cultivate unique varieties not readily available in nurseries. It’s also a fantastic way to connect with nature, learn about plant life cycles, and enjoy the fruits (literally!) of your labor. Plus, let’s be honest, who wouldn’t want to impress their friends and family with their homegrown grapes? This article will guide you through the entire process, from seed selection and germination to planting and nurturing your young grapevine, ensuring a bountiful harvest in the years to come. So, grab your gardening gloves, and let’s get started!
DIY: Einen Weinstock aus Samen ziehen – So geht’s!
Hallo liebe Gartenfreunde! Habt ihr euch jemals gefragt, ob man einen Weinstock wirklich aus einem kleinen Samenkorn ziehen kann? Die Antwort ist: Ja, das geht! Es ist zwar ein bisschen Geduld gefragt, denn es dauert länger als mit Stecklingen, aber es ist ein unglaublich lohnendes Projekt. Ich zeige euch, wie ich es gemacht habe und gebe euch alle Tipps und Tricks, damit auch ihr bald eure eigenen Trauben ernten könnt.
Was du brauchst:
* Traubenkerne: Am besten von reifen, gesunden Trauben aus dem Supermarkt oder direkt vom Winzer. Achte darauf, dass die Trauben, von denen du die Kerne nimmst, kernhaltig sind.
* Kleine Töpfe oder Anzuchtschalen: Mit Drainagelöchern, damit das Wasser gut ablaufen kann.
* Anzuchterde: Die ist nährstoffarm und locker, ideal für die Keimung.
* Sand: Zum Mischen mit der Anzuchterde.
* Gefrierbeutel oder Frischhaltefolie: Um ein feuchtes Klima zu schaffen.
* Kühlschrank: Für die Stratifizierung (Kältebehandlung) der Samen.
* Gießkanne oder Sprühflasche: Für die Bewässerung.
* Pflanzetiketten: Um die Sorten zu kennzeichnen (optional).
* Geduld: Das Wichtigste!
Die Vorbereitung: Die Stratifizierung der Traubenkerne
Die Stratifizierung ist ein wichtiger Schritt, um die Keimung der Traubenkerne zu fördern. Sie simuliert den Winter und hilft den Samen, ihre Keimhemmung zu überwinden.
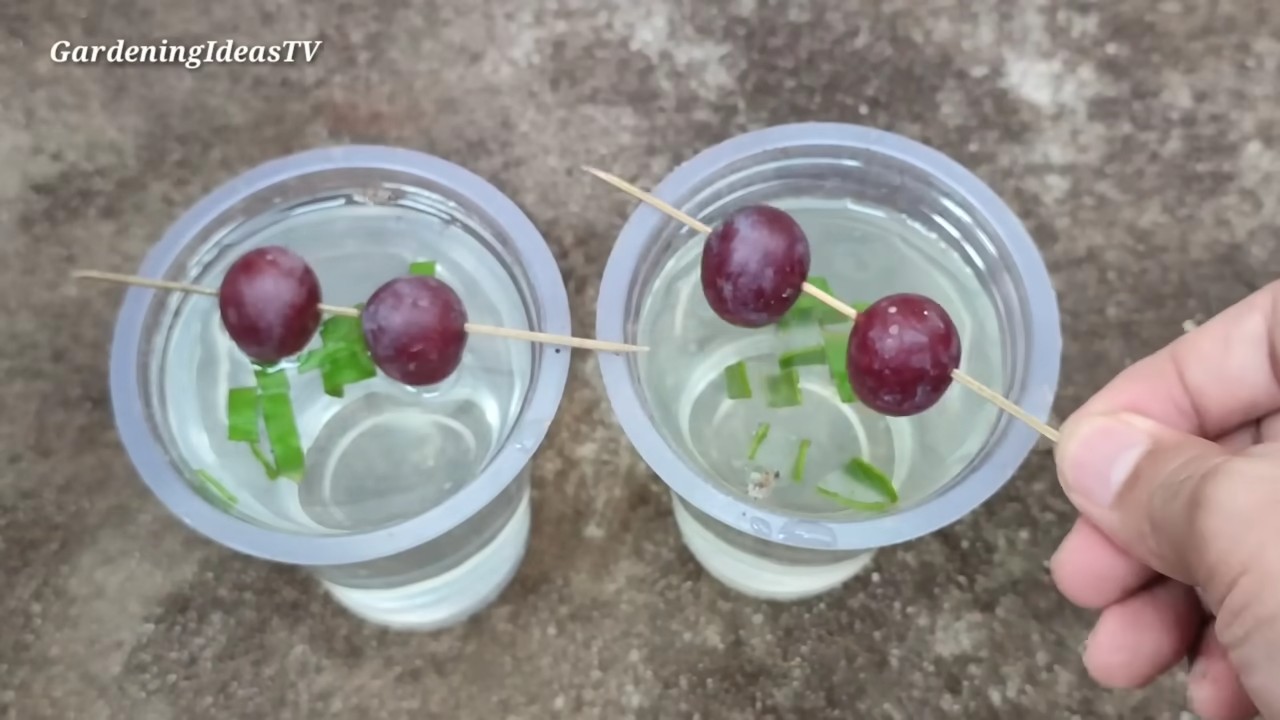
1. Kerne extrahieren: Zuerst musst du die Kerne aus den Trauben holen. Schneide die Trauben auf und entferne die Kerne vorsichtig. Spüle sie unter fließendem Wasser ab, um Fruchtfleischreste zu entfernen.
2. Reinigung und Trocknung: Lege die Kerne auf ein Küchenpapier und lasse sie ein paar Tage trocknen. Das ist wichtig, um Schimmelbildung während der Stratifizierung zu vermeiden.
3. Vorbereitung des Substrats: Befeuchte etwas Anzuchterde leicht. Sie sollte feucht, aber nicht nass sein.
4. Einpacken der Kerne: Gib die leicht feuchte Anzuchterde in einen Gefrierbeutel oder eine Frischhaltebox. Lege die Traubenkerne hinein und vermische alles gut.
5. Ab in den Kühlschrank: Verschließe den Beutel oder die Box und lege sie für 6-8 Wochen in den Kühlschrank. Die ideale Temperatur liegt bei 1-5 Grad Celsius. Kontrolliere die Feuchtigkeit regelmäßig. Die Erde sollte nicht austrocknen, aber auch nicht zu nass sein. Gegebenenfalls leicht nachfeuchten.
Die Aussaat: Endlich geht’s los!
Nach der Stratifizierung sind die Traubenkerne bereit für die Aussaat. Jetzt beginnt der spannende Teil!
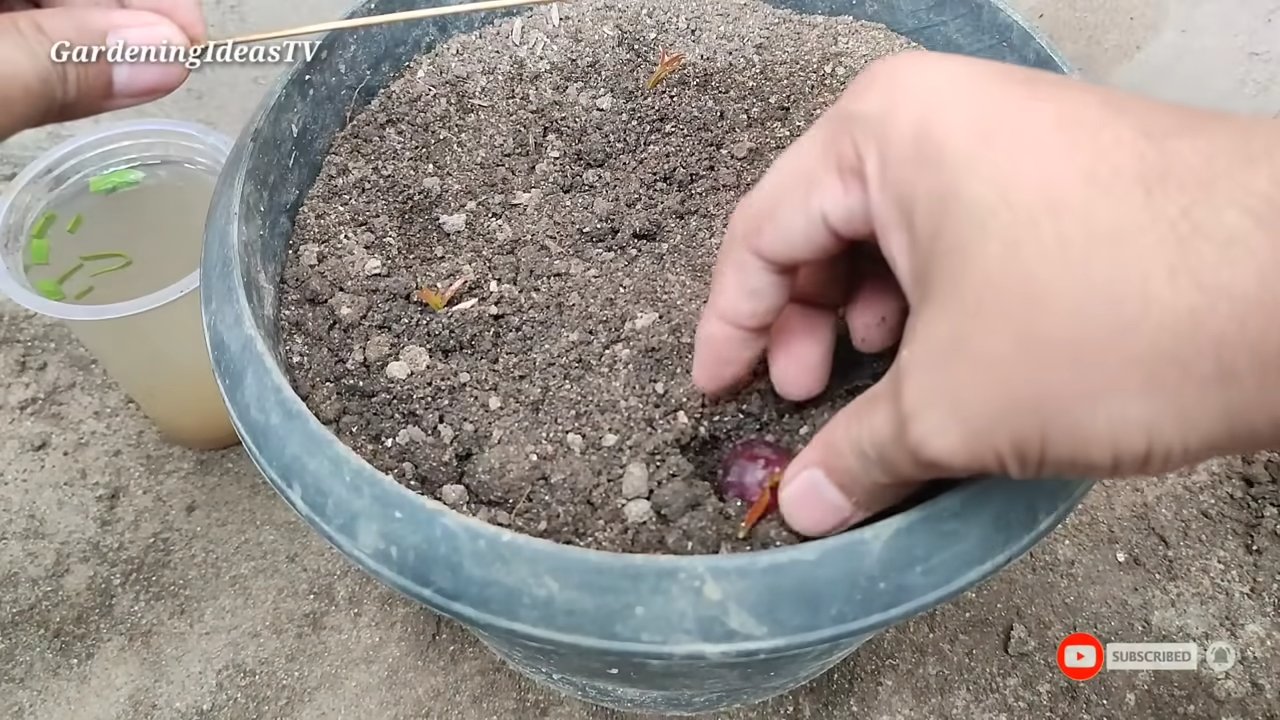
1. Töpfe vorbereiten: Fülle die kleinen Töpfe oder Anzuchtschalen mit Anzuchterde. Ich mische die Anzuchterde gerne noch mit etwas Sand, um sie noch lockerer zu machen. Das fördert die Drainage und verhindert Staunässe.
2. Aussaat der Kerne: Drücke die Erde leicht an und lege pro Topf 2-3 Traubenkerne aus. Bedecke die Kerne mit einer dünnen Schicht Anzuchterde (ca. 0,5 cm).
3. Bewässerung: Befeuchte die Erde vorsichtig mit einer Sprühflasche oder einer Gießkanne mit feinem Brausekopf. Die Erde sollte gut durchfeuchtet sein, aber nicht im Wasser stehen.
4. Mini-Gewächshaus: Um die Luftfeuchtigkeit hoch zu halten, kannst du die Töpfe mit Frischhaltefolie oder einem Gefrierbeutel abdecken. Steche ein paar kleine Löcher in die Folie, damit die Luft zirkulieren kann. Alternativ kannst du auch ein Mini-Gewächshaus verwenden.
5. Standort: Stelle die Töpfe an einen hellen, warmen Ort. Direkte Sonneneinstrahlung sollte vermieden werden, da die jungen Keimlinge sonst verbrennen können. Eine Fensterbank ist ideal.
Die Pflege: Geduld und Aufmerksamkeit sind gefragt
Jetzt heißt es warten und die kleinen Pflänzchen gut pflegen.
1. Bewässerung: Halte die Erde gleichmäßig feucht, aber vermeide Staunässe. Am besten kontrollierst du die Feuchtigkeit täglich und gießt bei Bedarf.
2. Lüften: Lüfte das Mini-Gewächshaus regelmäßig, um Schimmelbildung zu vermeiden. Entferne die Folie oder den Deckel für ein paar Stunden am Tag.
3. Keimung: Die Keimung kann einige Wochen dauern. Sei geduldig und gib nicht auf! Manchmal dauert es etwas länger, bis die ersten grünen Spitzen zu sehen sind.
4. Pikieren: Sobald die Keimlinge ein paar Blätter entwickelt haben, kannst du sie pikieren. Das bedeutet, dass du die stärksten Pflänzchen in separate Töpfe umpflanzt. Verwende dafür eine hochwertige Blumenerde.
5. Düngen: Beginne nach dem Pikieren mit dem Düngen. Verwende einen milden Flüssigdünger für Jungpflanzen. Dünge regelmäßig, aber überdünge nicht.
6. Standort: Stelle die jungen Weinstöcke an einen hellen, sonnigen Standort. Schütze sie vor starkem Wind und Frost.
Das Auspflanzen: Ab in den Garten!
Nachdem die jungen Weinstöcke kräftig genug sind, können sie ins Freie gepflanzt werden.
1. Abhärten: Bevor du die Weinstöcke auspflanzt, solltest du sie an die Bedingungen im Freien gewöhnen. Stelle sie tagsüber für ein paar Stunden ins Freie und hole sie abends wieder rein. Steigere die Zeit im Freien allmählich.
2. Standortwahl: Wähle einen sonnigen, warmen und windgeschützten Standort für deine Weinstöcke. Der Boden sollte gut durchlässig und nährstoffreich sein.
3. Pflanzloch vorbereiten: Grabe ein ausreichend großes Pflanzloch. Es sollte doppelt so breit und tief sein wie der Wurzelballen.
4. Einpflanzen: Setze den Weinstock vorsichtig in das Pflanzloch. Achte darauf, dass die Oberkante des Wurzelballens mit der Erdoberfläche abschließt. Fülle das Pflanzloch mit Erde auf und drücke sie leicht an.
5. Angießen: Gieße den Weinstock nach dem Einpflanzen gründlich an.
6. Stütze: Junge Weinstöcke benötigen eine Stütze, um gerade zu wachsen. Verwende einen Pfahl oder eine Rankhilfe.
Die Pflege im Freien: Auf dem Weg zur ersten Ernte
Auch nach dem Auspflanzen benötigen die Weinstöcke regelmäßige Pflege.
1. Bewässerung: Gieße die Weinstöcke regelmäßig, besonders in trockenen Perioden.
2. Düngung: Dünge die Weinstöcke im Frühjahr mit einem organischen Dünger.
3. Schnitt: Der Schnitt ist wichtig, um die Form und den Ertrag der Weinstöcke zu beeinflussen. Informiere dich über die verschiedenen Schnitttechniken.
4. Schutz: Schütze die Weinstöcke vor Schädlingen und Krankheiten.
5. Geduld: Es dauert einige Jahre, bis die Weinstöcke Früchte tragen. Aber die Mühe lohnt sich!
Wichtige Tipps und Tricks:
* Sortenwahl: Informiere dich über die verschiedenen Rebsorten und wähle Sorten, die für dein Klima geeignet sind.
* Bodenanalyse: Eine Bodenanalyse kann helfen, den Boden optimal auf die Bedürfnisse der Weinstöcke vorzubereiten.
* Veredelung: Um sicherzustellen, dass die Weinstöcke die gewünschten Eigenschaften haben, können sie veredelt werden.
* Schutz vor Frost: Junge Weinstöcke sind frostempfindlich. Schütze sie im Winter mit Reisig oder Vlies.
* Unterstützung: Weinstöcke benötigen eine Rankhilfe, um sich daran festzuhalten und zu w
Conclusion
So, there you have it! Growing a grape tree from seed might seem like a daunting task, a journey reserved for seasoned horticulturalists, but with a little patience, dedication, and the right guidance, you can absolutely cultivate your own thriving grapevine from the humble beginnings of a seed. This DIY trick isn’t just about saving money; it’s about connecting with nature on a deeper level, witnessing the miracle of life unfold before your eyes, and ultimately, enjoying the fruits (literally!) of your labor.
Why is this a must-try? Because it’s an incredibly rewarding experience. Imagine the satisfaction of harvesting grapes from a vine you nurtured from a tiny seed. Think of the stories you can tell, the knowledge you’ll gain, and the bragging rights you’ll earn among your friends and family. Beyond the personal fulfillment, growing grape trees from seed allows you to experiment with different varieties and rootstocks, potentially creating a unique and resilient grapevine perfectly suited to your local climate and soil conditions. You’re not just buying a plant; you’re crafting a legacy.
But the benefits don’t stop there. By starting from seed, you have complete control over the health and development of your grapevine. You can ensure it’s free from diseases and pests, and you can train it to grow in the specific shape and size you desire. This level of customization is simply not possible when purchasing a pre-grown plant.
Looking for variations? Consider experimenting with different grape varieties. Try planting seeds from your favorite table grapes, wine grapes, or even wild grapes. You can also explore different stratification methods to see which works best for your climate. Some gardeners have had success using a refrigerator for stratification, while others prefer burying the seeds outdoors over winter. Don’t be afraid to get creative and adapt the process to your specific needs and preferences.
Another exciting variation is to experiment with grafting. Once your seedling has grown into a young plant, you can graft it onto a more established rootstock to improve its disease resistance, vigor, or fruit quality. This technique allows you to combine the best traits of different grape varieties, creating a truly exceptional grapevine.
Growing grape trees from seed is a journey, not a race. There will be challenges along the way, but don’t let them discourage you. Embrace the learning process, celebrate your successes, and learn from your mistakes. The rewards are well worth the effort.
We wholeheartedly encourage you to try this DIY trick. Start small, perhaps with just a few seeds, and see how it goes. Document your progress, take photos, and share your experiences with us and other gardening enthusiasts. Your insights could help others embark on their own grape-growing adventures.
So, grab some grape seeds, prepare your soil, and get ready to witness the magic of life unfold. You might be surprised at what you can achieve with a little patience and a lot of love. Happy growing!
Frequently Asked Questions (FAQ)
How long does it take to grow a grape tree from seed?
Growing a grape tree from seed is a long-term project, requiring patience and dedication. Generally, it takes anywhere from 3 to 5 years for a grapevine grown from seed to produce its first significant crop of grapes. The first year is primarily focused on germination and initial seedling growth. The second and third years involve developing a strong root system and vine structure. By the fourth or fifth year, you can expect to see your first harvest, although the yield may be smaller than that of a mature, grafted vine. Keep in mind that these are estimates, and the actual time frame can vary depending on factors such as grape variety, climate, soil conditions, and the level of care provided.
What is stratification, and why is it necessary?
Stratification is the process of subjecting grape seeds to a period of cold, moist conditions to break their dormancy. Grape seeds have a natural dormancy mechanism that prevents them from germinating prematurely. This dormancy ensures that the seeds only sprout when environmental conditions are favorable for survival. Stratification mimics the natural winter conditions that grape seeds would experience in the wild, triggering the germination process. Without stratification, grape seeds are unlikely to germinate successfully. The recommended stratification period for grape seeds is typically 60 to 90 days at a temperature of around 35-45°F (2-7°C).
What type of soil is best for growing grape trees from seed?
Grapevines thrive in well-draining soil that is rich in organic matter. The ideal soil pH for grapevines is between 6.0 and 7.0. Before planting your grape seeds, it’s essential to amend the soil with compost or other organic materials to improve its drainage and fertility. Avoid heavy clay soils, as they can become waterlogged and suffocate the roots. If you have clay soil, consider adding sand or gravel to improve drainage. A well-draining soil allows the roots to access oxygen and nutrients, promoting healthy growth.
How often should I water my grape seedlings?
Grape seedlings require consistent moisture, especially during their first few months of growth. Water your seedlings regularly, keeping the soil consistently moist but not waterlogged. Avoid overwatering, as this can lead to root rot. As the seedlings mature, you can gradually reduce the frequency of watering, allowing the soil to dry out slightly between waterings. The best way to determine if your seedlings need water is to check the soil moisture level. If the top inch of soil feels dry to the touch, it’s time to water.
What kind of sunlight do grape seedlings need?
Grape seedlings need plenty of sunlight to thrive. Aim for at least 6-8 hours of direct sunlight per day. If you’re growing your seedlings indoors, place them near a sunny window or use grow lights to supplement natural light. Insufficient sunlight can lead to weak, leggy growth. As the seedlings mature, they can tolerate more intense sunlight.
Can I grow grape trees from seed in containers?
Yes, you can grow grape trees from seed in containers, especially during their early stages of development. Choose a container that is at least 12 inches in diameter and has drainage holes. Use a well-draining potting mix and provide regular watering and fertilization. As the grapevine grows, you may need to transplant it into a larger container. However, keep in mind that grapevines grown in containers may not reach the same size or produce as much fruit as those grown in the ground.
How do I protect my grape seedlings from pests and diseases?
Grape seedlings are susceptible to various pests and diseases, so it’s essential to take preventative measures. Monitor your seedlings regularly for signs of infestation or disease. Common pests that affect grapevines include aphids, spider mites, and Japanese beetles. Diseases that can affect grapevines include powdery mildew, downy mildew, and black rot. Use organic pest control methods, such as insecticidal soap or neem oil, to control pests. Ensure good air circulation around your seedlings to prevent fungal diseases. Remove any infected leaves or stems promptly.
When should I transplant my grape seedling into the ground?
Once your grape seedling has developed a strong root system and is at least 12 inches tall, you can transplant it into the ground. The best time to transplant is in the spring, after the last frost, or in the fall, before the first frost. Choose a sunny location with well-draining soil. Dig a hole that is twice as wide as the root ball and just as deep. Gently remove the seedling from its container and place it in the hole. Backfill the hole with soil and water thoroughly.
How do I train my grape tree?
Training a grapevine is essential for maximizing fruit production and maintaining its shape. There are several different training systems for grapevines, including the cordon system, the cane system, and the head system. Choose a training system that is appropriate for your grape variety and growing conditions. Prune your grapevine regularly to remove dead, damaged, or diseased wood and to encourage fruit production.
Will the grapes from a seed-grown vine taste the same as the parent grape?
This is a crucial point. Grapevines grown from seed will *not* produce grapes identical to the parent vine. This is because grape seeds are the result of sexual reproduction, meaning they contain a mix of genetic material from both parent plants. The resulting grapevine will be a unique individual with its own characteristics, which may or may not resemble the parent grape. This is why commercial grape growers typically propagate grapevines through cuttings or grafting, which preserves the genetic identity of the desired variety. However, this genetic variability is also what makes growing grape trees from seed so exciting – you might discover a new and improved grape variety!
Leave a Comment