
Growing Dill in Kitchen can be incredibly rewarding, bringing fresh, aromatic flavors right to your fingertips! Have you ever imagined snipping fresh dill to garnish your favorite dishes, all without stepping foot outside? It’s easier than you think, and this DIY guide will show you exactly how to make it happen.
For centuries, dill has been cherished not only for its culinary uses but also for its medicinal properties. Ancient Egyptians used it to soothe digestive issues, while the Romans believed it brought good fortune. Today, we appreciate dill for its unique flavor that elevates everything from pickles and salads to creamy dips and seafood. But let’s be honest, buying fresh dill from the store can be expensive, and it often wilts before you get a chance to use it all.
That’s where this DIY trick comes in! I’m going to share my secrets for successfully growing dill in kitchen, even if you have limited space or a less-than-green thumb. Imagine the satisfaction of harvesting your own herbs, knowing exactly where they came from and how they were grown. Plus, it’s a fantastic way to add a touch of greenery to your indoor space and enjoy the fresh, vibrant scent of dill year-round. So, let’s dive in and discover how to cultivate your own little dill patch right in your kitchen!
Dill Anbauen in der Küche: Dein Leitfaden für frisches Grün direkt vom Fensterbrett
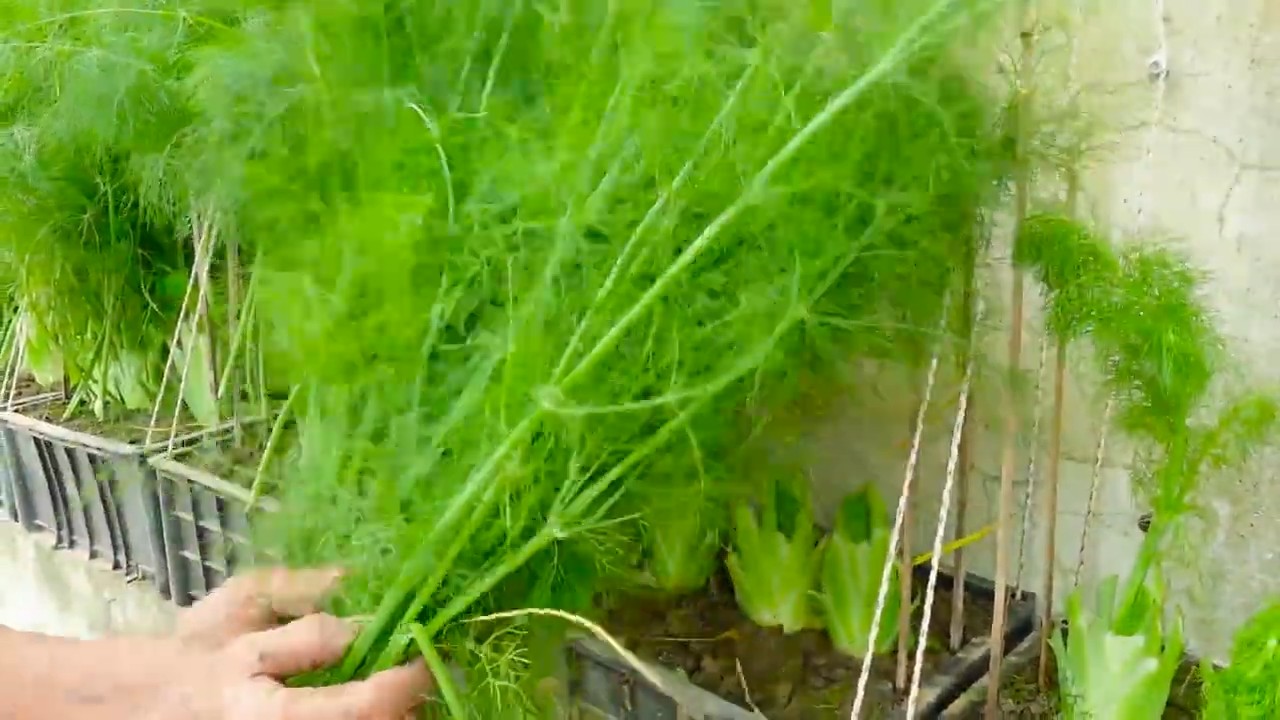
Ich liebe frische Kräuter! Und Dill ist da ganz vorne mit dabei. Der anisartige Geschmack passt perfekt zu Fisch, Salaten, Dips und vielem mehr. Aber Dill im Supermarkt zu kaufen, ist oft teuer und die Kräuter welken schnell. Deshalb zeige ich dir heute, wie du ganz einfach Dill in deiner Küche anbauen kannst. So hast du immer frischen Dill zur Hand und sparst auch noch Geld!
Was du brauchst:
* Dillsamen: Am besten Bio-Qualität, um sicherzustellen, dass sie nicht behandelt wurden. Du findest sie im Gartencenter oder online.
* Anzuchttöpfe oder -schalen: Kleine Töpfe (ca. 8-10 cm Durchmesser) sind ideal für den Anfang. Du kannst auch Anzuchtschalen mit mehreren Fächern verwenden.
* Hochwertige Anzuchterde: Diese ist nährstoffarm und locker, was für die Keimung der Samen wichtig ist. Normale Blumenerde ist oft zu reichhaltig.
* Blumentöpfe (später): Wenn die Dillpflanzen größer werden, brauchst du größere Töpfe (ca. 15-20 cm Durchmesser).
* Blumenerde: Hier kannst du dann eine gute Blumenerde verwenden, die etwas mehr Nährstoffe enthält.
* Gießkanne oder Sprühflasche: Zum sanften Bewässern der Samen und jungen Pflanzen.
* Helle Fensterbank: Dill braucht viel Licht, um gut zu wachsen. Ein Südfenster ist ideal.
* Optional: Eine kleine Schaufel, ein Pikierstab (oder Bleistift) und eine durchsichtige Plastikfolie oder ein Mini-Gewächshaus.
Phase 1: Aussaat der Dillsamen
1. Vorbereitung der Anzuchttöpfe: Fülle die Anzuchttöpfe oder -schalen mit Anzuchterde. Drücke die Erde leicht an, aber nicht zu fest. Sie sollte locker und luftig bleiben.
2. Aussaat der Samen: Verteile die Dillsamen gleichmäßig auf der Erde. Pro Topf reichen 3-5 Samen. Dill keimt nicht immer zu 100%, daher ist es besser, etwas mehr Samen zu säen.
3. Bedecken der Samen: Bedecke die Samen mit einer dünnen Schicht Anzuchterde (ca. 0,5 cm). Drücke die Erde wieder leicht an.
4. Bewässerung: Befeuchte die Erde vorsichtig mit einer Gießkanne oder Sprühflasche. Die Erde sollte feucht, aber nicht nass sein. Vermeide Staunässe, da die Samen sonst faulen können.
5. Abdeckung (optional): Decke die Anzuchttöpfe mit durchsichtiger Plastikfolie oder einem Mini-Gewächshaus ab. Das sorgt für eine höhere Luftfeuchtigkeit und beschleunigt die Keimung. Achte darauf, dass die Folie nicht direkt auf der Erde aufliegt. Du kannst kleine Stäbchen verwenden, um sie abzustützen.
6. Standort: Stelle die Anzuchttöpfe an einen hellen und warmen Ort. Eine Fensterbank mit Südausrichtung ist ideal. Die Temperatur sollte zwischen 18 und 22 Grad Celsius liegen.
Phase 2: Pflege der Keimlinge
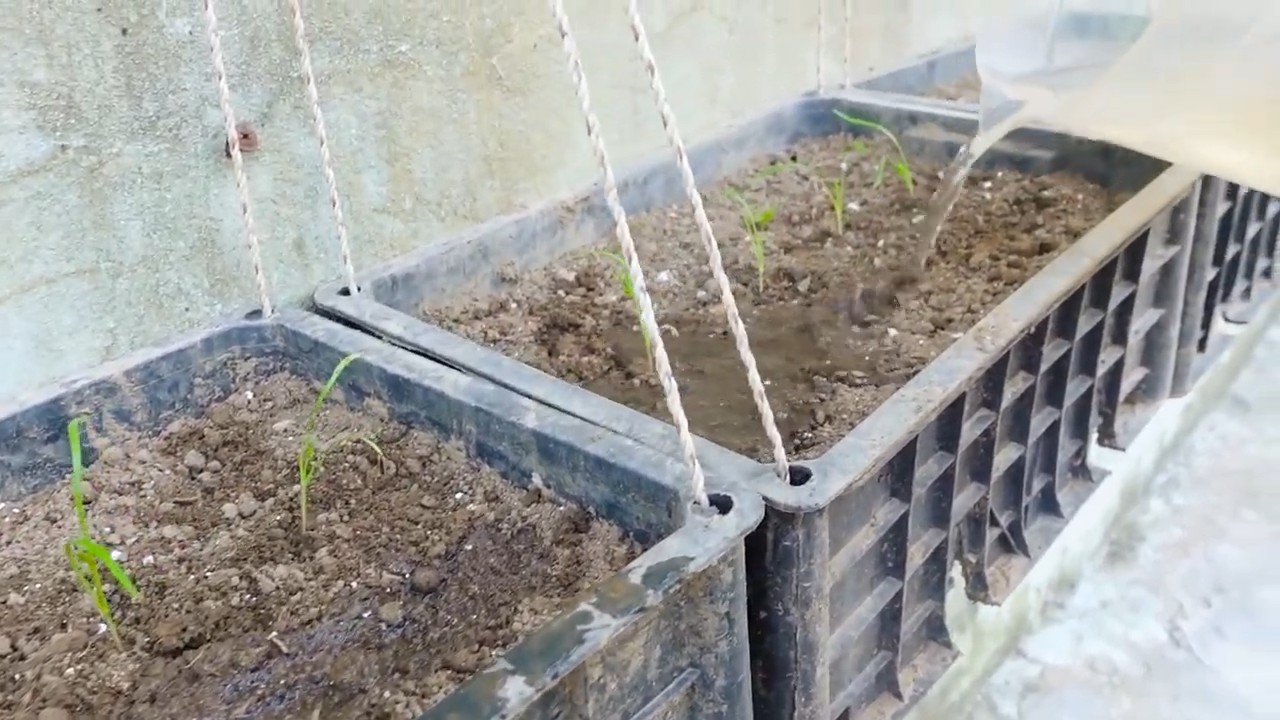
1. Regelmäßige Bewässerung: Halte die Erde feucht, aber nicht nass. Kontrolliere die Feuchtigkeit täglich und gieße bei Bedarf. Vermeide Staunässe.
2. Belüftung: Wenn du die Anzuchttöpfe mit Folie abgedeckt hast, lüfte sie regelmäßig (einmal täglich), um Schimmelbildung zu vermeiden. Nimm die Folie für ca. 15-20 Minuten ab.
3. Entfernung der Folie: Sobald die ersten Keimlinge erscheinen (nach ca. 7-14 Tagen), kannst du die Folie ganz entfernen.
4. Ausdünnen (optional): Wenn zu viele Samen gekeimt sind, kannst du die schwächsten Keimlinge vorsichtig entfernen, um den stärkeren Pflanzen mehr Platz zu geben.
5. Drehen der Töpfe: Drehe die Töpfe regelmäßig, damit die Pflanzen gleichmäßig wachsen und sich nicht zum Licht hinbiegen.
Phase 3: Umpflanzen in größere Töpfe
1. Zeitpunkt: Sobald die Dillpflanzen ca. 5-7 cm groß sind und mehrere Blätter haben, ist es Zeit, sie in größere Töpfe umzupflanzen.
2. Vorbereitung der Töpfe: Fülle die größeren Töpfe mit Blumenerde. Lasse oben ca. 2-3 cm Platz.
3. Herausnehmen der Pflanzen: Löse die Dillpflanzen vorsichtig aus den Anzuchttöpfen. Achte darauf, die Wurzeln nicht zu beschädigen. Du kannst einen Pikierstab oder Bleistift verwenden, um die Erde um die Wurzeln herum zu lockern.
4. Einpflanzen: Setze die Dillpflanzen in die vorbereiteten Töpfe. Die Oberkante des Wurzelballens sollte mit der Erdoberfläche abschließen.
5. Bewässerung: Gieße die Pflanzen nach dem Umpflanzen gründlich.
6. Standort: Stelle die Töpfe wieder an einen hellen und warmen Ort.
Phase 4: Pflege der Dillpflanzen
1. Bewässerung: Gieße die Dillpflanzen regelmäßig, aber vermeide Staunässe. Die Erde sollte immer leicht feucht sein.
2. Düngung (optional): Dill braucht nicht viel Dünger. Wenn du möchtest, kannst du die Pflanzen alle paar Wochen mit einem organischen Flüssigdünger düngen. Achte darauf, die Dosierungsanleitung zu befolgen.
3. Schnitt: Schneide die Dillspitzen regelmäßig ab, um das Wachstum anzuregen. Du kannst die abgeschnittenen Dillspitzen sofort verwenden oder sie trocknen oder einfrieren.
4. Blütenbildung verhindern: Wenn Dill blüht, verliert er an Aroma. Um die Blütenbildung zu verhindern, solltest du die Blütenstände regelmäßig entfernen.
5. Schädlinge und Krankheiten: Dill ist relativ widerstandsfähig gegen Schädlinge und Krankheiten. Gelegentlich können Blattläuse auftreten. Diese kannst du mit einem Wasserstrahl oder einer milden Seifenlauge entfernen.
Zusätzliche Tipps für den erfolgreichen Dillanbau in der Küche:
* Wähle den richtigen Standort: Dill braucht viel Licht, um gut zu wachsen. Ein Südfenster ist ideal. Wenn du kein Südfenster hast, kannst du die Pflanzen mit einer Pflanzenlampe unterstützen.
* Verwende die richtige Erde: Anzuchterde für die Keimung und Blumenerde für die größeren Töpfe.
* Achte auf die Bewässerung: Die Erde sollte immer leicht feucht sein, aber vermeide Staunässe.
* Schneide die Dillspitzen regelmäßig ab: Das regt das Wachstum an und verhindert die Blütenbildung.
* Sei geduldig: Dill braucht Zeit, um zu wachsen. Hab Geduld und gib nicht auf!
Dill ernten und verwenden:
Du kannst Dill ernten, sobald die Pflanzen groß genug sind. Schneide die Dillspitzen einfach mit einer Schere ab. Du kannst den Dill frisch verwenden oder ihn trocknen oder einfrieren.
* Frischer Dill: Passt perfekt zu Fisch, Salaten, Dips, Saucen und vielem mehr.
* Getrockneter Dill: Kann zum Würzen von Suppen, Eintöpfen und anderen Gerichten verwendet werden.
* Gefrorener Dill: Behält sein Aroma besser als getrockneter Dill. Du kannst ihn in Eiswürfelbehältern mit Wasser einfrieren oder ihn in einem Gefrierbeutel aufbewahren.
Ich hoffe, dieser Leitfaden hilft dir dabei, erfolgreich Dill in deiner Küche anzubauen. Es ist wirklich einfacher als du denkst und es ist toll, immer frischen Dill zur Hand zu haben! Viel Spaß beim Gärtnern!
Conclusion
So, there you have it! Growing dill in your kitchen isn’t just a whimsical idea; it’s a practical, rewarding, and surprisingly simple way to elevate your culinary creations. Forget those sad, wilted bunches from the grocery store – imagine snipping fresh, vibrant dill sprigs right when you need them, bursting with intense flavor and aroma. This DIY trick transforms your kitchen into a miniature herb garden, providing a constant supply of this versatile herb.
Why is this a must-try? Because it’s about more than just convenience. It’s about connecting with your food, understanding where it comes from, and experiencing the joy of nurturing something from seed to table. It’s about reducing your reliance on store-bought herbs, minimizing waste, and adding a touch of green to your indoor space. Plus, the satisfaction of using your own homegrown dill in your favorite recipes is simply unmatched.
But the best part? The possibilities are endless! Once you’ve mastered the basics, you can experiment with different varieties of dill, such as ‘Bouquet’ for its abundant foliage or ‘Long Island Mammoth’ for its impressive size. You can also explore different growing methods, like hydroponics or using self-watering containers, to further optimize your dill’s growth. Consider companion planting your dill with tomatoes or cucumbers, as it’s known to repel certain pests and improve their growth.
Don’t be afraid to get creative with how you use your homegrown dill. Beyond the classic dill pickles and creamy dill sauces, try adding it to salads, omelets, fish dishes, or even cocktails for a refreshing twist. Infuse olive oil with dill for a flavorful finishing oil, or dry your dill to preserve its flavor for year-round use.
We wholeheartedly encourage you to embark on this green adventure and discover the joys of growing dill in your kitchen. It’s a small investment of time and effort that yields a bountiful harvest of flavor and satisfaction. So, grab your seeds, pots, and potting mix, and get ready to transform your kitchen into a fragrant herb haven.
And most importantly, we want to hear about your experience! Share your tips, tricks, and triumphs in the comments below. Let us know what varieties of dill you’re growing, what recipes you’re using it in, and any challenges you’ve overcome along the way. Together, we can create a community of indoor gardeners, sharing our knowledge and inspiring others to embrace the joys of homegrown herbs. Let’s cultivate a world where fresh, flavorful dill is always within reach!
Frequently Asked Questions (FAQ)
What kind of dill should I grow indoors?
While most dill varieties can be grown indoors, some are better suited than others. ‘Bouquet’ dill is a popular choice due to its compact size and abundant foliage, making it ideal for containers. ‘Fernleaf’ dill is another good option, known for its feathery leaves and slower bolting (going to seed) rate. ‘Long Island Mammoth’ can also be grown indoors, but it requires a larger pot and more space. Consider the size of your growing area and your personal preferences when selecting a dill variety.
How much sunlight does indoor dill need?
Dill requires at least 6 hours of direct sunlight per day to thrive. If you don’t have a sunny windowsill, you can supplement with grow lights. Position the grow lights about 6-12 inches above the dill plants and keep them on for 12-16 hours per day. Insufficient sunlight can lead to leggy, weak growth and reduced flavor. Rotate your dill plants regularly to ensure even exposure to sunlight.
What kind of soil is best for growing dill indoors?
Dill prefers well-draining soil that is rich in organic matter. A good potting mix for dill should contain a blend of peat moss, perlite, and vermiculite. You can also add compost or other organic amendments to improve the soil’s fertility and drainage. Avoid using garden soil, as it can be too heavy and compact for container gardening.
How often should I water my indoor dill?
Water your dill regularly, keeping the soil consistently moist but not waterlogged. Allow the top inch of soil to dry out slightly between waterings. Overwatering can lead to root rot, while underwatering can cause the dill to wilt and dry out. Check the soil moisture regularly and adjust your watering schedule accordingly.
How do I prevent dill from bolting indoors?
Bolting, or going to seed, can make dill leaves bitter and less flavorful. To prevent bolting, keep your dill plants well-watered and fertilized, and provide them with adequate sunlight. Avoid exposing them to extreme temperatures or stress. You can also pinch off any flower buds that appear to encourage continued leaf production. Choosing a slow-bolting variety like ‘Fernleaf’ can also help.
When can I start harvesting my indoor dill?
You can start harvesting dill leaves as soon as the plants are about 6-8 inches tall. Snip off the outer leaves, leaving the inner leaves to continue growing. Regular harvesting will encourage bushier growth and prevent the plants from bolting. You can also harvest the dill seeds once the flowers have dried and turned brown.
Can I grow dill from seed indoors?
Yes, growing dill from seed indoors is a relatively easy process. Start by sowing the seeds in small pots or seed trays filled with well-draining potting mix. Keep the soil moist and warm, and the seeds should germinate within 7-14 days. Once the seedlings have developed a few sets of true leaves, you can transplant them into larger pots.
What are some common pests and diseases that affect indoor dill?
Dill is generally resistant to pests and diseases, but it can be susceptible to aphids, spider mites, and powdery mildew. Inspect your plants regularly for signs of infestation or disease, and take action promptly if you notice any problems. You can control aphids and spider mites with insecticidal soap or neem oil. Powdery mildew can be treated with a fungicide or by improving air circulation around the plants.
Can I transplant outdoor dill indoors?
While it’s possible to transplant outdoor dill indoors, it’s not always successful. Dill plants that have been growing outdoors may have a difficult time adjusting to the indoor environment. If you do decide to transplant, choose a healthy, young plant and carefully dig it up, taking care to preserve as much of the root system as possible. Transplant it into a large pot filled with well-draining potting mix and water it thoroughly. Keep the plant in a shaded location for a few days to help it adjust to its new environment.
How do I dry dill for later use?
Drying dill is a great way to preserve its flavor for year-round use. To dry dill, simply cut the stems and tie them together in small bunches. Hang the bunches upside down in a cool, dry, and well-ventilated place. Alternatively, you can spread the dill leaves on a baking sheet and dry them in a low oven (170°F) for several hours. Once the dill is completely dry, store it in an airtight container in a cool, dark place.
Leave a Comment