
Growing Chillies in Pots might seem daunting, but trust me, it’s easier than you think! Imagine plucking fiery, fresh chillies straight from your balcony to spice up your dinner – that’s the magic we’re unlocking today. For centuries, chillies have been prized not only for their culinary kick but also for their medicinal properties, playing a significant role in cultures around the globe. From ancient Aztec rituals to modern-day Thai cuisine, the chilli pepper has a rich and vibrant history.
But why bother growing your own? Well, store-bought chillies can sometimes lack that intense flavour and satisfying heat. Plus, let’s be honest, there’s something incredibly rewarding about nurturing a plant from seed to harvest. In this DIY guide, I’m going to share my tried-and-tested secrets for successfully growing chillies in pots, even if you’re a complete beginner. We’ll cover everything from choosing the right pot and soil to watering and fertilizing techniques, ensuring you have a thriving chilli plant bursting with flavour. Get ready to add some spice to your life – literally!
Growing Fiery Chillies in Pots: A DIY Guide to Spice Up Your Life!
Okay, chilli lovers, let’s get down to business! I’m going to walk you through everything you need to know to successfully grow your own chillies in pots. Trust me, there’s nothing quite like the satisfaction of harvesting your own homegrown heat! This guide is designed to be super detailed, so even if you’re a complete beginner, you’ll be picking peppers in no time.
What You’ll Need: The Chilli Grower’s Toolkit
Before we dive into the nitty-gritty, let’s gather our supplies. Here’s a checklist of everything you’ll need to get started:
* Chilli Seeds: This is the most important part! Choose varieties that you enjoy eating and that are suitable for your climate. I personally love growing Jalapeños, Habaneros, and Thai chillies.
* Seed Starting Tray or Small Pots: These will be used to germinate your seeds.
* Seed Starting Mix: This is a light, sterile soil mix that’s perfect for delicate seedlings.
* Larger Pots (at least 5 gallons): These will be the permanent homes for your chilli plants.
* Potting Mix: A good quality potting mix that drains well is essential. Avoid using garden soil, as it can become compacted in pots.
* Watering Can or Hose: For watering your plants.
* Fertilizer: A balanced fertilizer or one specifically formulated for tomatoes and peppers will help your plants thrive.
* Plant Labels and a Marker: To keep track of your chilli varieties.
* Optional:
* Heat Mat: To speed up germination.
* Grow Lights: If you don’t have a sunny spot.
* Gloves: To protect your hands when handling chillies (especially the hot ones!).
* Pruning Shears: For trimming and shaping your plants.
* Pest Control: Insecticidal soap or neem oil for dealing with pests.
Phase 1: Germinating Your Chilli Seeds
Chilli seeds can be a bit slow to germinate, so patience is key! Here’s how to give them the best possible start:
1. Soaking the Seeds (Optional but Recommended): I like to soak my chilli seeds in warm water for 12-24 hours before planting. This helps to soften the seed coat and speed up germination. Just place the seeds in a small bowl of water and let them sit.
2. Preparing the Seed Starting Tray: Fill your seed starting tray or small pots with seed starting mix. Gently firm the soil down, but don’t pack it too tightly.
3. Sowing the Seeds: Make a small hole (about 1/4 inch deep) in the center of each cell or pot. Place one or two seeds in each hole and cover them with seed starting mix.
4. Watering: Gently water the soil until it’s moist but not soggy. You can use a spray bottle to avoid disturbing the seeds.
5. Creating a Warm and Humid Environment: Chilli seeds germinate best in warm, humid conditions. You can achieve this by placing the seed starting tray in a propagator or covering it with a clear plastic lid or plastic wrap.
6. Providing Heat (Optional): A heat mat can significantly speed up germination. Place the seed starting tray on the heat mat and set the temperature to around 80-85°F (27-29°C).
7. Providing Light (If Needed): If you don’t have a sunny windowsill, you can use grow lights to provide your seedlings with the light they need. Position the grow lights a few inches above the seed starting tray.
8. Waiting Patiently: Germination can take anywhere from 1 to 3 weeks, depending on the chilli variety and the temperature. Keep the soil moist but not soggy, and check regularly for signs of germination.
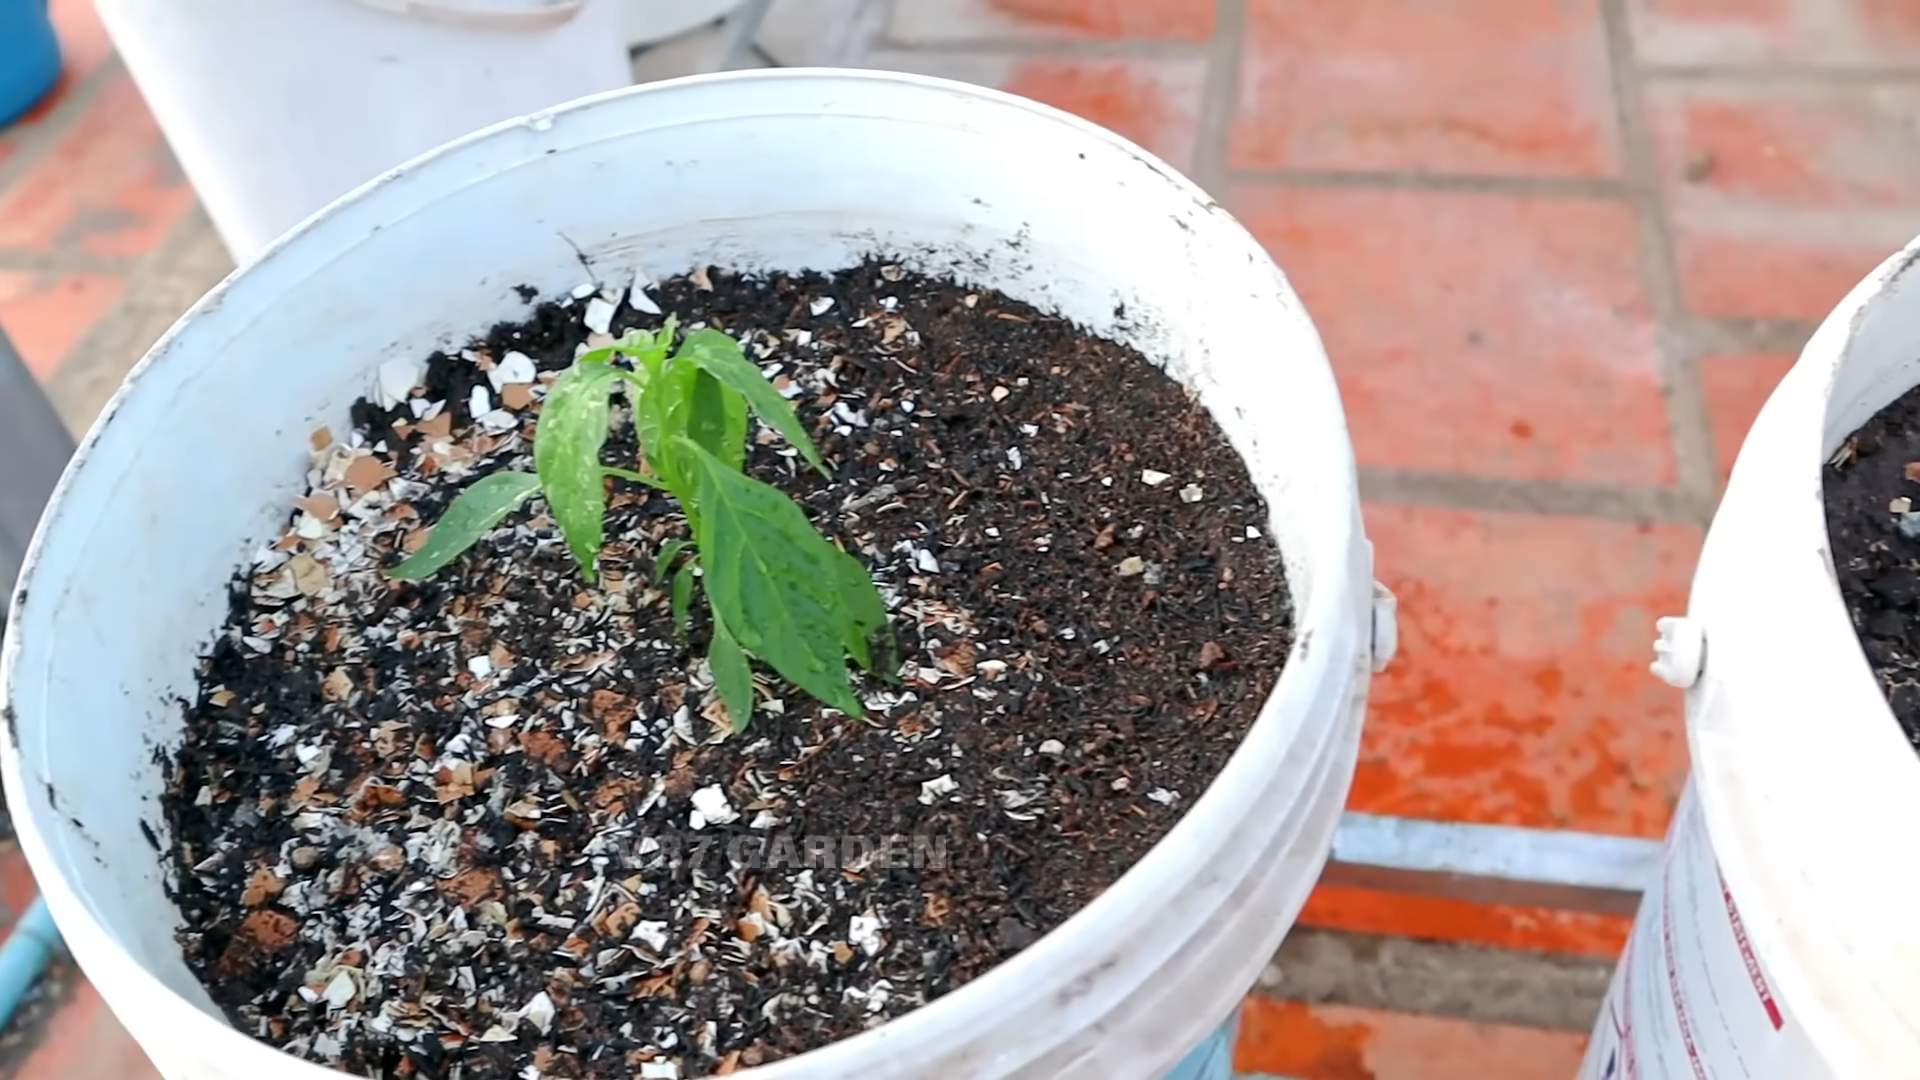
Phase 2: Transplanting Your Chilli Seedlings
Once your seedlings have developed their first set of true leaves (the leaves that appear after the initial seed leaves), it’s time to transplant them into larger pots.
1. Preparing the Larger Pots: Fill your larger pots (at least 5 gallons) with potting mix. Leave a few inches of space at the top of the pot.
2. Carefully Removing the Seedlings: Gently loosen the soil around the seedlings in the seed starting tray. Use a small spoon or fork to carefully lift the seedlings out of the tray, being careful not to damage the roots.
3. Planting the Seedlings: Make a hole in the center of the potting mix in the larger pot. The hole should be large enough to accommodate the root ball of the seedling. Place the seedling in the hole and gently backfill with potting mix.
4. Watering: Water the seedlings thoroughly after transplanting.
5. Providing Support (If Needed): Some chilli varieties can become quite tall and top-heavy. If your seedlings are looking wobbly, you can provide them with support by staking them with a bamboo cane or a small trellis.
Phase 3: Caring for Your Chilli Plants
Now that your chilli plants are in their permanent homes, it’s time to provide them with the care they need to thrive.
1. Sunlight: Chilli plants need at least 6-8 hours of sunlight per day. Place your pots in a sunny location, such as a south-facing balcony or patio. If you don’t have enough sunlight, you can supplement with grow lights.
2. Watering: Water your chilli plants regularly, especially during hot weather. The soil should be kept moist but not soggy. Avoid overwatering, as this can lead to root rot. Check the soil moisture by sticking your finger into the soil. If the top inch of soil is dry, it’s time to water.
3. Fertilizing: Chilli plants are heavy feeders and need regular fertilization to produce a good crop of peppers. Use a balanced fertilizer or one specifically formulated for tomatoes and peppers. Follow the instructions on the fertilizer packaging. I usually fertilize my chilli plants every 2-3 weeks.
4. Pruning: Pruning can help to encourage bushier growth and more fruit production. You can prune your chilli plants by pinching off the tips of the branches. This will encourage the plant to produce more side shoots. You can also remove any yellowing or dead leaves.
5. Pest Control: Chilli plants can be susceptible to pests such as aphids, spider mites, and whiteflies. Inspect your plants regularly for signs of pests. If you find any pests, you can treat them with insecticidal soap or neem oil. Follow the instructions on the product packaging.
6. Pollination: Chilli plants are self-pollinating, but you can help them along by gently shaking the plants or using a small paintbrush to transfer pollen from one flower to another. This is especially important if you’re growing your chillies indoors.
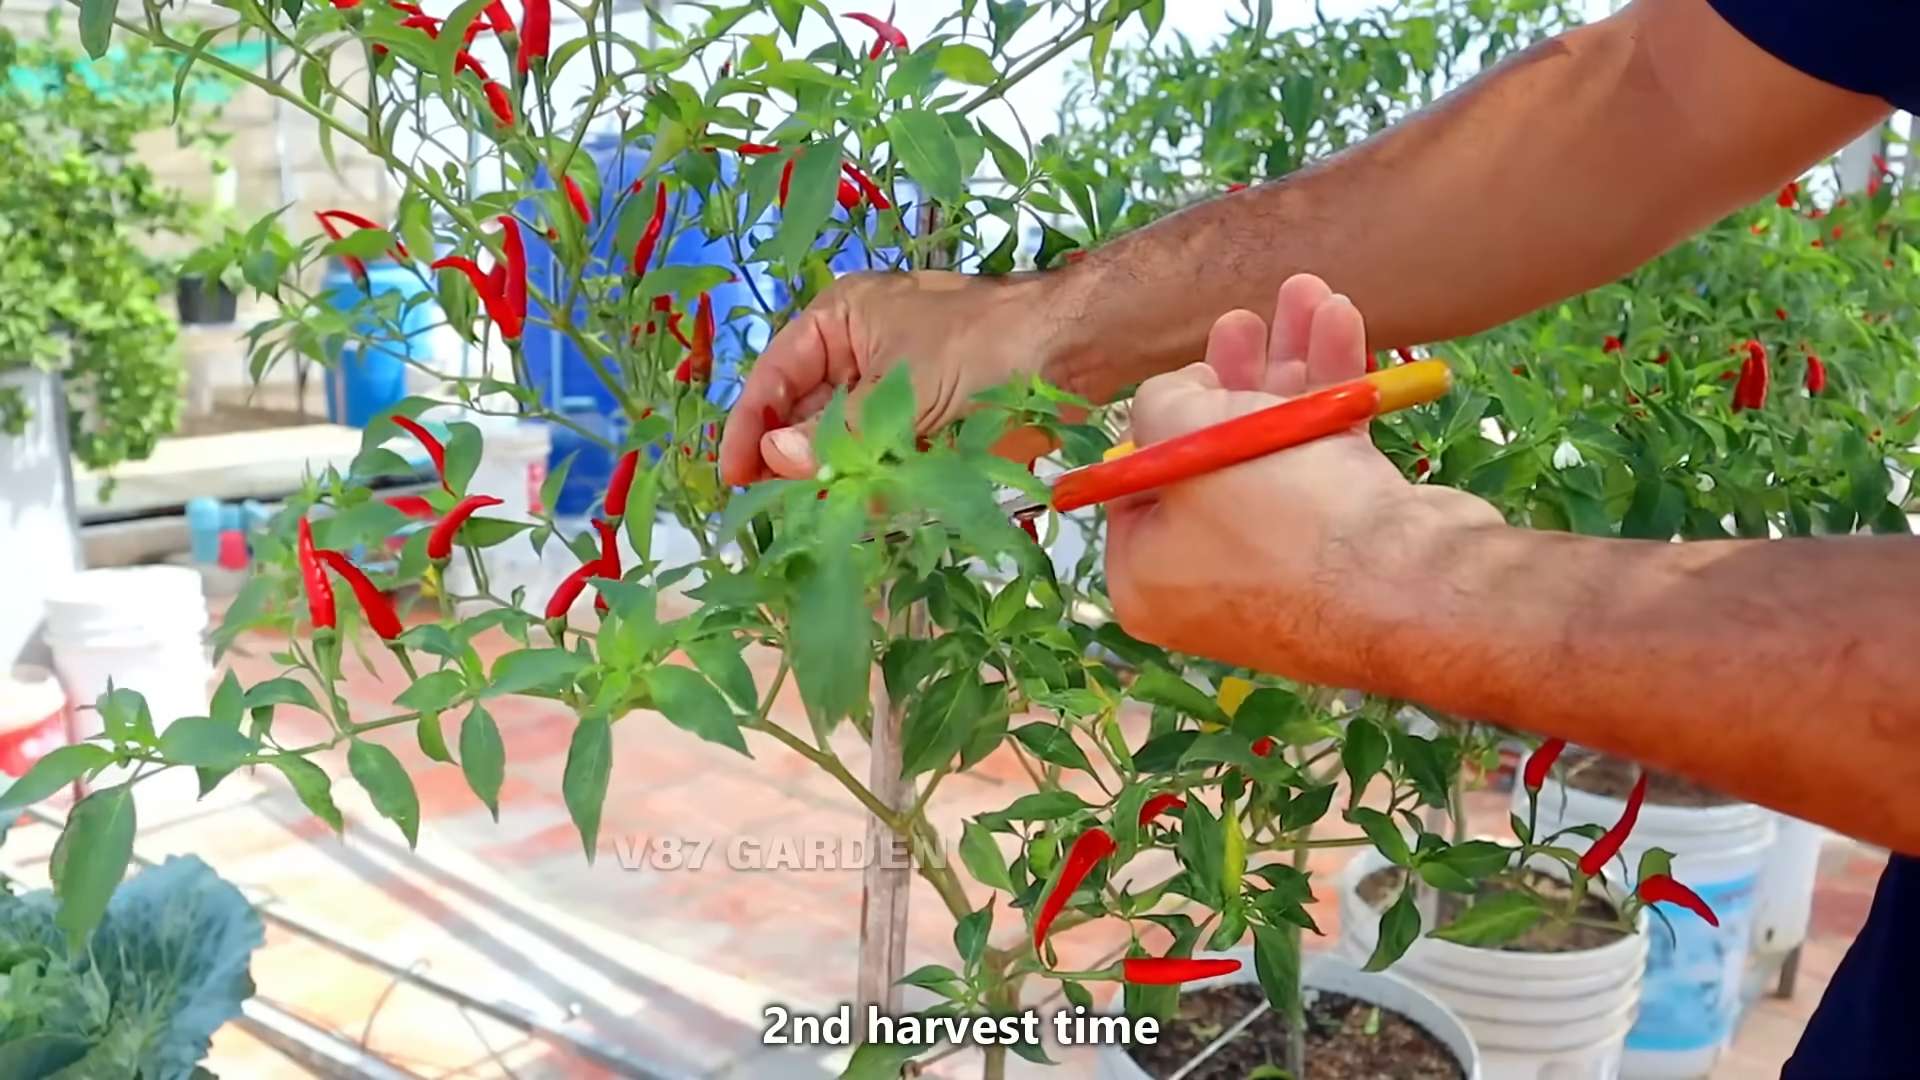
Phase 4: Harvesting Your Chillies
The moment you’ve been waiting for! Harvesting your chillies is the most rewarding part of the process.
1. Knowing When to Harvest: The best time to harvest your chillies depends on the variety and your personal preference. Some chillies are best harvested when they are green, while others are best harvested when they are red or another color. Generally, chillies are ready to harvest when they have reached their mature size and color.
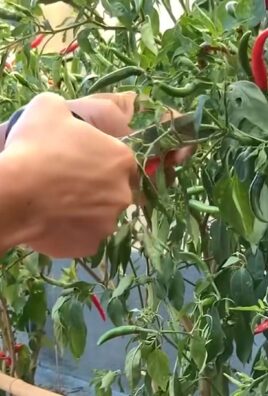
2. Harvesting Technique: Use pruning shears or scissors to cut the chillies from the plant. Be careful not to damage the plant. Wear gloves when harvesting hot chillies to avoid getting the oils on your skin.
3. Storing Your Chillies: You can store your chillies in the refrigerator for several weeks. You can also dry them, freeze them, or pickle them.
Troubleshooting: Common Chilli Growing Problems
Even with the best care, you might encounter some problems along the way. Here are a few common issues and how to address them:
* Yellowing Leaves: This can be caused by overwatering, underwatering, nutrient deficiencies, or pests. Check the soil moisture and adjust your watering accordingly. Fertilize your plants regularly. Inspect your plants for pests and treat them if necessary.
* Blossom Drop: This is when the flowers fall off the plant without producing fruit. It can be caused by temperature stress (too hot or too cold), lack of pollination, or nutrient deficiencies. Ensure your plants are getting enough sunlight and water. Hand-pollinate your plants if necessary. Fertilize your plants regularly.
* Pest Infestations: As mentioned earlier, aphids, spider mites, and whiteflies are common pests of chilli plants. Treat them with insecticidal soap or neem oil.
* Lack of Fruit Production: This can be caused by a variety of factors, including lack of sunlight, poor pollination, nutrient deficiencies, or temperature stress. Make sure your plants are getting enough sunlight and water. Hand-pollinate your plants if necessary. Fertilize your plants regularly
Conclusion
So, there you have it! Growing chillies in pots isn’t just a gardening project; it’s an adventure in flavor, a splash of vibrant color for your patio, and a deeply satisfying way to connect with the food you eat. We’ve walked through the essential steps, from selecting the perfect pot and choosing the right chilli variety to nurturing your plants and harvesting your fiery bounty.
Why is this DIY trick a must-try? Because it puts the power of fresh, flavorful chillies directly into your hands, regardless of whether you have a sprawling garden or just a sunny balcony. Imagine the satisfaction of adding a pinch of your own homegrown heat to your favorite dishes, knowing exactly where it came from and how it was nurtured. Store-bought chillies simply can’t compare to the vibrant taste and intense aroma of those you’ve grown yourself. Plus, it’s incredibly rewarding to watch your tiny seedlings transform into thriving plants laden with colorful peppers.
But the beauty of growing chillies in pots lies in its adaptability. Feel free to experiment! Try different varieties of chillies to discover your personal favorites. From the mild and fruity poblano to the scorching habanero, there’s a chilli out there for every palate. Consider companion planting – basil, marigolds, and carrots all thrive alongside chillies and can even help deter pests. You can also adjust the size of your pots to suit your space and the size of the chilli variety you’re growing. For smaller chillies like Thai bird’s eye, a smaller pot will suffice, while larger varieties like bell peppers will need a bigger home.
Don’t be afraid to get creative with your potting mix. While a standard potting mix works well, you can enrich it with compost or aged manure for an extra boost of nutrients. Adding perlite or vermiculite will improve drainage and aeration, which are crucial for healthy chilli plants.
And remember, growing chillies in pots is a learning process. Don’t be discouraged if you encounter challenges along the way. Pests, diseases, and nutrient deficiencies are all part of the gardening experience. The key is to be observant, proactive, and willing to learn from your mistakes.
We wholeheartedly encourage you to give this DIY trick a try. It’s easier than you might think, and the rewards are well worth the effort. Once you’ve tasted the difference between homegrown chillies and store-bought ones, you’ll never go back.
So, grab a pot, some seeds, and get ready to embark on your chilli-growing adventure! And most importantly, we want to hear about your experience. Share your successes, your challenges, and your favorite chilli recipes in the comments below. Let’s create a community of chilli enthusiasts and learn from each other. Happy growing!
Frequently Asked Questions (FAQ)
What is the best time of year to start growing chillies in pots?
The best time to start growing chillies depends on your climate. In general, you should start your seeds indoors 6-8 weeks before the last expected frost. This allows the seedlings to develop a strong root system before being transplanted outdoors. If you live in a warmer climate with a longer growing season, you can start your seeds directly in pots outdoors after the last frost. However, starting indoors gives you a head start and allows you to control the growing environment more effectively.
What size pot should I use for growing chillies?
The size of the pot depends on the variety of chilli you’re growing. Smaller chilli varieties like Thai bird’s eye or cayenne can thrive in pots as small as 8-10 inches in diameter. Larger varieties like bell peppers or jalapeños will need larger pots, at least 12-14 inches in diameter. A good rule of thumb is to choose a pot that is at least as wide as the mature plant is tall. Make sure the pot has drainage holes to prevent waterlogging.
What kind of soil should I use for growing chillies in pots?
Chillies prefer well-draining soil that is rich in organic matter. A good quality potting mix is a great starting point. You can amend the potting mix with compost, aged manure, or worm castings to add extra nutrients. Adding perlite or vermiculite will improve drainage and aeration. Avoid using garden soil, as it can be too heavy and may contain pests or diseases.
How often should I water my chilli plants?
Water your chilli plants regularly, especially during hot, dry weather. The soil should be kept consistently moist, but not waterlogged. Check the soil moisture by sticking your finger into the soil. If the top inch of soil feels dry, it’s time to water. Water deeply, until water drains out of the drainage holes. Avoid watering the leaves, as this can encourage fungal diseases.
How much sunlight do chilli plants need?
Chilli plants need at least 6-8 hours of sunlight per day to thrive. Choose a sunny location for your pots, preferably one that receives morning sun and afternoon shade. If you don’t have a sunny spot, you can supplement with grow lights.
What kind of fertilizer should I use for growing chillies?
Chillies are heavy feeders and benefit from regular fertilization. Use a balanced fertilizer with a ratio of 10-10-10 or 14-14-14. You can also use a fertilizer specifically formulated for tomatoes or peppers. Fertilize every 2-3 weeks during the growing season. Avoid over-fertilizing, as this can burn the roots.
How do I protect my chilli plants from pests and diseases?
Regularly inspect your chilli plants for pests and diseases. Common pests include aphids, spider mites, and whiteflies. You can control these pests with insecticidal soap or neem oil. Common diseases include powdery mildew and blossom end rot. Prevent these diseases by providing good air circulation, avoiding overwatering, and ensuring adequate calcium levels in the soil.
Why are my chilli flowers falling off?
Chilli flowers can fall off for a variety of reasons, including temperature stress, lack of pollination, and nutrient deficiencies. Ensure that your plants are receiving adequate sunlight and water. You can also hand-pollinate the flowers by gently shaking the plant or using a small brush to transfer pollen from one flower to another. Fertilize regularly to ensure that your plants have the nutrients they need.
When should I harvest my chillies?
The time to harvest your chillies depends on the variety and your personal preference. Most chillies are ready to harvest when they have reached their mature color and size. You can harvest green chillies for a milder flavor, or wait until they turn red, yellow, or orange for a hotter flavor. Use scissors or pruning shears to cut the chillies from the plant, leaving a small stem attached.
Can I overwinter my chilli plants?
Yes, you can overwinter your chilli plants indoors. Before the first frost, prune the plants back to about 6-8 inches tall and transplant them into smaller pots. Bring the pots indoors and place them in a sunny location. Water sparingly during the winter months. In the spring, gradually acclimate the plants to outdoor conditions before transplanting them back into larger pots. This is a great way to extend the life of your chilli plants and enjoy a second harvest.
Leave a Comment