
Growing Celery at Home might seem like a challenge reserved for seasoned gardeners, but I’m here to tell you it’s totally achievable, even if you’re a beginner! Forget those limp, expensive stalks from the grocery store. Imagine crisp, flavorful celery, fresh from your own backyard, ready to add a delightful crunch to your salads, soups, and snacks.
Celery has a rich history, dating back to ancient times where it was used medicinally before becoming a culinary staple. From the Mediterranean region, it slowly made its way into our modern diets, but the convenience of grocery stores often overshadows the joy of cultivating our own food. But why settle for store-bought when you can experience the satisfaction of nurturing your own celery patch?
This DIY guide is your secret weapon to successful growing celery at home. We’ll break down the process into easy-to-follow steps, covering everything from seed starting to harvesting. Many people struggle with getting celery to thrive, often facing issues like bolting (premature flowering) or pest infestations. But with the right knowledge and a few simple tricks, you can overcome these hurdles and enjoy a bountiful harvest. I’m excited to share these tips and hacks with you, so let’s get started and transform your garden into a celery-growing haven!

Growing Celery at Home: A Comprehensive DIY Guide
Hello everyone! I love using fresh ingredients straight from my garden, and celery is no exception. It might seem a bit intimidating at first, but believe me, with a little patience and the right steps, you can easily grow your own celery at home. This guide will walk you through the entire process, from choosing the right celery to harvesting your own crisp stalks. Let’s get started!
What You’ll Need
Before we begin, here is a list of the things you’ll need:
- Celery stump: Preferably a fresh, firm stalk from the supermarket or farmers’ market. Make sure the base (the bottom part where the roots were) is intact and not damaged.
- A glass or bowl: Large enough to hold the celery base.
- Water: Tap water is fine.
- Potting soil: High-quality potting soil is important for growth.
- A pot: With drainage holes, large enough for the celery.
- A sunny location: Celery needs plenty of sunlight.
- Patience: Celery takes time to grow.
Growing Celery from a Stump: Step-by-Step Guide
1. Prepare the celery stump:
- Cut the celery stump about 5-7 cm from the bottom end. Make sure you keep the part with the root base.
- Remove the outer, wilted, or damaged stalks. You can use the inner, fresh stalks for soups or salads.
2. Soak the celery base:
- Fill the glass or bowl with about 2-3 cm of water.
- Place the celery base with the cut side down into the water. Make sure only the base is in the water and not the entire stalk.
3. Place in a sunny spot:
- Put the glass with the celery base in a bright, sunny location. A windowsill is ideal.
- Change the water every 1-2 days to keep it fresh and clean.
4. Observe root formation:
- After about 5-7 days, you should see small roots on the underside of the celery base.
- New, green leaves should also begin to grow in the center of the stump.
5. Repot the celery:
- Once the roots are about 5 cm long, it’s time to plant the celery in a pot with soil.
- Fill the pot with potting soil.
- Make a hole in the center of the soil large enough to accommodate the celery base.
- Carefully place the celery base in the hole and cover it with soil. Leave the new leaves exposed.
- Water the celery thoroughly.
6. Care for the celery:
- Place the pot in a sunny location.
- Water the celery regularly, so the soil is moist but not wet.
- Fertilize the celery every 2-3 weeks with an organic fertilizer.
7. Be patient:
- Celery takes time to grow. It can take several months until you have a harvest-ready celery plant.
- Be patient and take good care of your celery.
Tips for Successful Celery Growth
- The right location: Celery needs at least 6 hours of sunlight per day. Choose a sunny spot in your garden or on your balcony.
- The right soil: Use a high-quality potting soil that is well-draining and rich in nutrients. You can also add compost or other organic materials to improve the soil.
- The right watering: Celery needs a lot of water. Water it regularly so the soil is moist but not wet. Avoid waterlogging, as this can lead to root rot.
- The right fertilization: Celery is a heavy feeder. Fertilize it every 2-3 weeks with an organic fertilizer.
- Protection from pests: Celery can be infested by various pests, such as aphids or slugs. Check your plants regularly and combat pests with natural methods if necessary.
- Blanching the celery (optional): To get lighter and milder celery stalks, you can blanch the celery. This is done by covering the stalks with soil or cardboard about 2-3 weeks before harvesting, so that only the leaves get light.
Harvesting Your Homegrown Celery
- When to harvest: Celery is ready to harvest when the stalks have reached a sufficient size and are firm. This is usually after about 3-4 months.
- How to harvest: Cut the stalks at the base with a sharp knife or garden shears. You can either harvest the entire celery plant at once or just individual stalks as needed.
- Storage: Celery can be stored in the refrigerator in a plastic bag or in a container with water. It will stay fresh for several weeks this way.
Potential Problems and Solutions
- Yellow leaves: Yellow leaves can be a sign of too little water, nutrient deficiency, or pest infestation. Check the watering, fertilize the celery, and inspect it for pests.
- Limp stalks: Limp stalks are often a sign of too little water. Water the celery thoroughly.
- Root rot: Root rot is caused by waterlogging. Make sure the pot has good drainage holes and do not overwater the celery.
- Pests: Check your plants regularly for pests and combat them with natural methods if necessary.
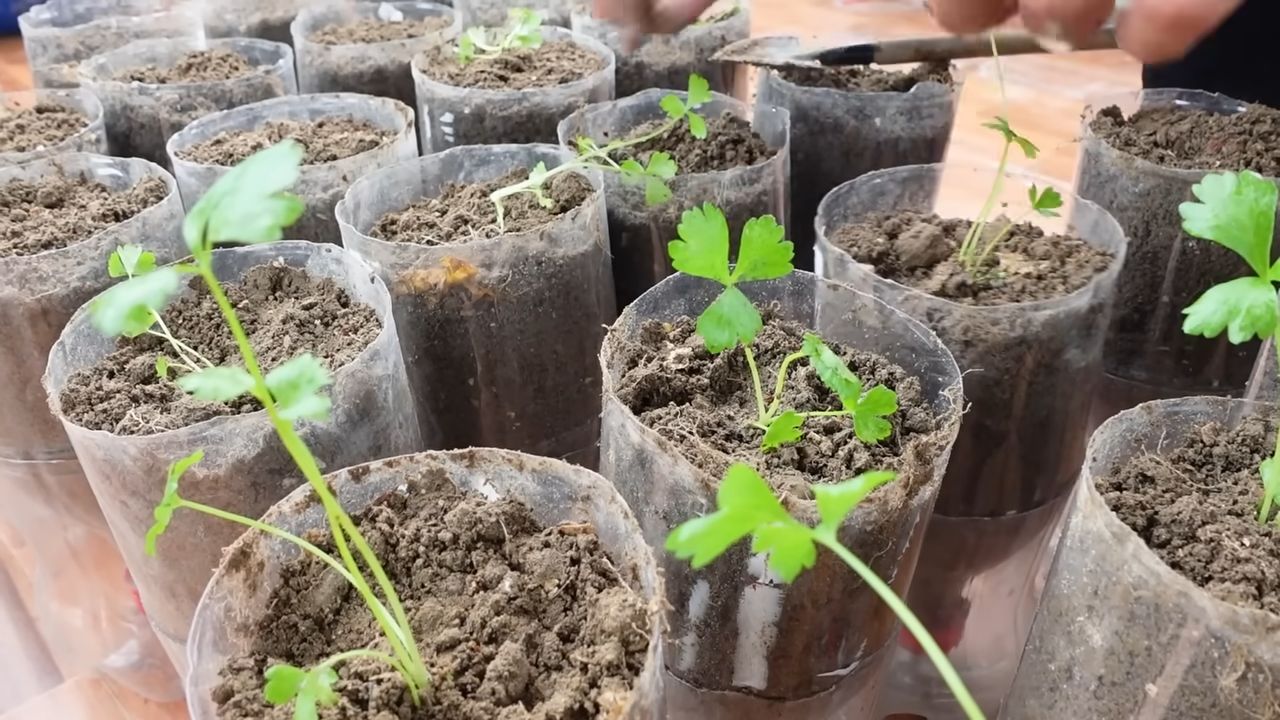
Growing Celery from Seed (Alternative)
Although this article focuses on growing celery from a stump, I want to briefly mention that you can also grow celery from seed. This is a bit more time-consuming, but it allows you to grow different celery varieties.
- Sowing: Sow celery seeds in seed trays or pots in the spring.
- Germination: Celery seeds need light to germinate. Lightly press the seeds into the soil and spray them with water. Keep the soil moist.
- Pricking out: Once the seedlings are large enough, prick them out into separate pots.
- Planting out: Plant the celery seedlings outdoors after the last frosts.
Why Grow Celery Yourself?
There are many reasons why I love to grow my own celery:
- Freshness: Homegrown celery is much fresher and more aromatic than celery from the supermarket.
- Sustainability: You reduce your ecological footprint by not requiring long transport routes.
- Control: You know exactly what’s in your celery because you grew it yourself.
- Satisfaction: It’s just a great feeling to grow and harvest something yourself.
I hope this guide has helped and inspired you to grow your own celery at home. It’s a rewarding project that will reward you with fresh, healthy ingredients. Good luck and have fun gardening
Conclusion
So, there you have it! Growing celery at home, while it might seem daunting at first, is a surprisingly rewarding experience. It’s not just about saving money on groceries; it’s about connecting with your food, understanding the process from seed to stalk, and enjoying the unparalleled freshness of homegrown produce. Think about it: no more limp, store-bought celery that’s been sitting on a shelf for days. Instead, you’ll have crisp, vibrant stalks ready to be harvested whenever you need them.
But the benefits extend beyond just taste and freshness. By growing your own celery, you’re reducing your carbon footprint by minimizing transportation and packaging. You’re also ensuring that your celery is free from harmful pesticides and herbicides, giving you complete control over what goes into your body. Plus, let’s be honest, there’s a certain satisfaction that comes from nurturing a plant from a tiny seed into a thriving vegetable. It’s a tangible accomplishment that you can be proud of.
This DIY trick of regrowing celery from the base is a fantastic starting point. It’s simple, requires minimal effort, and provides a quick and easy way to get your celery-growing journey underway. However, don’t stop there! Once you’ve mastered the art of regrowing from the base, consider experimenting with different celery varieties. There’s the classic Pascal celery, known for its crispness and mild flavor, or the Golden Self-Blanching celery, which is sweeter and more tender. You can even try growing celeriac, the root vegetable related to celery, for a unique and flavorful addition to your soups and stews.
Furthermore, explore different growing methods. While regrowing from the base is great for a quick start, consider starting celery from seed for a more complete growing experience. This will allow you to select specific varieties and control every aspect of the growing process. You can also experiment with different soil types and fertilizers to see what works best for your celery.
Don’t be afraid to get your hands dirty and experiment! Gardening is all about learning and adapting. There will be successes and failures along the way, but each experience will teach you something new.
We truly believe that growing celery at home is a must-try for any home gardener, regardless of experience level. It’s a fun, rewarding, and sustainable way to enjoy fresh, healthy produce. So, grab a celery base, follow our simple steps, and get ready to experience the joy of homegrown celery.
We’re confident that you’ll be amazed at how easy and rewarding it is. And once you’ve harvested your first crop, we encourage you to share your experience with us! Post photos of your homegrown celery on social media using [Your Hashtag Here] and tell us about your successes and challenges. We’d love to hear your tips and tricks for growing the best celery possible. Let’s create a community of home celery growers and inspire others to join in the fun! So, what are you waiting for? Get growing!
Frequently Asked Questions (FAQ)
Why should I bother growing celery at home when I can just buy it at the store?
That’s a valid question! While store-bought celery is convenient, homegrown celery offers several advantages. First and foremost, the taste and freshness are unparalleled. Homegrown celery is noticeably crisper, more flavorful, and lacks the bitterness that can sometimes be present in store-bought varieties. Secondly, you have complete control over the growing process, ensuring that your celery is free from harmful pesticides and herbicides. This is especially important if you’re concerned about the chemicals used in conventional agriculture. Thirdly, growing your own celery is a sustainable practice that reduces your carbon footprint by minimizing transportation and packaging. Finally, it’s a rewarding and educational experience that connects you with your food and the natural world. Plus, the satisfaction of harvesting your own celery is hard to beat!
Is it really that easy to regrow celery from the base?
Yes, it is! Regrowing celery from the base is one of the easiest and most beginner-friendly gardening projects you can undertake. It requires minimal effort and resources, and the results are often surprisingly quick. Simply place the celery base in a shallow dish of water, provide it with sunlight, and watch it sprout new growth. Within a week or two, you’ll have a small celery plant ready to be transplanted into soil. While it may not produce full-sized stalks right away, it’s a great way to get started and learn the basics of celery cultivation.
What kind of soil is best for growing celery?
Celery thrives in rich, well-drained soil that is high in organic matter. A good soil mix should retain moisture but also allow for adequate drainage to prevent root rot. Amend your garden soil with compost, aged manure, or other organic materials to improve its fertility and drainage. A slightly acidic to neutral soil pH (around 6.0 to 7.0) is ideal. You can test your soil pH using a home testing kit or by sending a sample to a local agricultural extension office.
How much sunlight does celery need?
Celery needs at least six hours of sunlight per day to thrive. Choose a location in your garden that receives full sun, especially during the morning hours. If you live in a hot climate, providing some afternoon shade can help prevent the celery from bolting (going to seed prematurely). When growing celery indoors, place it near a sunny window or supplement with artificial grow lights.
How often should I water my celery?
Celery is a water-loving plant and requires consistent moisture to grow properly. Water your celery regularly, especially during hot and dry weather. Aim to keep the soil consistently moist but not waterlogged. Check the soil moisture level regularly by sticking your finger into the soil. If the top inch feels dry, it’s time to water. Mulching around the base of the celery plant can help retain moisture and suppress weeds.
What are some common pests and diseases that affect celery?
Celery can be susceptible to several pests and diseases, including aphids, celery leaf tiers, and fungal diseases like early blight and late blight. Regularly inspect your celery plants for signs of infestation or disease. If you spot any problems, take action promptly to prevent them from spreading. Organic pest control methods, such as insecticidal soap or neem oil, can be effective against aphids and other pests. For fungal diseases, ensure good air circulation around the plants and avoid overhead watering. You can also use organic fungicides if necessary.
Can I grow celery in containers?
Yes, you can definitely grow celery in containers! Choose a large container (at least 12 inches in diameter) with drainage holes. Fill the container with a high-quality potting mix that is rich in organic matter. Water regularly and fertilize every few weeks with a balanced fertilizer. Container-grown celery may require more frequent watering than celery grown in the ground, especially during hot weather.
How long does it take to grow celery from seed?
Growing celery from seed takes longer than regrowing from the base. It typically takes around 120 to 150 days from seed to harvest. Start the seeds indoors 8 to 10 weeks before the last expected frost. Transplant the seedlings outdoors after the danger of frost has passed.
When is celery ready to harvest?
Celery is ready to harvest when the stalks are at least 6-8 inches long and have reached the desired thickness. You can harvest individual stalks as needed or harvest the entire plant at once. To harvest, simply cut the stalks at the base of the plant with a sharp knife.
Can I freeze celery?
Yes, you can freeze celery for later use. Wash and chop the celery into small pieces. Blanch the celery in boiling water for 2-3 minutes, then immediately transfer it to an ice bath to stop the cooking process. Drain the celery well and pack it into freezer bags or containers. Frozen celery is best used in soups, stews, and other cooked dishes.


Leave a Comment