
Growing cabbage at home might seem like a challenge reserved for seasoned gardeners, but I’m here to tell you it’s totally achievable, even if you’re a beginner! Forget those supermarket cabbages that lack flavor and freshness. Imagine stepping into your backyard and harvesting a crisp, juicy cabbage, bursting with homegrown goodness.
For centuries, cabbage has been a staple in diets across the globe, from the hearty stews of Eastern Europe to the vibrant slaws of America. Its versatility and nutritional value have made it a beloved vegetable in countless cultures. But did you know that cultivating your own cabbage connects you to this rich history in a tangible way?
In this article, I’m going to share some simple yet effective DIY tricks and hacks that will transform your garden into a cabbage-growing haven. We’ll cover everything from choosing the right variety for your climate to protecting your precious plants from pests. Growing cabbage at home doesn’t have to be intimidating. With a little know-how and these easy DIY solutions, you’ll be enjoying delicious, homegrown cabbage in no time. So, grab your gardening gloves, and let’s get started!
Growing Cabbage at Home: A Beginner’s Guide
Hey there, fellow gardening enthusiasts! Ever thought about growing your own cabbage? It’s surprisingly rewarding, and nothing beats the taste of fresh, homegrown cabbage in your favorite dishes. I’m going to walk you through everything you need to know, from choosing the right variety to harvesting your beautiful, leafy heads. Let’s get started!
Choosing Your Cabbage Variety
First things first, you need to decide what kind of cabbage you want to grow. There are tons of options, each with its own unique characteristics. Here’s a quick rundown:
* Green Cabbage: This is your classic, everyday cabbage. It’s versatile and great for coleslaw, soups, and stir-fries. Varieties like ‘Early Jersey Wakefield’ and ‘Golden Acre’ are popular choices.
* Red Cabbage: Adds a pop of color to your garden and your plate! It has a slightly peppery flavor and is delicious pickled or in salads. ‘Red Acre’ is a reliable variety.
* Savoy Cabbage: Known for its crinkled leaves and mild flavor. It’s perfect for stuffing or using in braised dishes. ‘Savoy Ace’ is a good option.
* Napa Cabbage: Also known as Chinese cabbage, it has a milder, sweeter flavor than other varieties. It’s often used in Asian cuisine, like stir-fries and kimchi.
Consider your climate and the length of your growing season when making your choice. Some varieties mature faster than others. Check the seed packet for specific information.
Starting Your Cabbage Seeds
You can either start your cabbage seeds indoors or directly sow them in your garden. I usually prefer starting them indoors, especially if I want an early harvest.
* Indoor Starting (Recommended):
1. Gather Your Supplies: You’ll need seed starting trays or small pots, seed starting mix (a light, well-draining mix is crucial), cabbage seeds, a spray bottle, and a grow light (optional, but highly recommended).
2. Sow the Seeds: Fill your trays or pots with seed starting mix. Moisten the mix with the spray bottle – you want it damp, not soggy. Sow the seeds about ¼ inch deep, placing 2-3 seeds per cell or pot.
3. Provide Light and Warmth: Cabbage seeds need light to germinate. Place your trays or pots under a grow light or in a sunny window. Keep the soil consistently moist. A heat mat can also help speed up germination.
4. Thin the Seedlings: Once the seedlings emerge (usually within 5-10 days), thin them to one strong seedling per cell or pot. Snip off the weaker seedlings at the soil line with scissors.
5. Harden Off the Seedlings: Before transplanting your seedlings outdoors, you need to “harden them off.” This means gradually exposing them to outdoor conditions over a period of 7-10 days. Start by placing them in a sheltered spot for an hour or two each day, gradually increasing the amount of time they spend outside.
* Direct Sowing (Less Common):
1. Prepare the Soil: Make sure your garden soil is well-drained and amended with compost or other organic matter.
2. Sow the Seeds: Sow the seeds about ½ inch deep, spacing them according to the variety’s recommendations (usually 12-24 inches apart).
3. Keep the Soil Moist: Water the area regularly to keep the soil consistently moist until the seedlings emerge.
4. Thin the Seedlings: Once the seedlings are a few inches tall, thin them to the strongest plant, spacing them appropriately.
Preparing Your Garden Bed
Cabbage thrives in well-drained, fertile soil with a pH between 6.0 and 7.0. Before transplanting your seedlings (or direct sowing), take the time to prepare your garden bed properly.
1. Choose a Sunny Location: Cabbage needs at least 6 hours of sunlight per day.
2. Amend the Soil: Dig in plenty of compost or well-rotted manure to improve soil drainage and fertility. Cabbage is a heavy feeder, so adding organic matter is essential.
3. Check the pH: Use a soil testing kit to check the pH of your soil. If it’s too acidic (below 6.0), add lime to raise the pH. If it’s too alkaline (above 7.0), add sulfur to lower the pH.
4. Create Raised Beds (Optional): Raised beds can improve drainage, especially in areas with heavy clay soil.
Transplanting Your Cabbage Seedlings
Once your seedlings are hardened off and your garden bed is prepared, it’s time to transplant them.
1. Choose the Right Time: Transplant your seedlings on a cool, cloudy day to minimize stress. Early morning or late afternoon is ideal.
2. Dig Holes: Dig holes that are slightly larger than the root balls of your seedlings. Space the holes according to the variety’s recommendations (usually 12-24 inches apart).
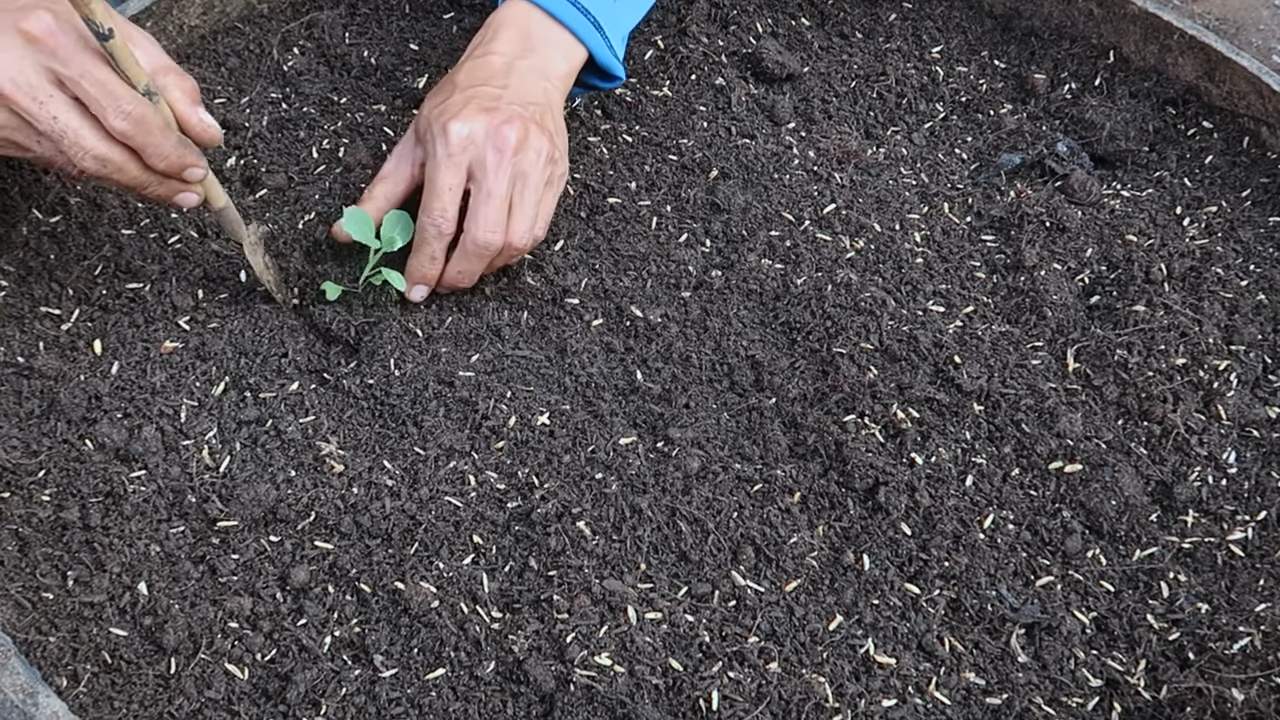
3. Carefully Remove Seedlings: Gently remove the seedlings from their trays or pots, being careful not to damage the roots.
4. Plant the Seedlings: Place the seedlings in the holes, making sure the top of the root ball is level with the soil surface.
5. Backfill and Water: Backfill the holes with soil and gently firm the soil around the base of the plants. Water thoroughly.
6. Mulch (Optional): Apply a layer of mulch around the plants to help retain moisture, suppress weeds, and regulate soil temperature. Straw, shredded leaves, or wood chips are good options.
Caring for Your Cabbage Plants
Now that your cabbage plants are in the ground, it’s time to provide them with the care they need to thrive.
* Watering: Cabbage needs consistent moisture, especially during hot, dry weather. Water deeply and regularly, aiming to keep the soil consistently moist but not waterlogged.
* Fertilizing: As I mentioned, cabbage is a heavy feeder. Fertilize your plants every 2-3 weeks with a balanced fertilizer or a fertilizer specifically formulated for vegetables. Follow the instructions on the fertilizer package. You can also side-dress with compost or well-rotted manure.
* Weeding: Keep your garden bed free of weeds, which can compete with your cabbage plants for nutrients and water. Hand-pull weeds regularly or use a hoe to cultivate the soil.
* Pest Control: Cabbage can be susceptible to several pests, including cabbage worms, aphids, and flea beetles.
* Cabbage Worms: These green caterpillars can quickly devour your cabbage leaves. Inspect your plants regularly and hand-pick any worms you find. You can also use Bacillus thuringiensis (Bt), a natural insecticide that is effective against cabbage worms.
* Aphids: These small, sap-sucking insects can weaken your plants. Spray them off with a strong stream of water or use insecticidal soap.
* Flea Beetles: These tiny beetles can create small holes in your cabbage leaves. Cover your plants with row covers to prevent flea beetles from reaching them. You can also use diatomaceous earth, a natural insecticide that is effective against flea beetles.
* Disease Prevention: Cabbage can also be susceptible to several diseases, including black rot and clubroot.
* Black Rot: This bacterial disease can cause yellowing and wilting of the leaves. Plant disease-resistant varieties and avoid overhead watering.
* Clubroot: This fungal disease can cause swollen, distorted roots. Rotate your crops and avoid planting cabbage in the same spot year after year. Amend the soil with lime to raise the pH.
Harvesting Your Cabbage
The time it takes for cabbage to mature depends on the variety and growing conditions. Most varieties are ready to harvest in 60-100 days from transplanting.
1. Check for Firmness: The cabbage head should feel firm and solid when you squeeze it.
2. Cut the Head: Use a sharp knife to cut the head from the stem, leaving a few outer leaves attached.
3. Store Properly: Store your harvested cabbage in the refrigerator. It will keep for several weeks.
Enjoy Your Homegrown Cabbage!
Congratulations! You’ve successfully grown your own cabbage. Now it’s time to enjoy the fruits (or rather, vegetables) of your labor. Use your fresh cabbage in coleslaw, soups, stir-fries, or any other dish you like. There’s nothing quite like the taste of homegrown cabbage!
Growing cabbage can be a really rewarding experience. Don’t be afraid to experiment with different varieties and techniques to find what works best for you. Happy gardening!
Conclusion
So, there you have it! Growing cabbage at home isn’t just a gardening project; it’s a gateway to fresher, tastier, and more rewarding meals. Forget those bland, store-bought heads that have traveled miles – imagine the crisp, vibrant flavor of cabbage harvested straight from your own backyard. This DIY approach puts you in control, allowing you to cultivate varieties you might never find at the grocery store and ensuring your cabbage is free from unwanted pesticides.
This method is a must-try for several compelling reasons. First, the taste difference is undeniable. Homegrown cabbage boasts a sweetness and tenderness that commercially grown varieties often lack. Second, you’ll save money in the long run. While there’s an initial investment in seeds or seedlings, you’ll be reaping the rewards of fresh cabbage for weeks, even months, depending on your planting schedule. Third, and perhaps most importantly, growing your own food is incredibly satisfying. There’s a unique sense of accomplishment that comes from nurturing a plant from seed to harvest, knowing you’ve provided yourself and your family with healthy, delicious food.
Don’t be afraid to experiment! Try different varieties of cabbage to find your favorites. Red cabbage adds a beautiful splash of color to salads and slaws, while savoy cabbage offers a delicate, crinkled texture. For a spicier kick, consider growing Chinese cabbage, perfect for stir-fries and kimchi. You can also adjust the planting schedule to ensure a continuous harvest throughout the growing season. Succession planting, where you sow seeds every few weeks, will keep you supplied with fresh cabbage for an extended period.
Consider companion planting to maximize your garden’s potential. Cabbage thrives alongside herbs like rosemary and thyme, which can help deter pests. Marigolds are also excellent companions, attracting beneficial insects that prey on cabbage worms. Avoid planting cabbage near strawberries or tomatoes, as they can compete for nutrients.
We understand that gardening can seem daunting, especially for beginners. But growing cabbage at home is surprisingly straightforward, and the rewards are well worth the effort. With a little planning, preparation, and patience, you can enjoy a bountiful harvest of fresh, delicious cabbage.
We wholeheartedly encourage you to give this DIY trick a try. Start small, learn as you go, and don’t be afraid to make mistakes. Gardening is a journey, and every season brings new opportunities to learn and grow.
And most importantly, we want to hear about your experiences! Share your tips, successes, and challenges in the comments below. Let’s build a community of cabbage-growing enthusiasts and learn from each other. What varieties did you try? What challenges did you face? What advice would you give to other beginners? Your insights can help others embark on their own cabbage-growing adventures. Happy gardening!
Frequently Asked Questions (FAQ)
What is the best time to plant cabbage?
The best time to plant cabbage depends on your climate and the variety you’re growing. Generally, cabbage is a cool-season crop, meaning it thrives in temperatures between 60°F and 70°F (15°C and 21°C). For spring harvests, start seeds indoors 6-8 weeks before the last expected frost. Transplant seedlings outdoors 2-3 weeks before the last frost. For fall harvests, sow seeds directly into the garden in mid-summer, about 10-12 weeks before the first expected frost. Check your local frost dates and the specific recommendations for your chosen cabbage variety for the most accurate timing.
How much sunlight does cabbage need?
Cabbage needs at least 6 hours of direct sunlight per day to thrive. Choose a sunny location in your garden where the plants will receive ample sunlight throughout the day. If you live in a particularly hot climate, some afternoon shade can be beneficial to prevent the leaves from scorching.
What kind of soil is best for growing cabbage?
Cabbage prefers well-drained, fertile soil that is rich in organic matter. Amend your soil with compost or well-rotted manure before planting to improve its fertility and drainage. The ideal soil pH for cabbage is between 6.0 and 7.0. You can test your soil pH using a home testing kit or by sending a sample to your local agricultural extension office.
How often should I water cabbage plants?
Cabbage plants need consistent moisture to thrive. Water deeply and regularly, especially during dry periods. Aim to keep the soil consistently moist but not waterlogged. Mulching around the plants can help retain moisture and suppress weeds. Check the soil moisture regularly by sticking your finger into the soil about an inch deep. If the soil feels dry, it’s time to water.
What are some common pests and diseases that affect cabbage?
Cabbage is susceptible to several pests and diseases, including cabbage worms, aphids, flea beetles, clubroot, and black rot. Regularly inspect your plants for signs of infestation or disease. Handpick cabbage worms and other pests as you see them. Use row covers to protect young plants from pests. Practice crop rotation to prevent soilborne diseases. Choose disease-resistant varieties whenever possible. If you encounter serious pest or disease problems, consult your local agricultural extension office for advice on appropriate treatments.
How do I prevent cabbage worms from eating my cabbage?
Cabbage worms are a common pest that can decimate your cabbage crop. There are several ways to prevent them. Row covers are an effective physical barrier that prevents moths from laying eggs on your plants. Bacillus thuringiensis (Bt) is a biological insecticide that is safe for humans and pets but deadly to cabbage worms. Apply Bt to the leaves of your plants according to the package directions. Companion planting with herbs like rosemary and thyme can also help deter cabbage moths.
When is cabbage ready to harvest?
Cabbage is ready to harvest when the head is firm and solid. The size of the head will vary depending on the variety. Gently squeeze the head to check for firmness. If it feels solid and compact, it’s ready to harvest. Use a sharp knife to cut the head from the stem, leaving a few outer leaves attached.
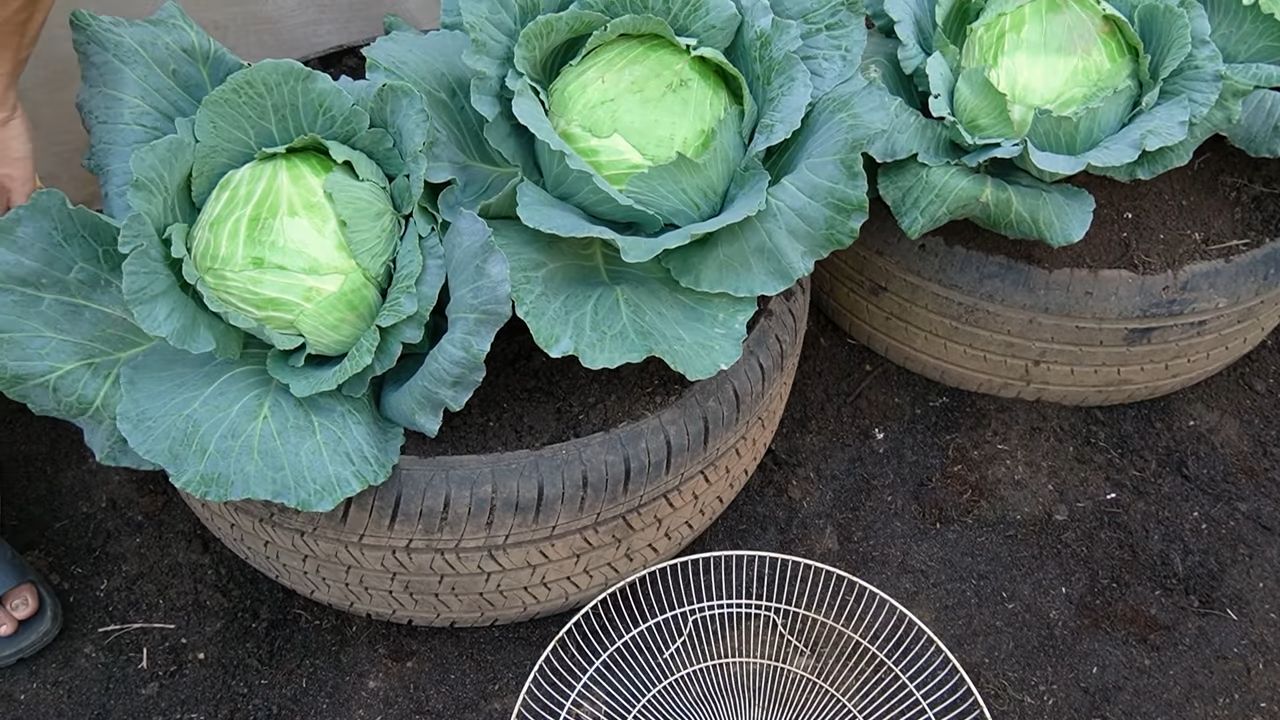
Can I grow cabbage in containers?
Yes, you can grow cabbage in containers, but you’ll need to choose a large container that is at least 12 inches in diameter and 12 inches deep. Use a well-draining potting mix and provide the plants with plenty of sunlight and water. Container-grown cabbage may require more frequent fertilization than cabbage grown in the ground.
How do I store harvested cabbage?
Store harvested cabbage in a cool, humid place, such as a refrigerator or root cellar. Wrap the head in plastic wrap or store it in a plastic bag to prevent it from drying out. Cabbage can be stored for several weeks under proper conditions.
What are some creative ways to use homegrown cabbage?
Homegrown cabbage is incredibly versatile and can be used in a wide variety of dishes. Enjoy it raw in salads and slaws, or cook it in stir-fries, soups, stews, and casseroles. Cabbage rolls are a classic dish that showcases the flavor of cabbage. You can also ferment cabbage to make sauerkraut or kimchi. Don’t forget to use the outer leaves in vegetable broth or compost them to enrich your garden soil.

Leave a Comment