
Growing Bottle Gourds at Home can seem like a daunting task, but trust me, with a few clever tricks and a little DIY spirit, you can be harvesting your own gourds in no time! Have you ever imagined transforming your backyard into a mini-farm, overflowing with these fascinating and versatile vegetables? Well, stop dreaming and start doing! This article is packed with easy-to-follow DIY hacks that will make growing bottle gourds a rewarding and enjoyable experience.
Bottle gourds, also known as calabash, have a rich history, dating back thousands of years. They weren’t just a food source; ancient civilizations used them for everything from crafting utensils and musical instruments to creating water containers. Imagine, your very own bottle gourd could be a link to that ancient ingenuity! But beyond the historical charm, why should *you* be interested in growing bottle gourds at home?
Well, for starters, they’re incredibly nutritious and delicious when young. Plus, they’re a fantastic conversation starter! More importantly, learning how to grow them yourself means you’re in control of what goes into your food – no harmful pesticides or questionable practices. In today’s world, where we’re all striving for a more sustainable and healthy lifestyle, mastering the art of growing bottle gourds at home is a fantastic step in the right direction. So, let’s dive in and unlock the secrets to a bountiful bottle gourd harvest!

Flaschenkürbisse zu Hause anbauen: Dein DIY-Leitfaden
Hey Gartenfreunde! Habt ihr schon mal daran gedacht, eure eigenen Flaschenkürbisse anzubauen? Es ist einfacher als ihr denkt und macht super viel Spaß! Außerdem könnt ihr die getrockneten Kürbisse später für tolle DIY-Projekte verwenden. Ich zeige euch, wie es geht!
Was du brauchst: Die Materialliste
Bevor wir loslegen, hier eine Liste mit allem, was du für den Anbau deiner eigenen Flaschenkürbisse benötigst:
* Flaschenkürbis-Samen: Am besten Bio-Samen von einem vertrauenswürdigen Anbieter.
* Anzuchttöpfe oder Eierkartons: Für die Voranzucht im Haus.
* Anzuchterde: Spezielle Erde für Keimlinge, die nicht zu stark gedüngt ist.
* Gartenerde: Gute, nährstoffreiche Erde für den späteren Standort im Garten.
* Kompost oder organischer Dünger: Um den Boden anzureichern.
* Pflanzgefäße (optional): Wenn du die Kürbisse nicht direkt in den Garten pflanzen möchtest.
* Rankhilfe: Flaschenkürbisse sind Kletterpflanzen und brauchen Unterstützung. Das kann ein Spalier, ein Zaun oder ein selbstgebautes Gerüst sein.
* Gießkanne oder Gartenschlauch: Zum regelmäßigen Gießen.
* Gartenschere: Zum Ausgeizen und Entfernen von Blättern.
* Handschuhe: Um deine Hände sauber zu halten.
* Geduld: Flaschenkürbisse brauchen Zeit zum Wachsen!
Phase 1: Die Voranzucht im Haus
Die Voranzucht im Haus ist besonders in kühleren Regionen wichtig, um den Kürbissen einen Vorsprung zu verschaffen. So geht’s:
1. Samen vorbereiten: Um die Keimung zu beschleunigen, kannst du die Samen für 24 Stunden in lauwarmem Wasser einweichen. Das macht die Schale weicher.
2. Anzuchttöpfe befüllen: Fülle die Anzuchttöpfe oder Eierkartons mit Anzuchterde. Drücke die Erde leicht an.
3. Samen säen: Lege in jeden Topf ein bis zwei Samen, etwa 1-2 cm tief. Bedecke die Samen mit Erde und gieße sie vorsichtig an.
4. Warm stellen: Stelle die Anzuchttöpfe an einen warmen, hellen Ort. Eine Fensterbank über der Heizung ist ideal. Die optimale Keimtemperatur liegt bei 20-25°C.
5. Feucht halten: Halte die Erde feucht, aber nicht nass. Am besten sprühst du die Erde regelmäßig mit einer Sprühflasche ein.
6. Geduld haben: Nach etwa 1-2 Wochen sollten die ersten Keimlinge zu sehen sein.
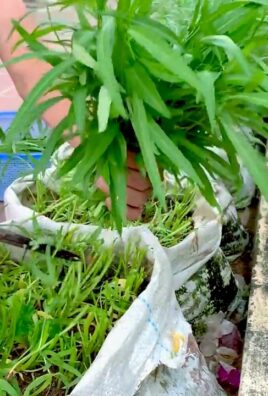
Phase 2: Die Auspflanzung ins Freie
Sobald die Keimlinge kräftig genug sind und keine Frostgefahr mehr besteht (meist Mitte Mai), können sie ins Freie gepflanzt werden.
1. Abhärten: Bevor du die Kürbispflanzen ins Freie pflanzt, solltest du sie einige Tage lang abhärten. Stelle sie tagsüber für ein paar Stunden nach draußen und hole sie abends wieder rein. So gewöhnen sie sich an die veränderten Bedingungen.
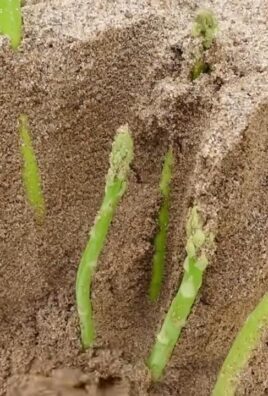
2. Standort vorbereiten: Wähle einen sonnigen Standort mit gut durchlässigem Boden. Flaschenkürbisse sind Starkzehrer und brauchen einen nährstoffreichen Boden. Grabe ein ausreichend großes Pflanzloch und mische Kompost oder organischen Dünger unter die Erde.
3. Pflanzen: Nimm die Kürbispflanzen vorsichtig aus den Anzuchttöpfen und setze sie in die Pflanzlöcher. Achte darauf, dass der Wurzelballen nicht beschädigt wird. Fülle die Löcher mit Erde auf und drücke sie leicht an.
4. Angießen: Gieße die Pflanzen nach dem Einpflanzen gründlich an.
5. Rankhilfe anbringen: Flaschenkürbisse sind Kletterpflanzen und brauchen eine Rankhilfe. Stelle ein Spalier, einen Zaun oder ein selbstgebautes Gerüst in der Nähe der Pflanzen auf. Die Kürbispflanzen werden sich bald daran festhalten und nach oben klettern.
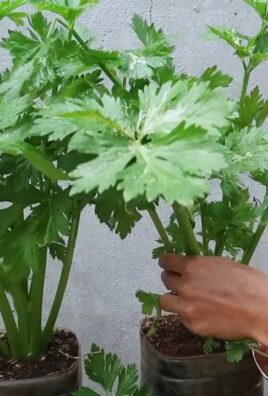
Phase 3: Pflege und Wachstum
Jetzt beginnt die eigentliche Arbeit: die Pflege der Kürbispflanzen.
1. Gießen: Gieße die Kürbispflanzen regelmäßig, besonders während trockener Perioden. Achte darauf, dass die Erde immer leicht feucht ist. Vermeide Staunässe, da dies zu Wurzelfäule führen kann.
2. Düngen: Dünge die Kürbispflanzen regelmäßig mit Kompost, organischem Dünger oder einem speziellen Kürbisdünger. Das fördert das Wachstum und die Fruchtbildung.
3. Ausgeizen: Entferne regelmäßig Seitentriebe (Geiztriebe), die aus den Blattachseln wachsen. Das fördert die Bildung von Früchten und verhindert, dass die Pflanze zu dicht wird.
4. Blätter entfernen: Entferne gelbe oder kranke Blätter, um die Pflanze gesund zu halten und die Luftzirkulation zu verbessern.
5. Bestäubung: Flaschenkürbisse sind einhäusig getrenntgeschlechtig, das heißt, sie haben männliche und weibliche Blüten auf derselben Pflanze. Die Bestäubung erfolgt in der Regel durch Insekten. Wenn du auf Nummer sicher gehen willst, kannst du die Blüten auch von Hand bestäuben. Übertrage dazu mit einem Pinsel Pollen von einer männlichen Blüte auf eine weibliche Blüte. Weibliche Blüten erkennst du an dem kleinen Fruchtansatz direkt unter der Blüte.
6. Schutz vor Schädlingen: Achte auf Schädlinge wie Schnecken, Blattläuse oder Kürbisfliegen. Bekämpfe sie bei Bedarf mit natürlichen Mitteln oder biologischen Schädlingsbekämpfern.
Phase 4: Die Ernte
Die Erntezeit für Flaschenkürbisse ist im Herbst, wenn die Früchte voll ausgereift sind und die Schale hart geworden ist.
1. Reife erkennen: Die Kürbisse sind reif, wenn die Schale hart ist und sich nicht mehr mit dem Fingernagel eindrücken lässt. Auch die Ranke, an der der Kürbis hängt, sollte trocken und braun sein.
2. Ernten: Schneide die Kürbisse mit einer Gartenschere ab, lasse aber einen Stiel von etwa 5-10 cm Länge stehen. Das verhindert, dass die Kürbisse faulen.
3. Trocknen: Die geernteten Kürbisse müssen nun getrocknet werden, bevor sie für DIY-Projekte verwendet werden können. Lege die Kürbisse an einen trockenen, gut belüfteten Ort, z.B. auf einen Dachboden oder in einen Schuppen. Achte darauf, dass die Kürbisse nicht übereinander liegen und dass sie vor Regen und Frost geschützt sind.
4. Trocknungsdauer: Die Trocknungsdauer beträgt je nach Größe der Kürbisse mehrere Wochen bis Monate. Während des Trocknungsprozesses schrumpfen die Kürbisse und die Schale wird immer härter. Schüttle die Kürbisse regelmäßig, um zu hören, ob die Kerne im Inneren lose sind. Wenn die Kerne klappern, sind die Kürbisse trocken.
Phase 5: Die Verwendung der getrockneten Flaschenkürbisse
Nach dem Trocknen sind die Flaschenkürbisse bereit für deine kreativen DIY-Projekte! Hier sind ein paar Ideen:
* Vogelhäuser: Bohre ein Loch in den Kürbis und hänge ihn als Vogelhaus auf.
* Laternen: Schnitze Muster in den Kürbis und stelle eine Kerze hinein.
* Schalen und Behälter: Schneide den Kürbis auf und verwende ihn als Schale oder Behälter.
* Musikinstrumente: Aus Flaschenkürbissen lassen sich tolle Musikinstrumente wie Rasseln oder Trommeln bauen.
* Dekoration: Bemal oder verziere die Kürbisse und verwende sie als Dekoration für dein Zuhause oder deinen Garten.
Ich hoffe, dieser Leitfaden hat dir geholfen und inspiriert, deine eigenen Flaschenkürbisse anz

Conclusion
So, there you have it! Growing bottle gourds at home is not only achievable but also incredibly rewarding. From the satisfaction of nurturing a plant from seed to the joy of harvesting your own fresh produce, this DIY project offers a unique connection to nature and a sustainable way to supplement your diet. We’ve covered everything from seed selection and soil preparation to trellising and pest control, providing you with a comprehensive guide to ensure your success.
But why is this DIY trick a must-try? Beyond the obvious benefits of fresh, organic produce, growing your own bottle gourds allows you to cultivate varieties that might not be readily available in your local markets. Imagine impressing your friends and family with unique dishes featuring gourds you’ve grown yourself! Furthermore, it’s a fantastic way to reduce your carbon footprint by minimizing transportation and packaging associated with store-bought produce.
Don’t be afraid to experiment with variations! Consider trying different trellising methods to maximize space and sunlight exposure. You could also explore companion planting to deter pests and attract beneficial insects. For example, planting marigolds near your bottle gourds can help repel nematodes. Another interesting variation is to train your gourds into specific shapes by using molds or supports as they grow. This can add a decorative element to your garden and create truly unique produce.
Remember, patience is key. Bottle gourds require time and attention to thrive, but the results are well worth the effort. The feeling of accomplishment you’ll experience when you harvest your first gourd is unparalleled. Plus, you’ll have a readily available supply of this versatile vegetable for soups, stews, curries, and even crafts!
We wholeheartedly encourage you to embark on this exciting gardening adventure. Give growing bottle gourds at home a try and discover the joys of homegrown produce. And most importantly, we want to hear about your experiences! Share your tips, challenges, and successes in the comments below. Let’s create a community of bottle gourd enthusiasts and learn from each other. Your insights could inspire others to take the plunge and experience the satisfaction of growing their own food. So, grab your seeds, prepare your soil, and get ready to cultivate your very own bottle gourd bounty! Let us know how your **growing bottle gourds at home** journey goes!
Frequently Asked Questions (FAQ)
What is the best time of year to plant bottle gourds?
The ideal time to plant bottle gourds is during the late spring or early summer, after the last frost has passed. Bottle gourds are warm-season crops and require consistent temperatures of at least 70°F (21°C) for optimal growth. In regions with shorter growing seasons, starting seeds indoors 4-6 weeks before the last frost can give you a head start. This allows the seedlings to develop a strong root system before being transplanted outdoors. Make sure to harden off the seedlings gradually by exposing them to increasing amounts of sunlight and outdoor conditions before transplanting.
How much space do bottle gourds need?
Bottle gourds are vigorous climbers and require ample space to grow. Each plant needs at least 6-8 feet of space in all directions. A sturdy trellis or support structure is essential to accommodate their sprawling vines. Consider the mature size of the gourd variety you are growing when planning your garden layout. If you are growing multiple plants, space them at least 3-4 feet apart to allow for adequate air circulation and sunlight penetration. Insufficient spacing can lead to overcrowding, which can increase the risk of fungal diseases and reduce fruit production.
What type of soil is best for growing bottle gourds?
Bottle gourds thrive in well-drained, fertile soil that is rich in organic matter. The ideal soil pH is between 6.0 and 7.0. Before planting, amend the soil with compost, well-rotted manure, or other organic amendments to improve its fertility and drainage. Avoid heavy clay soils, as they can become waterlogged and hinder root development. If you have clay soil, consider adding sand or perlite to improve drainage. Regular soil testing can help you determine the nutrient levels and pH of your soil, allowing you to make necessary adjustments to ensure optimal growth.
How often should I water bottle gourds?
Bottle gourds require consistent moisture, especially during hot and dry weather. Water deeply and regularly, aiming to keep the soil consistently moist but not waterlogged. The frequency of watering will depend on the weather conditions, soil type, and the size of the plants. As a general rule, water deeply 2-3 times per week, or more often during periods of drought. Use a soaker hose or drip irrigation system to deliver water directly to the roots, minimizing water loss through evaporation and reducing the risk of fungal diseases. Avoid overhead watering, as it can wet the foliage and create a favorable environment for fungal growth.
How do I control pests and diseases in bottle gourds?
Bottle gourds are susceptible to various pests and diseases, including squash bugs, squash vine borers, aphids, powdery mildew, and downy mildew. Regular monitoring of your plants is crucial for early detection and control. Handpicking pests, using insecticidal soap, or applying neem oil can help manage infestations. To prevent fungal diseases, ensure good air circulation, avoid overhead watering, and apply a fungicide if necessary. Crop rotation can also help reduce the buildup of soilborne pathogens. Consider using resistant varieties of bottle gourds to minimize the risk of disease.
When are bottle gourds ready to harvest?
The time it takes for bottle gourds to mature varies depending on the variety and growing conditions. Generally, they are ready to harvest 100-120 days after planting. The gourds should be firm and have a hard outer shell. The stem connecting the gourd to the vine will begin to dry and turn brown when the gourd is mature. Use a sharp knife or pruning shears to cut the gourd from the vine, leaving a few inches of stem attached. Handle the gourds carefully to avoid bruising or damaging the skin.
Can I eat bottle gourds?
Yes, bottle gourds are edible when they are young and tender. Mature gourds with a hard shell are typically used for crafts or as containers. When harvesting for culinary purposes, choose gourds that are small to medium in size and have a smooth, unblemished skin. The flesh should be firm and white. Bottle gourds can be used in a variety of dishes, including soups, stews, curries, and stir-fries. They have a mild, slightly sweet flavor that pairs well with other vegetables and spices.
How do I store bottle gourds?
Mature bottle gourds can be stored for several months if properly cured and stored in a cool, dry place. To cure the gourds, wipe them clean with a damp cloth and allow them to dry completely. Place them in a well-ventilated area, such as a shed or garage, away from direct sunlight and moisture. Turn the gourds regularly to ensure even drying. Once the gourds are completely dry and the outer shell is hard, they can be stored in a cool, dry place for several months. Check the gourds periodically for signs of rot or mold and discard any that are damaged. Young, tender gourds should be stored in the refrigerator and used within a few days.
Leave a Comment