
Growing Arugula Indoors can seem daunting, but trust me, it’s easier than you think! Have you ever craved that peppery, fresh bite of arugula in the dead of winter, only to be met with sad, wilted greens at the grocery store? Or perhaps you’re simply looking for a sustainable way to add vibrant flavor to your meals year-round? Well, you’re in the right place!
For centuries, cultivating herbs and vegetables indoors has been a practice rooted in necessity and ingenuity. From ancient Roman window boxes to medieval monastery gardens, people have always found ways to bring the bounty of nature inside. Today, with concerns about food security and a growing desire for fresh, locally sourced ingredients, indoor gardening is experiencing a major resurgence.
This DIY guide is your passport to a thriving indoor arugula patch. I’ll walk you through every step, from selecting the right container and soil to providing optimal light and water. You’ll discover simple hacks and tricks that will ensure a bountiful harvest, even if you don’t have a green thumb (yet!). Growing Arugula Indoors not only provides you with delicious, nutritious greens but also offers a therapeutic and rewarding experience. So, let’s ditch those bland supermarket greens and embark on this exciting journey together!
Sowing Arugula Indoors: Your Guide to Fresh Greens Straight from the Windowsill
Hey gardening friends! Are you in the mood for fresh, peppery arugula, also known as rocket, straight from your kitchen? Then you’ve come to the right place! I’ll show you how to easily grow arugula indoors, whether you have a garden or not. It’s easier than you think and will provide you with a delicious harvest all year round.
What You’ll Need: The Shopping List
Before we begin, here is a list of everything you’ll need for your indoor arugula project:
- Arugula seeds: It’s best to use organic seeds to ensure they haven’t been treated. You can find them at any garden center or online.
- Seedling pots or containers: You can use special seedling pots, but recycled yogurt cups or plastic containers with holes in the bottom will also do the trick.
- Seed starting mix: This soil is specially designed for starting seedlings and contains fewer nutrients than regular potting soil. This encourages root growth.
- Potting soil: After the seedlings have grown a bit larger, they’ll need more nutrient-rich soil.
- A spray bottle: For moistening the soil.
- A watering can: For later watering.
- A sunny spot: A windowsill that gets at least 6 hours of sunlight per day is ideal. Alternatively, you can use a grow light.
- Optional: A seedling dome or plastic wrap to increase humidity.
- Optional: Liquid fertilizer for herbs to support the plants later on.
Step-by-Step Guide: How to Succeed with Arugula Starts
Now, let’s get down to it! Follow these steps to grow your own arugula plants:
- Prepare the seedling pots: Fill the seedling pots or containers with seed starting mix. Lightly press the soil down, but not too firmly. It should remain loose and airy.
- Sow the seeds: Distribute the arugula seeds evenly over the soil. You can sow them quite densely, as not all seeds will germinate. Then, cover the seeds with a thin layer of seed starting mix (about 0.5 cm or 1/4 inch).
- Watering: Gently moisten the soil with the spray bottle. The soil should be moist, but not wet. Avoid washing the seeds away.
- Create a Mini Greenhouse (optional): Cover the seedling pots with a seedling dome or plastic wrap. This increases humidity and promotes germination. Make sure the wrap doesn’t lie directly on the soil but has a little space. You can use toothpicks, for example, to prop up the wrap.
- The Right Location: Place the seedling pots in a warm and bright spot. A temperature between 18 and 24 degrees Celsius (65-75°F) is ideal for germination.
- Patience is a Virtue: The seeds usually germinate within 5 to 10 days. Keep the soil moist, but not wet, during this time. Ventilate the seedling dome or wrap regularly to prevent mold.
Transplanting: Moving Arugula to Its New Home
Once the seedlings have developed a few leaves (about 2-3 weeks after germination), it’s time to transplant them into larger pots.
- Prepare the pots: Fill the larger pots with potting soil. Make sure the pots are large enough (at least 10 cm or 4 inches in diameter) so the arugula plants have enough space to grow.
- Careful Lifting: Gently lift the seedlings out of the starter pots. Try to damage the roots as little as possible. You can use a small spoon or fork for this.
- Planting: Place the seedlings into the prepared pots with potting soil. Make sure the roots are well covered. Lightly press the soil down.
- Watering: Water the plants thoroughly after transplanting.
- The Right Location: Place the pots in a sunny spot. Arugula needs at least 6 hours of sunlight per day. If you don’t have a sufficiently sunny spot, you can use a grow light.
Care: Helping Your Arugula Thrive
Proper care is crucial for a bountiful harvest. Here are a few tips:
- Watering: Water the arugula plants regularly, but avoid waterlogging. The soil should always be slightly moist. Check the soil’s moisture by sticking your finger into it. If the soil feels dry, it’s time to water.
- Fertilizing (optional): Fertilize the arugula plants every few weeks with a liquid fertilizer for herbs. This ensures strong growth and a rich harvest. Be sure to follow the dosage instructions on the fertilizer packaging.
- Pests: Regularly check the plants for pests like aphids or snails. In case of an infestation, you can use natural pesticides or simply pick the pests off.
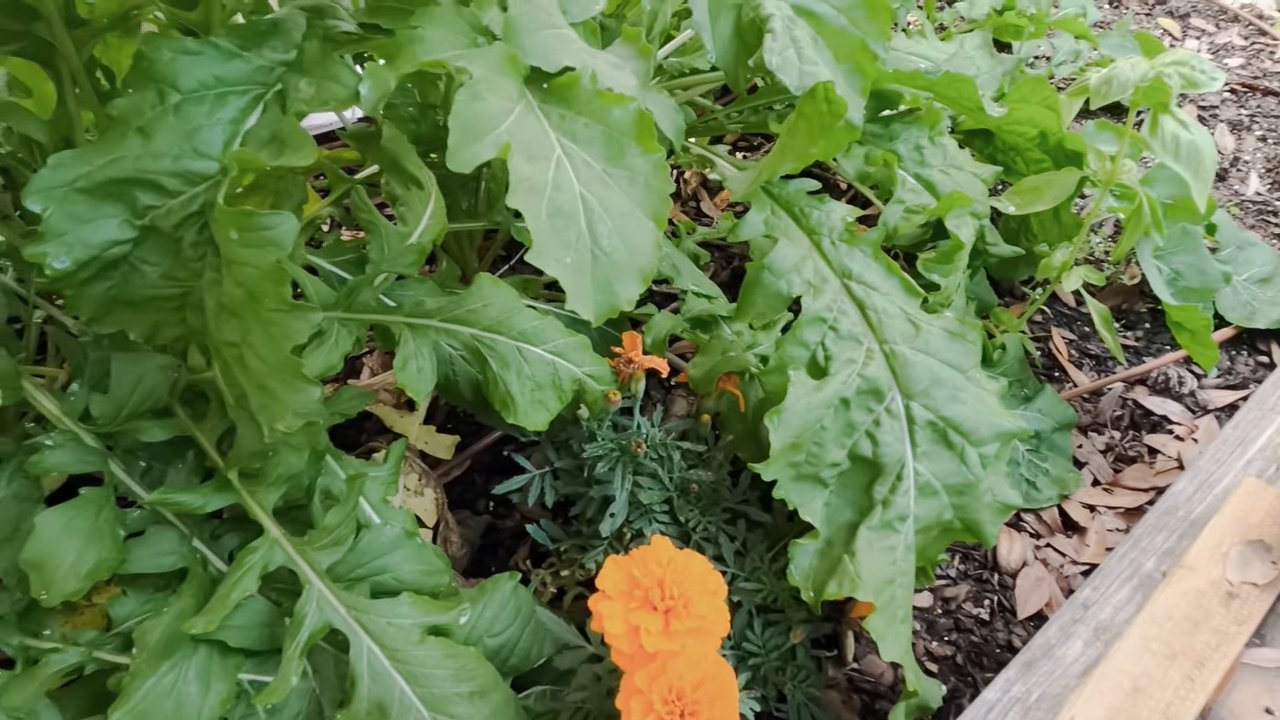
- Preventing Bolting: Arugula tends to bolt (flower) quickly, especially in high temperatures. When the plants flower, the leaves become bitter. To delay flowering, you should harvest the plants regularly and provide a cool environment.
Harvest: Fresh Arugula at Last!
After about 4-6 weeks, you can start harvesting.
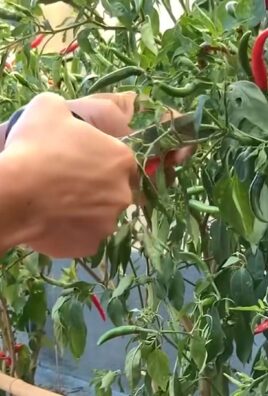
- Harvesting: Cut the leaves with scissors or a knife. You can harvest either individual leaves or entire stems.
- Regular Harvesting: By harvesting regularly, you encourage the growth of new leaves.
- Enjoy: Wash the harvested leaves thoroughly and enjoy them in salads, on pizza, or as a side dish to other meals.
Common Problems and Solutions
Even with indoor cultivation of arugula, problems can arise. Here are a few common issues and how you can solve them:
- Yellow leaves: Yellow leaves can be a sign of overwatering or a nutrient deficiency. Reduce the amount of water or fertilize the plants with a liquid fertilizer.
- Mold: Mold can develop due to excessive humidity. Ventilate the plants regularly and avoid waterlogging.
- Aphids: Aphids can weaken the plants. Spray the plants with a solution of water and dish soap or use natural pesticides.
- Bitter taste: A bitter taste can be caused by high temperatures or bolting. Provide a cool environment and harvest the plants regularly to delay flowering.
Additional Tips for a Successful Arugula Harvest
- Choose the right location: Arugula needs plenty of sunlight but doesn’t tolerate scorching midday sun. An east- or west-facing windowsill is ideal.
- Use the right soil: Seed starting mix for sowing and potting soil for later growth.
- Water correctly: The soil should always be slightly moist, but avoid waterlogging.
- Fertilize as needed: Feed the plants every few weeks with a liquid fertilizer for herbs if growth seems slow.
- Harvest regularly: By regularly harvesting the outer leaves, you encourage the plant to produce more from the center and delay bolting.
- Try succession planting: To ensure a continuous supply, sow a new batch of seeds every 2-3 weeks.
Conclusion: Your Personal Salad Bar
Growing arugula indoors is a wonderfully simple way to have fresh, flavorful greens at your fingertips. There’s nothing quite like adding a handful of peppery leaves that you grew yourself to a salad or sandwich. It’s a rewarding project for any level of gardener and a delicious addition to your kitchen. So grab a packet of seeds, find a sunny spot, and enjoy the peppery bite of homegrown arugula. Happy gardening

Conclusion
So, there you have it! Growing arugula indoors is not only achievable, but it’s also a remarkably rewarding experience. Forget those wilted, overpriced greens from the grocery store. Imagine stepping into your kitchen and harvesting a handful of peppery, fresh arugula whenever you need it. The vibrant flavor and crisp texture of homegrown arugula are simply unmatched, and the satisfaction of nurturing your own food from seed to salad is truly unparalleled.
This DIY trick is a must-try for several reasons. First and foremost, it provides you with a constant supply of fresh, organic arugula, free from pesticides and herbicides. You control every aspect of its growth, ensuring the highest quality and nutritional value. Secondly, it’s incredibly convenient. No more last-minute trips to the store or settling for subpar greens. Your arugula is always ready and waiting, just a snip away. Thirdly, it’s a fantastic way to add a touch of green to your home, especially during the colder months when outdoor gardening is limited. Arugula plants are visually appealing and can brighten up any windowsill or countertop.
But the benefits don’t stop there. Growing arugula indoors is also a sustainable practice. You’re reducing your carbon footprint by eliminating the need for transportation and packaging associated with store-bought greens. Plus, you can compost your leftover arugula stems and leaves, further minimizing waste.
Now, let’s talk about variations. While the method we’ve outlined is a great starting point, feel free to experiment and personalize your arugula-growing experience. Try different types of containers, from repurposed yogurt containers to stylish ceramic pots. Explore various potting mixes to find the one that works best for your plants. Consider using grow lights to supplement natural sunlight, especially during the winter months. You can also try succession planting, sowing new seeds every few weeks to ensure a continuous harvest.
For a spicier kick, try growing wild arugula varieties. If you prefer a milder flavor, opt for cultivated varieties like ‘Slow Bolt’ or ‘Astro’. You can even mix arugula with other leafy greens like spinach or lettuce for a more diverse salad blend. The possibilities are endless!
We wholeheartedly encourage you to give this DIY trick a try. It’s a simple, affordable, and incredibly rewarding way to enjoy fresh, flavorful arugula year-round. Don’t be intimidated if you’re a beginner gardener. Arugula is a relatively easy plant to grow, and with a little bit of care and attention, you’ll be harvesting your own delicious greens in no time.
Once you’ve tried growing arugula indoors, we’d love to hear about your experience. Share your tips, tricks, and photos with us in the comments below. Let’s create a community of indoor arugula growers and inspire others to embrace the joys of homegrown food. What are you waiting for? Grab some seeds, a pot, and some soil, and get ready to enjoy the freshest arugula you’ve ever tasted!
Frequently Asked Questions (FAQ)
What kind of container should I use for growing arugula indoors?
The beauty of growing arugula indoors is that you don’t need anything fancy! Almost any container with drainage holes will work. You can use plastic pots, terracotta pots, repurposed yogurt containers, or even old tin cans. The size of the container will depend on how much arugula you want to grow. A container that is at least 6 inches deep and 6 inches wide is a good starting point. Just make sure the container is clean and has adequate drainage to prevent waterlogging, which can lead to root rot. Consider the aesthetic appeal as well – choose a container that complements your home décor.
What kind of soil should I use for growing arugula indoors?
Arugula thrives in well-draining, nutrient-rich soil. A good quality potting mix specifically formulated for vegetables is ideal. Avoid using garden soil, as it can be too heavy and may contain pests or diseases. You can also create your own potting mix by combining equal parts of peat moss, perlite, and vermiculite. Adding some compost to the mix will provide extra nutrients for your arugula plants. Ensure the soil is loose and airy to allow for proper root development.
How much sunlight does arugula need when grown indoors?
Arugula needs at least 6 hours of sunlight per day to thrive. A sunny windowsill that faces south or west is ideal. If you don’t have access to enough natural sunlight, you can supplement with grow lights. Fluorescent or LED grow lights are a great option. Position the lights a few inches above the plants and keep them on for 12-14 hours per day. Rotate your plants regularly to ensure even light exposure. Insufficient light can result in leggy, weak plants with pale leaves.
How often should I water my arugula plants?
Water your arugula plants regularly, keeping the soil consistently moist but not waterlogged. Check the soil moisture by sticking your finger about an inch into the soil. If it feels dry, it’s time to water. Water deeply, allowing the excess water to drain out of the drainage holes. Avoid overwatering, as this can lead to root rot. During hot, dry weather, you may need to water more frequently. A good rule of thumb is to water when the top inch of soil feels dry to the touch.
How do I harvest arugula?
You can start harvesting arugula leaves when they are about 2-3 inches long. Simply snip off the outer leaves with scissors or your fingers, leaving the inner leaves to continue growing. This is known as a “cut-and-come-again” harvesting method, which allows you to harvest arugula multiple times from the same plant. Avoid harvesting more than one-third of the plant at a time to allow it to recover. Harvest in the morning for the best flavor.
What are some common problems when growing arugula indoors and how do I fix them?
One common problem is aphids, small sap-sucking insects that can infest arugula plants. You can get rid of aphids by spraying them with a strong stream of water or by using insecticidal soap. Another problem is powdery mildew, a fungal disease that can cause white spots on the leaves. To prevent powdery mildew, ensure good air circulation around your plants and avoid overwatering. If you notice any signs of disease, remove the affected leaves immediately. Overcrowding can also lead to problems, so make sure to thin out your seedlings if they are too close together.
Can I grow arugula from seed indoors?
Yes, growing arugula from seed indoors is very easy! Simply sow the seeds directly into your prepared potting mix, about ¼ inch deep. Keep the soil moist and warm, and the seeds should germinate within a few days. Once the seedlings emerge, thin them out to allow for adequate spacing. You can also start arugula seeds in seed trays or peat pots and transplant them into larger containers once they have developed a few sets of true leaves. Starting from seed gives you more control over the varieties you grow.
How long does it take for arugula to grow indoors?
Arugula is a fast-growing plant. You can typically start harvesting leaves about 3-4 weeks after sowing the seeds. The exact time will depend on the growing conditions, such as temperature, light, and water. With proper care, you can enjoy a continuous harvest of arugula for several weeks or even months. Succession planting, sowing new seeds every few weeks, will ensure a constant supply of fresh greens.
Can I grow arugula indoors year-round?
Yes, you can grow arugula indoors year-round, provided you have adequate light and temperature. During the winter months, you may need to supplement with grow lights to ensure sufficient light exposure. Keep the temperature between 60-70°F for optimal growth. Avoid placing your plants near drafts or heat sources. With a little bit of planning and care, you can enjoy fresh, homegrown arugula no matter the season.
Is growing arugula indoors organic?
Yes, growing arugula indoors can be completely organic. By using organic potting mix, avoiding synthetic fertilizers and pesticides, and providing your plants with the right growing conditions, you can ensure that your arugula is free from harmful chemicals. Organic arugula is not only healthier but also tastes better. You can even use organic pest control methods, such as introducing beneficial insects or using homemade insecticidal sprays.

Leave a Comment