
Growing Artichokes at Home might seem like a culinary dream reserved for seasoned gardeners, but I’m here to tell you it’s absolutely achievable, even if you’re a beginner! Have you ever imagined strolling through your own backyard, plucking a perfectly plump artichoke, and transforming it into a gourmet meal? This isn’t just a fantasy; it’s a delicious reality waiting to happen.
Artichokes, with their architectural beauty and delectable hearts, have a rich history. Originating in the Mediterranean, they were prized by the ancient Greeks and Romans for their culinary and medicinal properties. For centuries, they’ve been a symbol of abundance and sophistication, gracing tables from humble homes to royal feasts.
But why should you embark on this artichoke-growing adventure? Well, store-bought artichokes can be pricey, and nothing beats the flavor of freshly harvested produce. Plus, growing artichokes at home offers a unique sense of accomplishment and connection to nature. Imagine the satisfaction of nurturing a plant from seedling to harvest, knowing you’ve created something truly special. This DIY guide will provide you with simple, effective tricks and hacks to cultivate these fascinating plants, ensuring a bountiful harvest and a rewarding gardening experience. Let’s get our hands dirty and unlock the secrets to successful artichoke cultivation!
Growing Artichokes Yourself: A Comprehensive DIY Guide
Hello garden friends! Have you ever wondered how to grow those prickly beauties, artichokes, at home? I have, and after some trial and error, I’ve developed a process that really works. Growing artichokes is not only rewarding because you can harvest fresh, delicious artichokes, but also because the plants themselves are beautiful and add a special touch to the garden. Let’s dive into this adventure together!
What you need: The Preparation
Before we get started, it’s important that we have everything we need. Here is a list of the most important materials and tools:
-
Artichoke seeds or plants: I recommend starting with plants, as this speeds up the process. Seeds can be a bit more challenging.
-
Seedling pots or trays: If you are starting with seeds.
-
High-quality potting soil: For starting seeds and later for transplanting.
-
Compost or well-rotted manure: To enrich the soil.
-
Garden spade or shovel: For digging the planting holes.
-
Watering can or garden hose: For watering.
-
Mulch: To retain moisture in the soil and suppress weeds.
-
Pruning shears: For pruning the plants.
-
Plant stakes or trellises (optional): For additional support, especially in strong winds.
-
Garden fleece (optional): To protect against frost.
-
Patience and love: The most important thing!
Choosing the Right Variety
There are different varieties of artichokes, and choosing the right one is crucial for success. Here are some popular options:
-
‘Green Globe’: One of the most common varieties, known for its large, round artichokes.
-
‘Violetta Precoce’: An early variety with purple artichokes.
-
‘Imperial Star’: Another early variety that is well-suited for cooler climates.
-
‘Big Heart’: A thornless variety, ideal if you don’t want to deal with spines.
I have personally had good experiences with ‘Green Globe’, but feel free to try different varieties to find out which one thrives best in your garden.
Growing Artichokes: Step by Step
Now let’s get down to business! Here is a detailed guide on how to successfully grow artichokes:
1. Preparing the Soil
Artichokes love well-draining, fertile soil. Here’s how to prepare the soil:
-
Choose a sunny location: Artichokes need at least 6 hours of sun per day.
-
Loosen the soil: Dig the soil about 30-45 cm deep.
-
Enrich the soil: Mix in plenty of compost or well-rotted manure. This provides the necessary nutrients.
-
Improve drainage: If your soil is heavy and clay-like, add sand or gravel to improve drainage. Artichokes do not like waterlogging at all.
-
Test the pH: Artichokes prefer a pH between 6.0 and 7.0. You can check the pH with a soil test kit and adjust it if necessary.
2. Planting Artichokes
Whether you start with seeds or plants, planting is an important step:
-
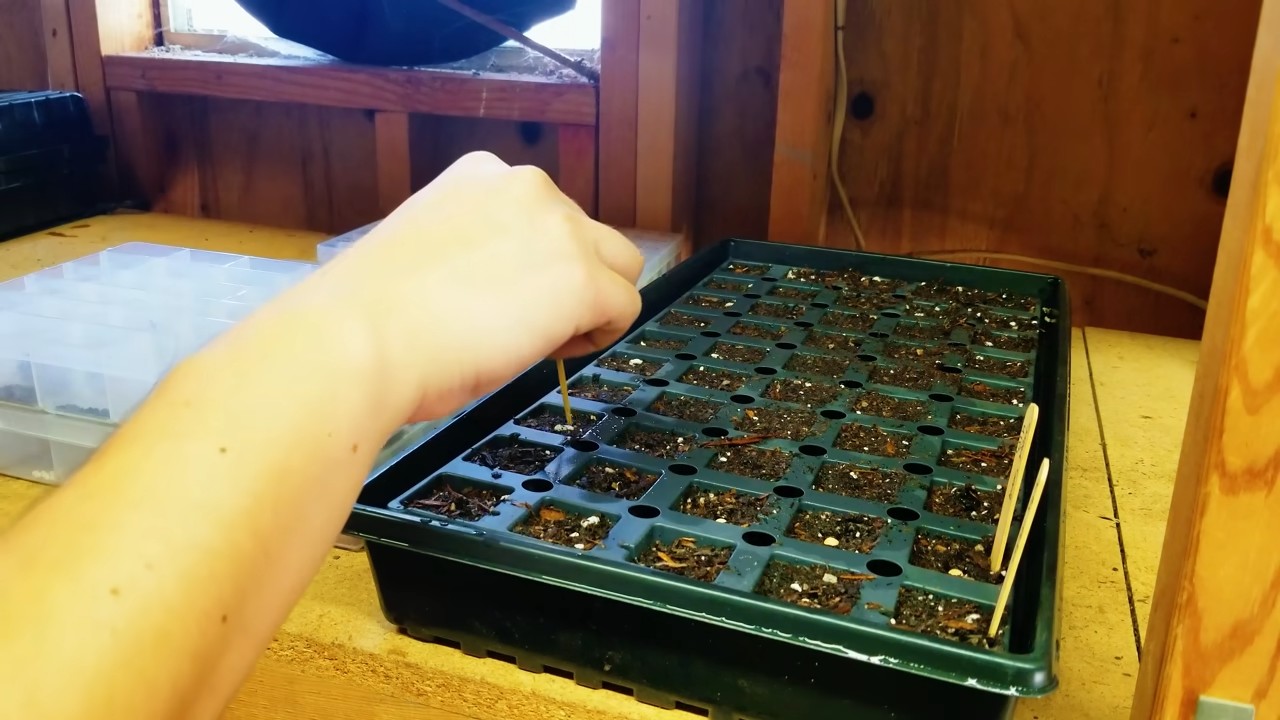
Start seeds indoors (optional): If you are starting with seeds, sow them in seedling pots about 8-10 weeks before the last frost. Keep the soil moist and warm.
-
Prepare plants: If you bought plants, water them thoroughly before planting.
-
Dig planting holes: Dig holes large enough to accommodate the root balls of the plants. Make sure the holes are about 90-120 cm apart, as artichokes need a lot of space.
-
Planting: Place the plants in the holes and fill them with soil. Make sure the top of the root ball is level with the soil surface.
-
Watering in: Water the plants thoroughly after planting.
3. Caring for the Artichokes
Proper care is crucial for a bountiful harvest:
-
Watering: Artichokes need regular watering, especially during dry periods. Make sure the soil is moist but not wet.
-
Fertilizing: Fertilize the plants every 4-6 weeks with a balanced fertilizer. Compost tea is also a great option.
-
Mulching: Apply a layer of mulch around the plants to retain moisture in the soil and suppress weeds.
-
Weed control: Remove weeds regularly to minimize competition for nutrients and water.
-
Pruning: Remove dead or damaged leaves to promote the health of the plants.
4. Overwintering
In colder climates, artichokes need to be overwintered:
-
Cutting back: In the fall, cut the plants back to about 15 cm above the ground.
-
Protection: Cover the plants with a thick layer of mulch or garden fleece to protect them from frost.
-
Overwintering in pots: If you have grown artichokes in pots, you can move them to a cool, frost-free place, such as a garage or a cellar.
5. Harvesting the Artichokes
Harvesting is the most rewarding part of the process:
-
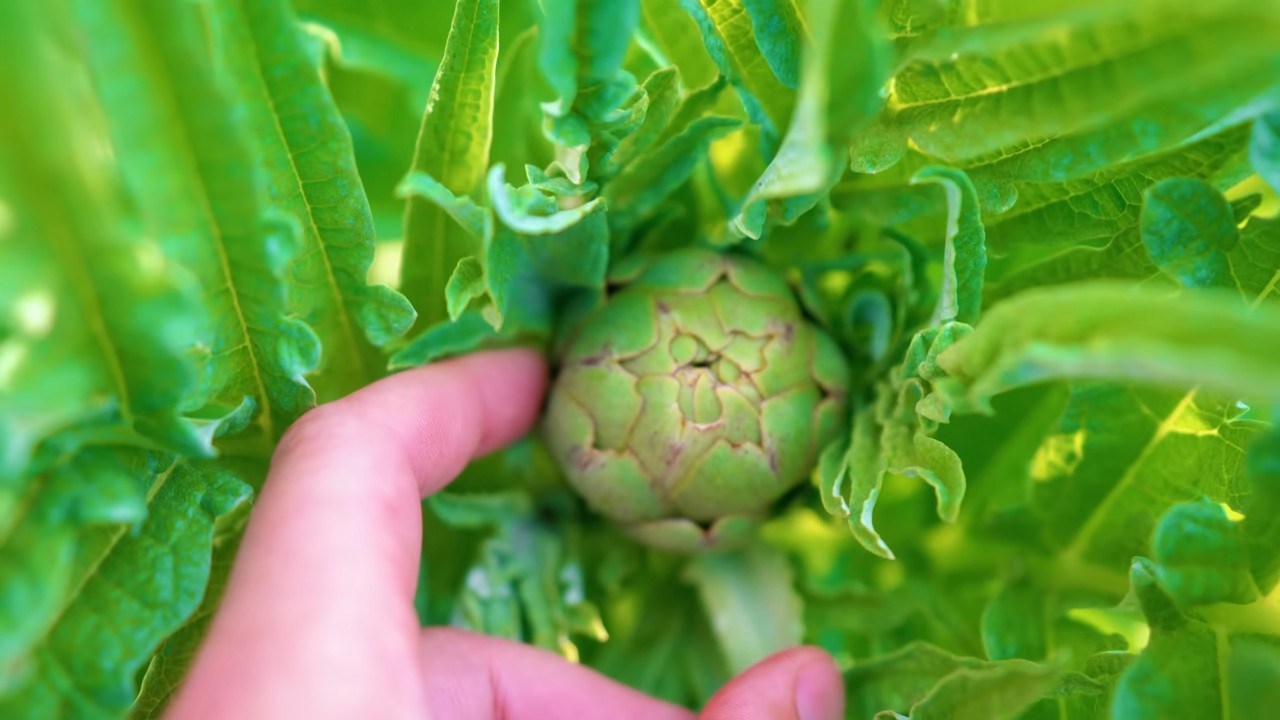
Timing: Harvest the artichokes when the buds are still firm and closed, but the outer bracts are starting to open slightly.
-
Method: Cut the artichokes with pruning shears about 5-8 cm below the bud.
-
Regular harvesting: Harvest the artichokes regularly to encourage the production of new buds.
Common Problems and Solutions
As with any gardening, problems can also occur when growing artichokes. Here are some common problems and how you can solve them:
-
Pests: Aphids, slugs, and caterpillars can infest artichokes. Use natural pesticides like neem oil or insecticidal soap.
-
Diseases: Fungal diseases like powdery mildew can occur. Ensure good air circulation and avoid overhead watering.
-
Yellow leaves: Yellow leaves can indicate a nutrient deficiency or overwatering. Check the soil’s pH and adjust your watering.
-
No artichokes: If your plants are not producing artichokes, it could be due to a lack of sun, a nutrient deficiency, or the wrong variety. Make sure the plants get enough sun, fertilize them regularly, and choose a suitable variety for your climate.
Additional Tips and Tricks
Here are a few more tips that can help you successfully grow artichokes:
-
Artichokes are perennials: In mild climates, artichokes can grow for several years. In colder climates, they may need to be replanted each year.
-
Artichokes as ornamental plants: Artichokes are not only delicious but also beautiful ornamental plants. Their large, silvery leaves and striking flower heads make them an eye-catcher in any garden.
-
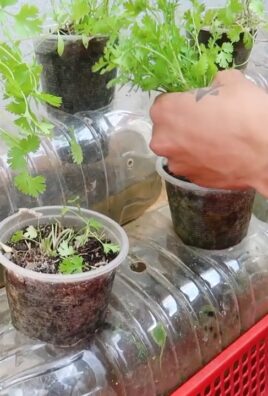
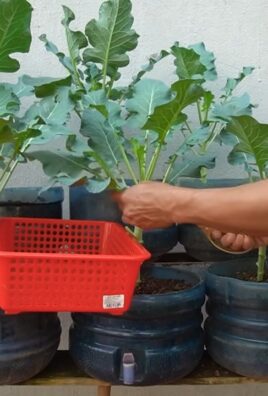
Artichokes in pots: Artichokes can also be grown in pots…
Conclusion
So, there you have it! Growing artichokes at home isn’t just a gardening project; it’s an investment in delicious, homegrown goodness and a rewarding experience that connects you to the earth. We’ve walked through the process, from selecting the right variety and preparing your soil to nurturing your plants and harvesting those prized buds.
Why is this DIY trick a must-try? Because store-bought artichokes simply can’t compare to the flavor and freshness of those you’ve grown yourself. Imagine the satisfaction of serving a dish featuring artichokes you’ve cultivated from seed or transplant, knowing exactly where they came from and how they were grown. Plus, you’ll save money in the long run, and you’ll have a beautiful, architectural plant gracing your garden.
But the benefits extend beyond the culinary. Growing artichokes is a fantastic way to learn about plant life cycles, soil health, and the importance of sustainable gardening practices. It’s a project that can involve the whole family, teaching children about where their food comes from and fostering a love for nature.
Don’t be afraid to experiment with variations! Try growing different artichoke varieties to discover your favorite flavor profile. ‘Green Globe’ is a classic choice, but ‘Violetta’ offers a beautiful purple hue, and ‘Romanesco’ is known for its tender hearts. You can also explore companion planting to enhance your artichoke’s growth and deter pests. Consider planting basil, marigolds, or rosemary nearby.
Furthermore, consider the presentation of your artichoke plants. They can be quite striking, so think about incorporating them into your landscape design. Use them as a focal point in a vegetable garden, or even as an ornamental plant in a flower bed. Their silvery-green foliage and architectural form add a touch of elegance to any outdoor space.
We encourage you to take the plunge and try growing artichokes at home. It may seem daunting at first, but with a little planning and care, you’ll be rewarded with a bountiful harvest of these delectable thistles. Remember to provide them with plenty of sunlight, well-drained soil, and regular watering. And don’t forget to protect them from frost in colder climates.
Once you’ve harvested your first artichokes, the possibilities are endless. Steam them and dip them in garlic butter, grill them for a smoky flavor, or add them to pasta dishes, salads, and dips. The flavor of homegrown artichokes is truly unmatched.
We’re confident that you’ll find growing artichokes at home to be a rewarding and enjoyable experience. So, grab your gardening gloves, prepare your soil, and get ready to enjoy the fruits (or rather, the thistles) of your labor.
We’d love to hear about your experiences! Share your tips, tricks, and photos with us in the comments below. Let’s build a community of artichoke enthusiasts and learn from each other. Happy gardening!
Frequently Asked Questions (FAQ)
What is the best time to plant artichokes?
The ideal time to plant artichokes depends on your climate. In regions with mild winters (zones 7-10), you can plant artichokes in the fall for a spring harvest. In colder climates (zones 6 and below), it’s best to start artichokes indoors 8-10 weeks before the last expected frost and transplant them outdoors in the spring after the danger of frost has passed. This gives them a head start and allows them to establish themselves before the heat of summer.
How much space do artichoke plants need?
Artichoke plants can grow quite large, reaching up to 3-4 feet in height and width. Therefore, it’s essential to provide them with ample space to thrive. Plant artichokes at least 4 feet apart to allow for proper air circulation and sunlight penetration. If you’re planting multiple rows, space the rows 6-8 feet apart. Adequate spacing will also make it easier to harvest the artichokes and manage any potential pest or disease problems.
What kind of soil is best for growing artichokes?
Artichokes prefer well-drained, fertile soil that is rich in organic matter. The ideal soil pH is between 6.0 and 7.0. Before planting, amend your soil with compost, aged manure, or other organic materials to improve its drainage and fertility. If your soil is heavy clay, consider adding sand or perlite to improve drainage. Artichokes are heavy feeders, so regular fertilization is essential.
How often should I water artichoke plants?
Artichokes need consistent moisture, especially during the growing season. Water deeply and regularly, especially during dry spells. Aim to keep the soil consistently moist but not waterlogged. Avoid overhead watering, as this can promote fungal diseases. A good rule of thumb is to water when the top inch of soil feels dry to the touch. Mulching around the plants can help retain moisture and suppress weeds.
How do I fertilize artichoke plants?
Artichokes are heavy feeders and benefit from regular fertilization. Apply a balanced fertilizer (e.g., 10-10-10) in the spring when new growth appears. You can also side-dress the plants with compost or aged manure throughout the growing season. Avoid over-fertilizing, as this can lead to excessive foliage growth at the expense of bud production. Consider using a slow-release fertilizer to provide a steady supply of nutrients.
How do I protect artichokes from pests and diseases?
Artichokes can be susceptible to various pests and diseases, including aphids, snails, slugs, and powdery mildew. Regularly inspect your plants for signs of infestation or disease. Handpick pests or use organic pest control methods such as insecticidal soap or neem oil. To prevent powdery mildew, ensure good air circulation around the plants and avoid overhead watering. Remove any infected leaves promptly.
When are artichokes ready to harvest?
Artichokes are typically ready to harvest in the spring or early summer, depending on the variety and your climate. The buds should be firm and plump, with tightly closed scales. Harvest the artichokes when the bottom scales begin to slightly separate from the bud. Use a sharp knife to cut the stem about 2-3 inches below the bud. Harvest the main bud first, followed by the smaller side buds.
Can I grow artichokes in containers?
Yes, you can grow artichokes in containers, but you’ll need a large container (at least 20 gallons) to accommodate their extensive root system. Choose a well-draining potting mix and provide regular watering and fertilization. Container-grown artichokes may need more frequent watering than those grown in the ground. Also, be sure to protect container-grown artichokes from frost in colder climates.
How do I overwinter artichoke plants?
In colder climates, artichokes need protection from frost and freezing temperatures. After the first frost, cut back the foliage to about 6 inches above the ground. Mulch heavily around the plants with straw, leaves, or other organic materials to insulate the roots. In very cold regions, you may need to dig up the plants and store them in a cool, dark place until spring. Alternatively, you can grow artichokes as annuals and replant them each year.
What are some delicious ways to prepare artichokes?
Artichokes are incredibly versatile and can be prepared in many ways. Steaming is a classic method, allowing you to dip the leaves in melted butter or aioli. Grilling artichokes adds a smoky flavor. You can also roast them, stuff them, or add them to pasta dishes, salads, and dips. The heart of the artichoke is considered a delicacy and can be enjoyed on its own or incorporated into various recipes. Don’t be afraid to experiment and discover your favorite way to enjoy this delicious vegetable.

Leave a Comment