
Grow Watermelons Successfully, even if you think you don’t have a green thumb! Have you ever dreamed of biting into a juicy, homegrown watermelon on a hot summer day? It’s a quintessential summer experience, conjuring images of picnics, laughter, and pure, unadulterated sweetness. Watermelons have been cultivated for thousands of years, with evidence suggesting their origins trace back to Africa. Ancient Egyptians even depicted watermelons in their art and placed them in tombs for the afterlife – talk about a refreshing journey!
But let’s be honest, the thought of growing these sprawling fruits can be intimidating. Many gardeners shy away, believing it requires acres of land and expert knowledge. That’s where this DIY guide comes in! I’m here to tell you that grow watermelons successfully is absolutely achievable, even in smaller spaces, with a few clever tricks and hacks.
This article is packed with easy-to-follow instructions and insider tips that will demystify the process. We’ll cover everything from choosing the right variety for your climate to maximizing your yield with simple DIY techniques. So, ditch the store-bought melons and get ready to impress your friends and family with your own delicious, homegrown watermelons! Let’s get started!
Growing Watermelons: A Comprehensive DIY Guide for Juicy Success
Hey there, fellow gardening enthusiasts! Ever dreamt of biting into a perfectly ripe, juicy watermelon that you grew yourself? Well, dream no more! Growing watermelons can seem daunting, but with a little know-how and some elbow grease, you can absolutely achieve watermelon glory. I’m going to walk you through everything you need to know, from seed to slice.
Choosing the Right Watermelon Variety
Before we even get our hands dirty, let’s talk about watermelon varieties. Not all watermelons are created equal, and choosing the right one for your climate and space is crucial.
* **Consider your climate:** Some varieties thrive in shorter growing seasons, while others need long, hot summers.
* **Think about space:** Bush varieties are perfect for smaller gardens, while vining varieties need plenty of room to sprawl.
* **Pick your preference:** Do you want a classic red watermelon, a yellow one, or a seedless variety?
Here are a few popular choices:
* **Sugar Baby:** A compact, early-maturing variety, perfect for smaller gardens and cooler climates.
* **Crimson Sweet:** A classic, large, red-fleshed watermelon with excellent flavor.
* **Jubilee:** A large, oblong watermelon with a thick rind, making it great for shipping and storage.
* **Bush Sugar Baby:** An even more compact version of Sugar Baby, ideal for containers.
* **Yellow Doll:** A unique yellow-fleshed watermelon with a sweet, honey-like flavor.
Preparing Your Watermelon Patch
Watermelons are heavy feeders, meaning they need nutrient-rich soil to thrive. Proper soil preparation is key to a successful harvest.
* **Sunlight is your friend:** Watermelons need at least 6-8 hours of direct sunlight per day. Choose a location that gets plenty of sun.
* **Soil testing is important:** Test your soil to determine its pH and nutrient levels. Watermelons prefer a slightly acidic soil with a pH between 6.0 and 6.8.
* **Amend, amend, amend:** Amend your soil with plenty of compost, well-rotted manure, or other organic matter. This will improve drainage, aeration, and nutrient content.
* **Raised beds are beneficial:** Consider growing your watermelons in raised beds, especially if you have heavy clay soil. Raised beds improve drainage and warm up faster in the spring.
Starting Your Watermelon Seeds
You can either direct sow your watermelon seeds or start them indoors. Starting them indoors gives you a head start, especially in cooler climates.
* **When to start seeds indoors:** Start your seeds indoors about 4-6 weeks before the last expected frost.
* **Use seed starting mix:** Use a high-quality seed starting mix that is light and well-draining.
* **Planting depth:** Plant your seeds about 1 inch deep.
* **Keep them warm:** Watermelon seeds need warm temperatures to germinate, ideally between 70-85°F (21-29°C). Use a heat mat to provide bottom heat.
* **Provide light:** Once the seedlings emerge, provide them with plenty of light. A grow light is ideal, but a sunny windowsill can also work.
* **Harden off your seedlings:** Before transplanting your seedlings outdoors, you need to harden them off. This means gradually exposing them to outdoor conditions over a period of 7-10 days. Start by placing them in a sheltered location for a few hours each day, gradually increasing the amount of time they spend outdoors.
Transplanting Your Watermelon Seedlings
Once the danger of frost has passed and your soil has warmed up, it’s time to transplant your watermelon seedlings outdoors.
* **Choose a calm day:** Transplant your seedlings on a calm, cloudy day to minimize stress.
* **Space them properly:** Space your seedlings according to the variety you are growing. Vining varieties need at least 3-4 feet of space between plants, while bush varieties can be spaced closer together.
* **Dig a hole:** Dig a hole that is slightly larger than the root ball of your seedling.
* **Gently remove the seedling:** Gently remove the seedling from its container, being careful not to damage the roots.
* **Place the seedling in the hole:** Place the seedling in the hole and backfill with soil.
* **Water thoroughly:** Water the seedling thoroughly after transplanting.
* **Mulch around the plants:** Mulch around the plants with straw, wood chips, or other organic mulch. This will help to retain moisture, suppress weeds, and regulate soil temperature.
Caring for Your Watermelon Plants
Watermelons need consistent care to thrive.
* **Water deeply and regularly:** Watermelons need plenty of water, especially during hot, dry weather. Water deeply and regularly, aiming to keep the soil consistently moist but not waterlogged.
* **Fertilize regularly:** Fertilize your watermelon plants every 2-3 weeks with a balanced fertilizer. You can also use a fertilizer specifically formulated for watermelons.
* **Weed regularly:** Keep your watermelon patch free of weeds. Weeds compete with your watermelon plants for water and nutrients.
* **Protect from pests and diseases:** Watermelons can be susceptible to various pests and diseases. Monitor your plants regularly and take action if you see any signs of problems. Common pests include aphids, squash bugs, and cucumber beetles. Common diseases include powdery mildew and fusarium wilt.
* **Pollination is key:** Watermelons need to be pollinated to produce fruit. Bees are the primary pollinators of watermelons. If you don’t have enough bees in your garden, you may need to hand-pollinate your plants. To hand-pollinate, use a small paintbrush to transfer pollen from the male flowers to the female flowers. Female flowers have a small fruit at the base of the flower, while male flowers do not.
Training Your Watermelon Vines
Training your watermelon vines can help to improve air circulation, reduce disease, and make it easier to harvest your watermelons.
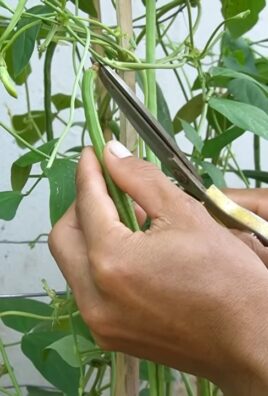
* **Prune the vines:** Prune the vines to encourage the plant to focus its energy on producing fruit. Remove any suckers (small shoots that grow from the base of the plant) and any dead or diseased leaves.
* **Direct the vines:** Direct the vines to grow in the direction you want them to go. You can use stakes, trellises, or other supports to train the vines.
* **Protect the fruit:** As the watermelons grow, protect them from direct contact with the soil. Place a piece of cardboard, straw, or wood under each watermelon to prevent rot.
Harvesting Your Watermelons
Knowing when to harvest your watermelons is crucial for getting that perfect, juicy flavor.
* **Check the tendril:** The tendril closest to the watermelon should be brown and dry.
* **Thump the watermelon:** A ripe watermelon will have a deep, hollow sound when thumped.
* **Check the ground spot:** The ground spot (the spot where the watermelon rested on the ground) should be yellow or cream-colored.
* **Consider the days to maturity:** Check the seed packet or plant tag for the days to maturity. This will give you a general idea of when your watermelons should be ripe.
Once you’ve determined that your watermelon is ripe, use a sharp knife to cut it from the vine, leaving a few inches of stem attached.
Enjoying Your Homegrown Watermelon
Congratulations! You’ve successfully grown your own watermelon. Now it’s time to enjoy the fruits (or rather, vegetables) of your labor.
* **Chill your watermelon:** Chill your watermelon in the refrigerator for a few hours before serving.
* **Cut and serve:** Cut your watermelon into wedges, cubes, or balls.
* **Get creative:** Use your watermelon in salads, smoothies, or other recipes.
* **Share with friends and family:** Share your homegrown watermelon with friends and family. They’ll be amazed by your gardening skills!
Troubleshooting Common Watermelon Problems
Even with the best care, you may encounter some problems when growing watermelons. Here are a few common issues and how to address them:
* **Poor pollination:** If your watermelons are not setting fruit, it may be due to poor pollination. Attract more bees to your garden by planting bee-friendly flowers. You can also hand-pollinate your plants.
* **Blossom-end rot:** Blossom-end rot is a condition that causes the end of the watermelon to rot. It is caused by a calcium deficiency. To prevent blossom-end rot, amend your soil with calcium before planting and water your plants consistently.
* **Powdery mildew:** Powdery mildew is a fungal disease that causes a white, powdery coating on the leaves. To prevent powdery mildew, provide good air circulation and avoid overhead watering. You can also treat powdery mildew with a fungicide.
* **Squash bugs:** Squash bugs are pests that can damage watermelon plants. To control squash bugs, handpick them off the plants or use an insecticide.
* **Fusarium wilt:** Fusarium wilt is
Conclusion
So, there you have it! Mastering the art of growing watermelons successfully isn’t some unattainable gardening dream. It’s a tangible reality within your reach, even if you’re a beginner. We’ve walked through the essential steps, from selecting the right variety for your climate to nurturing those precious seedlings and protecting your developing melons from pests and diseases.
But why should you dedicate your time and effort to this endeavor? The answer is simple: the unparalleled satisfaction of biting into a juicy, homegrown watermelon. Store-bought watermelons simply can’t compare to the vibrant flavor and crisp texture of a melon you’ve nurtured from seed to harvest. Plus, you’ll know exactly what went into growing it, ensuring a healthy and delicious treat for you and your family.
Beyond the pure enjoyment of the fruit itself, growing watermelons successfully offers a rewarding connection to nature. It’s a chance to learn about plant life cycles, develop your gardening skills, and appreciate the bounty of your own backyard. It’s also a fantastic way to get outdoors, soak up some sunshine, and engage in a relaxing and fulfilling hobby.
Don’t be afraid to experiment! Try different watermelon varieties to discover your favorites. Perhaps you’d like to try growing a smaller, personal-sized watermelon like Sugar Baby, or maybe you’re feeling ambitious and want to tackle a giant like Carolina Cross. You can also explore different growing techniques, such as vertical gardening with trellises to save space or using raised beds to improve drainage. Consider companion planting with herbs like basil or marigolds to deter pests naturally.
Remember, gardening is a journey of learning and discovery. There will be challenges along the way, but don’t let them discourage you. Every mistake is an opportunity to learn and improve. The key is to be patient, observant, and persistent.
We wholeheartedly encourage you to give growing watermelons successfully a try. It’s an experience you won’t regret. And once you’ve harvested your first watermelon, be sure to share your success (and any challenges you faced) with us! We’d love to hear about your journey and see photos of your beautiful melons. Share your tips, ask questions, and inspire others to embark on their own watermelon-growing adventures. Let’s build a community of passionate watermelon growers!
Now, let’s address some of the most frequently asked questions about growing watermelons:
Frequently Asked Questions (FAQ)
What is the best time to plant watermelon seeds?
The ideal time to plant watermelon seeds is when the soil temperature consistently reaches at least 70°F (21°C). This typically occurs 2-3 weeks after the last expected frost in your area. Planting too early in cold soil can lead to poor germination and stunted growth. Check your local weather forecasts and planting guides for specific recommendations for your region. You can also start seeds indoors 4-6 weeks before the last frost to get a head start.
How much space do watermelons need?
Watermelons are sprawling plants that require a significant amount of space. Allow at least 3-4 feet between plants in rows that are 6-8 feet apart. If you’re growing a larger variety, you may need even more space. Consider using trellises for smaller varieties to save space and improve air circulation.
What kind of soil is best for watermelons?
Watermelons thrive in well-drained, sandy loam soil that is rich in organic matter. The soil pH should be between 6.0 and 6.8. Before planting, amend the soil with compost, aged manure, or other organic materials to improve drainage, fertility, and water retention. Avoid heavy clay soils, as they can become waterlogged and inhibit root growth.
How often should I water my watermelons?
Watermelons need consistent watering, especially during hot, dry weather. Water deeply at least once a week, providing enough water to soak the soil down to a depth of 6-8 inches. During fruit development, increase watering frequency to 2-3 times per week. Avoid overhead watering, as it can promote fungal diseases. Use a soaker hose or drip irrigation to deliver water directly to the roots.
What are some common watermelon pests and diseases?
Common watermelon pests include aphids, squash bugs, cucumber beetles, and vine borers. Diseases include powdery mildew, fusarium wilt, and anthracnose. Regularly inspect your plants for signs of pests or diseases. Use organic pest control methods, such as insecticidal soap or neem oil, to control pests. Choose disease-resistant varieties and practice good sanitation to prevent diseases. Remove any infected leaves or plants promptly.
How do I know when a watermelon is ripe?
Determining watermelon ripeness can be tricky, but there are several indicators to look for:
* **The tendril closest to the fruit should be brown and dry.**
* **The underside of the watermelon (where it rests on the ground) should be yellow or creamy in color.** This is often referred to as the “ground spot.”
* **The watermelon should sound hollow when you thump it.** A dull thud indicates that the watermelon is not yet ripe.
* **The skin should be dull rather than shiny.**
It takes practice to accurately determine ripeness, so don’t be discouraged if you don’t get it right the first time.
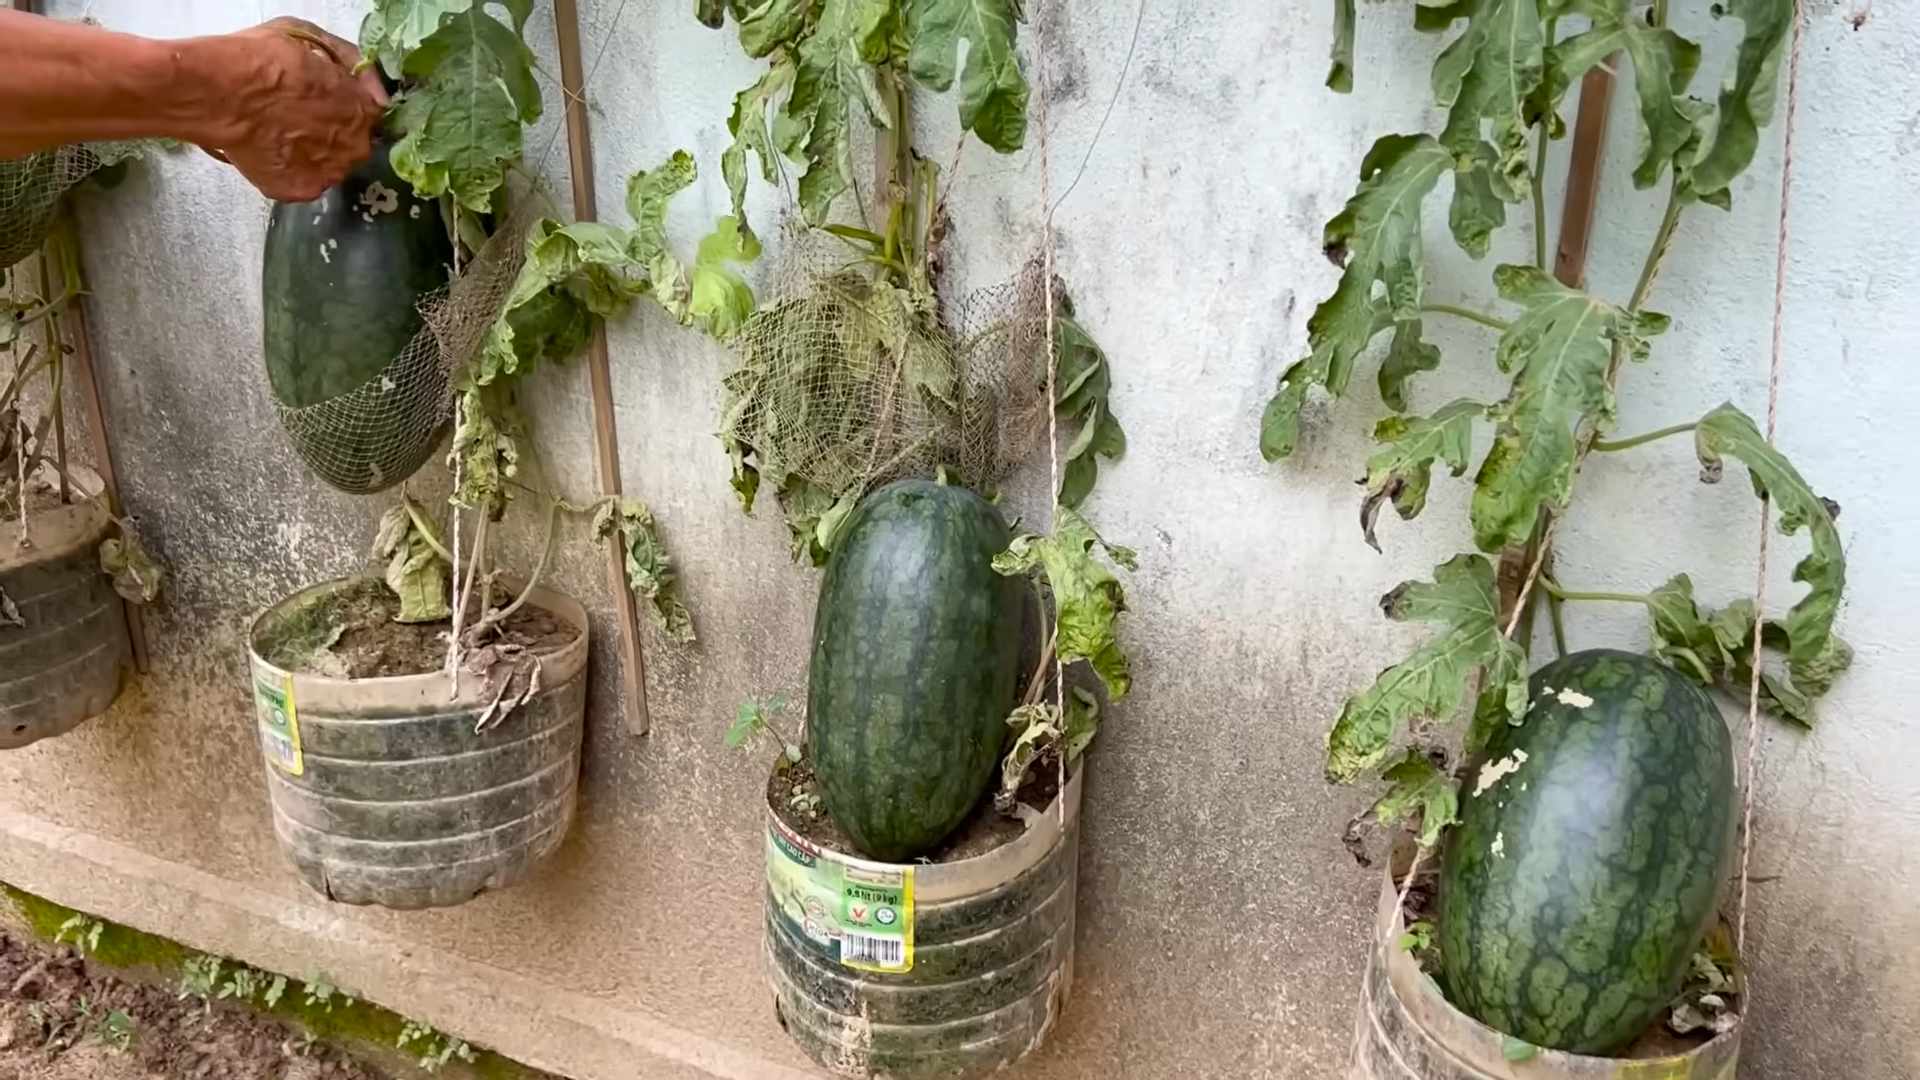
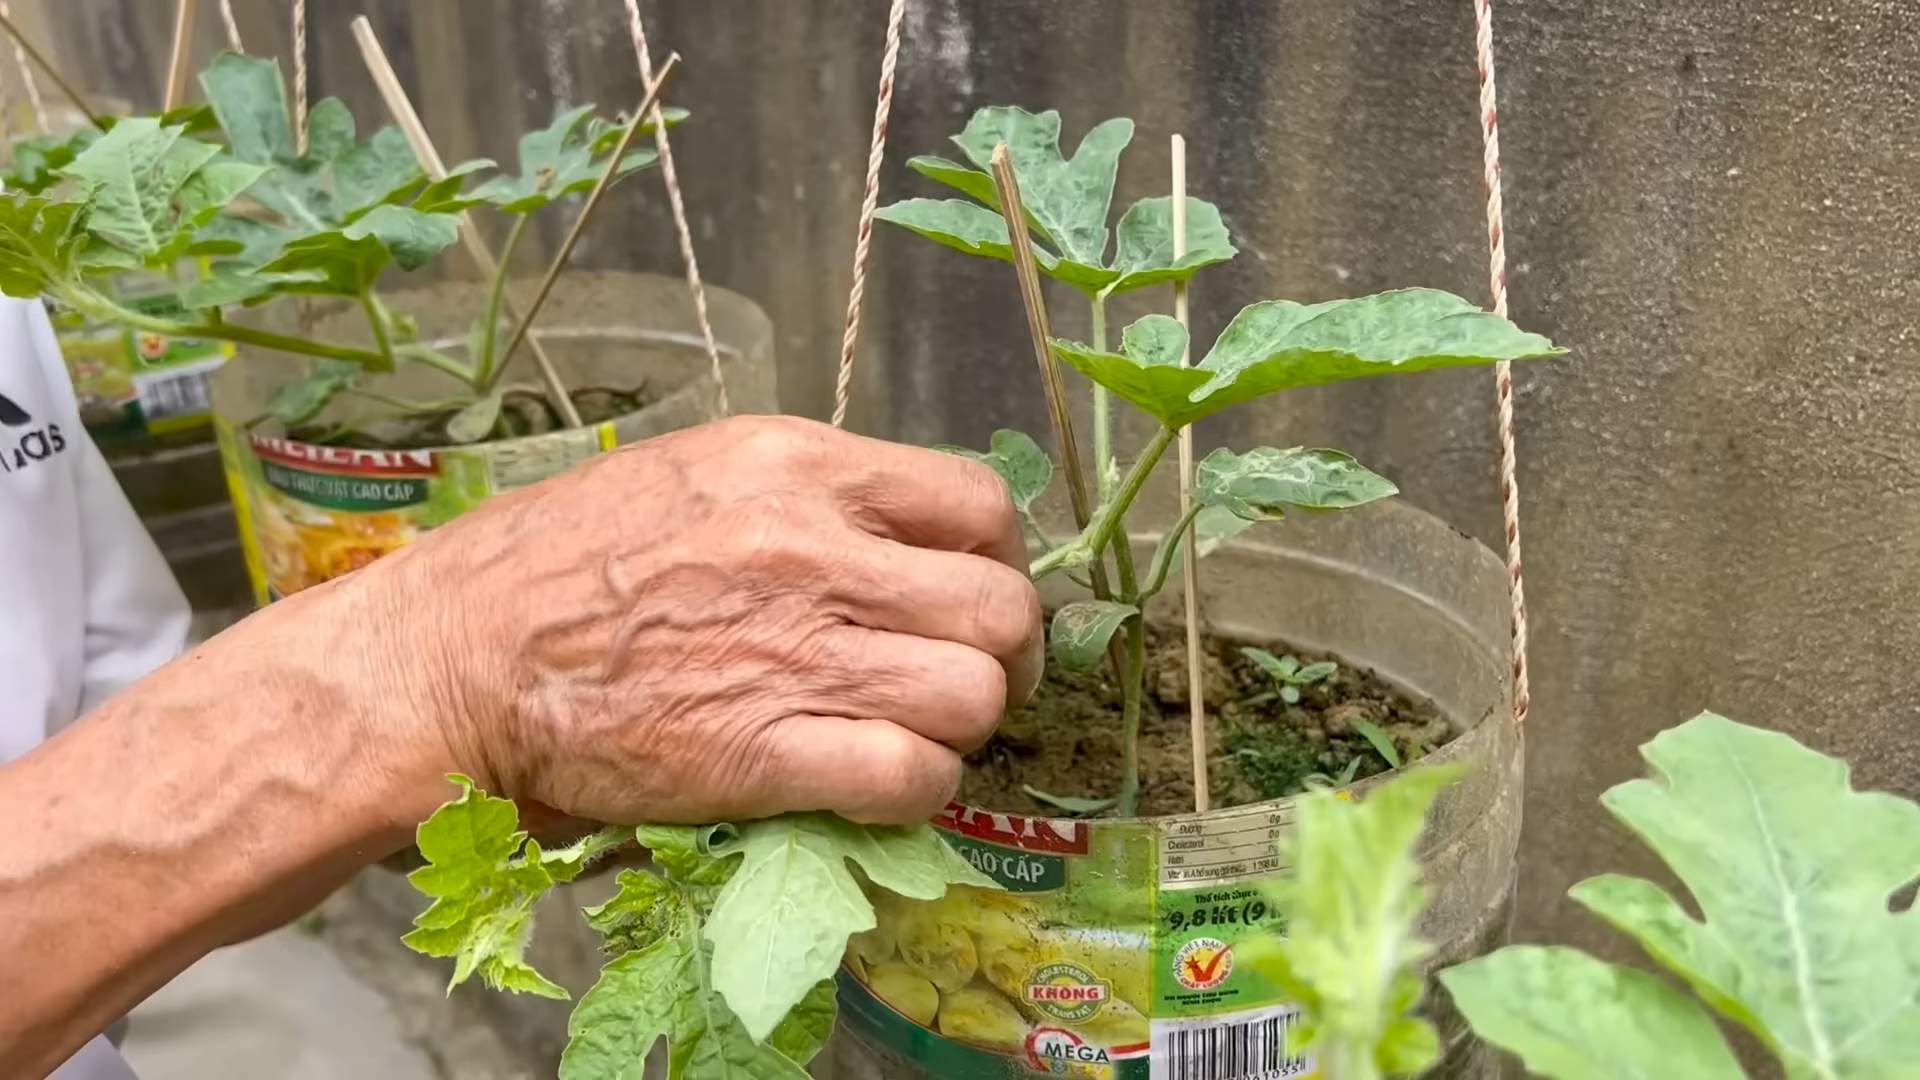
Can I grow watermelons in containers?
Yes, you can grow watermelons in containers, but you’ll need a large container (at least 20 gallons) with good drainage. Choose a dwarf or bush variety of watermelon that is well-suited for container gardening. Use a high-quality potting mix and provide regular watering and fertilization. Place the container in a sunny location that receives at least 6-8 hours of sunlight per day. You may also need to provide support for the vines as they grow.
What kind of fertilizer should I use for watermelons?
Watermelons benefit from regular fertilization. Before planting, incorporate a balanced fertilizer (e.g., 10-10-10) into the soil. After the plants begin to vine, side-dress them with a fertilizer that is higher in phosphorus and potassium to promote fruit development. You can also use a liquid fertilizer every 2-3 weeks. Avoid over-fertilizing, as it can lead to excessive vine growth and reduced fruit production.
How can I prevent blossom-end rot in watermelons?
Blossom-end rot is a common problem in watermelons, caused by a calcium deficiency. To prevent blossom-end rot, ensure that the soil is well-drained and that the plants receive consistent watering. Amend the soil with calcium-rich materials, such as bone meal or gypsum, before planting. You can also spray the plants with a calcium chloride solution.
My watermelon plant is producing flowers, but no fruit. What could be the problem?
There are several reasons why your watermelon plant may not be producing fruit. One possibility is that the flowers are not being pollinated. Watermelons require pollination to set fruit. Attract pollinators to your garden by planting flowers that attract bees and other beneficial insects. You can also hand-pollinate the flowers by transferring pollen from the male flowers to the female flowers. Other possible causes include nutrient deficiencies, insufficient sunlight, and extreme temperatures.

Leave a Comment