
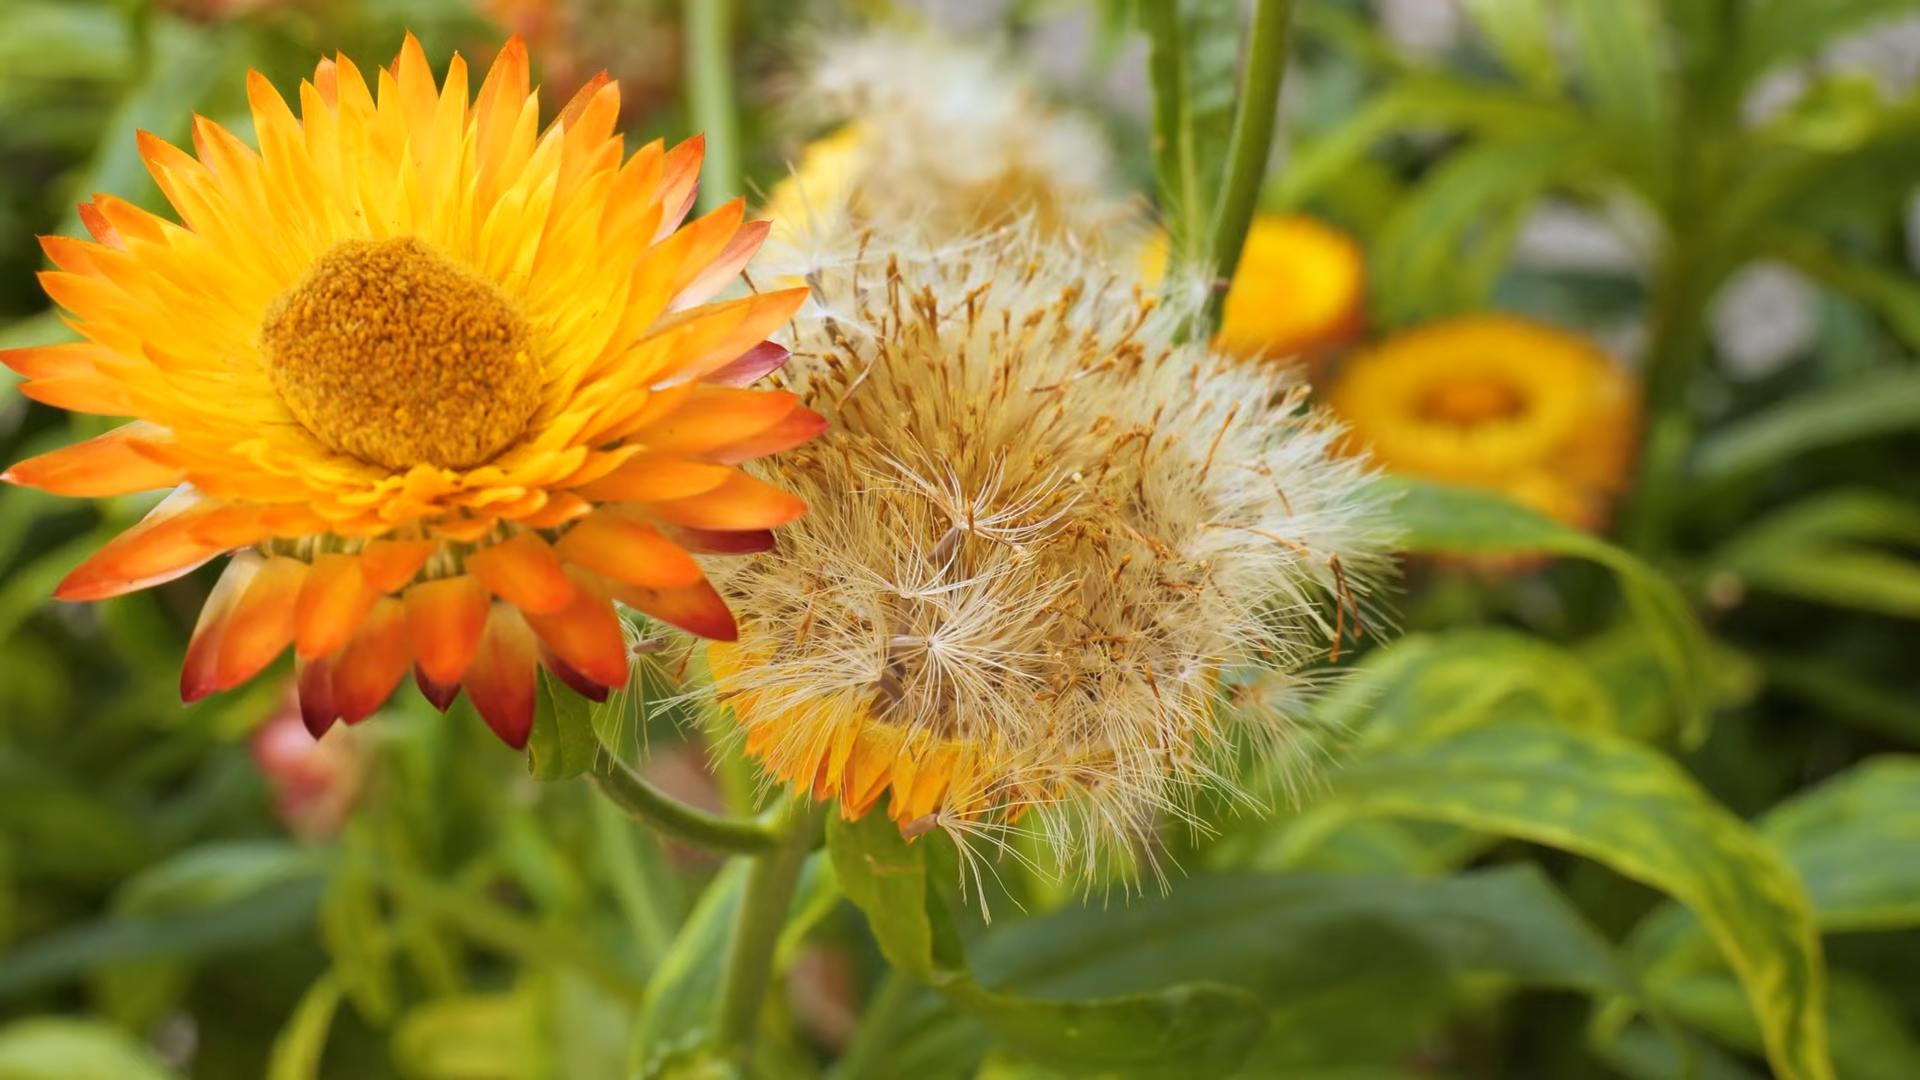
Grow Strawflowers from Seed and unlock a world of everlasting beauty right in your own backyard! Have you ever wished you could hold onto the vibrant colors of summer just a little bit longer? Well, with strawflowers, you absolutely can! These unique blooms, known for their papery petals and long-lasting charm, are a fantastic addition to any garden, and starting them from seed is surprisingly easy.
Strawflowers, also known as *Xerochrysum bracteatum*, have a fascinating history. Originating in Australia, they were quickly embraced by gardeners worldwide for their ability to retain their shape and color even when dried. In Victorian times, they were often used in elaborate floral arrangements, symbolizing lasting affection and remembrance. Imagine bringing that touch of timeless elegance to your own home!
But why should you bother learning to grow strawflowers from seed? In today’s world, where sustainability and DIY projects are all the rage, cultivating your own flowers is incredibly rewarding. Not only will you save money compared to buying cut flowers, but you’ll also have the satisfaction of nurturing something beautiful from start to finish. Plus, dried strawflowers are perfect for crafting, adding a personal touch to gifts, and creating stunning home décor. I’m excited to share my simple, step-by-step guide to help you successfully grow these delightful blooms and enjoy their beauty for months to come!
Grow Your Own Everlasting Bouquet: A DIY Guide to Strawflowers from Seed
Hey there, fellow flower enthusiasts! I’m so excited to share my experience growing strawflowers from seed. These beauties, also known as everlasting flowers, are not only gorgeous in the garden but also dry incredibly well, making them perfect for crafting and adding a touch of summer to your home all year round. Trust me, the satisfaction of creating your own dried flower arrangements from seeds you nurtured is unmatched!
Getting Started: Planning and Preparation
Before we dive into the nitty-gritty, let’s talk about planning. Strawflowers need a good amount of sunlight and well-draining soil, so choosing the right spot is crucial.
* Timing is Key: Strawflowers are annuals, meaning they complete their life cycle in one year. You can either start seeds indoors 6-8 weeks before the last expected frost or direct sow them outdoors after the danger of frost has passed. I personally prefer starting them indoors to get a head start on the season, especially if you live in a region with a shorter growing season.
* Choosing Your Seeds: There are so many beautiful strawflower varieties to choose from! From vibrant reds and oranges to pastel pinks and yellows, the options are endless. Consider the color scheme you want for your dried arrangements and select seeds accordingly. Reputable seed companies are your best bet for high-quality seeds with good germination rates.
* Gather Your Supplies: To successfully grow strawflowers from seed, you’ll need:
* Strawflower seeds
* Seed starting trays or small pots
* Seed starting mix (a light, well-draining mix is essential)
* Spray bottle or watering can with a gentle nozzle
* Grow lights (if starting indoors)
* Heat mat (optional, but helpful for germination)
* Plant labels
* Small trowel or spoon
* Well-draining garden soil
* Gardening gloves
* Fertilizer (balanced, slow-release fertilizer is ideal)
Starting Seeds Indoors: A Step-by-Step Guide
This is my preferred method, as it gives the seedlings a strong start and allows me to control the growing environment.
1. Prepare Your Seed Starting Trays: Fill your seed starting trays or small pots with seed starting mix. Gently press the mix down to eliminate air pockets.
2. Sow the Seeds: Strawflower seeds are quite small, so handle them with care. Sprinkle a few seeds (2-3) on top of the soil in each cell or pot. You don’t need to bury them deeply; a light dusting of soil is sufficient. They need light to germinate.
3. Water Gently: Use a spray bottle or watering can with a gentle nozzle to moisten the soil. Avoid overwatering, as this can lead to damping-off, a fungal disease that can kill seedlings. The soil should be moist but not soggy.
4. Provide Warmth and Light: Place the seed starting trays on a heat mat (if using) and under grow lights. The ideal temperature for germination is around 70-75°F (21-24°C). Keep the grow lights on for 14-16 hours per day.
5. Maintain Moisture: Check the soil moisture daily and water as needed to keep it consistently moist.
6. Thin Seedlings (If Necessary): Once the seedlings emerge (usually within 7-14 days), thin them to one strong seedling per cell or pot. Use small scissors to snip off the weaker seedlings at the soil line.
7. Harden Off Seedlings: Before transplanting the seedlings outdoors, you’ll need to “harden them off.” This process gradually acclimates them to outdoor conditions. Start by placing the seedlings outdoors in a sheltered location for a few hours each day, gradually increasing the amount of time they spend outside over the course of a week or two. Protect them from direct sunlight and strong winds during this process.
Direct Sowing Strawflower Seeds: An Alternative Approach
If you prefer, you can sow strawflower seeds directly into your garden after the danger of frost has passed.
1. Prepare the Soil: Choose a sunny location with well-draining soil. Amend the soil with compost or other organic matter to improve its fertility and drainage. Rake the soil smooth and remove any rocks or debris.
2. Sow the Seeds: Sprinkle the seeds thinly over the soil surface. Lightly rake the soil to cover the seeds with a thin layer of soil.
3. Water Gently: Water the area gently with a watering can or hose with a gentle nozzle. Keep the soil consistently moist until the seedlings emerge.
4. Thin Seedlings: Once the seedlings emerge, thin them to allow adequate spacing between plants. Strawflowers typically need about 12-18 inches of space between them.
Transplanting Seedlings Outdoors: Giving Them Room to Grow
Whether you started your seeds indoors or direct sowed them, transplanting is a crucial step.
1. Choose a Sunny Location: Strawflowers thrive in full sun, so select a location that receives at least 6-8 hours of direct sunlight per day.
2. Prepare the Planting Hole: Dig a hole that is slightly larger than the root ball of the seedling.
3. Gently Remove Seedlings: Carefully remove the seedlings from their pots or trays, being careful not to damage the roots.
4. Plant the Seedlings: Place the seedling in the hole and backfill with soil. Gently firm the soil around the base of the plant.
5. Water Thoroughly: Water the newly transplanted seedlings thoroughly to help them establish their roots.
6. Add Mulch: Apply a layer of mulch around the base of the plants to help retain moisture, suppress weeds, and regulate soil temperature.
Caring for Your Strawflowers: Ensuring a Bountiful Bloom
Once your strawflowers are established, they’re relatively low-maintenance.
1. Watering: Water regularly, especially during dry spells. Strawflowers prefer consistently moist soil, but avoid overwatering, as this can lead to root rot.
2. Fertilizing: Fertilize your strawflowers every few weeks with a balanced, slow-release fertilizer. Follow the instructions on the fertilizer package.
3. Deadheading: Deadhead spent flowers regularly to encourage more blooms. Simply snip off the faded flowers just below the flower head.
4. Pest and Disease Control: Strawflowers are generally pest and disease resistant, but keep an eye out for common garden pests like aphids and spider mites. If you notice any pests, treat them with an appropriate insecticide or horticultural oil. Good air circulation can help prevent fungal diseases.
5. Staking (Optional): Taller varieties of strawflowers may benefit from staking to prevent them from flopping over.
Harvesting and Drying Strawflowers: Preserving Their Beauty
This is the most rewarding part! Harvesting and drying your strawflowers allows you to enjoy their beauty long after the growing season is over.
1. Harvesting: Harvest strawflowers when the petals are about halfway open. This is when they are at their peak color and will dry the best. Cut the stems as long as possible, leaving a few inches of stem below the flower head.
2. Preparing for Drying: Remove the leaves from the stems. This will help prevent mold and speed up the drying process.
3. Drying Methods: There are several ways to dry strawflowers:
* Air Drying: This is the simplest method. Bundle the stems together with twine or rubber bands and hang them upside down in a cool, dark, and well-ventilated place. Make sure the flowers are not touching each other to allow for good air circulation. It usually takes 2-4 weeks for the flowers to dry completely.
* Using Desiccant: Bury the flowers in a desiccant like silica gel. This method preserves the color and shape of the flowers better than air drying. Follow the instructions on the desiccant package.
* Oven Drying: This is a faster method, but it can also make the flowers brittle. Preheat your oven to the lowest setting (around 170°F or 77°C). Place the flowers on a baking sheet lined with parchment paper and bake for 2-3 hours, or until they are dry. Check them frequently to prevent them from burning.
4. Storing Dried Strawflowers: Once the flowers are completely dry, store them in a cool, dry, and dark place. You can store them in airtight containers or boxes.
Creative Uses for Dried Strawflowers: Let Your Imagination Bloom!
Now that you have a beautiful collection of dried strawflowers, it’s time to get creative!
* Dried Flower Arrangements: Create stunning dried flower arrangements for your home. Strawflowers add a touch of rustic charm to any room.
* Wreaths: Make a beautiful strawflower wreath for your front door or as a gift.

Conclusion
So, there you have it – a comprehensive guide to growing strawflowers from seed! We’ve walked through everything from selecting the right seeds and preparing your soil to nurturing your seedlings and eventually harvesting those stunning, everlasting blooms. But why should you dedicate your time and effort to this particular gardening endeavor? The answer is simple: growing strawflowers from seed offers a unique blend of satisfaction, cost-effectiveness, and creative potential that you simply won’t find with store-bought dried flowers.
Think about it. You’re not just buying a product; you’re cultivating an experience. From the moment you sow those tiny seeds, you’re embarking on a journey of growth, patience, and connection with nature. You’ll witness the miracle of life unfold before your eyes as those humble seeds transform into vibrant, textured flowers. And the best part? You’ll have a bountiful supply of these beauties to enjoy fresh in bouquets or to dry and preserve for years to come.
Beyond the personal satisfaction, growing strawflowers from seed is also incredibly budget-friendly. A single packet of seeds can yield dozens, even hundreds, of flowers, far surpassing the quantity you’d get for the same price at a florist or craft store. This makes it an ideal project for budget-conscious gardeners and crafters alike.
But the real magic of growing strawflowers lies in their versatility. Once dried, these flowers become a blank canvas for your creativity. Use them in wreaths, potpourris, floral arrangements, or even incorporate them into handmade cards and gifts. The possibilities are truly endless!
Ready to take your strawflower game to the next level? Consider experimenting with different varieties. ‘Monstrosum’ offers large, showy blooms in a range of colors, while ‘Bright Bikini’ is known for its compact size and vibrant hues. You can also try succession planting, sowing seeds every few weeks to ensure a continuous supply of flowers throughout the growing season.
Another fun variation is to play with the drying process. While air-drying is the most common method, you can also try drying your strawflowers in a dehydrator or even pressing them for a unique, flattened effect. Each method will yield slightly different results, allowing you to further customize your creations.
Ultimately, growing strawflowers from seed is a rewarding and fulfilling experience that offers a multitude of benefits. It’s a chance to connect with nature, unleash your creativity, and save money all at the same time. So, what are you waiting for? Grab a packet of seeds, get your hands dirty, and prepare to be amazed by the beauty and versatility of these everlasting blooms.
We encourage you to try this DIY trick and share your experience with us! Post photos of your strawflower creations on social media using #GrowStrawflowersFromSeed and let us know what you’ve learned along the way. We can’t wait to see what you create! Don’t forget to share this article with your fellow gardening enthusiasts and crafters. Let’s spread the joy of growing strawflowers from seed far and wide!
Frequently Asked Questions (FAQ)
What is the best time to start strawflower seeds indoors?
The ideal time to start strawflower seeds indoors is approximately 6-8 weeks before the last expected frost in your area. This typically falls around late winter or early spring. Starting them indoors gives them a head start and allows them to develop a strong root system before being transplanted outdoors. Check your local frost dates to determine the most appropriate timing for your specific region.
How long does it take for strawflower seeds to germinate?
Strawflower seeds typically germinate within 7-21 days, depending on factors such as temperature, moisture levels, and seed quality. To ensure optimal germination, maintain a consistent soil temperature of around 70-75°F (21-24°C) and keep the soil consistently moist but not waterlogged. Using a heat mat can help to maintain the ideal soil temperature, especially in cooler climates.
What type of soil is best for growing strawflowers?
Strawflowers thrive in well-draining soil that is moderately fertile. A sandy loam soil is ideal, as it provides good drainage and aeration. Avoid heavy clay soils, as they can become waterlogged and inhibit root growth. Before planting, amend your soil with compost or other organic matter to improve drainage and fertility. A slightly acidic to neutral soil pH (around 6.0-7.0) is also preferred.
How much sunlight do strawflowers need?
Strawflowers require at least 6-8 hours of direct sunlight per day to thrive. Full sun exposure ensures that they produce abundant blooms and develop strong, healthy stems. If you are growing them indoors, place them near a sunny window or use grow lights to supplement natural light. Insufficient sunlight can result in leggy growth, fewer flowers, and duller colors.
How often should I water strawflowers?
Water strawflowers regularly, especially during dry periods. Aim to keep the soil consistently moist but not waterlogged. Water deeply when the top inch of soil feels dry to the touch. Avoid overhead watering, as this can increase the risk of fungal diseases. Mulching around the plants can help to retain moisture and suppress weed growth.
When is the best time to harvest strawflowers for drying?
The best time to harvest strawflowers for drying is when the outer petals have opened but the center cone is still closed. This ensures that the flowers retain their shape and color during the drying process. Harvest on a dry day, preferably in the morning after the dew has evaporated. Use sharp scissors or pruning shears to cut the stems, leaving a few inches of stem attached.
What is the best way to dry strawflowers?
The most common method for drying strawflowers is air-drying. To air-dry them, gather the stems into small bunches and tie them together with twine or rubber bands. Hang the bunches upside down in a cool, dark, and well-ventilated area. Avoid direct sunlight, as this can fade the colors of the flowers. It typically takes 2-4 weeks for the flowers to dry completely. You can also use a dehydrator on a low setting or press the flowers for a different effect.
Are strawflowers annuals or perennials?
Strawflowers are typically grown as annuals, meaning they complete their life cycle in one growing season. However, in warmer climates (USDA zones 8-10), they may behave as short-lived perennials, returning for a second year. In colder climates, they will need to be replanted each year.
Can I save seeds from my strawflowers to plant next year?
Yes, you can save seeds from your strawflowers to plant next year. Allow the flowers to fully mature and dry on the plant. Once the seed heads are dry and brown, carefully remove the seeds and store them in a cool, dry place until planting time. Keep in mind that seeds saved from hybrid varieties may not produce plants that are true to type.
What are some common pests and diseases that affect strawflowers?
Strawflowers are generally relatively pest and disease-resistant, but they can occasionally be affected by aphids, spider mites, or fungal diseases such as powdery mildew. To prevent these problems, provide good air circulation, avoid overhead watering, and inspect your plants regularly for signs of infestation or disease. If you notice any problems, treat them promptly with appropriate organic or chemical controls.
Leave a Comment