
Grow pineapple at home? Absolutely! Imagine the look on your friends’ faces when you tell them you harvested that juicy, tropical fruit right from your own backyard (or even your balcony!). It sounds like something out of a dream, right? But trust me, it’s more achievable than you think, and this DIY guide is going to show you exactly how.
Pineapples, with their spiky exterior and sweet, tangy flesh, have a rich history. Originating in South America, they were a symbol of hospitality and luxury, often displayed at feasts and gatherings. Bringing that tropical vibe into your home is easier than you might imagine.
Why should you learn this DIY trick? Well, for starters, store-bought pineapples can be expensive, and let’s be honest, sometimes they just don’t taste as good as you’d hoped. Plus, there’s something incredibly satisfying about nurturing a plant from start to finish and then enjoying the fruits (literally!) of your labor. This guide will provide you with the knowledge and confidence to grow pineapple at home, saving you money, reducing your carbon footprint, and adding a touch of the exotic to your life. So, grab your gardening gloves, and let’s get started!
Ananas zu Hause ziehen: Dein tropischer Traum wird wahr!
Hey Leute! Habt ihr euch jemals gefragt, ob ihr eine Ananas einfach so, zu Hause, ziehen könnt? Ich sage euch, es ist einfacher als ihr denkt und super befriedigend, wenn ihr dann eure eigene, selbstgezogene Ananas ernten könnt! Lasst uns gemeinsam in dieses tropische Abenteuer eintauchen.
Was du brauchst:
Bevor wir loslegen, hier eine Liste mit allem, was du für dein Ananas-Projekt benötigst:
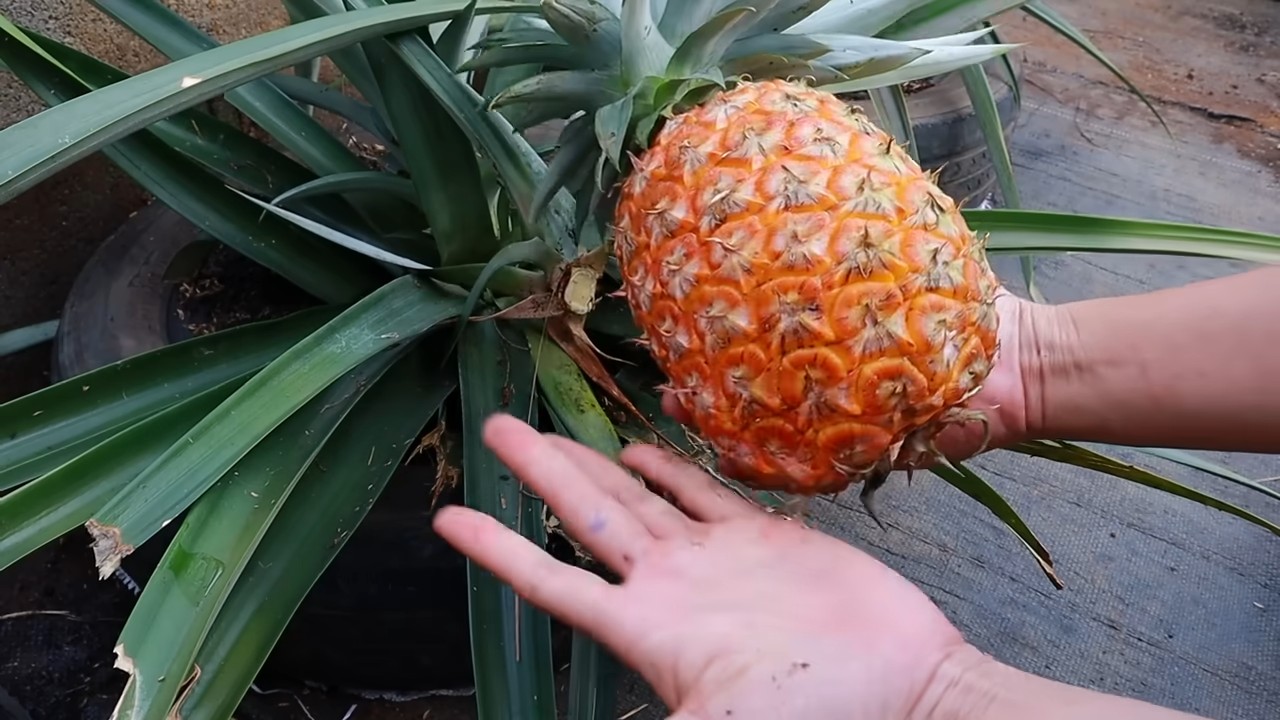
* Eine reife Ananas: Wähle eine Ananas mit gesunden, grünen Blättern. Achte darauf, dass die Blätter nicht braun oder beschädigt sind.
* Ein scharfes Messer: Zum Abtrennen des Blattschopfes.
* Ein Glas oder eine Vase: Zum Bewurzeln des Blattschopfes.
* Zahnstocher (optional): Um den Blattschopf im Wasser zu stabilisieren.
* Blumenerde: Am besten eine gut durchlässige Mischung.
* Ein Topf: Mit ausreichend Platz für die Wurzeln.
* Geduld: Ananas brauchen Zeit, um zu wachsen!
Ananas-Blattschopf vorbereiten: Der erste Schritt zum Erfolg
1. Blattschopf abtrennen: Nimm dein scharfes Messer und schneide den Blattschopf der Ananas vorsichtig ab. Achte darauf, dass du etwa 2-3 cm Fruchtfleisch am Blattschopf lässt.
2. Fruchtfleisch entfernen: Entferne das gesamte Fruchtfleisch vom Blattschopf. Das ist wichtig, da das Fruchtfleisch sonst faulen kann und die Bewurzelung verhindert. Du kannst das Fruchtfleisch einfach abschneiden oder vorsichtig abkratzen.
3. Untere Blätter entfernen: Entferne die untersten Blätter des Blattschopfes, etwa 2-3 cm hoch. Dadurch werden die Wurzelansätze freigelegt und die Bewurzelung gefördert. Ziehe die Blätter einfach vorsichtig nach unten ab.
4. Trocknen lassen: Lass den Blattschopf für 2-3 Tage an einem trockenen, gut belüfteten Ort trocknen. Dadurch können die Schnittstellen verheilen und das Risiko von Fäulnis wird reduziert.
Bewurzelung des Ananas-Blattschopfes: Wurzeln schlagen
1. Wasser vorbereiten: Fülle dein Glas oder deine Vase mit frischem Wasser. Das Wasser sollte sauber und zimmerwarm sein.
2. Blattschopf ins Wasser stellen: Stelle den Blattschopf so ins Wasser, dass nur die freigelegten Wurzelansätze im Wasser sind. Die Blätter sollten nicht im Wasser sein, da sie sonst faulen können.
3. Zahnstocher verwenden (optional): Wenn du möchtest, kannst du Zahnstocher verwenden, um den Blattschopf im Wasser zu stabilisieren. Stecke die Zahnstocher einfach in den Blattschopf und lege sie über den Rand des Glases.
4. Standort wählen: Stelle das Glas mit dem Blattschopf an einen hellen, warmen Ort, aber nicht in direktes Sonnenlicht. Ein Fensterbrett ist ideal.
5. Wasser wechseln: Wechsle das Wasser alle 2-3 Tage, um es sauber und frisch zu halten.
6. Geduld haben: Es kann einige Wochen dauern, bis sich Wurzeln bilden. Hab Geduld und beobachte den Blattschopf regelmäßig. Du solltest nach etwa 4-8 Wochen erste Wurzeln sehen.
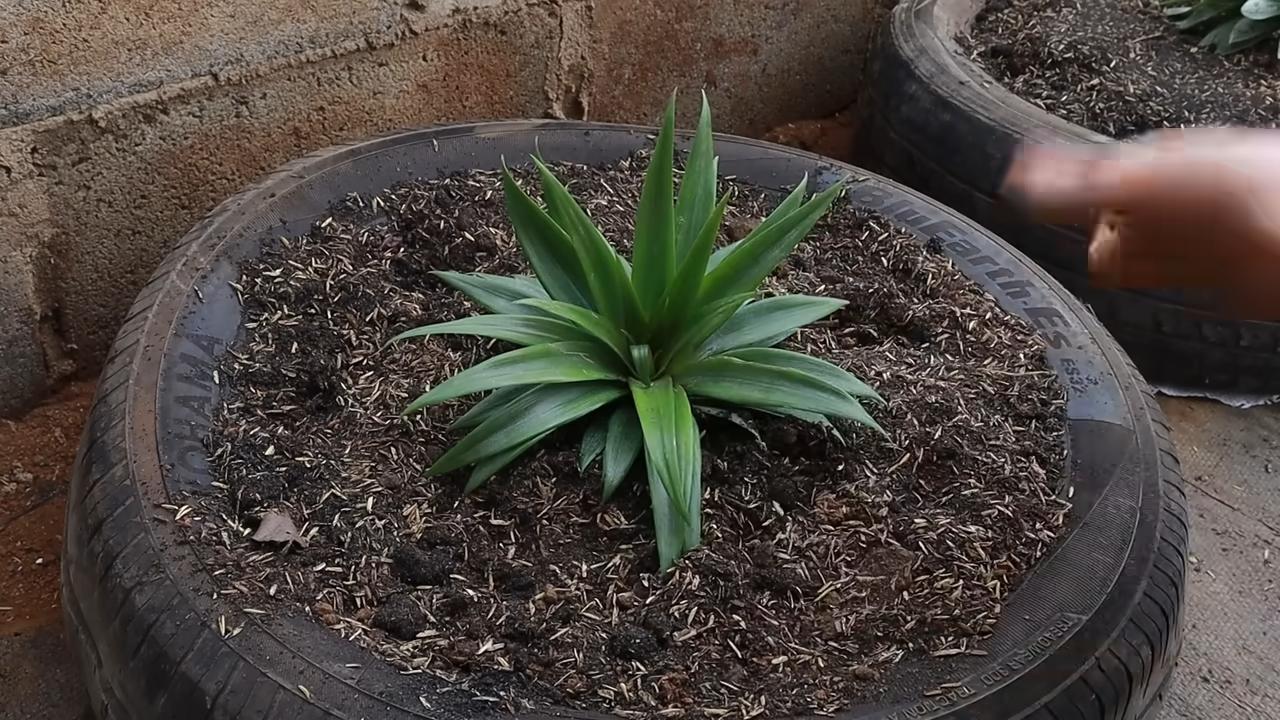
Ananas einpflanzen: Ab in die Erde!
1. Topf vorbereiten: Wähle einen Topf mit ausreichend Platz für die Wurzeln. Der Topf sollte mindestens 15-20 cm Durchmesser haben. Fülle den Topf mit gut durchlässiger Blumenerde.
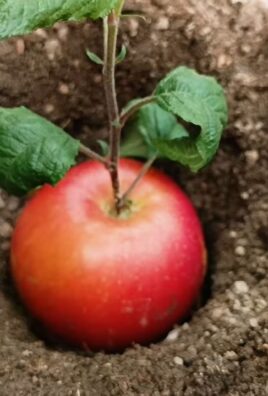
2. Ananas einpflanzen: Grabe ein kleines Loch in die Erde und setze den bewurzelten Blattschopf vorsichtig hinein. Achte darauf, dass die Wurzeln nicht beschädigt werden.
3. Erde andrücken: Drücke die Erde um den Blattschopf herum leicht an, um ihn zu stabilisieren.
4. Gießen: Gieße die Ananas nach dem Einpflanzen gründlich.
Ananas pflegen: Damit sie sich wohlfühlt
1. Standort: Stelle die Ananas an einen hellen, warmen Ort. Ananas lieben Sonne, aber direkte Mittagssonne kann die Blätter verbrennen.
2. Gießen: Gieße die Ananas regelmäßig, aber vermeide Staunässe. Die Erde sollte immer leicht feucht sein, aber nicht nass sein. Im Winter weniger gießen.
3. Düngen: Dünge die Ananas alle 2-3 Monate mit einem Flüssigdünger für Zimmerpflanzen.
4. Temperatur: Ananas bevorzugen warme Temperaturen zwischen 20 und 30 Grad Celsius. Vermeide Temperaturen unter 15 Grad Celsius.
5. Luftfeuchtigkeit: Ananas mögen eine hohe Luftfeuchtigkeit. Du kannst die Luftfeuchtigkeit erhöhen, indem du die Ananas regelmäßig mit Wasser besprühst oder sie in der Nähe einer Schale mit Wasser aufstellst.
6. Umpflanzen: Wenn die Ananas zu groß für ihren Topf wird, musst du sie in einen größeren Topf umpflanzen.
Geduld ist eine Tugend: Die Ananas-Ernte
Die Ananas braucht viel Zeit, um zu wachsen und Früchte zu tragen. Es kann 2-3 Jahre dauern, bis du deine erste Ananas ernten kannst. Aber keine Sorge, die Wartezeit lohnt sich!
Wie erkennst du, dass die Ananas reif ist?
* Die Farbe der Ananas verändert sich von grün zu gelb oder orange.
* Die Ananas duftet süßlich.
* Die Blätter der Ananas lassen sich leicht abzupfen.
Wenn die Ananas reif ist, kannst du sie einfach mit einem scharfen Messer abschneiden.
Zusätzliche Tipps und Tricks:
* Ananas-Sorte wählen: Es gibt verschiedene Ananas-Sorten. Einige Sorten sind besser für den Anbau im Topf geeignet als andere. Informiere dich vor dem Kauf über die verschiedenen Sorten.
* Schädlinge und Krankheiten: Ananas können von Schädlingen und Krankheiten befallen werden. Achte auf Anzeichen von Befall und behandle die Ananas gegebenenfalls mit einem geeigneten Mittel.
* Ananas im Winter: Im Winter brauchen Ananas weniger Wasser und Dünger. Stelle die Ananas an einen hellen, kühlen Ort und gieße sie nur, wenn die Erde trocken ist.
* Ananas vermehren: Du kannst Ananas nicht nur über den Blattschopf, sondern auch über Seitentriebe vermehren.
Häufige Probleme und Lösungen:
* Blattschopf fault: Wenn der Blattschopf fault, kann das an zu viel Feuchtigkeit oder an Fruchtfleischresten liegen. Entferne das faule Gewebe und lass den Blattschopf trocknen, bevor du ihn erneut ins Wasser stellst.
* Keine Wurzeln: Wenn sich nach einigen Wochen keine Wurzeln bilden, kann das an zu wenig Licht oder an schlechter Wasserqualität liegen. Stelle den Blattschopf an einen helleren Ort und wechsle das Wasser regelmäßig.
* Gelbe Blätter: Gelbe Blätter können ein Zeichen für zu viel oder zu wenig Wasser, Nährstoffmangel oder Schädlingsbefall sein. Überprüfe die Pflegebedingungen und passe sie gegebenenfalls an.
Ich hoffe, diese Anleitung hilft dir dabei, deine eigene Ananas zu Hause zu ziehen. Es ist ein spannendes und lohnendes Projekt, das dir viel Freude bereiten wird. Viel Erfolg!
Conclusion
So, there you have it! Growing your own pineapple at home isn’t just a fun project; it’s a rewarding experience that brings a touch of the tropics right to your windowsill or garden. Forget those expensive, often less-than-perfect pineapples from the grocery store. With a little patience and this simple DIY trick, you can cultivate your own sweet, juicy fruit.
Why is this a must-try? Because it’s sustainable, educational, and ultimately, delicious! You’re reducing your carbon footprint by avoiding long-distance transportation of store-bought pineapples. You’re learning about plant propagation and the fascinating life cycle of a pineapple. And most importantly, you’re enjoying the unparalleled flavor of a homegrown pineapple, ripened to perfection under your own care.
Beyond the basic method, there are plenty of ways to experiment and personalize your pineapple-growing journey. Try different varieties of pineapple – some are sweeter, some are tangier, and some are even pink! Consider using different potting mixes to see which one your pineapple crown prefers. You can also experiment with different light conditions to optimize growth. For those in colder climates, consider using a grow light during the winter months to ensure your pineapple gets enough sunshine.
Don’t be afraid to get creative with your presentation, too. Once your pineapple is ready, use it in smoothies, grilled dishes, or even as a decorative centerpiece. The possibilities are endless!
We wholeheartedly encourage you to give this DIY trick a try. It’s easier than you might think, and the satisfaction of harvesting your own pineapple is truly unmatched. Share your experiences with us! Post photos of your pineapple plants on social media using #HomegrownPineapple and let us know what worked best for you. We’re eager to see your successes and learn from your challenges. Let’s create a community of home pineapple growers and spread the joy of this tropical treat! Embrace the journey of growing pineapple at home, and you’ll be rewarded with a taste of paradise.
Frequently Asked Questions (FAQ)
How long does it take to grow a pineapple from a crown?
This is probably the most common question, and the answer is: patience is key! Growing pineapple at home from a crown is a long-term project. Generally, it takes anywhere from 2 to 3 years for a pineapple plant to mature and produce fruit. The exact timeframe depends on several factors, including the variety of pineapple, the climate, the amount of sunlight it receives, and the quality of the soil. Don’t be discouraged if it takes longer than expected; the wait is well worth it! Remember to consistently provide the plant with proper care, including watering, fertilizing, and adequate sunlight, to encourage healthy growth and eventual fruiting.
What kind of soil is best for growing pineapples?
Pineapples thrive in well-draining, slightly acidic soil. A mixture of equal parts potting soil, perlite, and peat moss is a good starting point. The perlite ensures good drainage, which is crucial to prevent root rot, a common problem for pineapples. The peat moss helps to retain moisture and provides a slightly acidic environment that pineapples prefer. You can also add some compost to the mix to provide extra nutrients. Avoid heavy clay soils, as they tend to retain too much water. If you’re planting your pineapple outdoors, amend the soil with organic matter to improve drainage and fertility. Regularly check the soil pH and adjust as needed to maintain a slightly acidic level (around 5.5 to 6.5).
How often should I water my pineapple plant?
Watering frequency depends on the climate and the time of year. In general, water your pineapple plant when the top inch of soil feels dry to the touch. During the warmer months, you may need to water it more frequently, perhaps every few days. In the cooler months, reduce watering to once a week or even less. Avoid overwatering, as this can lead to root rot. Ensure that the pot has good drainage to prevent water from accumulating at the bottom. When watering, water thoroughly until water drains out of the bottom of the pot. Pineapples also benefit from occasional misting, especially in dry climates.
What kind of fertilizer should I use for my pineapple plant?
Pineapples are heavy feeders and benefit from regular fertilization. Use a balanced fertilizer with a ratio of 10-10-10 or 14-14-14. Apply the fertilizer every 2-3 months during the growing season (spring and summer). Follow the instructions on the fertilizer package for the correct dosage. You can also use a liquid fertilizer diluted to half strength and apply it more frequently, such as every 2 weeks. Avoid over-fertilizing, as this can burn the roots. In addition to chemical fertilizers, you can also use organic fertilizers such as compost tea or fish emulsion. These provide essential nutrients and improve soil health.
My pineapple plant is growing, but it’s not producing fruit. What can I do?
There are several reasons why your pineapple plant might not be fruiting. First, ensure that it’s getting enough sunlight. Pineapples need at least 6 hours of direct sunlight per day to produce fruit. Second, make sure you’re fertilizing it regularly with a balanced fertilizer. Third, check the temperature. Pineapples prefer warm temperatures (between 65°F and 85°F). If the temperature is too low, it can inhibit fruiting.
If all of these conditions are met and your pineapple plant still isn’t fruiting, you can try forcing it to fruit by exposing it to ethylene gas. This can be done by placing a ripe apple or banana near the plant and covering it with a plastic bag for a few days. The ethylene gas released by the fruit will stimulate flowering. Be patient, as it may take several months for the fruit to develop after flowering.
Can I grow a pineapple plant indoors?
Yes, you can definitely grow a pineapple plant indoors, especially if you live in a climate with cold winters. Choose a sunny spot near a south-facing window where the plant will receive at least 6 hours of direct sunlight per day. If you don’t have enough natural light, you can supplement with a grow light. Use a well-draining potting mix and water the plant regularly, allowing the soil to dry out slightly between waterings. Maintain a warm temperature (between 65°F and 85°F) and provide adequate humidity. You may need to mist the plant regularly, especially in dry indoor environments.
What are some common problems with pineapple plants, and how can I fix them?
Some common problems with pineapple plants include root rot, mealybugs, and scale. Root rot is caused by overwatering and poor drainage. To prevent root rot, use a well-draining potting mix and avoid overwatering. If you suspect root rot, repot the plant in fresh soil and remove any affected roots.
Mealybugs and scale are common pests that can infest pineapple plants. They can be controlled with insecticidal soap or neem oil. Apply the insecticide according to the instructions on the package. You may need to repeat the treatment several times to completely eradicate the pests. Regularly inspect your pineapple plant for signs of pests and diseases to catch them early and prevent them from spreading.
How do I know when my pineapple is ripe?
Knowing when your homegrown pineapple is ripe is crucial for enjoying its full flavor. Several indicators can help you determine ripeness. First, the color of the pineapple will change from green to yellow or golden. The exact color depends on the variety of pineapple. Second, the pineapple will develop a sweet, fragrant aroma. Third, the “eyes” of the pineapple will flatten out. Fourth, the pineapple will feel slightly soft to the touch. Finally, you can try gently pulling on one of the leaves near the top of the pineapple. If it comes off easily, the pineapple is likely ripe. Once your pineapple is ripe, harvest it by cutting it off the plant with a sharp knife. Enjoy the fruits of your labor!
Leave a Comment