
Grow Parsley Indoors and unlock a world of fresh, vibrant flavor right at your fingertips! Imagine, no more last-minute dashes to the grocery store for that essential garnish. Instead, you can snip fragrant, healthy parsley leaves whenever you need them, adding a burst of freshness to your culinary creations. Have you ever wondered how the ancient Greeks and Romans revered parsley, crowning victors with its verdant sprigs and using it for both culinary and medicinal purposes? This humble herb boasts a rich history, and now, you can easily cultivate your own piece of that heritage within the cozy confines of your home.
Let’s face it, buying fresh herbs can be expensive, and they often wilt away in the fridge before you even get a chance to use them. That’s where the magic of DIY comes in! Learning how to grow parsley indoors is not only a cost-effective solution but also incredibly rewarding. It’s a simple project that brings a touch of nature into your living space and provides you with a constant supply of fresh, flavorful parsley. I’m excited to share some easy-to-follow tricks and hacks that will transform your windowsill into a thriving herb garden. Get ready to ditch the store-bought bunches and embrace the joy of homegrown goodness!
Successfully Growing Parsley Indoors: Your Comprehensive DIY Guide
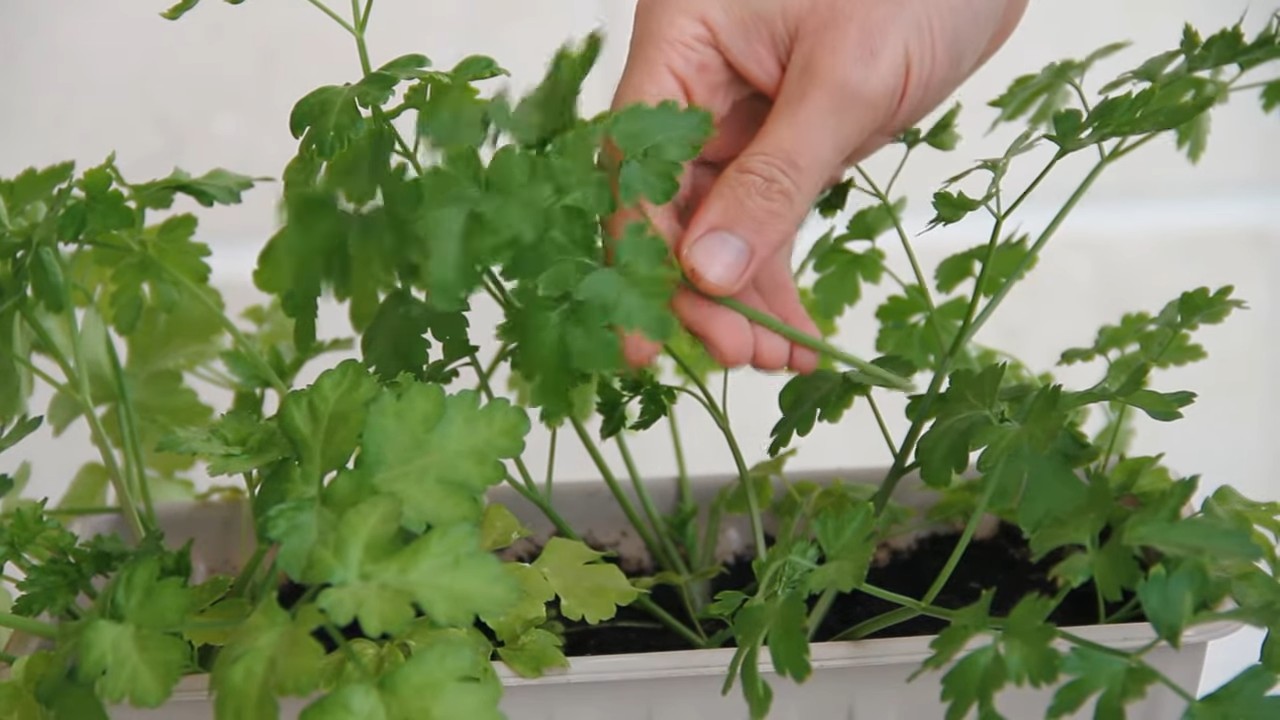
Hello, dear garden friends! Do you ever feel that fresh herbs are the perfect finishing touch to any dish? I love harvesting fresh parsley whenever I need it. But what if your garden is hibernating, or you don’t have a garden at all? Don’t worry, I’ll show you how you can easily grow parsley indoors! It’s easier than you think and brings fresh flavor directly into your kitchen.
What You Need: The Right Equipment for Your Indoor Parsley Garden
Before we get started, let’s make sure we have everything we need. Here is a list of the things you’ll need for your indoor parsley project:
- Seeds or a parsley plant: You can either start with seeds or buy a pre-grown plant. I personally find it more satisfying to start from seed, but both work!
- A suitable pot: Choose a pot with a diameter of at least 15 cm (6 inches) and good drainage. Parsley does not like waterlogged soil.
- High-quality potting soil: Use a well-draining potting soil that is rich in nutrients. I like to mix in some compost for an extra nutrient boost.
- A planter with drainage holes: Absolutely necessary to prevent waterlogging.
- A saucer: to catch excess water.
- A bright light source: Parsley needs a lot of light. A sunny windowsill (south or west-facing) is ideal. Otherwise, you’ll need a grow light.
- A spray bottle: For moistening the soil.
- A watering can: For watering the plant.
- Optional: Liquid fertilizer for herbs.
Growing Parsley from Seed: A Step-by-Step Guide
If you’ve decided to start with seeds, here is a detailed guide:
- Prepare the seeds: Parsley seeds can sometimes be slow to germinate. To speed up the process, you can soak the seeds in lukewarm water for 24 hours before planting. This helps to soften the hard seed coat.
- Prepare the pot: Fill the pot with potting soil, but leave about 2-3 cm (1 inch) of space at the top. Press the soil down lightly.
- Sow the seeds: Distribute the seeds evenly over the soil. Then cover them with a thin layer of soil (about 0.5 cm / 0.2 inches).
- Water: Gently moisten the soil with a spray bottle. The soil should be damp, but not soaked.
- Promote germination: Cover the pot with plastic wrap or a plastic bag to create high humidity. Place the pot in a warm place (approx. 20-25°C / 68-77°F).
- Be patient: Parsley seeds can take up to 3 weeks to germinate. Keep the soil moist during this time. Briefly ventilate the pot daily to prevent mold.
- After germination: As soon as the first seedlings appear, remove the wrap or bag. Move the pot to a bright location.
- Thinning: When the seedlings are a bit larger (about 5 cm / 2 inches high), you can thin them out. This means removing the weakest plants so that the remaining ones have enough space to grow. Leave about 5-7 cm (2-3 inches) of space between the plants.
Growing Parsley from a Plant: A Quick Start
If you’re in a hurry or just don’t want to wait, you can also buy a pre-grown parsley plant. Here’s how:
- Select a plant: Choose a healthy plant with strong, green leaves. Avoid plants that have yellow or brown leaves.
- Repot: Carefully remove the plant from its original pot. Loosen the roots a bit.
- Plant: Place the plant in the prepared pot with potting soil. Fill the pot with soil and press it down lightly.
- Water: Water the plant thoroughly until water runs out of the drainage holes.
- Choose a location: Place the plant in a bright location.
The Right Care: How to Keep Your Parsley Happy and Healthy
Whether you started with seeds or a plant, proper care is crucial for success. Here are some tips:
- Watering: Parsley likes it moist, but not wet. Water the plant when the top layer of soil feels dry. Avoid waterlogging.
- Light: Parsley needs at least 6 hours of sunlight per day. If you don’t have a sunny windowsill, use a grow light.
- Fertilizing: Fertilize the parsley every 2-4 weeks with a liquid fertilizer for herbs. Follow the instructions on the package.
- Harvesting: Harvest the parsley regularly to encourage growth. Cut the outer leaves instead of the whole plant.
- Pests and diseases: Watch out for pests like aphids or spider mites. If necessary, you can use a biological pesticide. Avoid overwatering to prevent fungal diseases.
- Regular pruning: Regularly remove yellow or brown leaves to keep the plant healthy.
Common Problems and Solutions: What to Do When Something Goes Wrong
Problems can also arise with indoor parsley cultivation. Here are some common problems and how you can fix them:
- Yellow leaves: Yellow leaves can be a sign of overwatering, underwatering, or a nutrient deficiency. Check the soil moisture and fertilize the plant if necessary.
- Aphids: Aphids are small, sucking insects that can attach to the leaves. You can rinse them off with a jet of water or use a biological pesticide.
- Mold: Mold can occur if the humidity is too high or the ventilation is poor. Ensure good ventilation and avoid overwatering.
- Slow growth: Slow growth can be a sign of too little light or a nutrient deficiency. Move the plant to a brighter location and fertilize it if necessary.
Extra Tips for a Lush Parsley Harvest
Here are a few additional tips to help you achieve a lush parsley harvest:
- Rotate the pot regularly: Rotate the pot regularly so that all sides of the plant receive even light.
- Use rainwater: If possible, use rainwater for watering. Rainwater is softer than tap water and contains no harmful chemicals.
- Mulch: A thin layer of mulch (e.g., coconut fibers or wood chips) on the soil helps to retain moisture and suppress weeds.
- Try different varieties: There are different parsley varieties, such as flat-leaf, curly, and Italian parsley. Try different types to find out which one you like best.
The Harvest: When and How to Harvest Your Parsley
The harvest is the best part! You can start harvesting as soon as the plant has enough leaves.
When to harvest: It’s best to harvest parsley in the morning when the essential oils are most concentrated.

Conclusion
So, there you have it! Growing parsley indoors is not only achievable, but it’s also a rewarding experience that brings fresh, vibrant flavor right to your fingertips. Forget those sad, wilted bunches from the grocery store – imagine snipping off exactly what you need, when you need it, for the ultimate in freshness and convenience. This DIY trick is a game-changer for any home cook, regardless of your gardening experience.
Why is this a must-try? Because it’s economical, sustainable, and incredibly satisfying. You’ll save money on store-bought herbs, reduce food waste, and enjoy the therapeutic benefits of nurturing a living plant. Plus, the aroma of fresh parsley filling your kitchen is simply divine!
But the best part? You can customize this process to fit your own needs and preferences. Experiment with different varieties of parsley – flat-leaf (Italian) for its robust flavor or curly parsley for its decorative appeal. Try different containers, from repurposed yogurt cups to stylish terracotta pots, to find what works best for your space. You can even explore hydroponic systems for an even more efficient and space-saving approach to growing parsley indoors.
Consider companion planting your indoor parsley with other herbs like chives or basil. Not only will this create a beautiful and fragrant mini-garden, but it can also help deter pests and promote healthy growth. Remember to adjust your watering schedule based on the humidity levels in your home and the type of container you’re using.
Don’t be afraid to experiment with different lighting conditions. While parsley thrives in bright, indirect light, you can supplement with a grow light if your home doesn’t receive enough natural sunlight. Observe your plants closely and adjust your care routine as needed.
We’re confident that once you try growing parsley indoors, you’ll be hooked. It’s a simple, yet impactful way to elevate your cooking and connect with nature, even in the heart of the city.
So, grab a pot, some soil, and a packet of parsley seeds, and get started today! We can’t wait to hear about your experiences. Share your photos, tips, and tricks in the comments below. Let’s create a community of indoor parsley growers and inspire others to bring the freshness of the garden into their homes. Happy growing!
Frequently Asked Questions (FAQ)
1. What kind of parsley should I grow indoors?
Both flat-leaf (Italian) and curly parsley varieties grow well indoors. Flat-leaf parsley is known for its stronger, more robust flavor, making it ideal for cooking. Curly parsley has a milder flavor and is often used as a garnish. The best choice depends on your personal preference and how you plan to use the parsley. Consider growing both to have a variety on hand!
2. What kind of pot and soil should I use?
Choose a pot that is at least 6 inches deep to allow for root growth. Make sure the pot has drainage holes to prevent waterlogging. Terracotta pots are a good option as they allow the soil to breathe, but plastic pots work just as well. Use a high-quality potting mix that is well-draining. Avoid using garden soil, as it can be too heavy and may contain pests or diseases. You can also add perlite or vermiculite to the potting mix to improve drainage.
3. How much light does indoor parsley need?
Parsley needs at least 6 hours of bright, indirect light per day. A south-facing window is ideal, but an east- or west-facing window can also work. If you don’t have enough natural light, you can supplement with a grow light. Place the grow light about 6-12 inches above the plants and keep it on for 12-14 hours per day. Rotate the pot regularly to ensure that all sides of the plant receive adequate light.
4. How often should I water my indoor parsley?
Water your parsley when the top inch of soil feels dry to the touch. Water thoroughly until water drains out of the drainage holes. Avoid overwatering, as this can lead to root rot. Check the soil moisture regularly and adjust your watering schedule based on the humidity levels in your home. In general, you’ll need to water more frequently during the warmer months and less frequently during the cooler months.
5. How often should I fertilize my indoor parsley?
Parsley is a light feeder, so you don’t need to fertilize it very often. Fertilize every 2-3 weeks with a diluted liquid fertilizer. Choose a fertilizer that is specifically formulated for herbs or vegetables. Follow the instructions on the fertilizer label carefully. Avoid over-fertilizing, as this can burn the roots.
6. How do I harvest my indoor parsley?
Harvest parsley by snipping off the outer stems near the base of the plant. This will encourage new growth from the center. Avoid cutting off more than one-third of the plant at a time. You can harvest parsley as needed throughout the growing season.
7. What are some common problems with growing parsley indoors?
Some common problems with growing parsley indoors include yellowing leaves, wilting, and pest infestations. Yellowing leaves can be caused by overwatering, underwatering, or nutrient deficiencies. Wilting can be caused by underwatering or root rot. Pest infestations can be treated with insecticidal soap or neem oil. Regularly inspect your plants for signs of pests or diseases and take action promptly.
8. How long will my indoor parsley plant last?
Parsley is a biennial plant, which means it typically lives for two years. However, it often bolts (goes to seed) in its second year, which can make the leaves bitter. To prolong the life of your parsley plant, pinch off any flower buds that appear. You can also start new plants from seed every year to ensure a continuous supply of fresh parsley.
9. Can I grow parsley from cuttings indoors?
While growing parsley from seed is the most common method, you can also try propagating it from cuttings. Take a 4-6 inch cutting from a healthy parsley plant, removing the lower leaves. Dip the cut end in rooting hormone and plant it in a pot filled with moist potting mix. Cover the pot with a plastic bag to create a humid environment. Keep the soil moist and the cutting in a warm, bright location. After a few weeks, the cutting should develop roots and you can remove the plastic bag.
10. Is growing parsley indoors worth the effort?
Absolutely! Growing parsley indoors is a rewarding and convenient way to have fresh herbs on hand whenever you need them. It’s also a great way to add a touch of greenery to your home and enjoy the therapeutic benefits of gardening. With a little care and attention, you can enjoy a continuous supply of fresh, flavorful parsley all year round.

Leave a Comment