
Grow Malabar Spinach Indoors? Absolutely! Imagine fresh, vibrant, and nutritious greens readily available right in your kitchen, no matter the season. Forget those limp, overpriced spinach bunches at the grocery store. I’m going to show you how to cultivate your own thriving Malabar spinach indoors, bringing a touch of the tropics to your home.
Malabar spinach, also known as Ceylon spinach or vine spinach, isn’t actually a true spinach, but its mild flavor and impressive nutritional profile have made it a popular leafy green in Asian and African cuisines for centuries. It’s a climbing vine, adding a beautiful vertical element to your indoor garden, and it’s incredibly easy to care for once you know the basics.
Why should you learn to grow Malabar spinach indoors? Well, for starters, it’s a fantastic way to enjoy fresh, organic produce year-round, regardless of your climate. Plus, it’s a sustainable and rewarding hobby that connects you with nature. In this guide, I’ll share my tried-and-true DIY tricks and hacks to ensure your indoor Malabar spinach thrives, from choosing the right container and soil to providing optimal light and support. Get ready to enjoy delicious, homegrown greens with minimal effort!
Growing Malabar Spinach Indoors: Your Comprehensive DIY Guide
I love fresh vegetables, especially when I can grow them myself! And Malabar spinach is no exception. It’s not only super healthy but also incredibly easy to grow indoors. In this article, I’ll show you step by step how you can grow your own Malabar spinach at home. Don’t worry, it’s easier than you think!
What You Need to Grow Malabar Spinach Indoors
Before we get started, let’s make sure you have everything you need. Here is a list of the most important things:
-
Malabar spinach seeds: You can buy them online or at a garden center. Make sure they are of good quality.
-
Seedling pots or trays: Small pots or trays are perfect for starting out.
-
Seed starting mix: This soil is specially formulated for starting seedlings and provides the best conditions for growth.
-
Larger pots: Once the seedlings get bigger, you’ll need larger pots for transplanting.
-
Potting soil: Good potting soil is important for the healthy growth of Malabar spinach.
-
Support/Trellis: Malabar spinach is a climbing plant, so you’ll need a support for it to climb on. This can be a trellis, a bamboo stake, or a wire frame.
-
Spray bottle: For moistening the soil.
-
Watering can: For watering the plants.
-
Sunlight: Malabar spinach needs a lot of sunlight, so choose a sunny location.
-
Optional: A plant lamp if you don’t have enough sunlight.
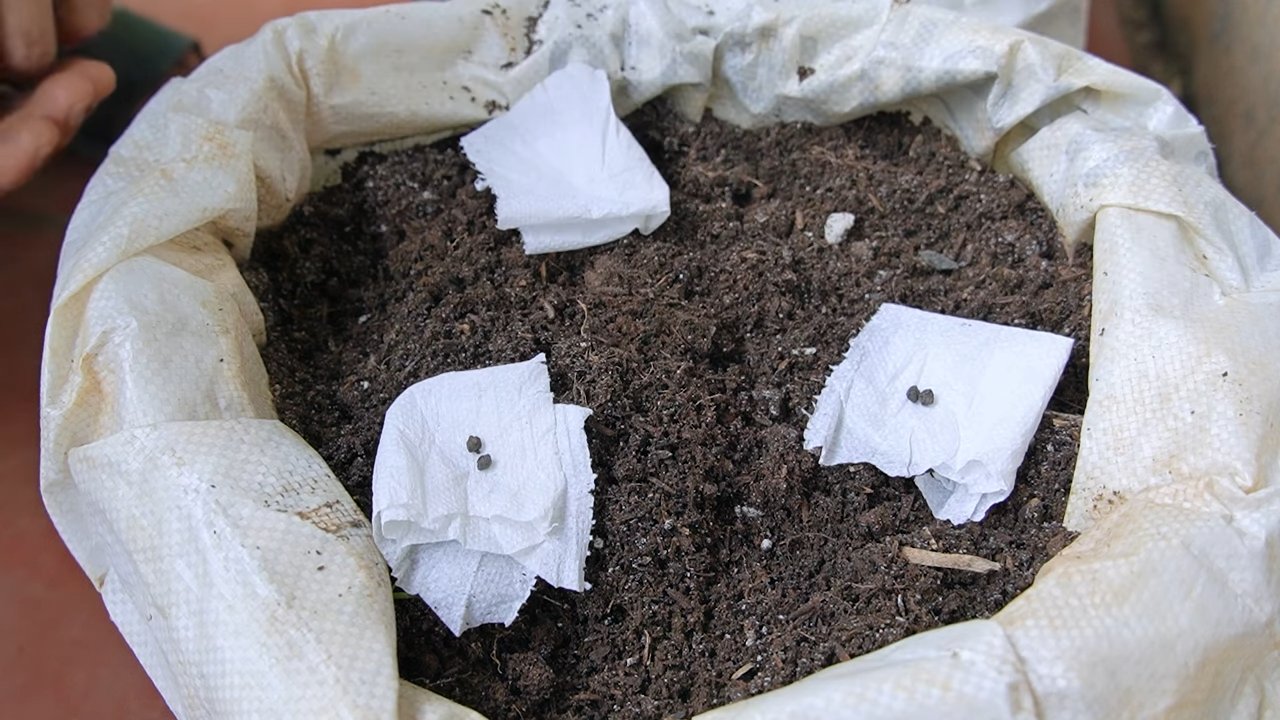
Sowing the Malabar Spinach Seeds
Sowing is the first step to having your own Malabar spinach. Here’s how you do it:
-
Prepare the seeds: Malabar spinach seeds have a hard shell. To speed up germination, you can soak them in warm water for 24 hours before sowing. This helps to soften the shell.
-
Prepare the seedling pots: Fill the seedling pots with seed starting mix. Press the soil down lightly, but not too firmly.
-
Sow the seeds: Place 2-3 seeds in each pot. Cover the seeds with a thin layer of soil (approx. 0.5 cm).
-
Water: Moisten the soil carefully with a spray bottle. The soil should be damp, but not wet.
-
Location: Place the seedling pots in a warm and bright place. A temperature of 20-25°C is ideal.
-
Maintain moisture: To retain moisture, you can cover the pots with plastic wrap or a transparent lid. Make sure to air out the cover regularly to prevent mold.
-
Be patient: Germination can take 1-3 weeks. Keep the soil moist and wait patiently.
Transplanting the Seedlings
Once the seedlings are large enough (approx. 5-7 cm high and with several leaves), it’s time to transplant them into larger pots.
-
Prepare the pots: Choose larger pots (at least 15-20 cm in diameter) and fill them with potting soil.
-
Carefully remove seedlings: Gently loosen the seedlings from the seedling pots. Be careful not to damage the roots. If you sowed several seeds in one pot, you can select the strongest seedlings and remove the weaker ones.
-
Transplant: Place the seedlings into the larger pots. The top of the root ball should be level with the surface of the soil.
-
Water: Water the plants thoroughly after transplanting.
-
Location: Place the pots in a sunny location. Malabar spinach needs at least 6 hours of sunlight per day.
Caring for Malabar Spinach
Proper care is crucial for the healthy growth of your Malabar spinach.
-
Watering: Water the plants regularly, especially during the hot summer months. The soil should always be moist, but not wet. Avoid waterlogging, as this can lead to root rot.
-
Fertilizing: Fertilize the plants every 2-3 weeks with an organic liquid fertilizer. This promotes growth and leaf production.
-
Support/Trellis: Provide the plants with a support structure they can climb on. This can be a trellis, a bamboo stake, or a wire frame.
-
Pruning: Prune the plants regularly to encourage growth and maintain their shape. Remove yellow or damaged leaves.
-
Pests and diseases: Watch out for pests like aphids or spider mites. If infested, you can treat the plants with a natural insecticide. Malabar spinach is relatively resistant to diseases, but watch for signs of fungal infection.
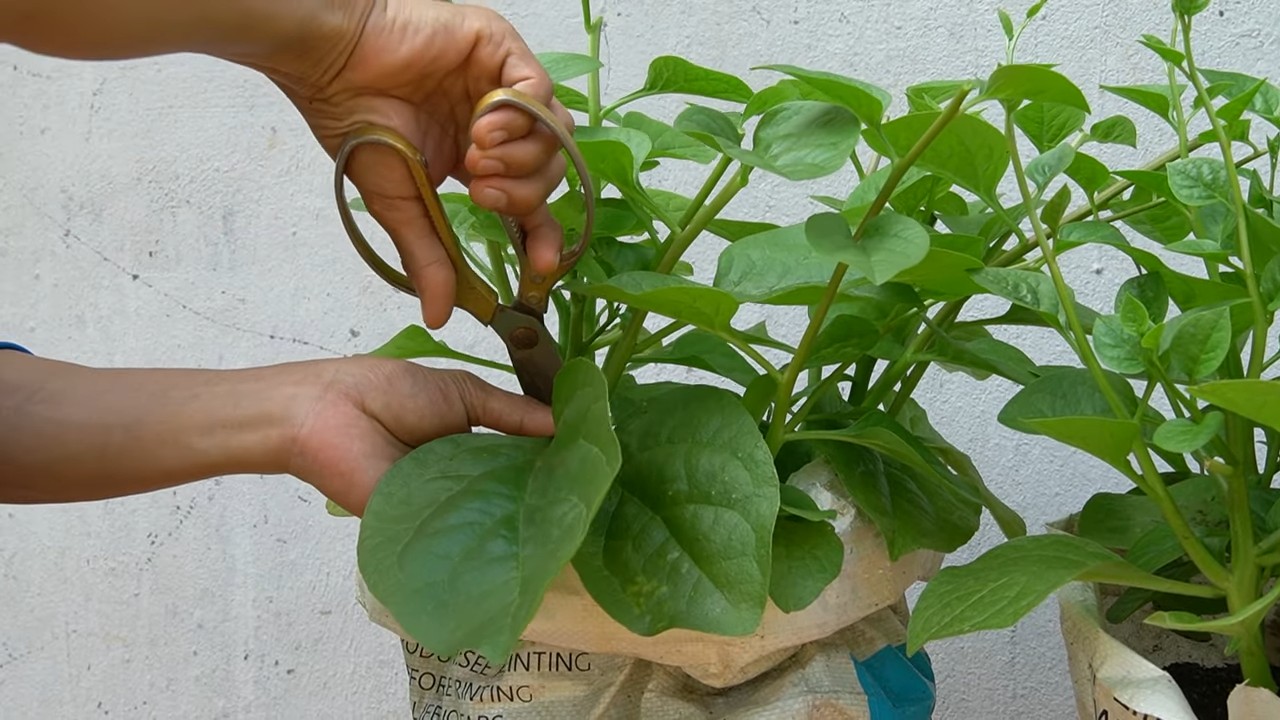
Harvesting Malabar Spinach
The harvest is the reward for your effort! You can start harvesting as soon as the plants have produced enough leaves.
-
Harvesting time: The leaves are ready to harvest when they have reached a size of about 10-15 cm.
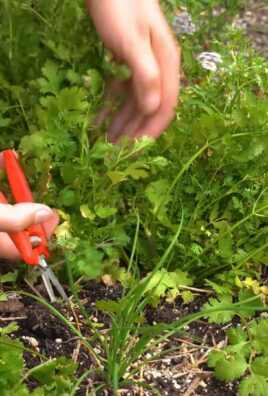
-
Harvesting method: Cut the leaves with scissors or a knife. You can either harvest individual leaves or entire shoots.
-
Regular harvesting: Regular harvesting encourages the growth of new leaves.
-
Storage: Fresh Malabar spinach leaves can be stored in the refrigerator for a few days. Wrap them in a damp cloth to keep them fresh.
Additional Tips for Successful Cultivation
-
Sunlight is crucial: Malabar spinach needs a lot of sunlight. If you don’t have enough sunlight, use a plant lamp.
-
Good drainage: Make sure the pots have good drainage to avoid waterlogging.
-
Regular checks: Check the plants regularly for pests and diseases.
-
Patience: Growing plants takes time and patience. Don’t be discouraged if it doesn’t work out right away.
Common Problems and Solutions
-
Yellow leaves: Yellow leaves can be a sign of overwatering, nutrient deficiency, or pest infestation. Check your watering, fertilize the plants, and inspect them for pests.
-
Slow growth: Slow growth can be caused by too little sunlight, a lack of nutrients, or temperatures that are too low. Move the plants to a sunnier location, fertilize them, and ensure an appropriate temperature.
-
Pests: Aphids and spider mites are common pests. Treat the plants with a natural insecticide or rinse them with water.
Why Grow Malabar Spinach Indoors?
There are many reasons why I grow Malabar spinach indoors:
-
Fresh ingredients: I always have fresh ingredients for my dishes on hand.
-
Health: Malabar spinach is rich in vitamins and minerals.
-
Sustainability: I reduce my ecological footprint by growing my own vegetables.
-
Relaxation: Gardening is a relaxing and therapeutic activity.
Malabar Spinach in the Kitchen
Malabar spinach is versatile…
Conclusion
So, there you have it! Growing Malabar spinach indoors is not only achievable, but it’s also a rewarding experience that brings fresh, nutritious greens right to your fingertips. Forget relying solely on grocery stores or limited seasonal availability. With a little effort and the right setup, you can enjoy a continuous harvest of this vibrant, leafy vegetable year-round.
This DIY trick is a must-try for several compelling reasons. Firstly, it offers unparalleled freshness. Imagine snipping off leaves just moments before adding them to your salad or stir-fry – the flavor and nutritional value are simply unmatched. Secondly, it’s incredibly cost-effective. Once you’ve established your initial setup, the ongoing costs are minimal, primarily consisting of water and occasional fertilizer. Over time, you’ll save a significant amount of money compared to purchasing Malabar spinach regularly. Thirdly, it’s an environmentally friendly choice. By growing your own food, you reduce your reliance on commercially grown produce, which often involves long-distance transportation and potentially harmful pesticides.
But the benefits don’t stop there. Growing Malabar spinach indoors is also a fantastic way to connect with nature and learn about the growing process. It’s a therapeutic activity that can reduce stress and improve your overall well-being. Plus, it’s a great conversation starter and a unique addition to your home.
Ready to take your indoor gardening to the next level? Consider these variations to personalize your Malabar spinach growing experience:
* Vertical Gardening: If you’re short on space, try growing your Malabar spinach in a vertical garden setup. This maximizes your growing area and adds a visually appealing element to your home. Use a trellis or climbing structure to support the vines as they grow upwards.
* Hydroponics: For a more advanced approach, explore hydroponic growing methods. This involves growing your Malabar spinach in nutrient-rich water without soil. It can lead to faster growth and higher yields.
* Companion Planting: Experiment with companion plants to enhance the growth and flavor of your Malabar spinach. Basil, marigolds, and nasturtiums are known to be beneficial companions.
* Different Varieties: While the green-stemmed variety is most common, explore other cultivars of Malabar spinach, such as the red-stemmed variety, for a different aesthetic and slightly different flavor profile.
Don’t be intimidated by the prospect of growing your own vegetables indoors. With a little patience and attention, you’ll be amazed at how easy and rewarding it can be. We encourage you to give this DIY trick a try and experience the joy of harvesting your own fresh, delicious Malabar spinach.
And most importantly, we want to hear about your experience! Share your tips, successes, and challenges in the comments below. Let’s create a community of indoor gardeners who are passionate about growing their own food. Your insights could inspire others to embark on their own Malabar spinach growing journey. So, grab your seeds, prepare your pots, and get ready to enjoy the taste of homegrown goodness! Remember, mastering the art of growing Malabar spinach indoors is within your reach.
Frequently Asked Questions (FAQ)
What are the ideal growing conditions for Malabar spinach indoors?
Malabar spinach thrives in warm temperatures, ideally between 70-85°F (21-29°C). It requires at least 6 hours of direct sunlight per day, or 12-14 hours of artificial light if growing indoors. A well-draining potting mix is essential to prevent root rot. Consistent moisture is also crucial, but avoid overwatering. Aim to keep the soil consistently moist but not soggy. Good air circulation is also important to prevent fungal diseases. Consider using a small fan to improve air flow around your plants.
How often should I water my indoor Malabar spinach?
Water your Malabar spinach regularly, especially during hot weather. Check the soil moisture daily and water when the top inch feels dry to the touch. Avoid letting the soil dry out completely, as this can stress the plant. However, be careful not to overwater, as this can lead to root rot. Ensure your pot has drainage holes to allow excess water to escape. A good rule of thumb is to water deeply until water drains out of the bottom of the pot.
What type of fertilizer should I use for Malabar spinach?
Malabar spinach benefits from regular fertilization. Use a balanced liquid fertilizer (e.g., 20-20-20) diluted to half strength every 2-3 weeks. You can also use organic fertilizers such as compost tea or fish emulsion. Avoid over-fertilizing, as this can lead to excessive foliage growth at the expense of flavor. Look for fertilizers specifically formulated for leafy greens, as these will provide the necessary nutrients for optimal growth.
How do I harvest Malabar spinach?
You can start harvesting Malabar spinach leaves when the plant is about 6-8 inches tall. Simply snip off the outer leaves, leaving the inner leaves to continue growing. Regular harvesting encourages the plant to produce more leaves. You can also harvest the tender stems, which are also edible. Avoid harvesting more than one-third of the plant at a time to allow it to recover and continue growing.
What are some common pests and diseases that affect Malabar spinach?
Malabar spinach is relatively pest-resistant, but it can be susceptible to aphids, spider mites, and whiteflies. Inspect your plants regularly for signs of infestation and treat promptly with insecticidal soap or neem oil. Overwatering can lead to fungal diseases such as root rot and powdery mildew. Ensure good air circulation and avoid overhead watering to prevent these problems. If you notice any signs of disease, remove the affected leaves immediately.
Can I grow Malabar spinach from seed indoors?
Yes, you can easily grow Malabar spinach from seed indoors. Start seeds indoors 6-8 weeks before the last expected frost. Soak the seeds in water for 24 hours before planting to improve germination rates. Sow the seeds about 1/2 inch deep in a well-draining potting mix. Keep the soil moist and warm (around 70-75°F) until germination occurs, which usually takes 7-14 days. Once the seedlings have developed a few true leaves, transplant them into larger pots.
How do I support the vines of Malabar spinach indoors?
Malabar spinach is a climbing vine, so it needs support to grow properly. Provide a trellis, stake, or other climbing structure for the vines to attach to. You can also train the vines to grow along a wall or window. Regularly prune the vines to encourage branching and prevent them from becoming too unruly.
Is Malabar spinach the same as regular spinach?
No, Malabar spinach is not the same as regular spinach. It is a different species (Basella alba) and belongs to the Basellaceae family, while regular spinach (Spinacia oleracea) belongs to the Amaranthaceae family. Malabar spinach has a thicker, more succulent texture and a slightly different flavor than regular spinach. It is also more heat-tolerant than regular spinach, making it a good choice for growing in warm climates.
Can I eat Malabar spinach raw?
Yes, you can eat Malabar spinach raw, but it is best to eat it when it is young and tender. Older leaves can be slightly bitter. Malabar spinach can be used in salads, sandwiches, and other raw preparations. It can also be cooked like regular spinach, steamed, sautéed, or added to soups and stews.
How long does it take for Malabar spinach to mature indoors?
Malabar spinach typically takes about 60-70 days to mature from seed. However, you can start harvesting leaves as soon as the plant is about 6-8 inches tall. With proper care, Malabar spinach can continue to produce leaves for several months.
Leave a Comment