
Grow Kale at Home and unlock a world of fresh, nutritious greens right outside your door! Imagine stepping into your garden and harvesting vibrant, leafy kale for your morning smoothie or a delicious side dish. No more trips to the grocery store or worrying about the freshness of store-bought produce. This DIY guide will empower you to cultivate your own thriving kale patch, regardless of your gardening experience.
Kale, a nutritional powerhouse, has a rich history dating back to ancient Greece and Rome, where it was a staple food. Over centuries, it has spread across the globe, becoming a beloved ingredient in diverse cuisines. But beyond its culinary appeal, growing your own kale offers a unique connection to nature and a sense of accomplishment.
In today’s fast-paced world, many of us crave a connection to the earth and a way to nourish our bodies with wholesome foods. That’s where learning to grow kale at home comes in. This DIY project isn’t just about gardening; it’s about embracing a healthier lifestyle, reducing your carbon footprint, and enjoying the satisfaction of harvesting your own food. I’m excited to share these simple yet effective tricks and hacks that will transform your backyard into a kale-growing haven!

Growing Cabbage: Your DIY Guide for Your Own Garden
Hey gardening friends! I love harvesting fresh vegetables directly from my garden, and cabbage is no exception. It’s super healthy, versatile, and surprisingly easy to grow, even if you don’t have a huge garden. In this article, I’ll show you step-by-step how to grow your own cabbage, whether in a garden bed or a pot. Let’s get started!
What You’ll Need: The Materials List
Before we begin, here is a list of everything you’ll need for your cabbage-growing adventure:
- Cabbage seeds or young plants: You can either start with seeds or buy pre-grown seedlings. I personally like starting from seed because it’s cheaper and I get to experience the whole process.
- Seed starting mix (optional): If you’re starting from seed, you’ll need a seed starting mix for indoor cultivation.
- Pots or seed trays (optional): For starting seeds.
- Garden soil: Good, nutrient-rich garden soil is essential.
- Compost or organic fertilizer: Cabbage is a heavy feeder, so it needs plenty of food.
- Watering can or garden hose: For watering.
- Garden tools: Spade, trowel, maybe a small rake.
- Slug pellets or slug barriers (optional): Slugs and snails love cabbage!
- Plant stakes (optional): To support particularly large cabbage heads.
- Patience: Cabbage takes time to grow!
Preparation: The Right Location and Soil
Cabbage isn’t super demanding, but there are a few things you should consider to make it feel at home:
- Sunny location: Cabbage needs at least 6 hours of sun per day. The more sun, the better!
- Well-draining soil: Cabbage does not like waterlogging at all. The soil should be loose and well-draining.
- Nutrient-rich soil: As mentioned, cabbage is a heavy feeder. The soil should be rich in nutrients.
Soil Improvement:
Before you plant, you should prepare the soil. It’s very simple:
- Loosen the soil: Use a spade or digging fork to loosen the soil.
- Remove weeds: Weeds steal nutrients and space from the cabbage.
- Mix in compost or organic fertilizer: This provides the necessary nutrients. I like to use well-rotted compost.
Sowing or Planting: Step by Step
Now comes the exciting part: sowing or planting!
Sowing (Optional):
If you’re starting from seed, it’s best to start them indoors. This gives the small plants a head start when they move outdoors.
- Fill seed trays or pots with seed starting mix: The soil should be loose and moist.
- Sow the seeds: Place 2-3 seeds in each pot or cell and cover them lightly with soil.
- Water the soil gently: The soil should be moist, but not wet.
- Place the seed trays in a bright, warm place: Ideal temperatures are between 18 and 22°C (65-72°F).
- Keep the soil moist: Water regularly, but avoid waterlogging.
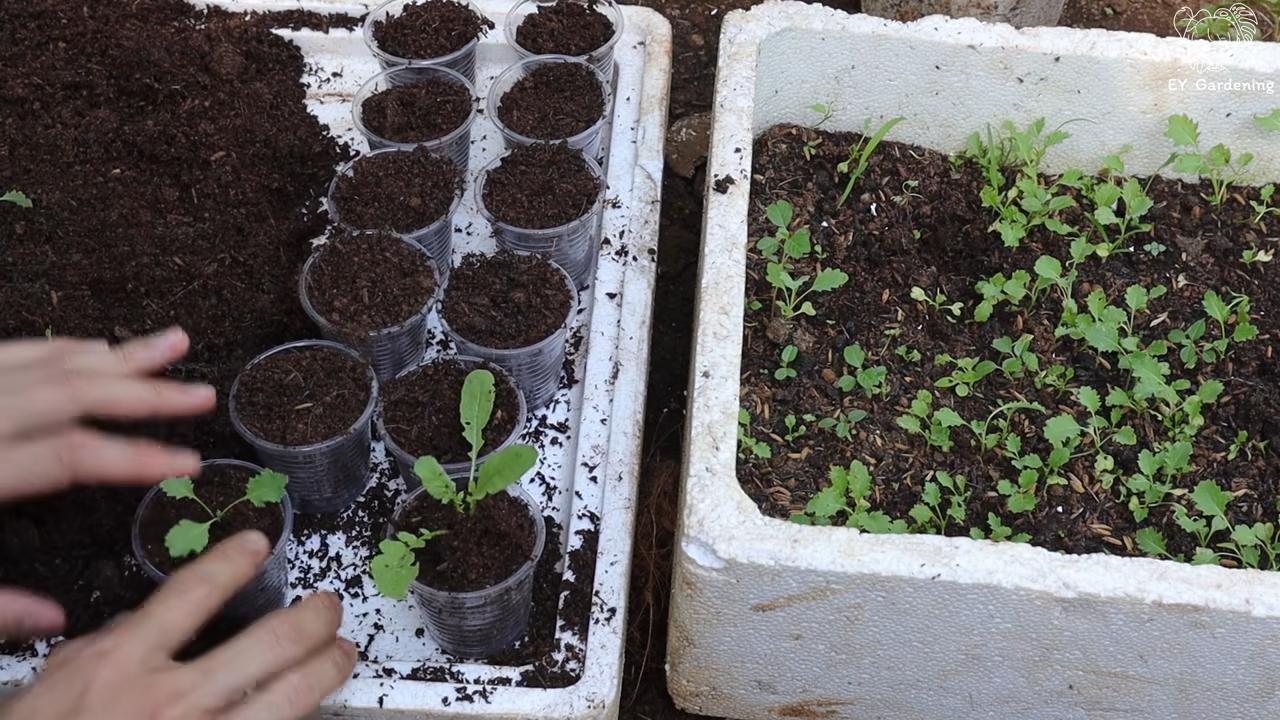
- Prick out the seedlings: Once the seedlings have a few leaves, you can prick them out. This means transplanting them into larger pots so they have more room to grow.
Planting:
Whether you bought seedlings or grew your own, planting is the next step.
- Harden off the seedlings: Before you plant the seedlings outdoors, you should harden them off. This means placing them outside during the day and bringing them back in at night for a few days. This helps them slowly acclimate to outdoor conditions.
- Plant the seedlings: Dig holes that are slightly larger than the root balls of the seedlings. Place the seedlings inside and fill the holes with soil. Lightly press the soil down.
- Water the seedlings: Water the seedlings thoroughly.
- Pay attention to plant spacing: The spacing depends on the cabbage variety. Find out how much space your variety needs beforehand. As a rule of thumb, there should be about 40-60 cm (16-24 inches) of space between plants.
Care: Watering, Fertilizing, and Protecting
Cabbage is relatively low-maintenance, but you should keep a few things in mind for it to grow well.
- Watering: Cabbage needs regular water, especially during dry periods. Make sure the soil is always moist, but avoid waterlogging.
- Fertilizing: Cabbage is a heavy feeder and needs regular fertilizer. I fertilize my cabbage plants every 2-3 weeks with organic fertilizer or compost.
- Slug and snail control: Slugs and snails love cabbage! There are several ways to combat them. You can use slug pellets, set up slug barriers, or simply pick them off by hand. I prefer the last method because it’s the most environmentally friendly.
- Weed control: Weeds steal nutrients and space from the cabbage. Remove weeds regularly.
- Diseases and pests: Cabbage can be affected by various diseases and pests. Watch for signs of infestation and treat them if necessary.
The Harvest: When is the Cabbage Ready?
The time of harvest depends on the cabbage variety. Generally, cabbage is ready to harvest when the head is firm and closed.
- Check for firmness: Gently press on the cabbage head. If it’s firm, it’s ready.
- Cut the cabbage head: Cut the head off with a sharp knife. Leave a few leaves on the stalk.
- Store the cabbage: Cabbage can be stored in the refrigerator for several days.
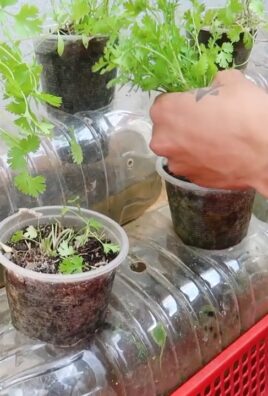
Growing Cabbage in a Pot: Is It Possible?
Yes, of course it is! Even if you don’t have a garden, you can grow cabbage in a pot.
- Choose a large pot: The pot should have a capacity of at least 30 liters (about 8 gallons).
- Use good soil: Use nutrient-rich garden soil.
- Water and fertilize regularly: Cabbage in a pot needs a lot of water and fertilizer.
- Place the pot in a sunny location: Cabbage needs at least 6 hours of sun per day.
Different Cabbage Varieties: Which One Should I Grow?
There are countless cabbage varieties, each with its own pros and cons. Here are a few popular types:
- Kale (Grünkohl): Super healthy and winter-hardy.
- White Cabbage (Weißkohl): A classic for sauerkraut.
- Red Cabbage (Rotkohl): Delicious as a side dish.
- Brussels Sprouts (Rosenkohl): Small, tasty sprouts.
- Cauliflower (Blumenkohl): Versatile in use.
- Broccoli (Brokkoli): Healthy and delicious.
- Savoy Cabbage (Wirsing): Mild and aromatic.
Choose the cabbage variety that you like best and that suits your climate.
Common Problems and Solutions: What to Do When Things Go Wrong?
Even with cabbage cultivation, problems can arise. Here are a few common problems and solutions:
- Slug and Snail Infestation: Use slug pellets, barriers, or collect them by hand.
- Cabbage Worms: The green caterpillars of the Cabbage White butterfly can chew large holes in leaves. The best defense is to cover plants with fine insect netting. You can also pick them off by hand or use an organic spray containing Bacillus thuringiensis (Bt).
- Clubroot: This is a soil-borne disease causing swollen roots and wilting plants. Avoid it by not planting cabbage or its relatives (like broccoli or kale) in the same spot for at least four years. Keeping the soil pH slightly alkaline can also help.
- Aphids: These small pests cluster on the undersides of leaves. A strong spray of water from a hose can knock them off, or you can use an insecticidal soap.
Conclusion: Enjoy Your Harvest!
Growing your own cabbage might seem daunting, but with a bit of planning and care, it’s a completely achievable and rewarding project. The satisfaction of harvesting a crisp, fresh head of cabbage that you grew yourself is hard to beat. So choose your favorite variety, get your hands dirty, and look forward to delicious, homegrown meals. Happy gardening
*
Conclusion
So, there you have it! Growing kale at home isn’t just a trendy gardening fad; it’s a genuinely rewarding experience that puts fresh, nutritious greens right at your fingertips. We’ve walked you through the simple steps, from selecting the right kale variety to harvesting your bountiful crop. But why is this DIY trick a must-try?
Firstly, consider the unparalleled freshness. Store-bought kale, even the organic kind, can’t compete with the vibrant flavor and crisp texture of kale you’ve nurtured yourself. Imagine stepping out into your garden, snipping off a few leaves, and adding them directly to your salad or smoothie. The difference is palpable.
Secondly, think about the cost savings. While the initial investment in seeds or seedlings and a few basic supplies is required, you’ll quickly recoup your expenses as your kale plants continue to produce throughout the growing season. No more expensive trips to the grocery store for wilted, overpriced greens!
Thirdly, and perhaps most importantly, growing kale at home connects you to your food source. It’s a tangible way to appreciate the natural world and understand where your meals come from. This connection can be incredibly fulfilling, especially in our increasingly disconnected modern lives.
But the beauty of this DIY project lies in its adaptability. Feel free to experiment with different kale varieties. Try ‘Lacinato’ (dinosaur kale) for its unique texture and nutty flavor, or ‘Red Russian’ for its beautiful purple stems and slightly sweeter taste. You can also explore different growing methods. If you’re short on space, consider growing kale in containers on your balcony or patio. Vertical gardening is another excellent option for maximizing your yield in a small area.
Don’t be afraid to get creative with your kale harvest, too. Beyond salads and smoothies, kale can be sautéed, baked into chips, added to soups and stews, or even used as a pizza topping. The possibilities are endless!
We wholeheartedly encourage you to give this DIY trick a try. Growing kale at home is easier than you might think, and the rewards are well worth the effort. Not only will you have access to fresh, healthy greens, but you’ll also gain a sense of accomplishment and a deeper appreciation for the natural world.
We’re confident that you’ll be amazed by how easy and rewarding it is to grow your own kale. So, grab some seeds, get your hands dirty, and start growing! And most importantly, we want to hear about your experiences. Share your tips, tricks, and photos with us in the comments below. Let’s build a community of home kale growers and inspire others to embrace the joys of gardening. Happy growing!
Frequently Asked Questions (FAQ)
What is the best time of year to plant kale?
The best time to plant kale depends on your climate. In general, kale is a cool-season crop, meaning it thrives in cooler temperatures. For a spring harvest, start seeds indoors 6-8 weeks before the last expected frost or direct sow outdoors 2-4 weeks before the last frost. For a fall/winter harvest, sow seeds outdoors in late summer or early fall. Kale can tolerate light frosts, and its flavor actually improves after a frost. In warmer climates, you can grow kale throughout the winter.
What kind of soil does kale need?
Kale prefers well-drained soil that is rich in organic matter. Amend your soil with compost or well-rotted manure before planting to improve its fertility and drainage. A slightly acidic to neutral soil pH (6.0-7.5) is ideal. If your soil is heavy clay, consider adding sand or other amendments to improve drainage.
How much sunlight does kale need?
Kale needs at least 6 hours of sunlight per day to thrive. However, it can tolerate some shade, especially in hotter climates. If you’re growing kale indoors, provide it with supplemental light using grow lights.
How often should I water kale?
Water kale regularly, especially during dry periods. Aim to keep the soil consistently moist but not waterlogged. Water deeply at the base of the plants to avoid wetting the leaves, which can increase the risk of fungal diseases. Mulching around the plants can help retain moisture and suppress weeds.
What are some common pests and diseases that affect kale?
Common pests that affect kale include aphids, cabbage worms, flea beetles, and slugs. You can control these pests by handpicking them off the plants, using insecticidal soap, or applying Bacillus thuringiensis (Bt) for cabbage worms. Common diseases that affect kale include black rot, downy mildew, and clubroot. Prevent these diseases by practicing crop rotation, ensuring good air circulation, and avoiding overhead watering. If you notice signs of disease, remove the affected leaves promptly.
How do I harvest kale?
You can begin harvesting kale leaves as soon as they are large enough to eat, typically when they are about 4-6 inches long. Harvest the outer leaves first, leaving the inner leaves to continue growing. You can harvest kale leaves continuously throughout the growing season. Simply snip off the leaves with a knife or scissors.
Can I grow kale in containers?
Yes, kale grows well in containers. Choose a container that is at least 12 inches deep and wide to provide enough room for the roots to grow. Use a well-draining potting mix and water regularly. Container-grown kale may need more frequent fertilization than kale grown in the ground.
How do I store kale after harvesting?
Store kale in the refrigerator in a plastic bag or container. It will keep for up to a week. To extend its shelf life, you can blanch the kale for 2-3 minutes and then freeze it.
Can I eat the stems of kale?
Yes, you can eat the stems of kale, but they can be tough and fibrous. To make them more palatable, remove the tough outer layer with a vegetable peeler and then chop them finely. You can add the stems to soups, stews, or stir-fries.
Is kale a good source of nutrients?
Yes, kale is an excellent source of nutrients. It is rich in vitamins A, C, and K, as well as calcium, iron, and antioxidants. Kale is also a good source of fiber. Incorporating kale into your diet can help improve your overall health and well-being.
What are some creative ways to use kale in my cooking?
Beyond salads and smoothies, kale can be used in a variety of dishes. Try sautéing it with garlic and olive oil, baking it into chips, adding it to soups and stews, or using it as a pizza topping. You can also add kale to omelets, frittatas, or quiches. Get creative and experiment with different flavors and textures to find your favorite ways to enjoy kale.
How can I encourage my kids to eat kale?
Getting kids to eat kale can be a challenge, but there are a few tricks you can try. Start by introducing kale in small amounts and mixing it with other familiar foods. You can also try making kale chips, which are a crispy and delicious snack that kids often enjoy. Another option is to blend kale into smoothies, where its flavor is masked by the other ingredients. Involving kids in the growing and preparation process can also make them more likely to try kale.

Leave a Comment