
Grow gourds, save money, and unlock a world of creative possibilities right in your own backyard! Have you ever admired those intricately carved gourds at a fall festival or wished you could add a unique, handcrafted touch to your home decor? Well, you can! For centuries, gourds have been more than just decorative items; they’ve been essential tools, musical instruments, and even food sources in various cultures around the world. From the Native American tradition of using gourds as dippers and containers to the African practice of crafting them into drums and rattles, these versatile plants have a rich and fascinating history.
But why should you consider growing gourds? In today’s world, where sustainability and mindful living are gaining importance, learning to grow gourds, save money, and create your own beautiful and functional items is incredibly rewarding. Not only will you reduce your reliance on mass-produced goods, but you’ll also gain a deeper connection to nature and unleash your inner artist. Plus, let’s be honest, who doesn’t love a good DIY project that saves money and adds a personal touch to their home? In this article, I’m going to share some simple yet effective tricks and hacks to help you cultivate a thriving gourd garden, even if you’re a complete beginner. Get ready to transform your garden into a treasure trove of natural materials and embark on a creative journey that will delight you for years to come!
Grow Your Own Gourds: A Beginner’s Guide to Saving Money and Having Fun!
Hey there, fellow DIY enthusiasts! Are you looking for a rewarding and budget-friendly gardening project? Look no further than growing your own gourds! Not only are they incredibly versatile for crafting and decorating, but they’re also surprisingly easy to cultivate. Plus, think of all the money you’ll save by skipping those pricey fall decorations at the store! I’m going to walk you through everything you need to know, from seed to stunning gourd creations.
Choosing Your Gourd Variety
Before we get our hands dirty, let’s talk about gourd types. There are two main categories: ornamental gourds and hard-shelled gourds.
* Ornamental Gourds: These are the colorful, often bumpy, gourds you see used in fall displays. They’re great for immediate decoration but don’t last as long as hard-shelled varieties. Think of the little warty gourds, the swan gourds, and the apple gourds.
* Hard-Shelled Gourds: These are the workhorses of the gourd world. They require a longer growing season and curing process, but they can be transformed into bowls, birdhouses, dippers, and so much more! Popular choices include bottle gourds, dipper gourds, and birdhouse gourds.
Choosing the right gourd depends on what you want to create! I personally love growing a mix of both for variety.
Getting Started: Planting Your Gourd Seeds
Gourds need a long growing season (around 100-120 days), so starting them indoors is often the best bet, especially if you live in a cooler climate.
* Timing is Key: Start your seeds indoors about 4-6 weeks before the last expected frost.
* Soaking the Seeds: To help with germination, soak your gourd seeds in warm water for 24 hours before planting. This softens the hard outer shell and encourages sprouting.
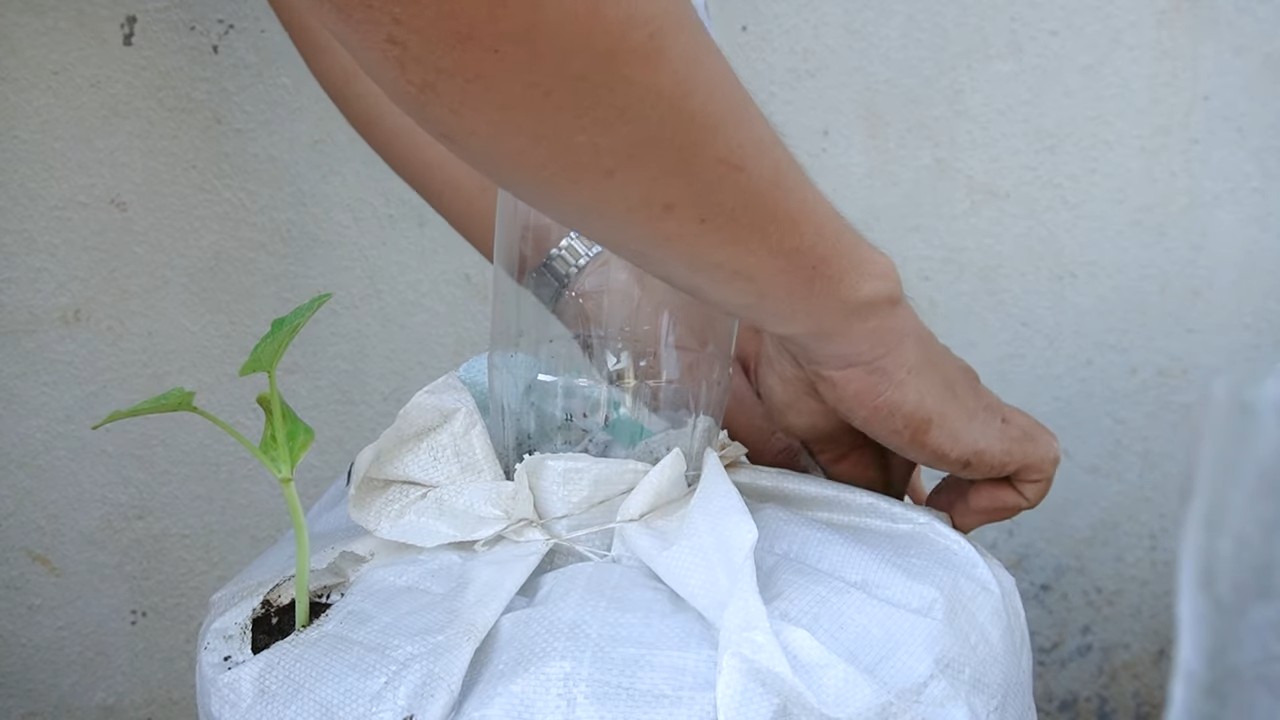
* Choosing Your Containers: Use peat pots or biodegradable pots. Gourds don’t like having their roots disturbed, so these pots can be planted directly into the ground, minimizing transplant shock.
* Potting Mix: Use a well-draining seed-starting mix.
* Planting Depth: Plant the seeds about 1 inch deep.
* Watering: Keep the soil consistently moist but not soggy.
* Warmth: Gourds love warmth! Aim for a soil temperature of around 70-80°F (21-27°C). A heat mat can be helpful.
* Light: Once the seedlings emerge, provide them with plenty of light. A sunny windowsill or grow lights will do the trick.
Step-by-Step Planting Instructions:
1. Soak the Seeds: Place your chosen gourd seeds in a bowl of warm water and let them soak for 24 hours.
2. Prepare Your Pots: Fill your peat pots with seed-starting mix, leaving about half an inch of space at the top.
3. Plant the Seeds: Make a small hole in the center of each pot, about 1 inch deep. Drop one seed into each hole and cover it gently with soil.
4. Water Thoroughly: Water the pots gently until the soil is evenly moist.
5. Provide Warmth and Light: Place the pots in a warm location with plenty of light. If using a heat mat, follow the manufacturer’s instructions.
6. Monitor and Water: Check the soil moisture daily and water as needed to keep it consistently moist.
Transplanting Your Gourd Seedlings
Once the danger of frost has passed and your gourd seedlings have developed a few sets of true leaves, it’s time to transplant them outdoors.
* Choosing the Right Location: Gourds need plenty of sunshine (at least 6-8 hours a day) and well-drained soil. They also need a lot of space! These vines can get HUGE.
* Soil Preparation: Amend your soil with compost or well-rotted manure to improve drainage and fertility. Gourds are heavy feeders.
* Spacing: Space your gourd plants at least 3-4 feet apart. If you’re growing them on a trellis, you can space them closer together.
* Hardening Off: Before transplanting, gradually acclimate your seedlings to outdoor conditions by exposing them to increasing amounts of sunlight and fresh air over a period of 7-10 days. This process is called “hardening off.”
* Watering: Water the seedlings thoroughly after transplanting.
Step-by-Step Transplanting Instructions:
1. Harden Off Your Seedlings: Start by placing your seedlings outdoors in a sheltered location for an hour or two each day, gradually increasing the amount of time they spend outside.
2. Prepare the Planting Hole: Dig a hole that is slightly larger than the peat pot.
3. Plant the Seedling: Gently remove the seedling from the peat pot (or plant the entire peat pot directly into the ground). Place the seedling in the hole and backfill with soil.
4. Water Thoroughly: Water the seedling thoroughly after planting.
5. Mulch: Apply a layer of mulch around the base of the plant to help retain moisture and suppress weeds.
Caring for Your Gourd Plants
Now that your gourds are in the ground, it’s time to provide them with the care they need to thrive.
* Watering: Gourds need consistent watering, especially during hot, dry weather. Aim for about 1 inch of water per week.
* Fertilizing: Fertilize your gourd plants every 2-3 weeks with a balanced fertilizer.
* Weeding: Keep the area around your gourd plants free of weeds.
* Pest Control: Watch out for common gourd pests like squash bugs and vine borers. Hand-picking the pests or using insecticidal soap can help control infestations.
* Trellising (Optional): If you’re growing vining gourds, consider providing them with a trellis or other support structure. This will help keep the gourds off the ground and improve air circulation.
Tips for Healthy Gourd Growth:
1. Water deeply and regularly: Especially during dry spells.
2. Fertilize consistently: Gourds are heavy feeders.
3. Control pests and diseases: Early detection is key.
4. Provide support for vining varieties: Trellises or fences work well.
5. Pinch off excess blossoms: This encourages larger gourd development.
Harvesting Your Gourds
The moment you’ve been waiting for! Knowing when to harvest your gourds is crucial for successful curing and long-lasting crafts.
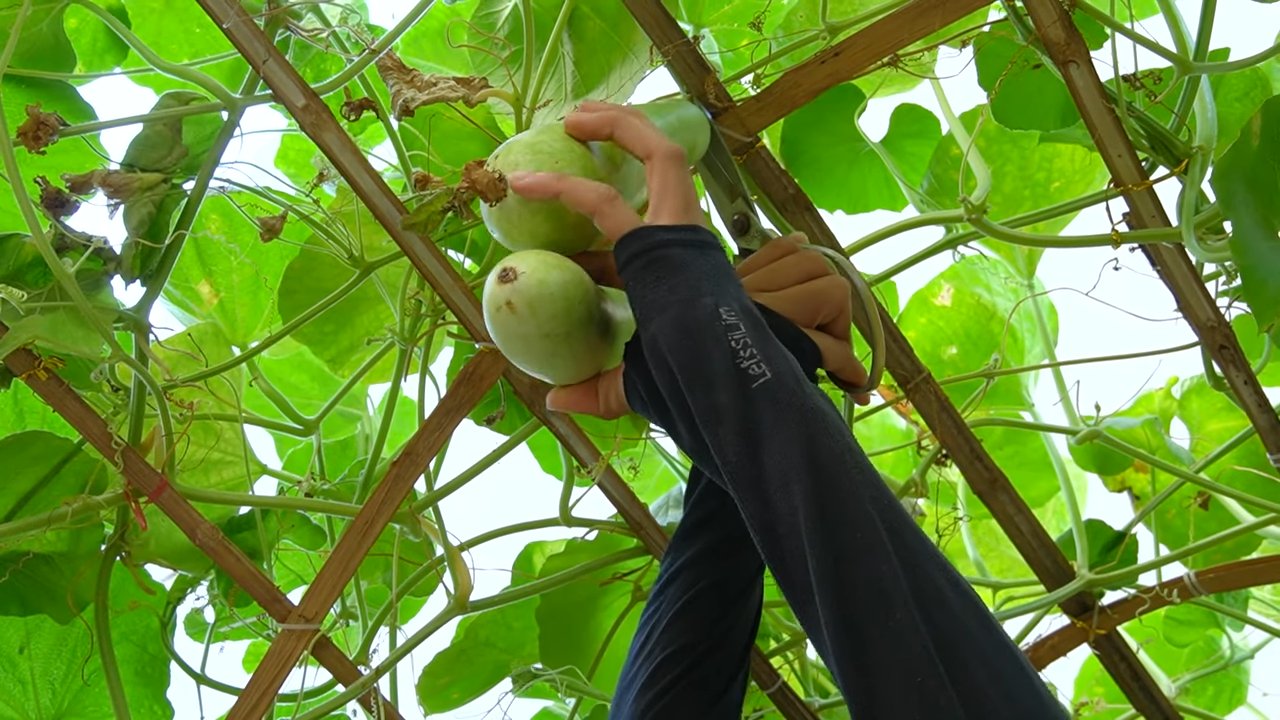
* Timing is Everything: Harvest your gourds when the stems have turned brown and dry. This usually happens in the fall, before the first frost.
* Handle with Care: Use pruning shears or a sharp knife to cut the gourds from the vine, leaving a few inches of stem attached.
* Avoid Bruising: Handle the gourds carefully to avoid bruising or damaging the skin.
Step-by-Step Harvesting Instructions:
Hey there, fellow DIY enthusiasts! Are you looking for a rewarding and budget-friendly gardening project? Look no further than growing your own gourds! Not only are they incredibly versatile for crafting and decorating, but they’re also surprisingly easy to cultivate. Plus, think of all the money you’ll save by skipping those pricey fall decorations at the store! I’m going to walk you through everything you need to know, from seed to stunning gourd creations.
Choosing Your Gourd Variety
Before we get our hands dirty, let’s talk about gourd types. There are two main categories: ornamental gourds and hard-shelled gourds.
* Ornamental Gourds: These are the colorful, often bumpy, gourds you see used in fall displays. They’re great for immediate decoration but don’t last as long as hard-shelled varieties. Think of the little warty gourds, the swan gourds, and the apple gourds.
* Hard-Shelled Gourds: These are the workhorses of the gourd world. They require a longer growing season and curing process, but they can be transformed into bowls, birdhouses, dippers, and so much more! Popular choices include bottle gourds, dipper gourds, and birdhouse gourds.
Choosing the right gourd depends on what you want to create! I personally love growing a mix of both for variety.
Getting Started: Planting Your Gourd Seeds
Gourds need a long growing season (around 100-120 days), so starting them indoors is often the best bet, especially if you live in a cooler climate.
* Timing is Key: Start your seeds indoors about 4-6 weeks before the last expected frost.
* Soaking the Seeds: To help with germination, soak your gourd seeds in warm water for 24 hours before planting. This softens the hard outer shell and encourages sprouting.
* Choosing Your Containers: Use peat pots or biodegradable pots. Gourds don’t like having their roots disturbed, so these pots can be planted directly into the ground, minimizing transplant shock.
* Potting Mix: Use a well-draining seed-starting mix.
* Planting Depth: Plant the seeds about 1 inch deep.
* Watering: Keep the soil consistently moist but not soggy.
* Warmth: Gourds love warmth! Aim for a soil temperature of around 70-80°F (21-27°C). A heat mat can be helpful.
* Light: Once the seedlings emerge, provide them with plenty of light. A sunny windowsill or grow lights will do the trick.
Step-by-Step Planting Instructions:
1. Soak the Seeds: Place your chosen gourd seeds in a bowl of warm water and let them soak for 24 hours.
2. Prepare Your Pots: Fill your peat pots with seed-starting mix, leaving about half an inch of space at the top.
3. Plant the Seeds: Make a small hole in the center of each pot, about 1 inch deep. Drop one seed into each hole and cover it gently with soil.
4. Water Thoroughly: Water the pots gently until the soil is evenly moist.
5. Provide Warmth and Light: Place the pots in a warm location with plenty of light. If using a heat mat, follow the manufacturer’s instructions.
6. Monitor and Water: Check the soil moisture daily and water as needed to keep it consistently moist.
Transplanting Your Gourd Seedlings
Once the danger of frost has passed and your gourd seedlings have developed a few sets of true leaves, it’s time to transplant them outdoors.
* Choosing the Right Location: Gourds need plenty of sunshine (at least 6-8 hours a day) and well-drained soil. They also need a lot of space! These vines can get HUGE.
* Soil Preparation: Amend your soil with compost or well-rotted manure to improve drainage and fertility. Gourds are heavy feeders.
* Spacing: Space your gourd plants at least 3-4 feet apart. If you’re growing them on a trellis, you can space them closer together.
* Hardening Off: Before transplanting, gradually acclimate your seedlings to outdoor conditions by exposing them to increasing amounts of sunlight and fresh air over a period of 7-10 days. This process is called “hardening off.”
* Watering: Water the seedlings thoroughly after transplanting.
Step-by-Step Transplanting Instructions:
1. Harden Off Your Seedlings: Start by placing your seedlings outdoors in a sheltered location for an hour or two each day, gradually increasing the amount of time they spend outside.
2. Prepare the Planting Hole: Dig a hole that is slightly larger than the peat pot.
3. Plant the Seedling: Gently remove the seedling from the peat pot (or plant the entire peat pot directly into the ground). Place the seedling in the hole and backfill with soil.
4. Water Thoroughly: Water the seedling thoroughly after planting.
5. Mulch: Apply a layer of mulch around the base of the plant to help retain moisture and suppress weeds.
Caring for Your Gourd Plants
Now that your gourds are in the ground, it’s time to provide them with the care they need to thrive.
* Watering: Gourds need consistent watering, especially during hot, dry weather. Aim for about 1 inch of water per week.
* Fertilizing: Fertilize your gourd plants every 2-3 weeks with a balanced fertilizer.
* Weeding: Keep the area around your gourd plants free of weeds.
* Pest Control: Watch out for common gourd pests like squash bugs and vine borers. Hand-picking the pests or using insecticidal soap can help control infestations.
* Trellising (Optional): If you’re growing vining gourds, consider providing them with a trellis or other support structure. This will help keep the gourds off the ground and improve air circulation.
Tips for Healthy Gourd Growth:
1. Water deeply and regularly: Especially during dry spells.
2. Fertilize consistently: Gourds are heavy feeders.
3. Control pests and diseases: Early detection is key.
4. Provide support for vining varieties: Trellises or fences work well.
5. Pinch off excess blossoms: This encourages larger gourd development.
Harvesting Your Gourds
The moment you’ve been waiting for! Knowing when to harvest your gourds is crucial for successful curing and long-lasting crafts.
* Timing is Everything: Harvest your gourds when the stems have turned brown and dry. This usually happens in the fall, before the first frost.
* Handle with Care: Use pruning shears or a sharp knife to cut the gourds from the vine, leaving a few inches of stem attached.
* Avoid Bruising: Handle the gourds carefully to avoid bruising or damaging the skin.
Step-by-Step Harvesting Instructions:
1. Check for Maturity: Make sure the stems are completely dry and brown.
2. Cut the Gourds: Use pruning shears or a sharp knife to cut the gourds from the vine, leaving a few inches of stem attached.
3. Handle Carefully: Avoid bruising or damaging the gourds.
4. Clean Gently: Wipe off any dirt or debris with a soft cloth.
Curing Your Gourds
Curing is the process of drying out the gourds, which is essential for preserving them and preventing rot. This is probably the most important step!
* Choose a Well-Ventilated Location: Find a dry, well-ventilated location, such as a garage, shed, or attic.
* Elevate the Gourds: Place the gourds on a wire rack or pallets to allow for air circulation.
* Space Them Out: Make sure the gourds are not touching each other.
* Monitor Regularly: Check the gourds regularly for signs of mold or rot. If you see any, wipe them down with a solution of bleach and water (1 part bleach to 10 parts water).
* Be Patient: The curing process can take several weeks or even months, depending on the size and thickness of the gourds. You’ll know they’re ready when they feel lightweight and the seeds rattle inside.
Step-by-Step Curing Instructions:
1. Clean the Gourds: Gently wipe off any dirt or debris with a soft cloth.
2. Choose a Curing Location: Select a dry, well-ventilated location.
3. Elevate the Gourds: Place the gourds on a
Conclusion
So, there you have it! Growing your own gourds isn’t just a fun gardening project; it’s a fantastic way to save money and add a unique, personal touch to your home decor, crafting projects, and even your kitchen. Forget those overpriced gourds at the craft store or farmers market – with a little effort and patience, you can cultivate a bountiful harvest of your very own, tailored to your exact needs and aesthetic preferences.
Think about the possibilities! Imagine crafting personalized birdhouses from dried bottle gourds, creating stunning fall centerpieces with uniquely shaped ornamental gourds, or even whipping up delicious gourd-based recipes (yes, some gourds are edible!). The satisfaction of using something you nurtured from seed to finished product is truly unparalleled.
This DIY trick is a must-try because it empowers you to be self-sufficient, creative, and environmentally conscious. You’re reducing your carbon footprint by avoiding commercially grown and transported gourds, and you’re gaining a valuable skill that you can pass down to future generations. Plus, let’s be honest, there’s something incredibly rewarding about watching those tiny seedlings transform into sprawling vines laden with colorful, quirky gourds.
Ready to take your gourd-growing game to the next level? Consider experimenting with different varieties of gourds. Try growing luffa gourds for natural sponges, or explore the world of dipper gourds for unique serving utensils. You can also enhance your growing environment by adding compost to your soil, using companion planting techniques, or even building a custom trellis to support your vines.
Don’t be intimidated if you’re a beginner gardener. Growing gourds is surprisingly straightforward, and the rewards far outweigh the effort. Start small, be patient, and don’t be afraid to experiment.
We’re confident that you’ll find this DIY gourd-growing experience both enjoyable and rewarding. So, grab your seeds, prepare your soil, and get ready to embark on a gourd-growing adventure!
We’d love to hear about your experiences! Share your photos, tips, and stories in the comments below. Let’s create a community of gourd-growing enthusiasts and inspire others to embrace this fantastic DIY project. What varieties are you most excited to grow? What creative projects do you have in mind for your harvest? Let us know! Your insights could be invaluable to other aspiring gourd growers. Happy growing!
Frequently Asked Questions (FAQ)
What types of gourds are easiest for beginners to grow?
Bottle gourds and ornamental gourds are generally considered the easiest for beginners. Bottle gourds are versatile and can be used for a variety of crafts, while ornamental gourds come in a wide range of shapes and colors, making them perfect for fall decorations. Luffa gourds, while requiring a longer growing season, are also relatively easy to cultivate and provide a sustainable alternative to synthetic sponges. Avoid more finicky varieties until you’ve gained some experience.
How much space do gourds need to grow?
Gourds are vining plants, so they require a significant amount of space. Each plant can easily spread 10-15 feet, so plan accordingly. You can train them to grow on a trellis or fence to save space, but ensure the structure is sturdy enough to support the weight of the mature gourds. If you’re growing them on the ground, provide ample room for the vines to spread without overcrowding other plants. Crowding can lead to disease and reduced yields.
How often should I water my gourd plants?
Gourd plants need consistent moisture, especially during hot, dry weather. Water deeply at the base of the plant, avoiding wetting the foliage, which can encourage fungal diseases. Aim to water 2-3 times per week, or more frequently if the soil dries out quickly. Mulching around the base of the plants can help retain moisture and suppress weeds. Check the soil moisture regularly by sticking your finger a few inches into the soil. If it feels dry, it’s time to water.
When is the best time to harvest my gourds?
The timing of harvest depends on the type of gourd you’re growing and its intended use. Generally, gourds are ready to harvest when the vine begins to dry out and the gourd’s skin becomes hard and dull. For ornamental gourds, you can harvest them after the first frost. For bottle gourds intended for crafting, allow them to mature fully on the vine until the stem turns brown and dry. Luffa gourds are ready to harvest when they feel lightweight and the skin is easily peeled away to reveal the fibrous sponge inside.
How do I cure gourds after harvesting them?
Curing is essential for preserving gourds and preventing them from rotting. After harvesting, gently wash the gourds with soapy water to remove any dirt or debris. Then, place them in a well-ventilated, dry, and dark location. A shed, garage, or attic works well. Avoid direct sunlight, which can cause the gourds to crack. Allow the gourds to cure for several weeks or even months, until they are completely dry and lightweight. Check them regularly for any signs of mold or rot, and discard any affected gourds immediately to prevent the spread of disease.
What are some common problems when growing gourds, and how can I prevent them?
Common problems include powdery mildew, squash bugs, and vine borers. Powdery mildew can be prevented by ensuring good air circulation around the plants and avoiding overhead watering. Squash bugs can be controlled by handpicking them off the plants or using insecticidal soap. Vine borers can be a more challenging pest. Wrap the base of the stems with aluminum foil to prevent them from laying eggs, and inspect the vines regularly for signs of infestation. If you find vine borers, you can carefully slit the vine open and remove them manually.
Can I eat gourds?
While many ornamental gourds are not edible, some varieties, such as calabash gourds and certain types of squash, are perfectly safe to eat. However, it’s crucial to identify the specific type of gourd before consuming it, as some gourds can be toxic. When in doubt, it’s best to err on the side of caution and avoid eating gourds unless you are absolutely certain of their edibility. Always cook gourds thoroughly before eating them.
How can I save money by growing my own gourds?
Growing your own gourds can significantly reduce your expenses on fall decorations, crafting supplies, and even kitchen utensils. Instead of purchasing gourds from stores, you can harvest them from your own garden for free. You can also save money by using your own compost and fertilizer, and by propagating new plants from seeds saved from previous harvests. Over time, the savings can add up considerably, making gourd growing a cost-effective and rewarding hobby. Plus, you’ll have the satisfaction of knowing that you grew your own materials sustainably and organically.

Leave a Comment