
Grow Epazote at Home and unlock a world of authentic Mexican flavors right in your backyard! Have you ever craved that distinct, slightly citrusy, and earthy note that elevates dishes like black beans, quesadillas, and corn? Well, what if I told you that you could easily cultivate this culinary gem yourself, ensuring a fresh and readily available supply whenever your taste buds call?
Epazote, also known as wormseed, has a rich history deeply intertwined with Mexican and Central American cultures. For centuries, it’s been more than just a flavoring agent; it’s been used in traditional medicine for its digestive properties. Our ancestors knew the power of this plant, and now, you can too!
Let’s face it, finding fresh epazote at your local grocery store can be a challenge. Even when you do, the quality might not be the best. That’s where this DIY guide comes in. I’m going to show you simple, effective techniques to grow epazote at home, regardless of your gardening experience. Imagine the satisfaction of harvesting your own herbs, knowing exactly where they came from and how they were grown. Plus, you’ll always have this unique flavor on hand to impress your friends and family with authentic, home-cooked meals. Let’s get started!
Growing Epazote at Home: A Beginner’s Guide
Hey there, fellow gardening enthusiasts! Ever heard of epazote? It’s a fascinating herb with a unique flavor profile – a bit citrusy, a bit minty, and a little bit… well, hard to describe! It’s a staple in Mexican cuisine, often used in bean dishes to help with digestion (yes, really!). And the best part? You can totally grow it at home! I’m going to walk you through everything you need to know to successfully cultivate this amazing herb in your own garden or even in a container.
What is Epazote?
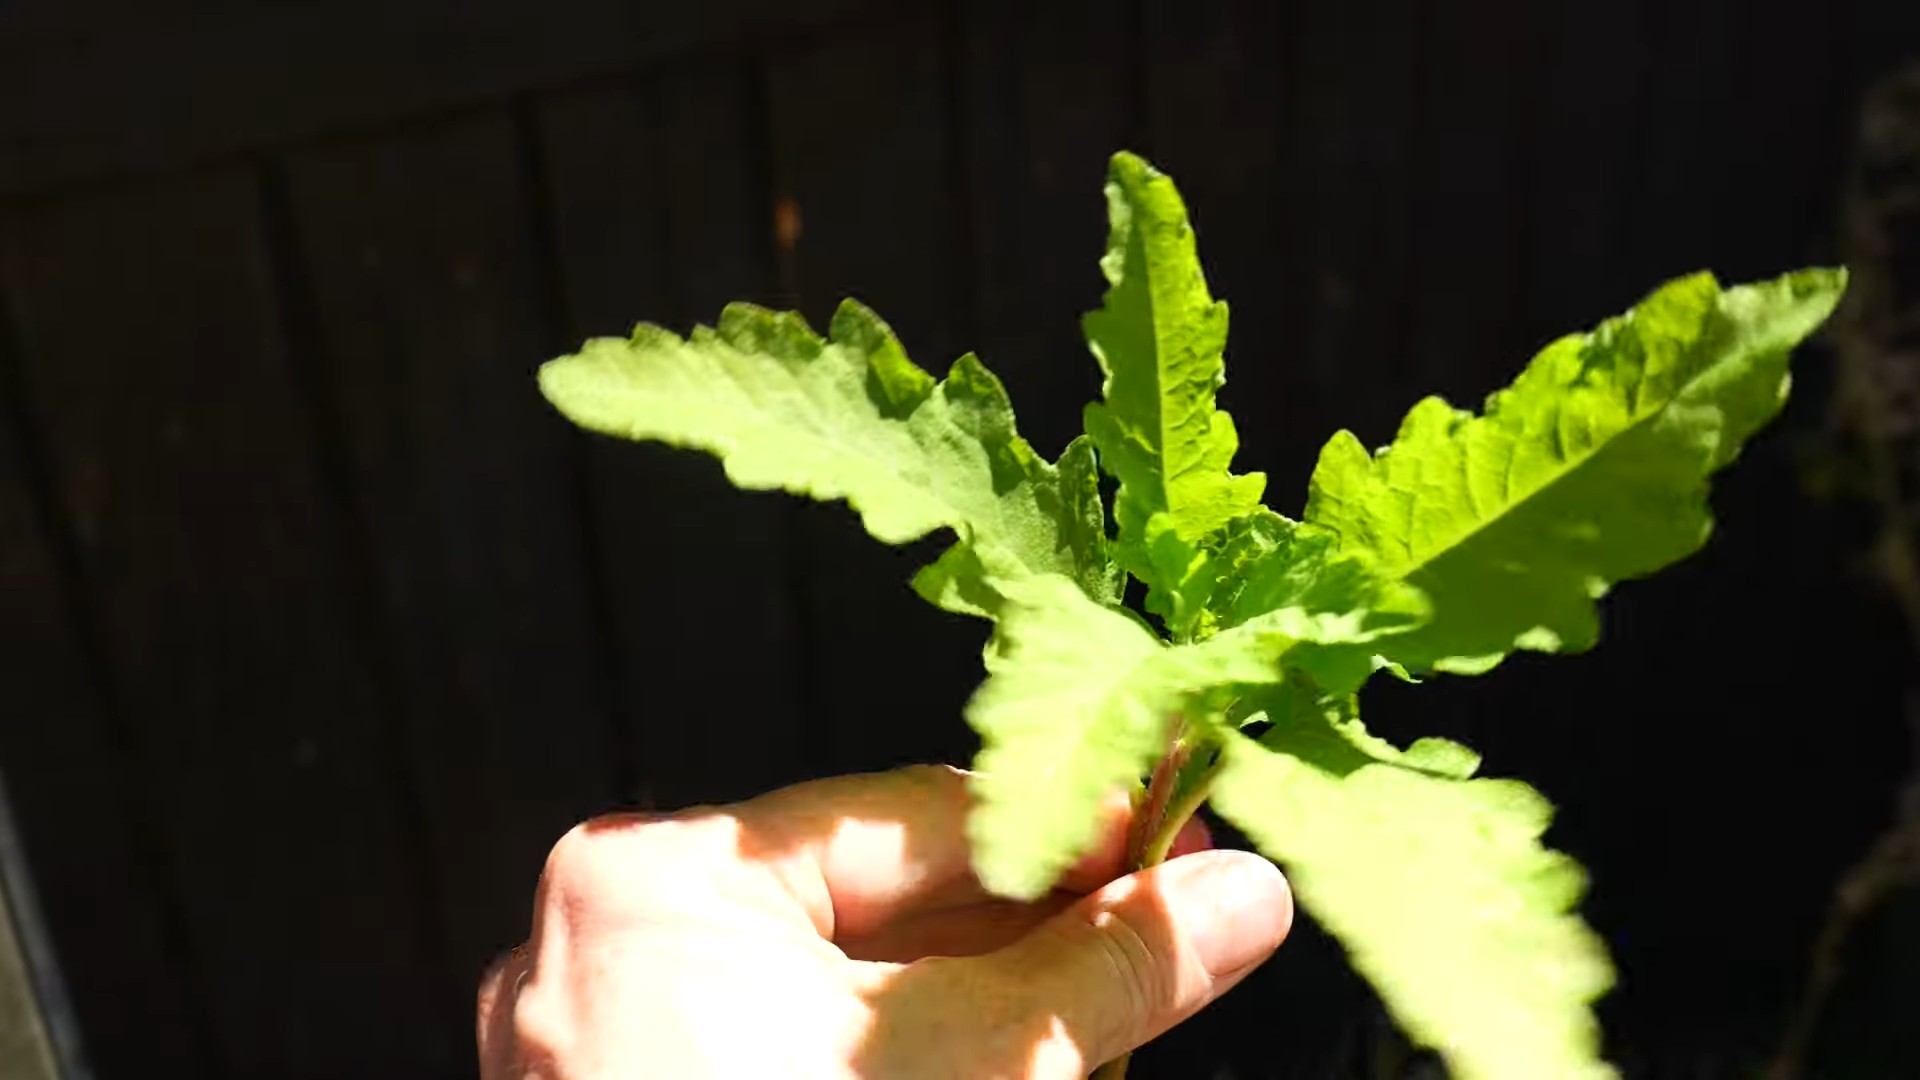
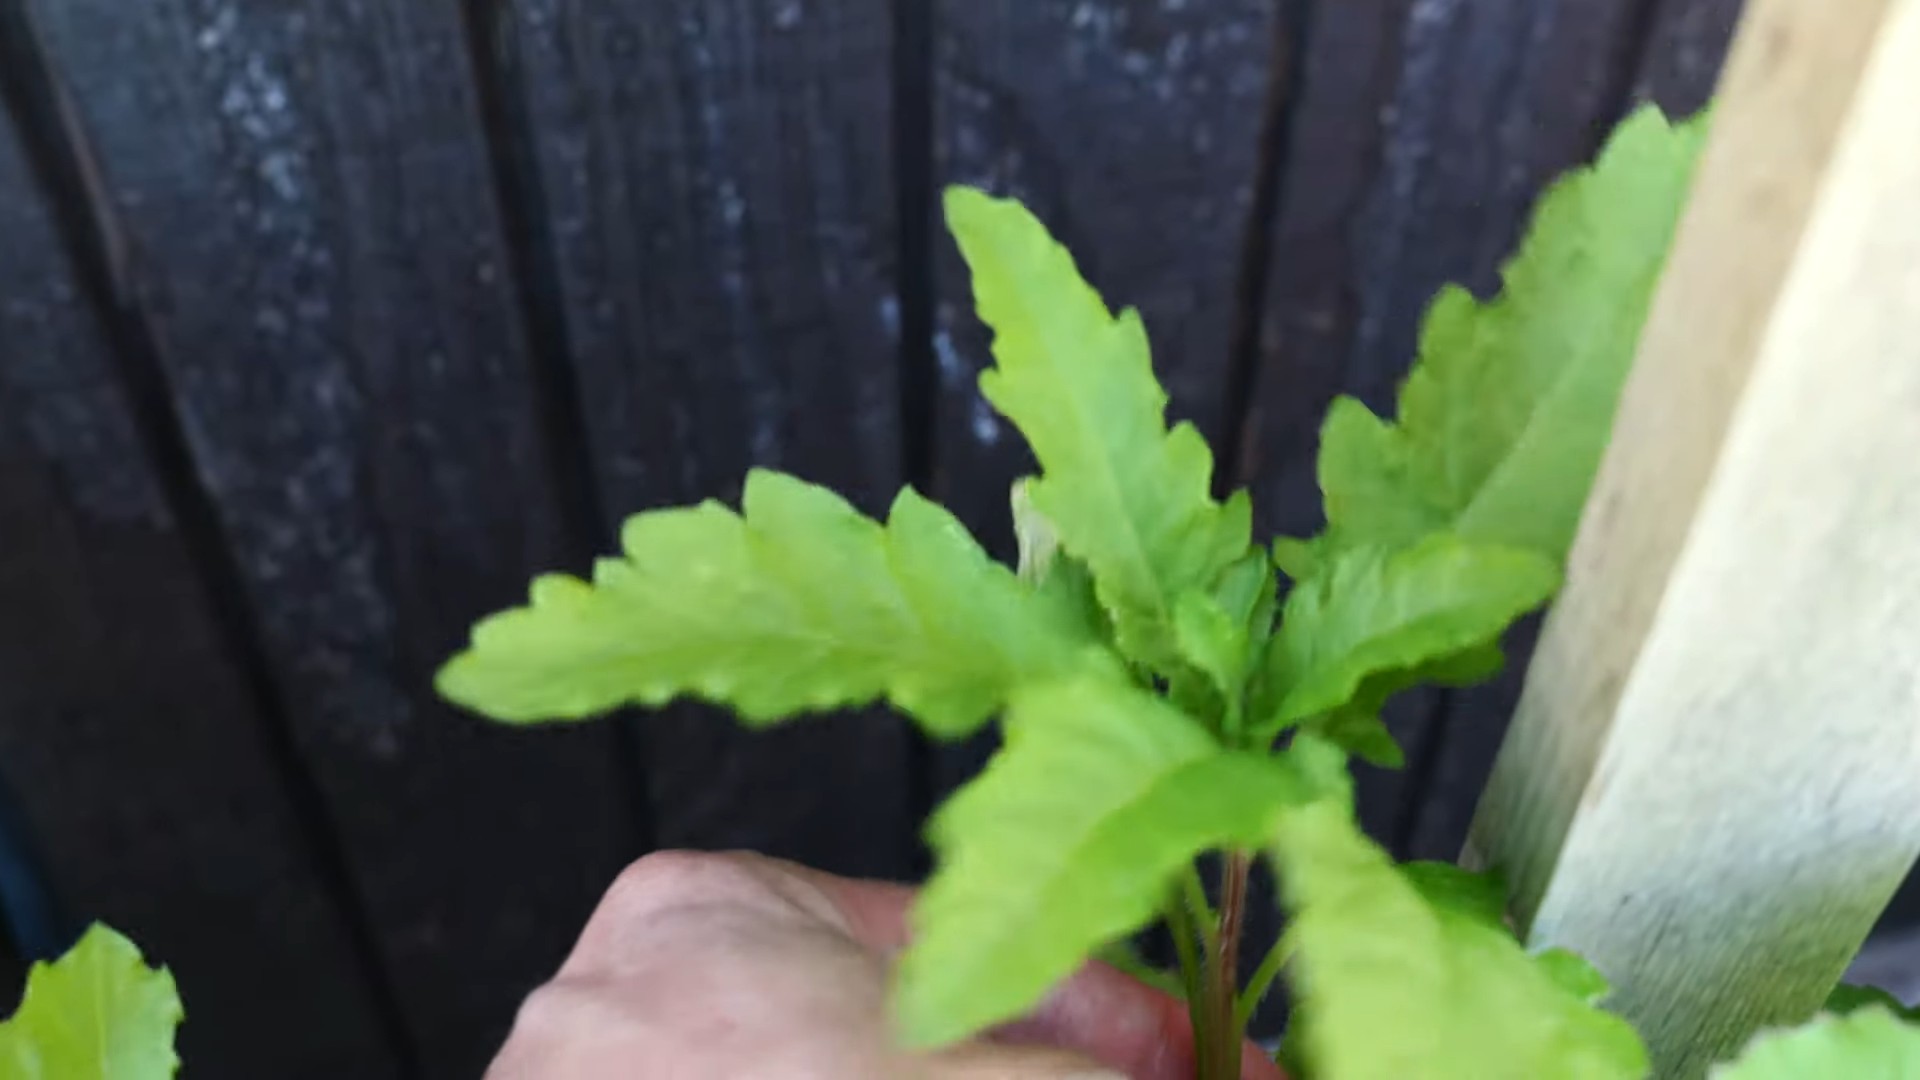
Before we dive in, let’s get acquainted with our star herb. Epazote ( *Dysphania ambrosioides* , formerly *Chenopodium ambrosioides*) is an annual herb native to Central and South America. It’s known for its distinctive aroma and flavor, which some describe as a mix of anise, citrus, and mint. It’s traditionally used in Mexican and Guatemalan cuisine, particularly in dishes containing beans, as it’s believed to reduce flatulence. Beyond its culinary uses, epazote has also been used in traditional medicine for its anthelmintic (worm-expelling) properties.
Why Grow Your Own Epazote?
* Freshness: Nothing beats the flavor of freshly harvested herbs. Store-bought dried epazote just doesn’t compare.
* Control: You know exactly what’s going into your plants – no harmful pesticides or herbicides.
* Cost-effective: A packet of epazote seeds is relatively inexpensive, and you can harvest multiple times throughout the growing season.
* Unique Flavor: Add a distinctive and authentic touch to your Mexican dishes.
* It’s Easy!: Epazote is a relatively low-maintenance plant, making it perfect for beginner gardeners.
Getting Started: What You’ll Need
Before we get our hands dirty, let’s gather our supplies. Here’s what you’ll need to grow epazote at home:
* Epazote Seeds: You can find these online or at your local garden center. Make sure you’re buying from a reputable source to ensure good germination rates.
* Potting Soil (if growing in containers): Choose a well-draining potting mix.
* Garden Soil (if growing in the ground): Epazote prefers well-drained soil that is slightly acidic to neutral. Amend your soil with compost or other organic matter if needed.
* Containers (optional): If you’re growing in containers, choose pots that are at least 12 inches in diameter to give the plants enough room to grow.
* Watering Can or Hose: For watering your plants.
* Gardening Gloves (optional): To protect your hands.
* Sunlight: Epazote needs at least 6 hours of sunlight per day.
* Fertilizer (optional): A balanced fertilizer can help boost growth, but it’s not essential.
Step-by-Step Guide to Growing Epazote
Okay, let’s get down to the nitty-gritty! Here’s a step-by-step guide to growing epazote, whether you’re planting in containers or directly in the ground.
1. Starting from Seed (Indoors or Outdoors)
Epazote can be started indoors or directly sown outdoors, depending on your climate. I personally prefer starting indoors to get a head start on the growing season.
* Indoor Starting (Recommended):
1. Sow Seeds: Fill small pots or seed trays with potting mix. Sprinkle the epazote seeds on the surface of the soil and gently press them down. They don’t need to be buried deeply; just a light covering of soil is sufficient.
2. Water Gently: Water the soil gently to avoid disturbing the seeds. You can use a spray bottle to mist the soil.
3. Provide Light: Place the pots or trays in a sunny location or under grow lights. Epazote seeds need light to germinate.
4. Keep Moist: Keep the soil consistently moist but not waterlogged. You can cover the pots or trays with plastic wrap to help retain moisture.
5. Germination: Epazote seeds typically germinate in 7-14 days.
6. Thin Seedlings: Once the seedlings have developed a few true leaves, thin them out, leaving only the strongest seedling in each pot.
7. Harden Off: Before transplanting the seedlings outdoors, you’ll need to harden them off. This means gradually exposing them to outdoor conditions over a period of 7-10 days. Start by placing them in a sheltered location for a few hours each day, gradually increasing the amount of time they spend outdoors.
* Direct Sowing (Outdoors):
1. Prepare the Soil: Choose a sunny location with well-drained soil. Amend the soil with compost or other organic matter if needed.
2. Sow Seeds: Sprinkle the epazote seeds on the surface of the soil and gently press them down.
3. Water Gently: Water the soil gently to avoid disturbing the seeds.
4. Keep Moist: Keep the soil consistently moist until the seeds germinate.
5. Thin Seedlings: Once the seedlings have developed a few true leaves, thin them out, spacing them about 12-18 inches apart.
2. Transplanting (If Starting Indoors)
Once your seedlings have been hardened off, it’s time to transplant them into their permanent home.
1. Choose a Location: Select a sunny location with well-drained soil.
2. Prepare the Soil: Dig a hole that is slightly larger than the root ball of the seedling.
3. Gently Remove Seedling: Carefully remove the seedling from its pot, being careful not to damage the roots.
4. Place Seedling: Place the seedling in the hole and backfill with soil.
5. Water Thoroughly: Water the seed
Hey there, fellow gardening enthusiasts! Ever heard of epazote? It’s a fascinating herb with a unique flavor profile – a bit citrusy, a bit minty, and a little bit… well, hard to describe! It’s a staple in Mexican cuisine, often used in bean dishes to help with digestion (yes, really!). And the best part? You can totally grow it at home! I’m going to walk you through everything you need to know to successfully cultivate this amazing herb in your own garden or even in a container.
What is Epazote?
Before we dive in, let’s get acquainted with our star herb. Epazote ( *Dysphania ambrosioides* , formerly *Chenopodium ambrosioides*) is an annual herb native to Central and South America. It’s known for its distinctive aroma and flavor, which some describe as a mix of anise, citrus, and mint. It’s traditionally used in Mexican and Guatemalan cuisine, particularly in dishes containing beans, as it’s believed to reduce flatulence. Beyond its culinary uses, epazote has also been used in traditional medicine for its anthelmintic (worm-expelling) properties.
Why Grow Your Own Epazote?
* Freshness: Nothing beats the flavor of freshly harvested herbs. Store-bought dried epazote just doesn’t compare.
* Control: You know exactly what’s going into your plants – no harmful pesticides or herbicides.
* Cost-effective: A packet of epazote seeds is relatively inexpensive, and you can harvest multiple times throughout the growing season.
* Unique Flavor: Add a distinctive and authentic touch to your Mexican dishes.
* It’s Easy!: Epazote is a relatively low-maintenance plant, making it perfect for beginner gardeners.
Getting Started: What You’ll Need
Before we get our hands dirty, let’s gather our supplies. Here’s what you’ll need to grow epazote at home:
* Epazote Seeds: You can find these online or at your local garden center. Make sure you’re buying from a reputable source to ensure good germination rates.
* Potting Soil (if growing in containers): Choose a well-draining potting mix.
* Garden Soil (if growing in the ground): Epazote prefers well-drained soil that is slightly acidic to neutral. Amend your soil with compost or other organic matter if needed.
* Containers (optional): If you’re growing in containers, choose pots that are at least 12 inches in diameter to give the plants enough room to grow.
* Watering Can or Hose: For watering your plants.
* Gardening Gloves (optional): To protect your hands.
* Sunlight: Epazote needs at least 6 hours of sunlight per day.
* Fertilizer (optional): A balanced fertilizer can help boost growth, but it’s not essential.
Step-by-Step Guide to Growing Epazote
Okay, let’s get down to the nitty-gritty! Here’s a step-by-step guide to growing epazote, whether you’re planting in containers or directly in the ground.
1. Starting from Seed (Indoors or Outdoors)
Epazote can be started indoors or directly sown outdoors, depending on your climate. I personally prefer starting indoors to get a head start on the growing season.
* Indoor Starting (Recommended):
1. Sow Seeds: Fill small pots or seed trays with potting mix. Sprinkle the epazote seeds on the surface of the soil and gently press them down. They don’t need to be buried deeply; just a light covering of soil is sufficient.
2. Water Gently: Water the soil gently to avoid disturbing the seeds. You can use a spray bottle to mist the soil.
3. Provide Light: Place the pots or trays in a sunny location or under grow lights. Epazote seeds need light to germinate.
4. Keep Moist: Keep the soil consistently moist but not waterlogged. You can cover the pots or trays with plastic wrap to help retain moisture.
5. Germination: Epazote seeds typically germinate in 7-14 days.
6. Thin Seedlings: Once the seedlings have developed a few true leaves, thin them out, leaving only the strongest seedling in each pot.
7. Harden Off: Before transplanting the seedlings outdoors, you’ll need to harden them off. This means gradually exposing them to outdoor conditions over a period of 7-10 days. Start by placing them in a sheltered location for a few hours each day, gradually increasing the amount of time they spend outdoors.
* Direct Sowing (Outdoors):
1. Prepare the Soil: Choose a sunny location with well-drained soil. Amend the soil with compost or other organic matter if needed.
2. Sow Seeds: Sprinkle the epazote seeds on the surface of the soil and gently press them down.
3. Water Gently: Water the soil gently to avoid disturbing the seeds.
4. Keep Moist: Keep the soil consistently moist until the seeds germinate.
5. Thin Seedlings: Once the seedlings have developed a few true leaves, thin them out, spacing them about 12-18 inches apart.
2. Transplanting (If Starting Indoors)
Once your seedlings have been hardened off, it’s time to transplant them into their permanent home.
1. Choose a Location: Select a sunny location with well-drained soil.
2. Prepare the Soil: Dig a hole that is slightly larger than the root ball of the seedling.
3. Gently Remove Seedling: Carefully remove the seedling from its pot, being careful not to damage the roots.
4. Place Seedling: Place the seedling in the hole and backfill with soil.
5. Water Thoroughly: Water the seedling thoroughly after planting.
3. Caring for Your Epazote Plants
Now that your epazote plants are in the ground (or in containers), it’s time to provide them with the care they need to thrive.
1. Watering: Water your epazote plants regularly, especially during dry spells. Aim to keep the soil consistently moist but not waterlogged.
2. Sunlight: Ensure your epazote plants receive at least 6 hours of sunlight per day.
3. Fertilizing (Optional): If you want to boost growth, you can fertilize your epazote plants every few weeks with a balanced fertilizer. Follow the instructions on the fertilizer package. I personally don’t fertilize mine much, and they still do great!
4. Weeding: Keep the area around your epazote plants free of weeds. Weeds can compete with your plants for nutrients and water.
5. Pest Control: Epazote is relatively pest-resistant, but it can occasionally be affected by aphids or spider mites. If you notice any pests, you can treat them with insecticidal soap or neem oil.
6. Pruning: You can prune your epazote plants to encourage bushier growth. Simply pinch off the tips of the stems.
4. Harvesting Epazote
The best part! You can start harvesting epazote leaves once the plants are about 6-8 inches tall.
1. Harvesting Leaves: Simply snip off the leaves with scissors or your fingers. You can harvest leaves as needed throughout the growing season.
2. Harvesting Seeds: If you want to collect seeds for next year, allow some of the plants to flower. Once the flowers have dried and turned brown, you can harvest the seeds. Store the seeds in a cool, dry place.
3. Drying Epazote: To dry epazote, hang the stems upside down in a cool, dry place. Once the leaves are completely dry, you can crumble them and store them in an airtight container.
Tips for Success
* Choose the Right Location: Epazote needs plenty of sunlight and well-drained soil.
* Don’t Overwater: Overwatering can lead to root rot.
* Harvest Regularly: Regular harvesting encourages bushier growth.
* Consider Companion Planting: Epazote is said to be a good companion plant for beans, as it helps to repel bean beetles.
* Be Aware of Allelopathy: Epazote can inhibit the growth of some other plants, so be mindful of where you plant it.
Troubleshooting
* Yellowing Leaves: This could be a sign of overwatering or nutrient deficiency.
* Stunted Growth: This could be due to lack of sunlight or poor soil.
* Pests: Check your plants regularly for pests and treat them accordingly.
Using Epazote in the Kitchen
Now that you’ve successfully grown your
Conclusion
So, there you have it! Growing epazote at home is not only achievable but also incredibly rewarding. Forget relying on potentially wilted or overpriced bunches from the grocery store. Imagine stepping into your own backyard or onto your balcony and harvesting fresh, vibrant epazote leaves whenever you need them. The difference in flavor between store-bought and homegrown is truly remarkable – a brighter, more intense citrusy-anise flavor that will elevate your Mexican dishes to a whole new level.
This DIY trick is a must-try for several reasons. First, it provides you with a constant supply of fresh epazote, ensuring you always have this essential herb on hand. Second, it’s a cost-effective solution, especially if you use epazote frequently. Third, it’s incredibly satisfying to nurture a plant from seed or seedling to a thriving herb, knowing you’re contributing to your own culinary creations. Finally, growing your own epazote allows you to control the growing conditions, ensuring it’s free from harmful pesticides and herbicides.
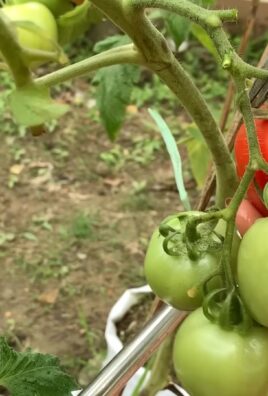
But the fun doesn’t stop there! Consider experimenting with different varieties of epazote. While the most common type has a strong, distinctive flavor, you might find other cultivars with slightly different nuances. You can also try companion planting epazote with other herbs and vegetables, such as beans, tomatoes, and marigolds, to deter pests and improve the overall health of your garden. Another variation is to grow epazote in containers, making it accessible even if you have limited space. Use a well-draining potting mix and ensure the container has adequate drainage holes.
Don’t be intimidated if you’re new to gardening. Growing epazote is relatively easy, even for beginners. With a little bit of sunlight, well-drained soil, and regular watering, you’ll be enjoying your own homegrown epazote in no time.
We wholeheartedly encourage you to give this DIY trick a try. It’s a simple, affordable, and rewarding way to enhance your culinary experience. Once you’ve harvested your first batch of homegrown epazote, we’d love to hear about your experience! Share your tips, tricks, and favorite recipes using your freshly grown herb in the comments below. Let’s build a community of epazote enthusiasts and inspire others to embrace the joys of homegrown herbs. We are confident that once you experience the flavor and convenience of growing epazote at home, you’ll never go back to store-bought again. So, grab your seeds or seedlings, get your hands dirty, and start growing your own delicious epazote today!
Frequently Asked Questions (FAQ)
What exactly is epazote and why should I grow it?
Epazote (Dysphania ambrosioides) is a leafy herb native to Central America and Mexico. It’s a staple ingredient in many traditional Mexican dishes, particularly bean dishes, where it’s believed to help reduce gas and bloating. It has a unique flavor profile, often described as citrusy, anise-like, and slightly pungent. Growing epazote at home ensures you have a fresh, readily available supply of this flavorful herb, often superior in taste to store-bought options. Plus, it’s a fun and rewarding gardening project!
How do I start growing epazote?
You can start epazote from seeds or seedlings. Seeds can be sown directly into the ground after the last frost, or started indoors 6-8 weeks before the last frost. If starting indoors, use a seed-starting mix and keep the soil consistently moist. Seedlings can be transplanted outdoors once the danger of frost has passed. Choose a sunny location with well-drained soil.
What are the ideal growing conditions for epazote?
Epazote thrives in full sun (at least 6 hours of direct sunlight per day) and well-drained soil. It prefers slightly acidic to neutral soil pH. Water regularly, especially during dry periods, but avoid overwatering, as this can lead to root rot. Epazote is relatively drought-tolerant once established.
How often should I water my epazote plant?
Water your epazote plant when the top inch of soil feels dry to the touch. Avoid letting the soil dry out completely, but also avoid overwatering, which can lead to root rot. The frequency of watering will depend on the weather conditions and the type of soil you have.
Does epazote need fertilizer?
Epazote is not a heavy feeder and generally doesn’t require a lot of fertilizer. However, you can amend the soil with compost or well-rotted manure before planting to provide essential nutrients. If you notice the leaves are pale or the plant is not growing vigorously, you can apply a balanced organic fertilizer diluted to half strength.
How do I harvest epazote?
You can start harvesting epazote leaves once the plant is about 6-8 inches tall. Simply snip off the leaves as needed, using scissors or pruning shears. Regular harvesting will encourage the plant to produce more leaves. The flavor of epazote is strongest just before the plant flowers.
When is the best time to harvest epazote?
The best time to harvest epazote is in the morning, after the dew has dried. This is when the essential oils are most concentrated, resulting in the most flavorful leaves.
How do I store epazote?
Fresh epazote leaves can be stored in the refrigerator for a few days. Wrap them in a damp paper towel and place them in a plastic bag. You can also dry epazote leaves by hanging them upside down in a cool, dry place. Once dried, store them in an airtight container. Another option is to freeze epazote leaves. Chop them up and freeze them in ice cube trays with water or olive oil.
Is epazote invasive?
Epazote can be somewhat invasive in some regions, as it self-seeds readily. To prevent it from spreading, you can deadhead the flowers before they go to seed. You can also grow epazote in containers to control its spread.
Are there any pests or diseases that affect epazote?
Epazote is generally resistant to pests and diseases. However, it can be susceptible to aphids and spider mites. If you notice these pests, you can spray the plant with insecticidal soap or neem oil. Overwatering can lead to root rot, so be sure to provide well-drained soil.
Can I grow epazote indoors?
Yes, you can grow epazote indoors, but it will need plenty of sunlight. Place it in a sunny window or under grow lights. Use a well-draining potting mix and water regularly.
Is epazote safe to consume?
Epazote is generally safe to consume in moderation. However, pregnant women and people with certain medical conditions should avoid consuming large amounts of epazote. The essential oil of epazote is toxic and should not be ingested.
What are some culinary uses for epazote?
Epazote is commonly used in Mexican cuisine, particularly in bean dishes, soups, stews, and quesadillas. It’s also used to flavor tamales, salsas, and mole sauces. The leaves can be used fresh or dried. Add epazote towards the end of cooking to preserve its flavor.
Can I use epazote as a natural pest repellent?
Yes, epazote has insect-repellent properties and can be used as a natural pest repellent in the garden. Plant it near other vegetables to deter pests such as bean beetles and cabbage moths.
What are some companion plants for epazote?
Good companion plants for epazote include beans, tomatoes, marigolds, and basil. These plants can help deter pests and improve the overall health of your garden.
Leave a Comment