
Grow Endive at Home and unlock a world of fresh, slightly bitter greens right at your fingertips! Have you ever dreamt of strolling into your backyard and harvesting crisp, flavorful endive for a vibrant salad or a sophisticated appetizer? Well, dream no more! This DIY guide is your key to cultivating this elegant vegetable, even if you’re a complete beginner.
Endive, with its intriguing history, has been enjoyed for centuries. Originating in Belgium, legend has it that endive was discovered accidentally when a farmer stored chicory roots in a dark cellar during the winter. The resulting pale, tightly packed heads were a delightful surprise, and thus, Belgian endive was born! Today, endive is prized for its unique flavor and versatility in culinary creations around the globe.
But why should you bother to grow endive at home? Simple! Store-bought endive can be expensive and often lacks the freshness and vibrancy of homegrown produce. Plus, there’s nothing quite like the satisfaction of nurturing a plant from seed to harvest. In this article, I’ll share my favorite DIY tricks and hacks to help you successfully cultivate endive, regardless of your gardening experience. From seed starting to blanching techniques, I’ll guide you through every step of the process, ensuring you enjoy a bountiful harvest of this delicious and nutritious vegetable. Let’s get started!

Growing Endive at Home: A DIY Guide to Bitter Greens
Okay, so you want to grow endive at home? Awesome! It might seem a little intimidating at first, but trust me, with a little patience and this guide, you’ll be enjoying fresh, slightly bitter endive in your salads in no time. Endive is a biennial, meaning it has a two-year life cycle. We’re going to focus on forcing the chicons (the blanched heads) in this guide, which is the part you typically see in the grocery store.
Understanding the Endive Growing Process
Before we dive into the nitty-gritty, let’s understand the two main phases:
* **Phase 1: Root Development (Outdoor Growing):** This is where we grow the endive plants outdoors to develop strong, healthy roots. This phase takes place during the spring and summer.
* **Phase 2: Forcing (Indoor Blanching):** This is where we trick the roots into producing the blanched chicons indoors, away from light. This phase typically happens in the fall and winter.
Materials You’ll Need
Here’s a list of everything you’ll need to successfully grow endive at home:
* **Endive Seeds:** Choose a variety suitable for forcing, such as ‘Zoom’ or ‘Brussels Whitloof’.
* **Seed Starting Trays or Pots:** For starting the seeds indoors.
* **Seed Starting Mix:** A light, well-draining mix.
* **Outdoor Garden Space:** A sunny spot with well-drained soil.
* **Compost or Well-Rotted Manure:** To enrich the soil.
* **Gardening Tools:** Trowel, shovel, watering can, etc.
* **Large Containers or Buckets:** For forcing the chicons indoors.
* **Potting Soil:** For the forcing containers.
* **Dark Material:** Black plastic bags, dark cloth, or a covered container to exclude light during forcing.
* **Optional: Heating Mat:** To speed up germination.
* **Optional: Grow Lights:** If you don’t have a naturally dark and cool space for forcing.
Phase 1: Root Development (Outdoor Growing)
This is where the magic begins! We need to get those endive roots growing strong.
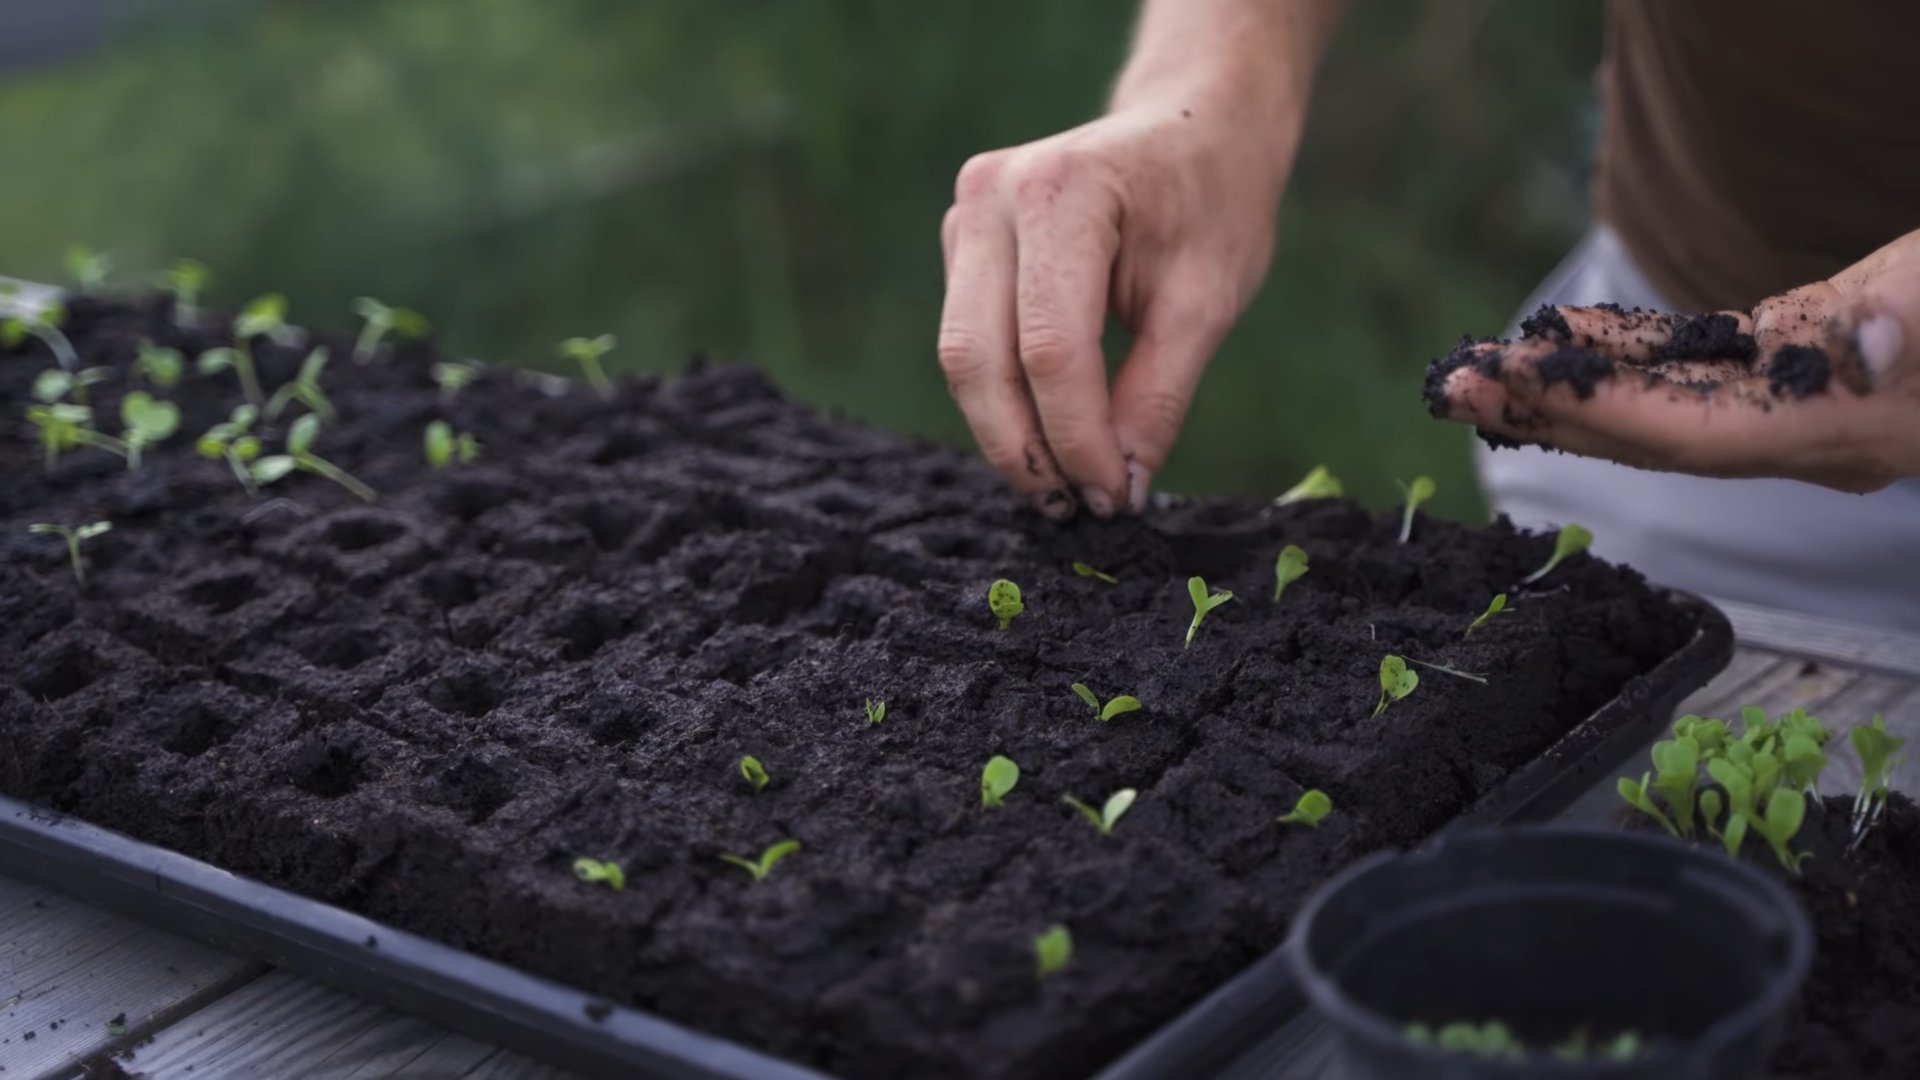
1. **Start Seeds Indoors (Optional):** I prefer to start my endive seeds indoors about 6-8 weeks before the last expected frost. This gives them a head start.
* Fill your seed starting trays or pots with seed starting mix.
* Moisten the mix thoroughly.
* Sow the seeds about ¼ inch deep.
* Gently cover the seeds with soil.
* Water gently.
* Place the trays or pots in a warm location (around 70-75°F). A heating mat can help speed up germination.
* Keep the soil consistently moist but not soggy.
* Once the seedlings emerge (usually in 7-14 days), provide them with plenty of light. A sunny windowsill or grow lights will work.
2. **Direct Sow Seeds Outdoors (Alternative):** If you prefer, you can direct sow the seeds outdoors after the last frost.
* Prepare the soil by loosening it and adding compost or well-rotted manure.
* Sow the seeds about ¼ inch deep in rows that are 12-18 inches apart.
* Gently cover the seeds with soil.
* Water gently.
* Keep the soil consistently moist.
3. **Thin Seedlings:** Once the seedlings have a few true leaves, thin them to about 8-12 inches apart. This gives them enough space to grow.
4. **Water Regularly:** Endive needs consistent moisture, especially during hot weather. Water deeply whenever the soil feels dry to the touch.
5. **Weed Regularly:** Keep the area around your endive plants free of weeds. Weeds compete for nutrients and water.
6. **Fertilize (Optional):** If your soil is poor, you can fertilize your endive plants with a balanced fertilizer every few weeks. Follow the instructions on the fertilizer package.
7. **Harvest Roots:** In the fall, after the first frost, it’s time to harvest the roots. This is usually around October or November.
* Carefully dig up the endive plants, being careful not to damage the roots.
* Cut off the leaves about 1-2 inches above the crown of the root.
* Trim any small, lateral roots.
* Select the healthiest, firmest roots that are about 1-2 inches in diameter. Discard any damaged or diseased roots.
Preparing the Roots for Forcing
Before we move on to the forcing stage, we need to prepare the roots properly.
1. **Cleaning the Roots:** Gently wash the roots to remove any soil.
2. **Drying the Roots:** Allow the roots to dry for a few days in a cool, dry place. This helps prevent rot.
3. **Storing the Roots (Optional):** If you’re not ready to force the chicons immediately, you can store the roots in a cool, dark, and humid place, such as a root cellar or a refrigerator. Wrap them in damp paper towels or store them in a plastic bag with air holes. They can be stored for several weeks.
Phase 2: Forcing (Indoor Blanching)
Now for the fun part – forcing those beautiful chicons!
1. **Prepare the Forcing Containers:** Choose large containers or buckets that are at least 12 inches deep. Make sure they have drainage holes.
2. **Fill the Containers:** Fill the containers with potting soil, leaving about 2-3 inches of space at the top.
3. **Plant the Roots:** Plant the endive roots upright in the soil, close together but not touching. The tops of the roots should be just below the surface of the soil.
4. **Water Thoroughly:** Water the soil thoroughly until it is evenly moist.
5. **Cover the Containers:** This is crucial! We need to exclude all light to blanch the chicons. Cover the containers with black plastic bags, dark cloth, or a covered container. Make sure the covering is completely lightproof. You can use multiple layers if needed.
6. **Maintain the Right Temperature:** The ideal temperature for forcing endive is between 50-60°F (10-15°C). A cool basement, garage, or shed is perfect. Avoid temperatures above 65°F, as this can cause the chicons to become bitter.
7. **Check Moisture Levels:** Check the soil moisture every few days. Keep the soil consistently moist, but not soggy. Water as needed.
8. **Be Patient:** It takes about 3-5 weeks for the chicons to develop.
9. **Harvest the Chicons:** Once the chicons are about 4-6 inches long and tightly closed, they are ready to harvest.
* Carefully remove the covering.
* Gently dig up the chicons.
* Cut them off at the base.
* Rinse them with water.
Tips for Success
* Choose the Right Variety: Not all endive varieties are suitable for forcing. Look for varieties specifically bred for this purpose.
* Proper Root Development is Key: The stronger the roots, the better the chicons will be.
* Maintain Consistent Moisture: Both during root development and forcing, consistent moisture is essential.
* Ensure Complete Darkness: Any light exposure will cause the chicons to turn green and become bitter.
* Control the Temperature: Maintaining the correct temperature is crucial for successful forcing.
* Don’t Overwater: Soggy soil can lead to rot.
* Successive Planting: To have a continuous supply of endive, plant the roots in batches every few weeks.
* Enjoy Your Harvest: Endive is delicious in salads, soups, and stews. You can also grill or braise it.
Troubleshooting
* **Chicons are Bitter:** This is usually caused by exposure to light or temperatures that are too high.
* **Chicons are Rotting:** This is usually caused by overwatering or poor drainage.
* **Chicons are Not Developing:** This could be due to weak roots, insufficient moisture, or temperatures that are too low.
Growing endive at home takes a little effort, but the reward of fresh, homegrown chicons is well worth it. With a little practice, you’ll be a pro in no time! Happy growing!
Conclusion
So, there you have it! Growing endive at home, while perhaps seeming a bit daunting at first, is a surprisingly rewarding and achievable endeavor. We’ve walked you through the process, from selecting the right seeds to forcing those beautifully blanched heads. But why should you bother? Why not just pick up a head of endive at the grocery store?
The answer lies in the unparalleled freshness and flavor you simply can’t replicate with store-bought produce. Imagine the crisp, slightly bitter leaves, bursting with vitality, gracing your salads or adding a sophisticated touch to your cooked dishes. This isn’t just about saving a few dollars; it’s about experiencing the joy of cultivating your own food and connecting with the natural world. It’s about knowing exactly where your food comes from and enjoying the peak of its flavor.
Beyond the superior taste, growing your own endive allows for experimentation and customization. Want a slightly sweeter endive? Try a different variety or adjust the forcing conditions. Prefer a more intense bitterness? Shorten the blanching period. The possibilities are endless!
Consider these variations to truly make your homegrown endive your own:
* Experiment with different endive varieties: Broadleaf Batavian, Belgian Whitloof, and Frisee all offer unique flavor profiles and textures.
* Try different forcing containers: While we suggested buckets, you can also use large pots, bins, or even repurposed containers. Just ensure they are lightproof and well-draining.
* Play with the blanching time: Adjust the blanching period to achieve your desired level of bitterness. Shorter blanching times result in more bitter leaves, while longer times produce sweeter, milder endive.
* Add a touch of compost tea during forcing: A diluted compost tea can provide a boost of nutrients and enhance the flavor of your endive.
* Grow endive indoors year-round: With proper lighting and temperature control, you can enjoy fresh endive even in the dead of winter.
The key takeaway is that growing endive at home is not just a recipe; it’s an adventure. It’s a chance to learn, experiment, and connect with the earth. It’s a way to elevate your culinary creations and impress your friends and family with your homegrown bounty.
We wholeheartedly encourage you to give this DIY trick a try. Don’t be afraid to get your hands dirty and embrace the process. The satisfaction of harvesting your own perfectly blanched endive is truly unmatched.
And most importantly, we want to hear about your experience! Share your photos, tips, and challenges in the comments below. Let’s create a community of home endive growers and learn from each other. What varieties did you try? What challenges did you face? What successes did you celebrate? Your insights will help others embark on their own endive-growing journey. So, go ahead, get growing, and let’s share the delicious rewards of homegrown endive!
Frequently Asked Questions (FAQ)
What if my endive doesn’t blanch properly?
Blanching issues are common, but usually easily addressed. If your endive isn’t blanching properly, meaning the leaves aren’t turning pale and tender, the most likely culprit is insufficient darkness. Ensure your forcing container is completely lightproof. Even a small amount of light can inhibit blanching. Double-check for any cracks or holes in your container and seal them with tape or an opaque covering. Another possibility is that the temperature is too high. Ideal forcing temperatures are between 60-70°F (15-21°C). Higher temperatures can lead to bitterness and poor blanching. Finally, ensure the endive roots are properly covered with soil or sand during the forcing process.
How long does it take to force endive?
The forcing process typically takes about 3-5 weeks, depending on the variety of endive, the temperature, and the amount of light exposure. Warmer temperatures can speed up the process, while cooler temperatures may slow it down. Regularly check the endive heads for signs of blanching. They are ready to harvest when the leaves are pale, tightly packed, and feel firm to the touch.
Can I eat the endive roots after harvesting the heads?
While the primary goal is to harvest the blanched heads, the roots themselves are technically edible. However, they tend to be quite bitter and tough. Some people choose to add them to soups or stews for a subtle bitter flavor, but they are generally not consumed on their own. Composting the roots is a more common and environmentally friendly option.
What are some common pests and diseases that affect endive?
Endive is generally a hardy plant, but it can be susceptible to certain pests and diseases, including aphids, slugs, snails, and downy mildew. Regularly inspect your plants for signs of infestation or disease. Aphids can be controlled with insecticidal soap or a strong blast of water. Slugs and snails can be handpicked or trapped. Downy mildew can be prevented by ensuring good air circulation and avoiding overhead watering. If downy mildew does occur, treat it with a fungicide specifically labeled for use on leafy greens.
How do I store harvested endive?
To store harvested endive, wrap the heads loosely in a damp paper towel and place them in a plastic bag in the refrigerator. This will help to keep them crisp and fresh for up to a week. Avoid storing endive near ethylene-producing fruits, such as apples and bananas, as this can cause them to brown and spoil more quickly.
Can I grow endive from seed directly in the garden?
While it’s possible to grow endive directly from seed in the garden, it’s generally recommended to start seeds indoors and transplant them later. This allows you to control the growing conditions and ensure a higher success rate. Direct sowing can be challenging, especially in areas with short growing seasons or poor soil.
What is the best time of year to start growing endive?
The best time of year to start growing endive depends on your climate. In general, endive is a cool-season crop that thrives in temperatures between 60-70°F (15-21°C). In areas with mild winters, you can start seeds in late summer or early fall for a winter harvest. In areas with cold winters, start seeds indoors in late winter or early spring for a spring or summer harvest.
Is endive the same as escarole?
Endive and escarole are both members of the chicory family, but they are distinct vegetables with different characteristics. Endive has tightly packed, blanched leaves that are typically pale yellow or white, while escarole has broader, green leaves that are more bitter. Endive is often eaten raw in salads, while escarole is more commonly cooked.
Can I regrow endive from the base after harvesting?
Yes, you can often regrow endive from the base after harvesting, similar to how you can regrow lettuce or celery. Leave about an inch or two of the base intact when you harvest the head. Place the base in a shallow dish of water, ensuring that the cut end is submerged. Place the dish in a sunny location and change the water every day or two. New leaves should start to sprout from the base within a week or two. You can then transplant the regrown endive into a pot or back into the garden. While the regrown head may not be as large or tightly packed as the original, it’s a great way to get a second harvest from your endive.


Leave a Comment