
Grow Dill Kitchen Garden: Imagine stepping into your kitchen, needing a sprig of fresh dill for your creamy cucumber salad, and simply snipping it right from your windowsill. Sounds idyllic, right? Well, it’s absolutely achievable! For centuries, cultivating herbs like dill in small, accessible spaces has been a cornerstone of home cooking, connecting us to the land and providing fresh flavors at our fingertips. From ancient Roman gardens to medieval monastery plots, the practice of growing herbs close to the kitchen has deep historical roots.
But in today’s fast-paced world, who has time for a sprawling garden? That’s where our DIY tricks and hacks come in! I’m going to show you how easy it is to grow dill kitchen garden, even if you have limited space or a less-than-green thumb. Dill is a fantastic herb to start with – it’s relatively low-maintenance, adds a burst of flavor to countless dishes, and its feathery foliage is simply beautiful.
This article is packed with simple, step-by-step instructions and clever tips to ensure your dill thrives indoors. We’ll cover everything from choosing the right container and soil to providing optimal light and watering. Say goodbye to expensive, wilted herbs from the grocery store and hello to a constant supply of fresh, fragrant dill, ready to elevate your culinary creations. Let’s get started!
Growing Dill: Your Kitchen Garden Project for Fresh Flavor
Hello dear garden friends! I’m so excited to show you today how you can easily grow dill in your own kitchen. Fresh dill is simply unbeatable, whether for salads, fish dishes, or just as a topping on a delicious slice of bread. And the best part? It’s super easy and a lot of fun!
What You Need: The Materials List
Before we get started, here is a list of everything you’ll need for your dill project:
- Dill seeds: Preferably organic quality, so you can be sure no harmful substances are included. You can find them in any garden center or online.
- Seedling pots or trays: Small pots or trays with drainage holes are ideal. You can also use yogurt cups or egg cartons if you want to get creative.
- Seed starting mix: This soil is particularly low in nutrients and loose, perfect for the germination of the seeds.
- Potting soil: When the dill seedlings are larger, they will need more nutrient-rich soil.
- A larger pot (approx. 20 cm in diameter): This is where the dill plants will move to later.
- Watering can or spray bottle: For gently watering the seeds and seedlings.
- A sunny location: Dill loves the sun! A windowsill or a balcony with plenty of sun is perfect.
- Optional: A small shovel or spoon for repotting.
Phase 1: Sowing – How to Get Your Dill Seeds to Germinate
Sowing is the first and most important step. Here I’ll show you how to do it right:
- Prepare the seedling pots: Fill the seedling pots or trays with seed starting mix. Press the soil down lightly, but not too firmly. It should remain loose and airy.
- Sow the seeds: Distribute the dill seeds evenly on the soil. You can sow a few more seeds, as not all will germinate. I usually sow 3-5 seeds per small pot.
- Cover the seeds: Cover the seeds with a thin layer of seed starting mix (approx. 0.5 cm).
- Watering: Moisten the soil carefully with a spray bottle or a watering can with a fine rose head. The soil should be damp, but not wet. Avoid waterlogging!
- The right location: Place the seedling pots in a warm and bright place. A temperature of 18-20°C is ideal for germination. Direct sunlight is not necessary yet.
- Patience is required: Now it’s time to wait! The seeds usually germinate within 10-14 days. Keep the soil moist during this time, but avoid waterlogging.
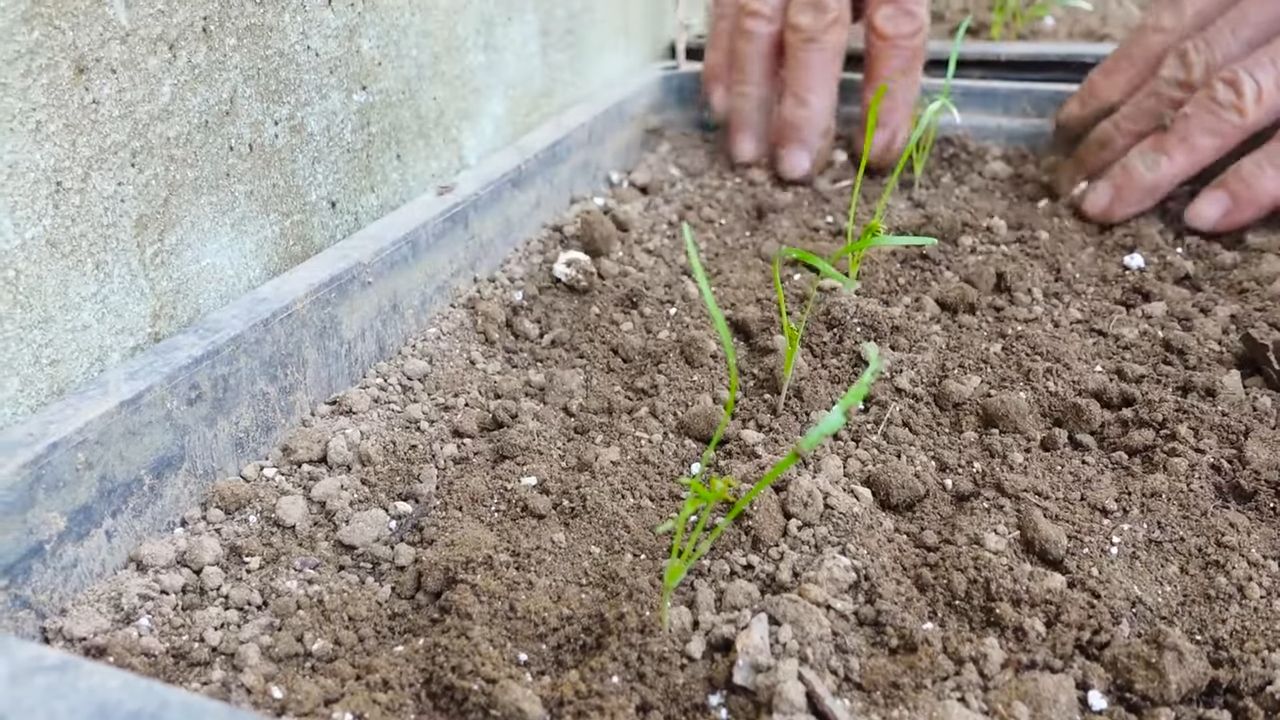
Phase 2: Caring for the Dill Seedlings – How They Grow Strong and Healthy
As soon as the first green tips sprout from the soil, the next phase begins: caring for the dill seedlings.
- More light: Once the seedlings have germinated, they need a lot of light. Place them in a sunny location, e.g., on a south-facing windowsill or on the balcony.
- Regular watering: Water the seedlings regularly, but not too much. The soil should always be slightly moist. Avoid waterlogging, as this can lead to root rot. I always check with my finger if the soil is dry before I water.
- Thinning the seedlings: If several seedlings are growing in one pot, you should thin them out as soon as they are a few centimeters tall. This means you remove the weaker seedlings so the stronger ones have enough space to grow.
- Fertilizing (optional): Dill is not particularly demanding, but occasional fertilizing can promote growth. Use an organic liquid fertilizer and follow the instructions on the packaging. I fertilize my dill plants about every two weeks.
- Rotating the pots: Rotate the pots regularly so the seedlings grow evenly and don’t bend towards the light.
Phase 3: Repotting – A New Home for Your Dill
When the dill seedlings are large enough (approx. 10-15 cm), it’s time to repot them into a larger pot.
- Prepare the new pot: Fill the larger pot with potting soil. Make sure the pot has drainage holes so excess water can run off.
- Carefully remove the seedlings: Gently loosen the dill seedlings from the seedling pots. Try to damage the roots as little as possible.
- Place in the new pot: Place the dill seedlings in the new pot and fill the pot with potting soil. Press the soil down lightly.
- Watering: Water the dill seedlings thoroughly after repotting.
- The right location: Place the pot in a sunny location.
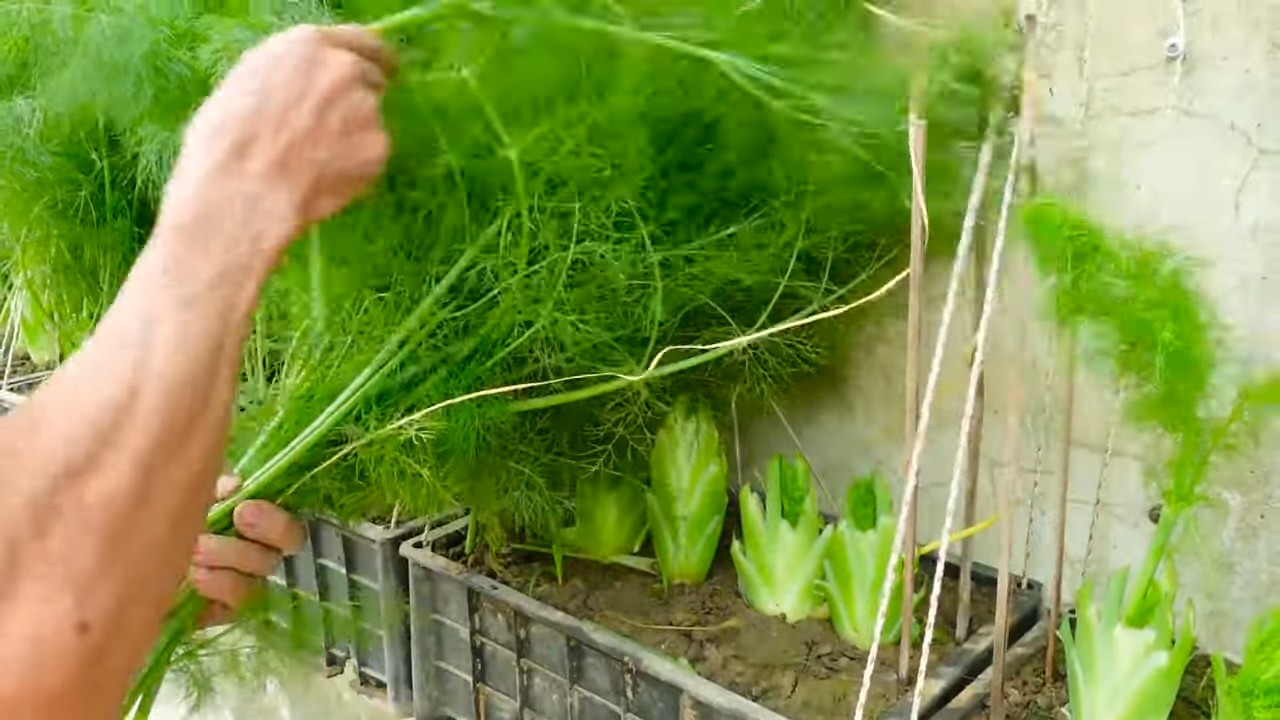
Phase 4: The Harvest – Fresh Dill for Your Kitchen
After a few weeks, you can finally harvest your own dill!
- Harvest time: You can harvest dill as soon as it has reached a height of approx. 15-20 cm.
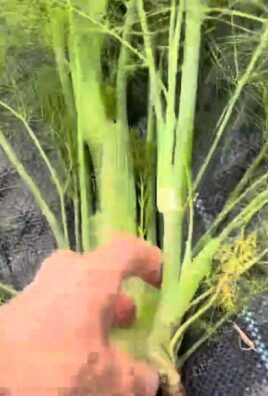
- Harvesting method: Cut the dill stems with scissors or a knife. You can either harvest individual leaves or whole stems.
- Regular harvesting: Regular harvesting promotes the growth of the plant. Cut off the flower heads before they open, as the plant will otherwise put its energy into seed production and produce fewer leaves.
- Storage: Fresh dill will keep in the refrigerator for a few days. You can also freeze or dry it.
Additional Tips and Tricks for Your Dill Success
- Pests: Dill is relatively resistant to pests. Occasionally, aphids may appear. You can simply rinse them off with a jet of water or treat them with an organic pesticide.
- Diseases: Waterlogging can lead to root rot. Therefore, ensure good drainage and avoid excessive watering.
- Sowing time: You can sow dill from spring to autumn.
- Dill outdoors: If you have a garden, you can also sow dill directly outdoors.
- Dill as a companion plant: Dill is a good companion plant for many vegetables, e.g., cucumbers, tomatoes, and cabbage. It keeps pests away and promotes the growth of the plants.
I hope this guide helps you to grow your own dill in the kitchen. It’s a really great feeling to harvest fresh herbs from your own garden and use them to enhance your dishes. Happy gardening
28
Conclusion
So, there you have it! Cultivating your own dill, right in your kitchen, is not only achievable but also incredibly rewarding. This simple DIY trick for a kitchen garden offers a constant supply of fresh, aromatic dill, ready to elevate your culinary creations at a moment’s notice. Forget those sad, wilted bunches from the grocery store; imagine the vibrant flavor of freshly snipped dill sprigs enhancing your salads, soups, dips, and seafood dishes.
Why is this a must-try? Because it’s more than just growing herbs; it’s about connecting with your food, reducing waste, and adding a touch of green to your indoor space. It’s about the satisfaction of nurturing a plant from seed to harvest, all within the comfort of your own home. Plus, think of the money you’ll save by not having to constantly repurchase dill!
But the beauty of this DIY project lies in its adaptability. Feel free to experiment with different containers – from repurposed yogurt cups to stylish ceramic pots. Consider using a variety of dill seeds, such as ‘Bouquet’ for its prolific leaf production or ‘Long Island Mammoth’ for its impressive size. You can even try companion planting, adding small marigolds or basil to your dill container to deter pests and enhance growth.
And don’t stop at dill! Once you’ve mastered this technique, you can easily apply it to other herbs like parsley, chives, or mint, creating a thriving indoor herb garden that caters to your specific culinary needs. Imagine the possibilities!
We wholeheartedly encourage you to give this DIY trick a try. It’s a simple, cost-effective, and incredibly satisfying way to bring the freshness of the garden into your kitchen. We’re confident that you’ll be amazed at how easy it is to grow your own dill.
Once you’ve embarked on your dill-growing adventure, we’d love to hear about your experience! Share your tips, tricks, and photos with us in the comments below. Let’s create a community of indoor gardeners, sharing our knowledge and inspiring others to embrace the joy of growing their own food. So, grab your seeds, potting mix, and a sunny windowsill, and get ready to experience the magic of growing your own **dill kitchen garden**! We can’t wait to see what you create!
Frequently Asked Questions (FAQ)
What kind of soil is best for growing dill indoors?
Dill thrives in well-draining soil that is rich in organic matter. A good starting point is a standard potting mix amended with compost or aged manure. Avoid heavy clay soils, as they can retain too much moisture and lead to root rot. You can also create your own custom blend by combining equal parts potting soil, perlite, and vermiculite. This mixture provides excellent drainage and aeration, which are crucial for healthy dill growth. Remember to choose a potting mix that is specifically formulated for containers, as these mixes are designed to retain moisture without becoming waterlogged.
How much sunlight does dill need when grown indoors?
Dill requires at least 6 hours of direct sunlight per day to thrive. If you don’t have a sunny windowsill, you can supplement with grow lights. Place the grow lights about 6-12 inches above the plants and keep them on for 12-14 hours per day. Insufficient sunlight can lead to leggy growth and reduced flavor. Rotate your dill plants regularly to ensure that all sides receive adequate light. If you notice that your dill is stretching towards the light source, it’s a sign that it needs more light.
How often should I water my indoor dill plant?
Water your dill plant when the top inch of soil feels dry to the touch. Avoid overwatering, as this can lead to root rot. Ensure that your container has drainage holes to allow excess water to escape. During the warmer months, you may need to water more frequently than during the cooler months. Check the soil moisture regularly and adjust your watering schedule accordingly. A good rule of thumb is to water deeply but infrequently, allowing the soil to dry out slightly between waterings.
How do I harvest dill from my indoor garden?
You can start harvesting dill leaves once the plant is about 6-8 inches tall. Simply snip off the leaves with scissors or your fingers. Avoid removing more than one-third of the plant at a time, as this can stunt its growth. Regular harvesting encourages the plant to produce more leaves. You can also harvest the dill seeds once the flower heads have dried and turned brown. Dill seeds have a stronger flavor than the leaves and can be used in pickling, soups, and stews.
What are some common pests and diseases that affect indoor dill plants?
Common pests that can affect indoor dill plants include aphids, spider mites, and whiteflies. These pests can be controlled with insecticidal soap or neem oil. Ensure that you spray all parts of the plant, including the undersides of the leaves. Overwatering can lead to fungal diseases such as powdery mildew and root rot. To prevent these diseases, ensure that your dill plant has good air circulation and well-draining soil. Avoid overcrowding your plants and water them in the morning so that the leaves have time to dry before nightfall.
Can I grow dill from seed indoors, or is it better to start with a transplant?
Growing dill from seed indoors is relatively easy and often more successful than transplanting. Dill seedlings can be sensitive to transplant shock, so starting from seed allows them to establish their roots in their final container. Sow the seeds directly into your potting mix and keep the soil moist until they germinate. Once the seedlings have emerged, thin them out to allow for adequate spacing.
How long does it take for dill to grow from seed to harvest indoors?
Dill typically takes about 40-60 days to grow from seed to harvest indoors. The exact time will depend on factors such as temperature, light, and soil fertility. Provide your dill plant with optimal growing conditions to ensure a faster harvest.
Can I dry or freeze dill from my indoor garden?
Yes, you can dry or freeze dill to preserve it for later use. To dry dill, hang the stems upside down in a cool, dry place until the leaves are brittle. You can also use a dehydrator to speed up the drying process. To freeze dill, chop the leaves and place them in ice cube trays with water or olive oil. Once frozen, transfer the cubes to a freezer bag for long-term storage.
What are some creative ways to use fresh dill from my kitchen garden?
Fresh dill can be used in a variety of dishes, including salads, soups, dips, sauces, and seafood. It pairs well with cucumbers, yogurt, cream cheese, and lemon. You can also use dill to flavor pickles, vinegars, and oils. Add fresh dill to your scrambled eggs, omelets, or frittatas for a burst of flavor. Garnish your grilled fish or chicken with fresh dill sprigs for an elegant presentation. The possibilities are endless!
Is it possible to grow dill indoors year-round?
Yes, with proper care and attention, you can grow dill indoors year-round. Provide your dill plant with adequate light, water, and nutrients, and it will continue to produce fresh leaves throughout the year. You may need to adjust your watering and fertilizing schedule depending on the season. During the winter months, when daylight hours are shorter, you may need to supplement with grow lights to ensure that your dill plant receives enough light.
Leave a Comment