
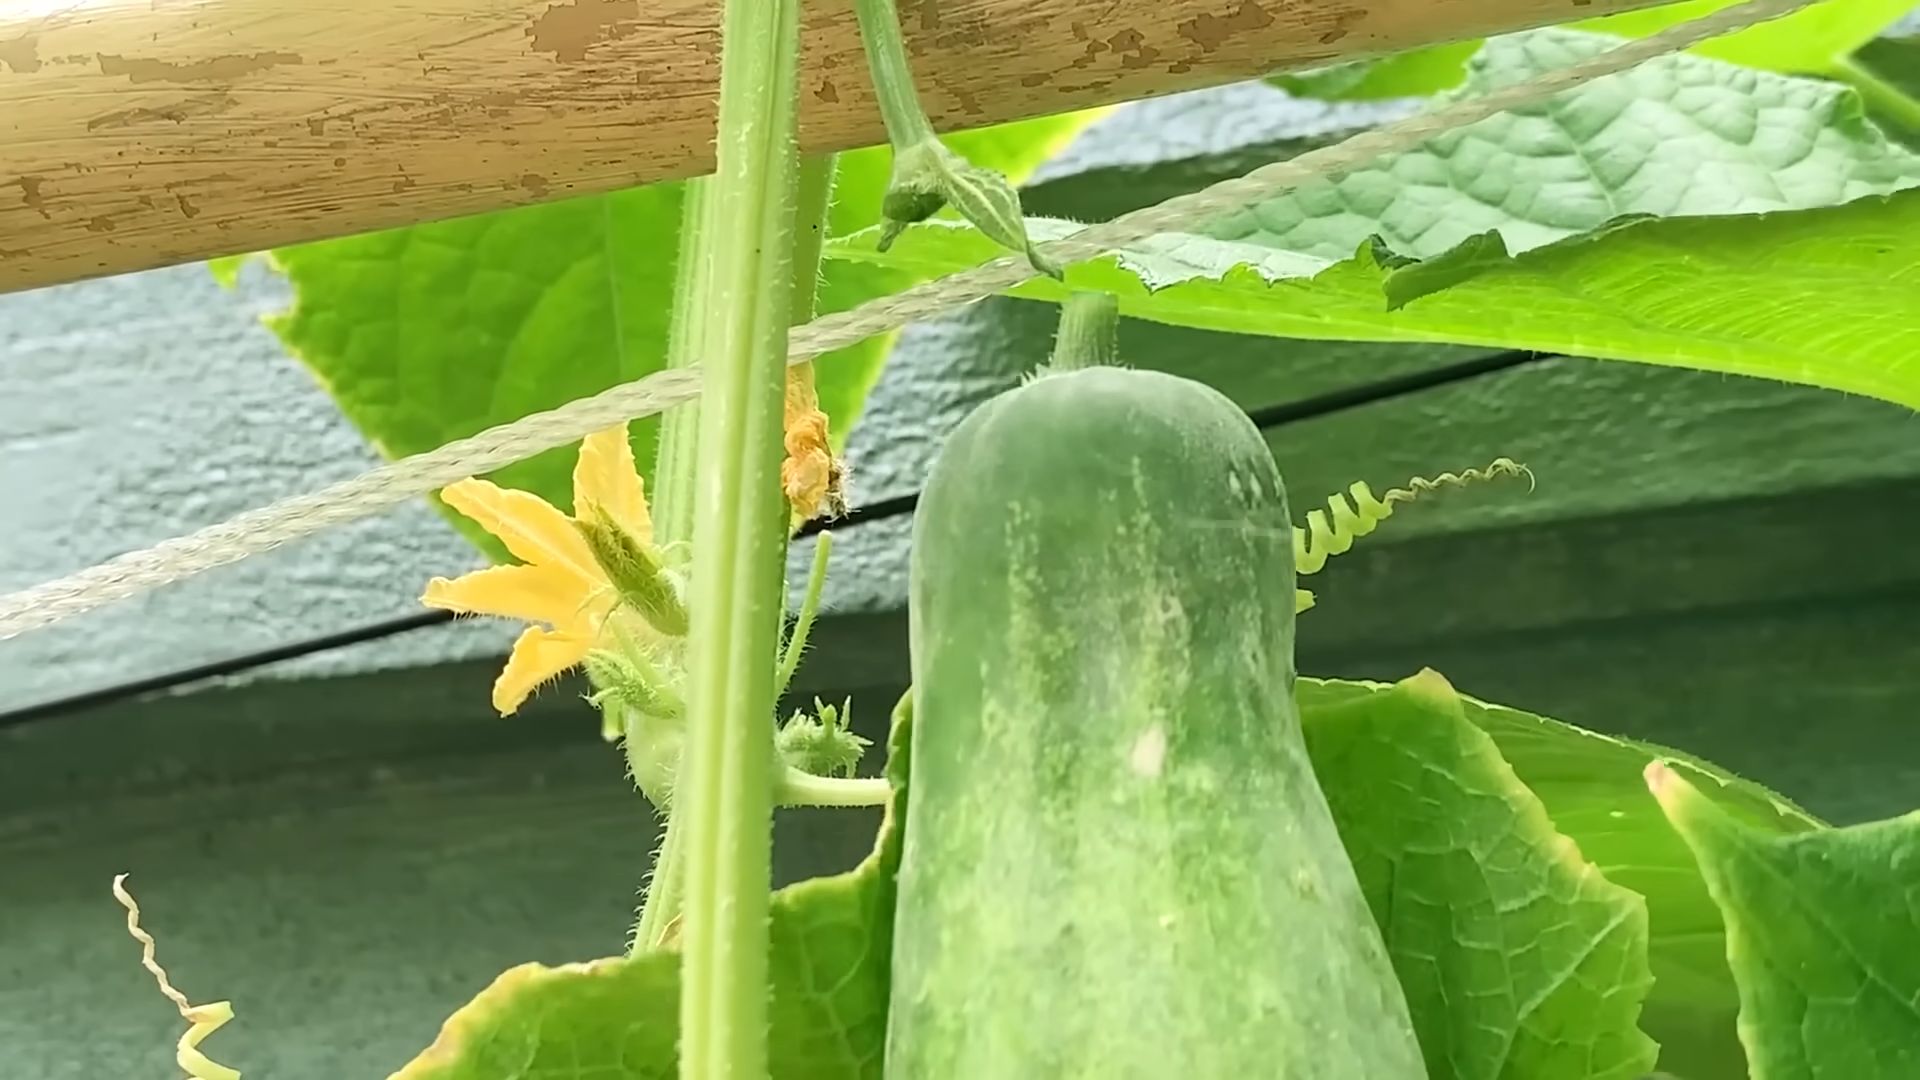
Grow Cucumbers at Home, you say? Absolutely! Imagine biting into a crisp, refreshing cucumber you nurtured from a tiny seed, right in your own backyard. Forget those bland, store-bought cucumbers – we’re talking about flavor explosions and the satisfaction of knowing exactly where your food comes from.
For centuries, cucumbers have been a staple in diets around the world, from ancient Egypt where they were prized for their cooling properties, to the elaborate gardens of the Roman emperors. Today, the desire to connect with nature and enjoy fresh, healthy produce is driving a resurgence in home gardening, and growing cucumbers is a fantastic place to start.
But let’s be honest, sometimes gardening can feel a little overwhelming, right? That’s where these DIY tricks and hacks come in. I’m here to share some simple, effective methods to help you grow cucumbers at home successfully, even if you’re a complete beginner. We’ll cover everything from choosing the right varieties for your space to dealing with common pests and diseases. So, ditch the gardening gloves intimidation and get ready to enjoy a bountiful harvest of delicious, homegrown cucumbers!
Grow Your Own Delicious Spinach: A Beginner’s Guide
Hey there, fellow gardening enthusiasts! I’m so excited to share my secrets to growing vibrant, healthy spinach right in your own backyard (or even on your balcony!). Spinach is a nutritional powerhouse, packed with vitamins and minerals, and nothing beats the taste of freshly harvested, homegrown greens. Trust me, once you taste the difference, you’ll never go back to store-bought!
This guide will walk you through every step, from choosing the right variety to harvesting your bountiful crop. Let’s get started!
Choosing the Right Spinach Variety
First things first, let’s talk spinach varieties. Not all spinach is created equal, and choosing the right one for your climate and growing conditions is crucial for success. Here are a few popular options:
* Savoy Spinach: This type has crinkled, curly leaves and a slightly stronger flavor. It’s cold-hardy and great for fall and winter harvests. Examples include ‘Bloomsdale Long Standing’ and ‘Melody’.
* Smooth-Leaf Spinach: As the name suggests, this variety has smooth, flat leaves. It’s easier to clean and has a milder flavor. ‘Space’ and ‘Olympia’ are popular choices.
* Semi-Savoy Spinach: This is a hybrid between Savoy and smooth-leaf spinach, offering a good balance of flavor and texture. ‘Tyee’ is a well-regarded semi-savoy variety.
* Malabar Spinach: Okay, technically not *true* spinach, but it’s a heat-tolerant alternative that thrives in warm climates where regular spinach struggles. It has thick, fleshy leaves and a slightly different flavor profile.
My Recommendation: If you’re a beginner, I suggest starting with a smooth-leaf variety like ‘Space’ or ‘Olympia’. They’re relatively easy to grow and have a mild flavor that most people enjoy. If you live in a colder climate, ‘Bloomsdale Long Standing’ is a fantastic choice.
Preparing Your Spinach Bed
Spinach loves well-drained, fertile soil with a slightly acidic to neutral pH (around 6.5 to 7.0). Here’s how to prepare your garden bed:
* Sunlight: Spinach needs at least 3-6 hours of sunlight per day. Morning sun is ideal, as it helps dry the leaves and prevent fungal diseases.
* Soil: Amend your soil with plenty of compost or well-rotted manure. This will improve drainage, add nutrients, and create a loose, friable texture that spinach roots love.
* Drainage: Make sure your soil drains well. Spinach doesn’t like to sit in soggy soil, which can lead to root rot. If your soil is heavy clay, consider adding sand or perlite to improve drainage.
* Weed Removal: Remove all weeds from the planting area. Weeds compete with spinach for nutrients and water.
* Fertilizer: You can incorporate a slow-release organic fertilizer into the soil before planting. Look for one that’s high in nitrogen, which promotes leafy growth.
My Tip: I always do a soil test before planting anything. It’s a simple and inexpensive way to determine the pH and nutrient levels of your soil, so you can make the necessary amendments. You can buy a soil test kit at most garden centers or send a sample to your local agricultural extension office.
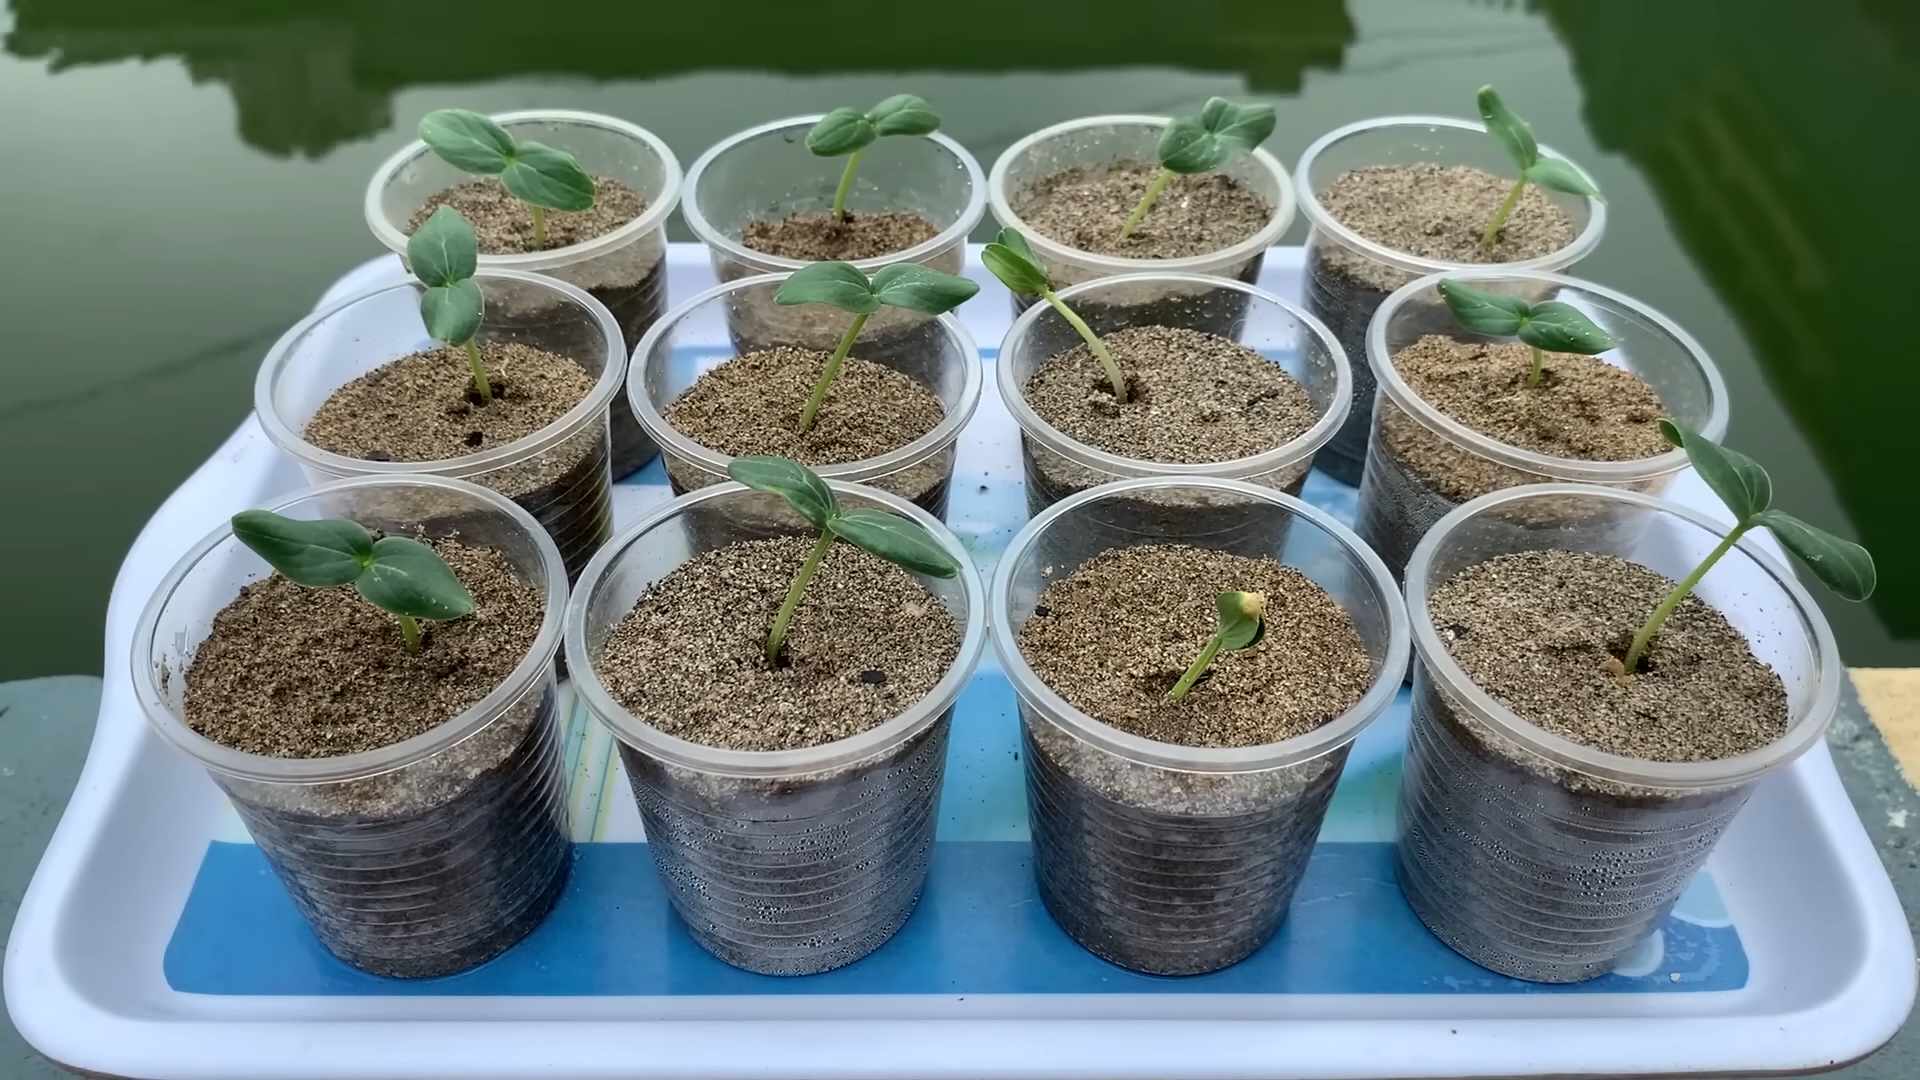
Planting Your Spinach Seeds
Spinach is a cool-season crop, meaning it grows best in the spring and fall. Here’s how to plant your seeds:
1. Timing: Plant spinach seeds 4-6 weeks before the last expected frost in the spring, or 6-8 weeks before the first expected frost in the fall.
2. Sowing: Sow seeds ½ inch deep and 1 inch apart in rows that are 12-18 inches apart.
3. Watering: Gently water the soil after planting. Keep the soil consistently moist until the seeds germinate.
4. Germination: Spinach seeds typically germinate in 5-10 days, depending on the temperature.
5. Thinning: Once the seedlings emerge, thin them to 3-6 inches apart. This will give them enough space to grow and prevent overcrowding. You can eat the thinned seedlings as microgreens!
My Trick: To speed up germination, you can soak the spinach seeds in water for 24 hours before planting. This will soften the seed coat and make it easier for the seedlings to emerge.
Caring for Your Spinach Plants
Once your spinach plants are established, here’s how to keep them healthy and productive:
* Watering: Water regularly, especially during dry periods. Spinach needs consistent moisture to thrive. Aim for about 1 inch of water per week.
* Weeding: Keep the area around your spinach plants free of weeds. Hand-pull weeds carefully to avoid disturbing the spinach roots.
Hey there, fellow gardening enthusiasts! I’m so excited to share my secrets to growing vibrant, healthy spinach right in your own backyard (or even on your balcony!). Spinach is a nutritional powerhouse, packed with vitamins and minerals, and nothing beats the taste of freshly harvested, homegrown greens. Trust me, once you taste the difference, you’ll never go back to store-bought!
This guide will walk you through every step, from choosing the right variety to harvesting your bountiful crop. Let’s get started!
Choosing the Right Spinach Variety
First things first, let’s talk spinach varieties. Not all spinach is created equal, and choosing the right one for your climate and growing conditions is crucial for success. Here are a few popular options:
* Savoy Spinach: This type has crinkled, curly leaves and a slightly stronger flavor. It’s cold-hardy and great for fall and winter harvests. Examples include ‘Bloomsdale Long Standing’ and ‘Melody’.
* Smooth-Leaf Spinach: As the name suggests, this variety has smooth, flat leaves. It’s easier to clean and has a milder flavor. ‘Space’ and ‘Olympia’ are popular choices.
* Semi-Savoy Spinach: This is a hybrid between Savoy and smooth-leaf spinach, offering a good balance of flavor and texture. ‘Tyee’ is a well-regarded semi-savoy variety.
* Malabar Spinach: Okay, technically not *true* spinach, but it’s a heat-tolerant alternative that thrives in warm climates where regular spinach struggles. It has thick, fleshy leaves and a slightly different flavor profile.
My Recommendation: If you’re a beginner, I suggest starting with a smooth-leaf variety like ‘Space’ or ‘Olympia’. They’re relatively easy to grow and have a mild flavor that most people enjoy. If you live in a colder climate, ‘Bloomsdale Long Standing’ is a fantastic choice.
Preparing Your Spinach Bed
Spinach loves well-drained, fertile soil with a slightly acidic to neutral pH (around 6.5 to 7.0). Here’s how to prepare your garden bed:
* Sunlight: Spinach needs at least 3-6 hours of sunlight per day. Morning sun is ideal, as it helps dry the leaves and prevent fungal diseases.
* Soil: Amend your soil with plenty of compost or well-rotted manure. This will improve drainage, add nutrients, and create a loose, friable texture that spinach roots love.
* Drainage: Make sure your soil drains well. Spinach doesn’t like to sit in soggy soil, which can lead to root rot. If your soil is heavy clay, consider adding sand or perlite to improve drainage.
* Weed Removal: Remove all weeds from the planting area. Weeds compete with spinach for nutrients and water.
* Fertilizer: You can incorporate a slow-release organic fertilizer into the soil before planting. Look for one that’s high in nitrogen, which promotes leafy growth.
My Tip: I always do a soil test before planting anything. It’s a simple and inexpensive way to determine the pH and nutrient levels of your soil, so you can make the necessary amendments. You can buy a soil test kit at most garden centers or send a sample to your local agricultural extension office.
Planting Your Spinach Seeds
Spinach is a cool-season crop, meaning it grows best in the spring and fall. Here’s how to plant your seeds:
1. Timing: Plant spinach seeds 4-6 weeks before the last expected frost in the spring, or 6-8 weeks before the first expected frost in the fall.
2. Sowing: Sow seeds ½ inch deep and 1 inch apart in rows that are 12-18 inches apart.
3. Watering: Gently water the soil after planting. Keep the soil consistently moist until the seeds germinate.
4. Germination: Spinach seeds typically germinate in 5-10 days, depending on the temperature.
5. Thinning: Once the seedlings emerge, thin them to 3-6 inches apart. This will give them enough space to grow and prevent overcrowding. You can eat the thinned seedlings as microgreens!
My Trick: To speed up germination, you can soak the spinach seeds in water for 24 hours before planting. This will soften the seed coat and make it easier for the seedlings to emerge.
Caring for Your Spinach Plants
Once your spinach plants are established, here’s how to keep them healthy and productive:
* Watering: Water regularly, especially during dry periods. Spinach needs consistent moisture to thrive. Aim for about 1 inch of water per week.
* Weeding: Keep the area around your spinach plants free of weeds. Hand-pull weeds carefully to avoid disturbing the spinach roots.
* Fertilizing: Side-dress your spinach plants with a nitrogen-rich fertilizer every 2-3 weeks. You can use compost tea, fish emulsion, or a commercial organic fertilizer.
* Pest Control: Keep an eye out for pests like aphids, flea beetles, and leaf miners. You can control these pests with insecticidal soap, neem oil, or by hand-picking them off the plants.
* Bolting: Spinach is prone to bolting (going to seed) in hot weather. To prevent bolting, plant spinach in a shady location during the summer months, or choose a bolt-resistant variety.
My Secret Weapon: I love using mulch around my spinach plants. Mulch helps retain moisture, suppress weeds, and keep the soil cool, which can prevent bolting. I use straw, shredded leaves, or wood chips as mulch.
Harvesting Your Spinach
The best part! You can start harvesting spinach leaves as soon as they’re big enough to eat, usually about 4-6 weeks after planting.
1. Harvesting Method: You can harvest individual leaves or cut the entire plant at the base. If you harvest individual leaves, the plant will continue to produce new leaves.
2. Timing: Harvest spinach in the morning, when the leaves are crisp and cool.
3. Storage: Store spinach in the refrigerator for up to a week. Wash the leaves just before using them.
My Pro Tip: For a continuous harvest, plant spinach seeds every 2-3 weeks. This will ensure that you always have a fresh supply of spinach.
Troubleshooting Common Spinach Problems
Even with the best care, you might encounter some problems while growing spinach. Here are a few common issues and how to address them:
* Yellowing Leaves: This can be caused by nutrient deficiencies, overwatering, or underwatering. Make sure your soil is well-drained and that you’re fertilizing regularly.
* Leaf Spots: Leaf spots can be caused by fungal diseases. Improve air circulation by thinning the plants and avoid overhead watering. You can also treat the plants with a fungicide.
* Pests: As mentioned earlier, aphids, flea beetles, and leaf miners can attack spinach plants. Use insecticidal soap, neem oil, or hand-picking to control these pests.
* Bolting: Bolting is a common problem in hot weather. Plant spinach in a shady location or choose a bolt-resistant variety.
My Experience: I once had a terrible aphid infestation on my spinach plants. I tried everything, but nothing seemed to work. Finally, I released ladybugs into my garden, and they devoured the aphids in no time! Ladybugs are a natural and effective way to control aphids and other pests.
Enjoying Your Homegrown Spinach
Now that you’ve harvested your delicious spinach, it’s time to enjoy it! Spinach is incredibly versatile and can be used in a variety of dishes.
* Salads: Add fresh spinach to your salads for a boost of nutrients and flavor.
* Smoothies: Blend spinach into your smoothies for a healthy and delicious drink.
* Soups: Add spinach to your soups for a boost of vitamins and minerals.
* Sautéed: Sauté spinach with garlic and olive oil for a simple and flavorful side dish.
* Omelets: Add spinach to your omelets for a healthy and filling breakfast.
My Favorite Recipe: I love making spinach and feta stuffed chicken breasts. It’s a healthy and delicious meal that’s perfect for a weeknight dinner.
Growing your own spinach is a rewarding experience that will provide you with a fresh, healthy, and delicious source of greens. With a little bit of care and attention, you can enjoy a bountiful harvest of homegrown spinach all season long. Happy gardening!
Conclusion
So, there you have it! Growing cucumbers at home is not only achievable, but it’s also incredibly rewarding. Forget those bland, store-bought cucumbers that lack that fresh, crisp bite. With a little effort and the right techniques, you can cultivate a thriving cucumber patch right in your backyard, balcony, or even on your windowsill.
This DIY approach to cucumber cultivation offers a multitude of benefits. You’ll have access to fresher, more flavorful cucumbers, free from the pesticides and preservatives often found in commercially grown produce. Plus, you’ll experience the satisfaction of nurturing a plant from seed to harvest, connecting with nature in a tangible and meaningful way.
But the real magic lies in the control you have over the entire process. Want to experiment with different varieties? Go for it! Try growing Armenian cucumbers for their mild flavor and thin skin, or perhaps some pickling cucumbers for your next batch of homemade pickles. You can even explore unusual varieties like lemon cucumbers or crystal apple cucumbers for a unique twist.
And don’t think you need a sprawling garden to participate. Container gardening is a fantastic option for those with limited space. Just choose a large enough pot, provide adequate drainage, and select a compact cucumber variety that’s well-suited for container growing. Vertical gardening techniques, such as trellising or using hanging baskets, can also maximize your space and create a stunning visual display.
Consider companion planting to further enhance your cucumber garden. Marigolds can deter pests, while dill attracts beneficial insects. Planting basil nearby can improve the flavor of your cucumbers, and beans can help fix nitrogen in the soil, benefiting your cucumber plants.
Remember to pay close attention to your plants’ needs. Consistent watering, proper fertilization, and regular pruning are essential for healthy growth and abundant yields. Keep an eye out for common cucumber pests and diseases, and take prompt action to address any issues that arise.
Ultimately, the success of your cucumber garden depends on your dedication and willingness to learn. Don’t be afraid to experiment, make mistakes, and adapt your approach as needed. The more you observe your plants and understand their needs, the better equipped you’ll be to cultivate a thriving cucumber patch.
We strongly encourage you to embark on this exciting journey of growing cucumbers at home. It’s a fun, educational, and rewarding experience that will provide you with a bounty of fresh, delicious cucumbers to enjoy all season long. And once you’ve tasted the difference between homegrown and store-bought, you’ll never go back!
So, grab your seeds, prepare your soil, and get ready to experience the joy of growing your own cucumbers. We can’t wait to hear about your successes, challenges, and delicious cucumber creations. Share your experiences, tips, and photos with us in the comments below. Let’s build a community of passionate home gardeners and celebrate the wonders of homegrown cucumbers!
Frequently Asked Questions (FAQ)
What is the best time to start growing cucumbers?
The ideal time to start growing cucumbers depends on your climate. Cucumbers are warm-season vegetables and are sensitive to frost. In most regions, you can start seeds indoors about 3-4 weeks before the last expected frost. Once the soil has warmed up to at least 60°F (15°C), you can transplant the seedlings outdoors. If you live in a warmer climate with a longer growing season, you can directly sow cucumber seeds into the garden after the last frost. Check your local weather forecasts and gardening guides for specific recommendations for your area.
What kind of soil do cucumbers need?
Cucumbers thrive in well-drained, fertile soil that is rich in organic matter. The ideal soil pH for cucumbers is between 6.0 and 7.0. Before planting, amend your soil with compost, aged manure, or other organic materials to improve its fertility and drainage. If your soil is heavy clay, consider adding sand or perlite to improve drainage. A soil test can help you determine the specific nutrient needs of your soil and guide your fertilization strategy.
How much sunlight do cucumbers need?
Cucumbers require at least 6-8 hours of direct sunlight per day to thrive. Choose a planting location that receives plenty of sunlight throughout the day. If you live in a hot climate, some afternoon shade can be beneficial to prevent the plants from overheating. Insufficient sunlight can lead to stunted growth, reduced yields, and increased susceptibility to pests and diseases.
How often should I water my cucumber plants?
Cucumbers need consistent moisture to produce healthy fruits. Water your cucumber plants deeply and regularly, especially during hot, dry weather. Aim to keep the soil consistently moist but not waterlogged. A good rule of thumb is to water when the top inch of soil feels dry to the touch. Mulching around your cucumber plants can help retain moisture and suppress weeds. Drip irrigation or soaker hoses are excellent options for delivering water directly to the roots of the plants.
What are some common cucumber pests and diseases?
Cucumbers are susceptible to a variety of pests and diseases, including aphids, cucumber beetles, squash bugs, powdery mildew, and downy mildew. Regularly inspect your plants for signs of pests or diseases. Handpick pests whenever possible, and use organic pest control methods such as insecticidal soap or neem oil to control infestations. To prevent diseases, ensure good air circulation around your plants, avoid overhead watering, and choose disease-resistant cucumber varieties.
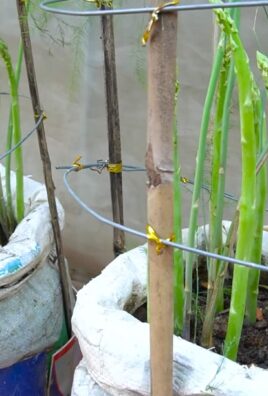
Do I need to trellis my cucumber plants?
Trellising cucumbers is highly recommended, especially for vining varieties. Trellising provides support for the plants, improves air circulation, and makes harvesting easier. It also helps to save space in the garden and reduces the risk of fruit rot. You can use a variety of trellising methods, such as A-frame trellises, vertical trellises, or even tomato cages.
How do I know when my cucumbers are ready to harvest?
Cucumbers are typically ready to harvest when they reach the desired size and color for their variety. Check the seed packet or plant tag for specific harvesting instructions. Generally, cucumbers should be firm to the touch and have a smooth, even skin. Overripe cucumbers can become bitter and seedy. Harvest cucumbers regularly to encourage continued production.
Can I grow cucumbers in containers?
Yes, you can successfully grow cucumbers in containers. Choose a large container that is at least 12 inches in diameter and has good drainage. Select a compact cucumber variety that is well-suited for container growing. Use a high-quality potting mix and provide adequate support for the plants. Water and fertilize your container-grown cucumbers regularly.
How do I prevent my cucumbers from becoming bitter?
Cucumber bitterness is often caused by stress factors such as inconsistent watering, high temperatures, or poor soil conditions. To prevent bitterness, ensure that your cucumber plants receive consistent moisture, adequate sunlight, and fertile soil. Choose cucumber varieties that are less prone to bitterness. You can also try peeling the skin off the cucumbers before eating them, as the bitterness is often concentrated in the skin.
What are some good companion plants for cucumbers?
Several plants can benefit cucumbers when planted nearby. Marigolds deter pests, dill attracts beneficial insects, basil improves the flavor of cucumbers, and beans fix nitrogen in the soil. Avoid planting cucumbers near aromatic herbs like sage, as they can inhibit cucumber growth.


Leave a Comment