
Grow corn kitchen garden dreams can absolutely become a reality, even if you don’t have acres of farmland! Imagine stepping outside your back door and harvesting fresh, sweet corn for dinner – it’s a lot easier than you think. For centuries, corn has been a staple crop, deeply woven into the cultures of indigenous peoples across the Americas, providing sustenance and playing a vital role in their traditions. Now, you can bring a piece of that history and self-sufficiency to your own home.
But let’s be honest, the thought of growing corn might seem intimidating. That’s where these DIY tricks and hacks come in! I’m going to share some simple, effective methods to help you successfully grow corn kitchen garden, even in small spaces like balconies or patios. We’ll cover everything from choosing the right varieties to maximizing your yield.
Why do you need these tricks? Because store-bought corn just doesn’t compare to the flavor of homegrown! Plus, knowing exactly where your food comes from and how it was grown is incredibly empowering. So, get ready to roll up your sleeves and discover the joy of growing your own delicious corn, right in your own backyard (or balcony!).
Growing Corn in Your Own Kitchen Garden: Here’s How!
Hey guys! Have you ever wondered if you can grow corn in your own garden? The answer is a clear YES! And I’ll show you how you can easily do it yourself. It’s not as hard as you might think, and fresh, homegrown corn just tastes unbeatable. Let’s get started!
What you need for growing corn:
- Corn seeds: Choose a variety that is suitable for your region. There are many different types, from sweet corn to popcorn. It’s best to get advice from a specialty store.
- A sunny location: Corn loves the sun! At least 6-8 hours of direct sunlight per day is ideal.
- Well-draining soil: The soil should be loose and rich in humus. Heavy, clay soils should be improved with compost or sand.
- Compost or organic fertilizer: Corn is a heavy feeder and needs a lot of nutrients.
- Watering can or garden hose: For regular watering.
- Garden tools: Spade, rake, possibly a trowel.
- Patience: Corn takes time to grow!
Preparation: The Foundation for a Bountiful Harvest
Before we start planting, we need to prepare the soil. This is super important so the corn can grow well later.
- Loosen the soil: Take a spade and loosen the soil thoroughly. It’s best to turn it over completely. This helps the roots grow deep later on.
- Remove weeds: Remove any weeds growing in the bed. Weeds steal nutrients from the corn, and we don’t want that.
- Work in compost: Generously spread compost or organic fertilizer on the bed and work it into the soil with a rake. This gives the corn a good nutrient boost.
- Level the soil: Rake the soil smooth so that it is nice and even. This makes planting easier.
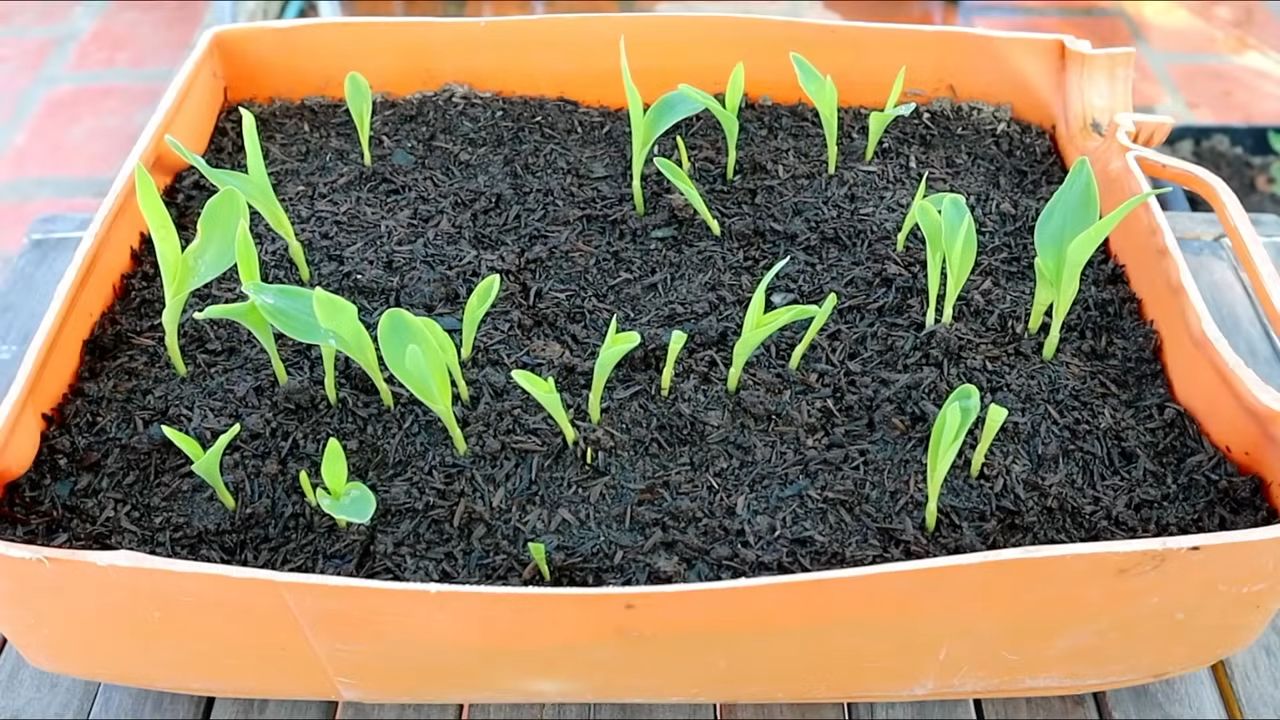
Sowing: Getting the Corn in the Ground
Now for the exciting part: we’re sowing the corn!
- Make rows: Use a rake or a stick to draw rows in the soil. The rows should be about 60-75 cm (24-30 inches) apart. This gives the corn plants enough space to grow.
- Place the seeds: Place the corn seeds in the rows. The distance between the seeds should be about 20-25 cm (8-10 inches). Make sure the seeds are about 2-3 cm (about 1 inch) deep in the soil.
- Cover with soil: Cover the seeds with soil and press down lightly.
- Water: Gently water the rows. Make sure the soil is moist, but not wet.
Important Tip: Corn is a wind-pollinator. This means it pollinates best when planted in a block, not in a single row. So, it’s best to plant several rows next to each other.
Care: Ensuring the Corn Thrives
After sowing, it’s important to take good care of the corn so it thrives.
- Water regularly: Corn needs regular water, especially during the growth phase and when the cobs are forming. It’s best to water early in the morning or late in the evening so the water doesn’t evaporate as quickly.
- Weed: Regularly remove weeds that grow between the corn plants. Weeds steal nutrients from the corn, and we don’t want that.
- Fertilize: Fertilize the corn once or twice during the growing season with compost or organic fertilizer. This gives it an extra nutrient boost.
- Watch for pests: Keep an eye out for pests like corn borers or aphids. You can use organic pesticides if necessary.
- Staking: If the corn plants get very tall, it may be a good idea to support them so they don’t fall over.
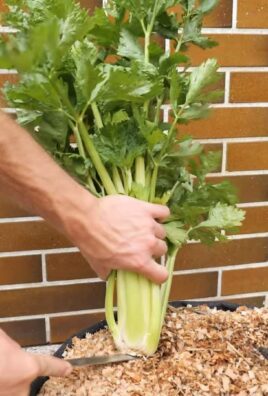
The Harvest: The Reward for Your Efforts
After about 80-100 days, the time has finally come: you can harvest your homegrown corn!
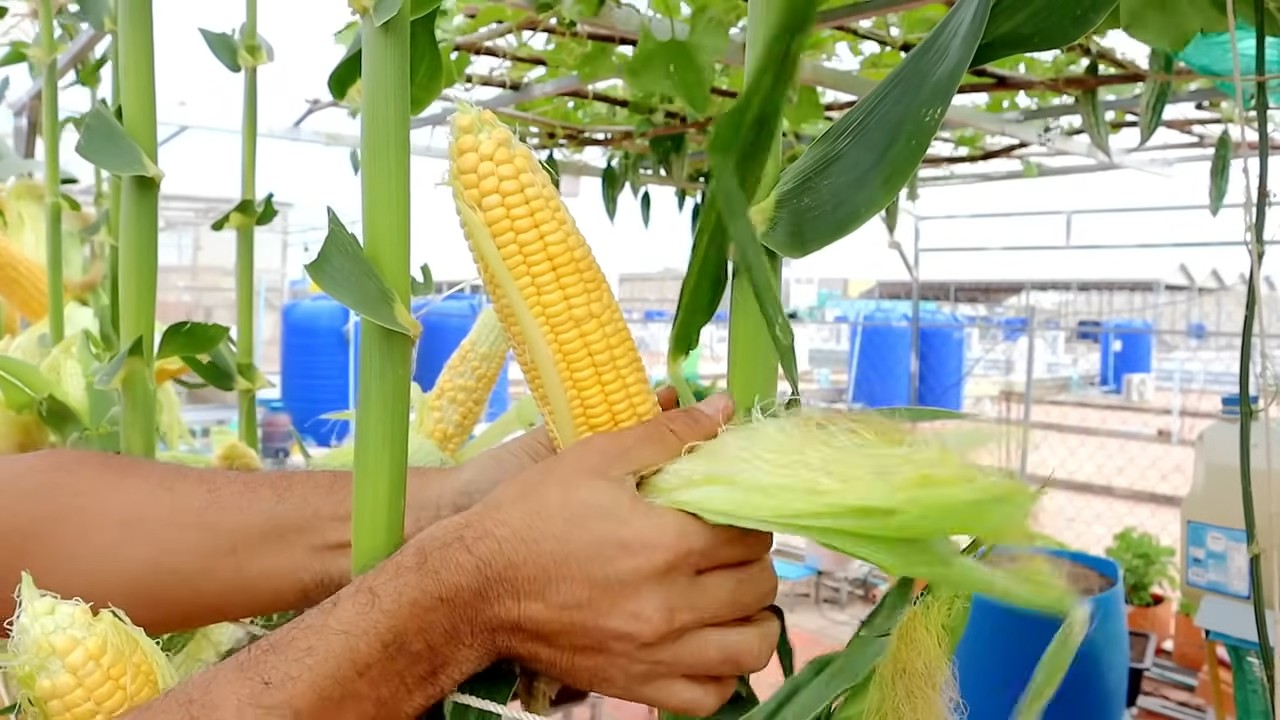
- Recognizing ripeness: The corn cobs are ripe when the silks are brown and dry, and the cobs feel plump.
- Harvesting the cobs: Carefully break the corn cobs off the plants.
- Enjoy: Now you can enjoy your homegrown corn! It tastes best fresh off the grill or boiled with butter and salt.
Extra Tip: If you have grown popcorn, you will need to let the cobs dry for a few weeks after harvesting before you can turn them into popcorn.
Common Problems and Solutions:
- Poor germination: If the seeds don’t germinate, there could be several reasons. Perhaps the soil was too dry or too cold. Make sure the soil is moist and the soil temperature is at least 10 degrees Celsius (50°F).
- Yellow leaves: Yellow leaves can be a sign of a nutrient deficiency. Fertilize the corn with compost or organic fertilizer.
- Pests: Pests like corn borers or aphids can infest the corn. Use organic pesticides if necessary.
- Falling over: If the corn plants fall over, it could be due to strong wind or a weak stalk. Support the plants with sticks or bamboo stakes.
Additional Tips for a Successful Corn Harvest:
Practice crop rotation: Don’t grow corn in the same spot every year. Rotate your crops to avoid depleting the soil of specific nutrients.äen, um den Boden zu verbessern.
* Sortenwahl: Wählt eine Maissorte, die für eure Region und eure Bedürfnisse geeignet ist.
* Beobachtung: Beobachtet eure Maispflanzen regelmäßig, um Probleme frühzeitig zu erkennen und zu beheben.
Ich hoffe, diese Anleitung hilft euch dabei, euren eigenen Mais im Küchengarten anzubauen. Es ist wirklich ein tolles Gefühl, die eigenen Früchte zu ernten und zu genießen. Viel Spaß beim Gärtnern! Und denkt daran: Geduld ist der Schlüssel zum Erfolg!
Conclusion
So, there you have it! Growing your own corn, even in a limited space like a kitchen garden, is not only achievable but also incredibly rewarding. This DIY trick transforms the seemingly daunting task of corn cultivation into a manageable and enjoyable project, bringing the taste of summer freshness right to your table. Forget the store-bought corn, often lacking in flavor and freshness; imagine sinking your teeth into a sweet, juicy ear of corn that you nurtured from seed to harvest. The difference is truly remarkable.
This method isn’t just about convenience; it’s about control. You have complete control over the growing environment, ensuring your corn is free from harmful pesticides and herbicides. You can choose the specific variety of corn that suits your taste preferences, whether you prefer the classic sweetness of sweet corn or the robust flavor of heirloom varieties. Plus, the satisfaction of harvesting your own food is an unparalleled experience.
But the benefits don’t stop there. Growing corn in your kitchen garden is also a fantastic way to teach children about the food cycle and the importance of sustainable living. It’s a hands-on learning experience that fosters a deeper appreciation for nature and the origins of our food.
Ready to take your kitchen garden to the next level?
Consider these variations to personalize your corn-growing experience:
* **Succession Planting:** Plant corn seeds in staggered intervals (every two weeks) to ensure a continuous harvest throughout the growing season. This way, you’ll have a steady supply of fresh corn for weeks on end.
* **Companion Planting:** Maximize your garden space by planting companion plants alongside your corn. Beans, squash, and cucumbers are excellent choices, as they provide mutual benefits and help to deter pests.
* **Container Gardening:** If you’re truly limited on space, experiment with growing dwarf corn varieties in large containers. Ensure the containers have adequate drainage and provide sufficient sunlight.
* **Different Varieties:** Don’t be afraid to experiment with different corn varieties! Try growing colorful Indian corn for decorative purposes or popcorn kernels for a fun family activity.
This DIY trick for growing corn in your kitchen garden is more than just a gardening technique; it’s an invitation to connect with nature, cultivate your own food, and experience the joy of homegrown goodness. It’s a simple yet powerful way to enhance your culinary creations and embrace a more sustainable lifestyle.
We encourage you to give this method a try and share your experiences with us! Let us know what varieties you planted, what challenges you faced, and what successes you celebrated. Your insights will help other gardeners embark on their own corn-growing adventures. Share your photos and stories on social media using [Your Hashtag Here] and let’s build a community of homegrown corn enthusiasts! So, grab your seeds, prepare your soil, and get ready to enjoy the sweet taste of success. Happy gardening!
Frequently Asked Questions (FAQ)
Q: What is the best type of corn to grow in a kitchen garden?
A: The best type of corn for a kitchen garden depends on your space and preferences. Sweet corn varieties are generally popular due to their delicious flavor and relatively compact size. Look for varieties labeled as “early maturing” or “bush” types, as these tend to be better suited for smaller spaces. Dwarf corn varieties are also an excellent option for container gardening. Consider your local climate and growing season when selecting your corn variety.
Q: How much sunlight does corn need to grow successfully?
A: Corn requires at least 6-8 hours of direct sunlight per day to thrive. Choose a location in your kitchen garden that receives ample sunlight throughout the day. If you’re growing corn in containers, ensure you can move them to a sunnier spot if needed. Insufficient sunlight can lead to stunted growth and poor ear development.
Q: What type of soil is best for growing corn?
A: Corn prefers well-drained, fertile soil that is rich in organic matter. Amend your soil with compost or well-rotted manure before planting to improve its fertility and drainage. A slightly acidic to neutral soil pH (around 6.0 to 7.0) is ideal. Conduct a soil test to determine your soil’s pH and nutrient levels, and adjust accordingly.
Q: How often should I water my corn plants?
A: Corn plants need consistent moisture, especially during germination and ear development. Water deeply and regularly, ensuring the soil remains consistently moist but not waterlogged. Check the soil moisture level regularly by sticking your finger into the soil; if the top inch feels dry, it’s time to water. During hot, dry weather, you may need to water more frequently.
Q: How do I pollinate corn if I’m only growing a few plants?
A: Corn is wind-pollinated, so if you’re only growing a few plants, you may need to assist with pollination. When the tassels (the male flowers at the top of the plant) begin to shed pollen, gently shake the plants to release the pollen. You can also collect pollen from the tassels and sprinkle it onto the silks (the female flowers that emerge from the developing ears). Repeat this process for several days to ensure adequate pollination.
Q: How do I know when my corn is ready to harvest?
A: Several indicators can help you determine when your corn is ready to harvest. The silks should turn brown and dry, and the ear should feel plump and full. You can also gently peel back a portion of the husk and puncture a kernel with your fingernail. If the liquid that comes out is milky, the corn is ready to harvest. If the liquid is clear, it’s not quite ready; if it’s doughy, it’s overripe.
Q: What are some common pests and diseases that affect corn?
A: Common pests that affect corn include corn earworms, aphids, and Japanese beetles. Diseases include corn smut, rust, and leaf blight. Regularly inspect your plants for signs of pests or diseases and take appropriate action, such as using organic pesticides or fungicides. Companion planting can also help to deter pests and diseases.
Q: Can I grow corn in containers?
A: Yes, you can grow corn in containers, but you’ll need to choose a dwarf or compact variety and use a large container (at least 12 inches in diameter and depth). Ensure the container has adequate drainage and provide sufficient sunlight and water. You may also need to fertilize more frequently, as container-grown plants tend to deplete nutrients more quickly.
Q: How can I improve the yield of my corn plants?
A: To improve the yield of your corn plants, ensure they receive adequate sunlight, water, and nutrients. Amend your soil with compost or manure before planting and fertilize regularly with a balanced fertilizer. Assist with pollination if necessary, and protect your plants from pests and diseases. Consider succession planting to extend your harvest season.
Q: Is it possible to grow organic corn in my kitchen garden?
A: Absolutely! Growing organic corn is a great way to ensure you’re consuming healthy, pesticide-free produce. Use organic seeds, amend your soil with organic compost and manure, and use organic pest control methods. Avoid using synthetic fertilizers, pesticides, and herbicides.
Leave a Comment