
Grow Coriander in Bottles: Imagine fresh, fragrant coriander always at your fingertips, ready to elevate your meals with its zesty flavor. No more last-minute grocery runs or wilted bunches from the supermarket! This isn’t just a dream; it’s an achievable reality with our simple and effective DIY guide to growing coriander in bottles.
For centuries, coriander has been a staple in cuisines around the globe, from the vibrant curries of India to the fresh salsas of Latin America. Its use dates back to ancient Egypt, where it was even found in Tutankhamun’s tomb! This humble herb has a rich history, and now, you can easily cultivate your own piece of that history, right on your windowsill.
Why should you learn this DIY trick? Well, let’s face it, buying fresh herbs can be expensive, and they often spoil quickly. Plus, who doesn’t love the satisfaction of growing their own food? This method of growing coriander in bottles is perfect for apartment dwellers, beginner gardeners, or anyone looking for a space-saving and cost-effective way to enjoy fresh herbs. I’m excited to share this easy-to-follow guide that will have you harvesting your own coriander in no time. Let’s get started!
Koriander im Flaschengarten: Dein DIY-Guide für frisches Grün
Hey Gartenfreunde! Habt ihr auch manchmal das Problem, dass der Koriander im Supermarkt schon welk ist, bevor ihr ihn überhaupt verwenden könnt? Oder dass er im Garten einfach nicht so richtig wachsen will? Keine Sorge, ich habe die Lösung: Koriander im Flaschengarten! Das ist nicht nur super einfach, sondern auch platzsparend und sieht richtig cool aus. Und das Beste: Ihr habt immer frischen Koriander griffbereit. Lasst uns loslegen!
Was du brauchst:
* Eine Plastikflasche (am besten eine 1,5-Liter-Flasche, aber auch größere oder kleinere Flaschen funktionieren)
* Ein scharfes Messer oder eine Schere
* Erde (am besten Anzuchterde oder Kräutererde)
* Koriandersamen (gibt’s im Gartencenter oder online)
* Wasser
* Optional: Kies oder Blähton für die Drainage
* Optional: Sprühflasche
Die Vorbereitung: Die Flasche zum Garten machen
Bevor wir mit dem Pflanzen beginnen können, müssen wir die Flasche vorbereiten. Das ist aber wirklich kinderleicht.
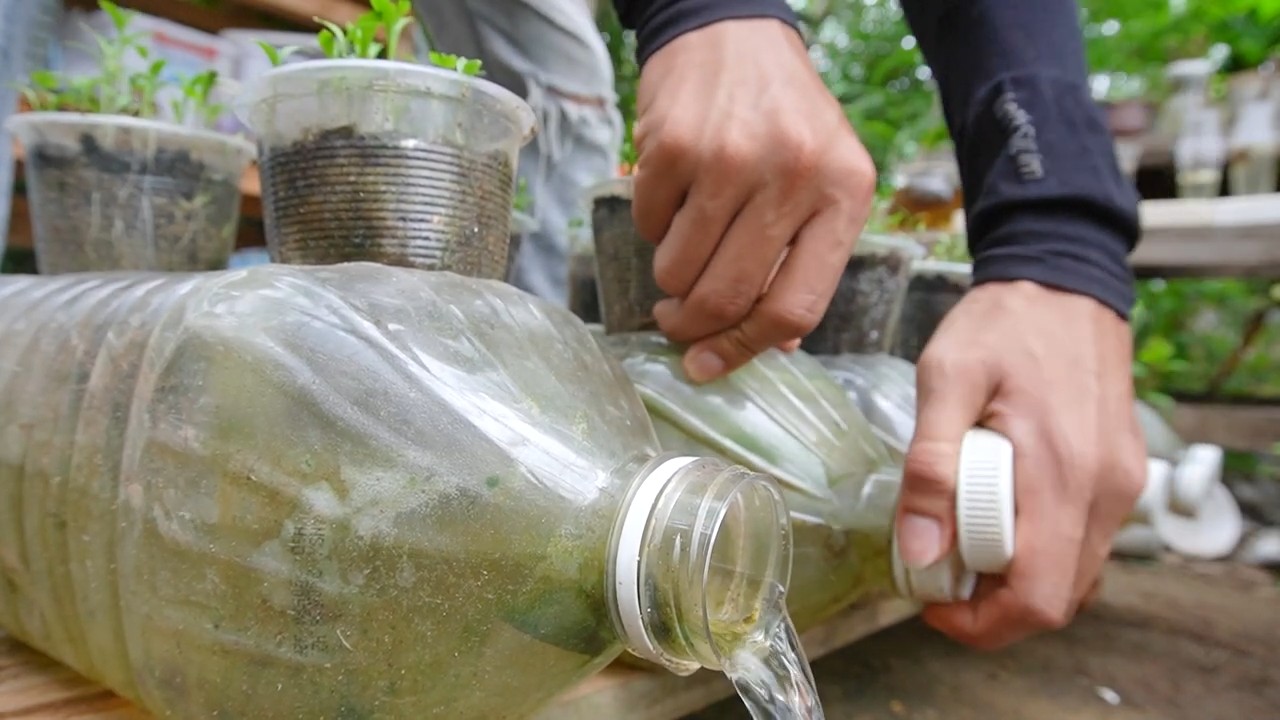
1. Flasche reinigen: Zuerst spülen wir die Flasche gründlich mit warmem Wasser aus. So entfernen wir alle Rückstände und sorgen für eine saubere Umgebung für unsere Korianderpflanzen.
2. Flasche schneiden: Jetzt kommt der spannende Teil: das Schneiden der Flasche. Hier gibt es zwei Möglichkeiten, je nachdem, wie du deinen Flaschengarten gestalten möchtest:
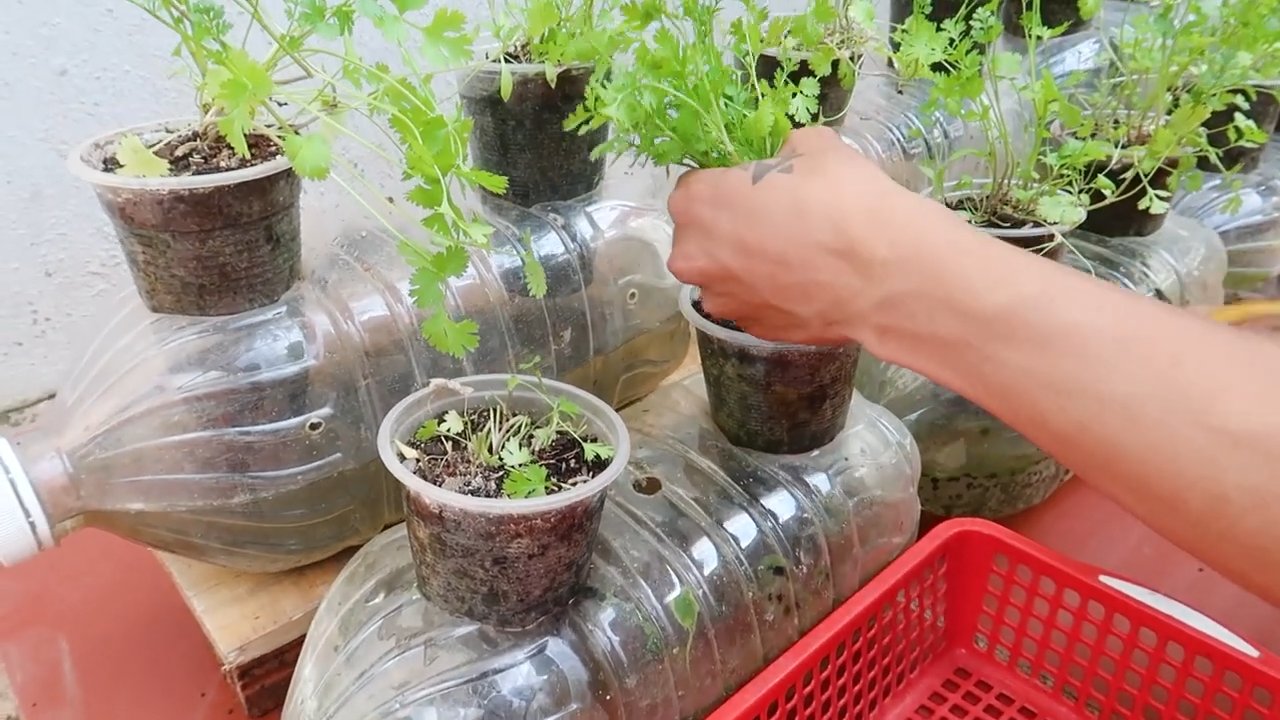
* Variante 1: Horizontaler Schnitt: Schneide die Flasche etwa 10-15 cm vom Boden entfernt horizontal durch. Du erhältst zwei Teile: den unteren Teil (den wir als Pflanzgefäß nutzen) und den oberen Teil (den wir später als eine Art Mini-Gewächshaus verwenden können).
* Variante 2: Vertikaler Schnitt: Schneide die Flasche der Länge nach auf, aber nicht ganz durch. Lasse am Flaschenhals ein Stück ungeschnitten, sodass die Flasche noch zusammenhält. So kannst du die Flasche aufklappen und hast eine größere Pflanzfläche.
Wichtig: Sei vorsichtig beim Schneiden! Am besten verwendest du ein scharfes Messer oder eine Schere und schneidest langsam und kontrolliert.
3. Drainage vorbereiten (optional): Wenn du möchtest, kannst du eine Drainageschicht in den Boden der Flasche geben. Das verhindert Staunässe und sorgt dafür, dass die Wurzeln nicht faulen. Gib dazu einfach eine Schicht Kies oder Blähton (ca. 2-3 cm hoch) in den unteren Teil der Flasche.
Die Aussaat: Koriander zum Leben erwecken
Jetzt kommt der spaßige Teil: das Pflanzen!
1. Erde einfüllen: Fülle die Flasche mit Erde. Achte darauf, dass die Erde locker und luftig ist. Lass oben etwa 2-3 cm Platz bis zum Rand.
2. Samen aussäen: Verteile die Koriandersamen gleichmäßig auf der Erde. Drücke sie leicht an, aber bedecke sie nicht zu dick mit Erde. Koriander ist ein Lichtkeimer, das heißt, er braucht Licht zum Keimen. Eine dünne Schicht Erde (ca. 0,5 cm) reicht völlig aus.
3. Angießen: Gieße die Erde vorsichtig an. Am besten verwendest du eine Sprühflasche, damit die Samen nicht weggespült werden. Die Erde sollte feucht, aber nicht nass sein.
4. Mini-Gewächshaus (optional): Wenn du die Flasche horizontal geschnitten hast, kannst du den oberen Teil der Flasche umgedreht über den unteren Teil stülpen. So entsteht ein Mini-Gewächshaus, das die Keimung beschleunigt und die Luftfeuchtigkeit erhöht. Achte aber darauf, dass du regelmäßig lüftest, damit sich kein Schimmel bildet.
Die Pflege: Koriander glücklich machen
Damit dein Koriander gut wächst, braucht er ein bisschen Pflege. Aber keine Sorge, das ist wirklich nicht viel.
1. Standort: Stelle den Flaschengarten an einen hellen Ort, aber nicht in die pralle Sonne. Koriander mag es hell, aber zu viel Sonne kann die Blätter verbrennen. Ein Fensterbrett ist ideal.
2. Gießen: Gieße den Koriander regelmäßig, aber nicht zu viel. Die Erde sollte immer leicht feucht sein, aber nicht nass. Am besten testest du mit dem Finger, ob die Erde trocken ist, bevor du gießt. Wenn du den oberen Teil der Flasche als Mini-Gewächshaus verwendest, musst du weniger gießen, da die Feuchtigkeit länger gehalten wird.
3. Lüften: Wenn du den oberen Teil der Flasche als Mini-Gewächshaus verwendest, solltest du regelmäßig lüften, um Schimmelbildung zu vermeiden. Nimm den oberen Teil der Flasche einfach für ein paar Stunden ab oder öffne den Deckel.
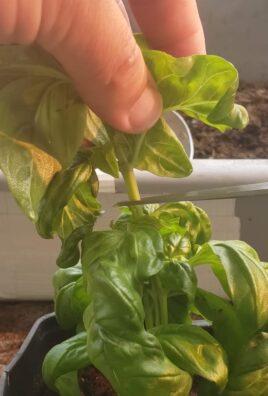
4. Ernten: Sobald der Koriander groß genug ist (ca. 10-15 cm hoch), kannst du ihn ernten. Schneide die Blätter einfach mit einer Schere ab. Am besten erntest du die äußeren Blätter, damit die inneren Blätter weiterwachsen können.
5. Düngen (optional): Wenn du möchtest, kannst du den Koriander ab und zu düngen. Verwende dazu einen flüssigen Kräuterdünger und halte dich an die Dosierungsanleitung auf der Verpackung.
Problemlösung: Was tun, wenn…?
Auch beim Korianderanbau im Flaschengarten können mal Probleme auftreten. Hier sind ein paar Tipps, was du tun kannst:
* Koriander keimt nicht: Überprüfe, ob die Samen noch keimfähig sind. Du kannst einen Keimtest machen, indem du ein paar Samen auf ein feuchtes Küchentuch legst und sie an einem warmen Ort aufbewahrst. Wenn die Samen nach ein paar Tagen nicht keimen, sind sie wahrscheinlich nicht mehr gut. Achte auch darauf, dass die Erde nicht zu trocken oder zu nass ist.
* Koriander wird gelb: Gelbe Blätter können ein Zeichen für zu viel oder zu wenig Wasser sein. Überprüfe die Feuchtigkeit der Erde und passe die Bewässerung entsprechend an. Gelbe Blätter können auch ein Zeichen für Nährstoffmangel sein. Dünge den Koriander in diesem Fall mit einem flüssigen Kräuterdünger.
* Koriander bekommt Schimmel: Schimmelbildung ist meist ein Zeichen für zu hohe Luftfeuchtigkeit und mangelnde Belüftung. Lüfte den Flaschengarten regelmäßig und achte darauf, dass die Erde nicht zu nass ist. Entferne befallene Blätter sofort.
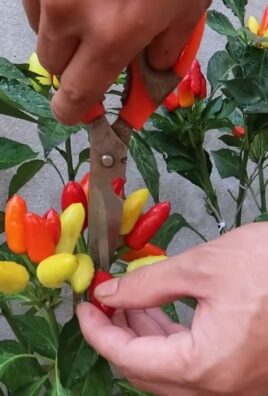
* Koriander schießt: Wenn der Koriander blüht, werden die Blätter bitter und ungenießbar. Um das zu verhindern, solltest du die Blütenstände regelmäßig entfernen. Wenn der Koriander trotzdem schießt, kannst du die Samen ernten und für die nächste Aussaat verwenden.
Weitere Tipps und Tricks:
* Verschiedene Sorten: Es gibt verschiedene Koriandersorten, die sich in Geschmack und Aussehen unterscheiden. Probiere verschiedene Sorten aus, um deinen Favoriten zu finden.
* Kombination mit anderen Kräutern: Du kannst den Koriander auch mit anderen Kräutern in einem Flaschengarten kombinieren, z.B. mit Petersilie oder Schnittlauch. Achte aber darauf, dass die Kräuter ähnliche Ansprüche an Licht und Wasser haben.
* Upcycling: Anstatt Plastikflaschen kannst du auch andere Behälter für deinen Flaschengarten verwenden, z.B. alte Marmeladengläser oder Konservendosen.
* Dekoration: Du kannst den Flaschengarten auch dekorieren, z.B. mit kleinen Steinen, Muscheln oder Figuren. So wird er zu einem echten Hingucker.
Ich hoffe, dieser Guide hat dir geholfen, deinen eigenen Koriander-Flaschengarten anzulegen. Viel Spaß beim Gärtnern und guten Appetit!
Conclusion
So, there you have it! Growing your own coriander in bottles isn’t just a quirky gardening experiment; it’s a game-changer for anyone who loves fresh herbs but hates the wilting disappointment of store-bought bunches. This simple DIY trick offers a sustainable, space-saving, and incredibly rewarding way to ensure you always have vibrant, flavorful coriander at your fingertips.
Think about it: no more last-minute grocery runs for that essential garnish, no more wasted herbs languishing in the crisper drawer. Instead, you’ll have a thriving mini-garden, bursting with the fresh, citrusy aroma of coriander, ready to elevate your culinary creations. From adding a zesty kick to your tacos and curries to garnishing your soups and salads, the possibilities are endless.
But the benefits extend beyond mere convenience. Growing your own coriander allows you to control the growing environment, ensuring your herbs are free from harmful pesticides and chemicals. You’ll also be reducing your carbon footprint by minimizing transportation and packaging waste. It’s a win-win for your taste buds and the planet!
Ready to take your coriander game to the next level? Consider experimenting with different bottle sizes and shapes to find what works best for your space. You can even create a tiered system using multiple bottles, maximizing your vertical growing potential. For a touch of visual appeal, paint the bottles with vibrant colors or decorate them with stencils.
And don’t limit yourself to just coriander! This bottle-growing method can be adapted for other herbs like parsley, mint, and basil. Imagine a windowsill overflowing with a fragrant medley of fresh herbs, ready to be snipped and added to your favorite dishes.
We’re confident that once you try this DIY trick, you’ll be hooked. It’s a simple, satisfying, and sustainable way to enjoy the freshest, most flavorful coriander possible. So, grab a few bottles, some potting mix, and a packet of coriander seeds, and get ready to embark on your own herb-growing adventure.
We’re eager to hear about your experiences! Share your photos, tips, and tricks in the comments below. Let’s create a community of bottle-gardening enthusiasts and inspire others to embrace the joy of growing their own fresh herbs. What are you waiting for? Start growing your own coriander in bottles today!
Frequently Asked Questions (FAQ)
What kind of bottles are best for growing coriander?
Almost any plastic bottle can be used, but clear or translucent bottles are ideal as they allow sunlight to reach the soil. Bottles that previously held water, juice, or soda are all good choices. Just make sure to thoroughly clean the bottles with soap and water before using them to remove any residue that could harm your plants. Consider the size of the bottle as well; larger bottles will provide more room for the coriander roots to grow, leading to healthier and more productive plants. 2-liter bottles are a good starting point.
What type of soil should I use?
A well-draining potting mix is essential for growing healthy coriander in bottles. Avoid using garden soil, as it can become compacted and waterlogged in containers. A good potting mix will provide adequate drainage and aeration, allowing the coriander roots to thrive. You can also amend your potting mix with perlite or vermiculite to further improve drainage. Consider using an organic potting mix to ensure your coriander is free from synthetic fertilizers and pesticides.
How much sunlight does coriander need?
Coriander thrives in full sun, which means it needs at least 6 hours of direct sunlight per day. If you don’t have a sunny spot indoors, you can supplement with grow lights. Place the bottles near a south-facing window for optimal sunlight exposure. If you notice the coriander plants becoming leggy or stretching towards the light, it’s a sign that they need more sunlight. Rotate the bottles regularly to ensure all sides of the plants receive adequate light.
How often should I water my coriander plants?
Water your coriander plants when the top inch of soil feels dry to the touch. Avoid overwatering, as this can lead to root rot. Ensure the bottles have drainage holes to allow excess water to escape. Water thoroughly, until water drains out of the bottom of the bottle. Check the soil moisture regularly, especially during hot weather, and adjust your watering schedule accordingly.
How do I harvest coriander leaves?
Harvest coriander leaves as needed, starting when the plants are about 6 inches tall. Snip off the outer leaves, leaving the inner leaves to continue growing. This will encourage the plant to produce more leaves. Avoid harvesting more than one-third of the plant at a time, as this can stress the plant and reduce its productivity. Harvest in the morning, when the leaves are at their most flavorful.
Can I grow coriander from seed in bottles?
Yes, you can easily grow coriander from seed in bottles. Sow the seeds directly into the potting mix, about 1/4 inch deep. Keep the soil moist until the seeds germinate, which usually takes about 7-14 days. Once the seedlings emerge, thin them out to ensure they have enough space to grow. You can also start the seeds indoors in seed trays and transplant them into the bottles once they are large enough to handle.
How do I prevent coriander from bolting (going to seed)?
Coriander is prone to bolting in hot weather. To prevent bolting, keep the plants well-watered and provide them with some shade during the hottest part of the day. You can also pinch off any flower buds that appear, as this will encourage the plant to focus its energy on producing leaves. Choose bolt-resistant varieties of coriander for best results.
Can I grow coriander indoors year-round?
Yes, you can grow coriander indoors year-round, provided you provide it with adequate light and water. Use grow lights to supplement natural sunlight during the winter months. Maintain a consistent temperature and humidity level. Regularly fertilize the plants with a balanced liquid fertilizer to provide them with the nutrients they need to thrive.
What are some common problems when growing coriander in bottles?
Some common problems when growing coriander in bottles include overwatering, underwatering, pests, and diseases. Overwatering can lead to root rot, while underwatering can cause the plants to wilt. Pests such as aphids and spider mites can infest the plants, while diseases such as powdery mildew can affect the leaves. Regularly inspect your plants for any signs of problems and take appropriate action to address them.
How can I fertilize my coriander plants in bottles?
Use a balanced liquid fertilizer diluted to half strength to fertilize your coriander plants every 2-3 weeks. Avoid over-fertilizing, as this can burn the roots. You can also add compost tea to the soil to provide the plants with additional nutrients. Look for fertilizers specifically formulated for herbs or vegetables. Organic fertilizers are a great option for those who want to avoid synthetic chemicals.
Leave a Comment