
Grow Coral Bells from Seeds and unlock a world of vibrant foliage right in your own backyard! Have you ever gazed upon those stunning, jewel-toned leaves of Coral Bells (Heuchera) and wished you could cultivate your own kaleidoscope of color? Well, you absolutely can, and it’s easier than you might think with a little DIY know-how.
For centuries, gardeners have been captivated by the beauty and versatility of Coral Bells. Originating from North America, these plants were traditionally used by indigenous peoples for medicinal purposes, but their ornamental appeal quickly caught on. Today, they’re a staple in gardens worldwide, adding texture and visual interest to borders, containers, and rock gardens alike.
But why should you bother growing them from seed? Let’s face it, buying established plants can be expensive, and sometimes you just can’t find the exact variety you’re looking for. That’s where this DIY guide comes in! I’m going to show you how to grow Coral Bells from Seeds successfully, saving you money and giving you the satisfaction of nurturing these beauties from tiny sprouts to thriving plants. Plus, you’ll have a wider selection of varieties to choose from, allowing you to create a truly unique and personalized garden display. So, grab your gardening gloves, and let’s get started!

Growing Coral Bells (Heuchera) from Seed: A Comprehensive DIY Guide
Hey there, fellow gardening enthusiasts! I’m so excited to share my experience with growing Coral Bells (Heuchera) from seed. It’s a rewarding process, and while it requires patience, the vibrant foliage you’ll get is totally worth it. This guide will walk you through every step, from preparing your seeds to transplanting your seedlings. Let’s get started!
Understanding Coral Bell Seeds
Before we dive in, let’s talk about Coral Bell seeds. They’re tiny – seriously tiny! Think dust particles. This means handling them requires a delicate touch. Also, Coral Bells are known for their variability when grown from seed. You might not get the exact same color or leaf shape as the parent plant, but that’s part of the fun! You’ll get a unique mix of colors and forms.
Materials You’ll Need
Here’s a list of everything you’ll need to successfully grow Coral Bells from seed:
* Coral Bell Seeds: Purchase from a reputable seed supplier. Look for fresh seeds for the best germination rates.
* Seed Starting Tray or Pots: Choose a tray with drainage holes. Small pots (2-3 inches) also work well.
* Seed Starting Mix: This is crucial! Regular potting soil is too heavy and can suffocate the delicate seedlings. Seed starting mix is light, airy, and sterile.
* Spray Bottle: For gentle watering.
* Clear Plastic Dome or Plastic Wrap: To create a humid environment.
* Grow Lights (Optional but Recommended): Coral Bells need bright light to thrive.
* Heat Mat (Optional): To speed up germination.
* Tweezers (Optional): For handling the tiny seeds.
* Small Labels and a Marker: To keep track of your varieties.
* Vermiculite (Optional): To help retain moisture and improve drainage.
Phase 1: Preparing for Planting
This phase is all about setting the stage for successful germination.
1. Prepare Your Seed Starting Tray or Pots: Fill your chosen container with seed starting mix. Gently tap the container to settle the mix, but don’t pack it down too tightly. You want it to be light and airy. Leave about half an inch of space at the top.
2. Moisten the Seed Starting Mix: Use your spray bottle to thoroughly moisten the mix. You want it to be damp, but not soggy. The mix should be evenly moist throughout.
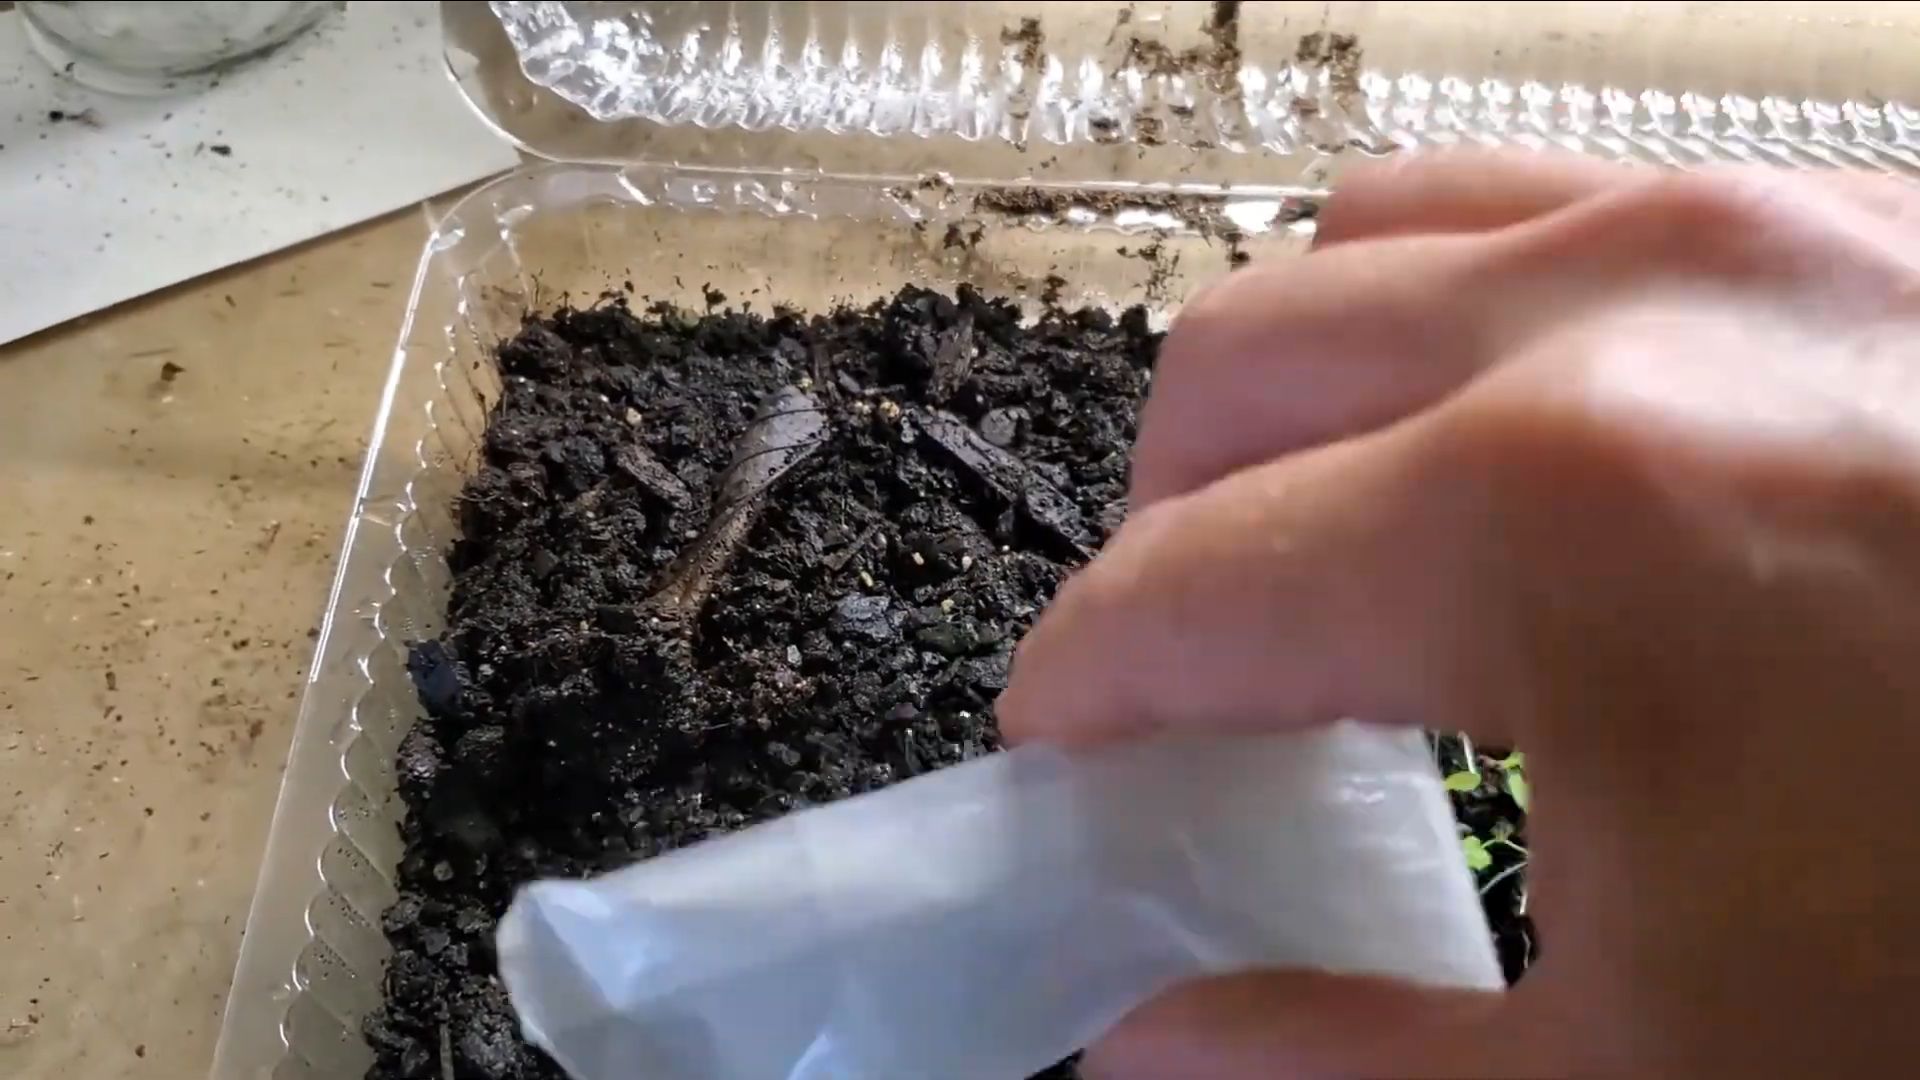
3. Surface Sowing: Remember those tiny seeds? They need light to germinate, so we’re going to surface sow them. This means we won’t bury them.
4. Sowing the Seeds: This is where the tweezers might come in handy! Carefully sprinkle the Coral Bell seeds evenly over the surface of the moistened seed starting mix. Try not to clump them together. If you’re using vermiculite, you can lightly sprinkle a very thin layer over the seeds. This will help retain moisture without blocking the light.
5. Mist Again: Gently mist the surface of the seeds with your spray bottle. This will help them settle into the mix.
6. Cover with a Dome or Plastic Wrap: This creates a humid environment that’s essential for germination. Make sure the dome or plastic wrap doesn’t touch the seeds. You can use small sticks or skewers to prop it up if needed.
Phase 2: Germination and Early Growth
This is the waiting game, but it’s important to monitor your seeds closely.
1. Place in a Warm, Bright Location: Coral Bell seeds germinate best in warm temperatures (around 65-75°F or 18-24°C). If you’re using a heat mat, place the tray or pots on the mat. Place under grow lights, if you have them. If not, a bright windowsill will work, but be sure to monitor for overheating.
2. Maintain Moisture: Check the moisture level of the seed starting mix daily. If it starts to dry out, gently mist the surface with your spray bottle. Avoid overwatering, as this can lead to fungal diseases.
3. Ventilation: Once you see signs of germination (usually within 14-21 days, but it can take longer), start to provide some ventilation. Remove the dome or plastic wrap for a few hours each day, gradually increasing the amount of time. This will help prevent damping-off, a fungal disease that can kill young seedlings.
4. Thinning Seedlings (If Necessary): If you have too many seedlings growing close together, you’ll need to thin them out. Use small scissors to carefully snip off the weaker seedlings at the soil line. This will give the remaining seedlings more room to grow. Aim for about an inch of space between seedlings.
Phase 3: Growing On
Now that your seedlings are established, it’s time to help them grow bigger and stronger.
1. Continue Providing Bright Light: Coral Bells need plenty of light to develop their vibrant foliage. If you’re using grow lights, keep them on for 14-16 hours per day. If you’re using a windowsill, rotate the tray or pots regularly to ensure even growth.
2. Watering: Water your seedlings when the top inch of soil feels dry to the touch. Water gently, avoiding getting water on the leaves. Overwatering can lead to root rot.
3. Fertilizing: Once your seedlings have developed their first true leaves (the leaves that look like miniature versions of the adult leaves), you can start to fertilize them with a diluted liquid fertilizer. Use a balanced fertilizer (e.g., 10-10-10) diluted to half strength. Fertilize every two weeks.
4. Hardening Off: Before transplanting your seedlings outdoors, you’ll need to harden them off. This means gradually acclimating them to outdoor conditions. Start by placing the tray or pots outdoors in a sheltered location for an hour or two each day, gradually increasing the amount of time over the course of a week or two. Protect them from direct sunlight and strong winds.
Phase 4: Transplanting
The final step! Your seedlings are ready to move to their permanent homes.
1. Choose a Location: Coral Bells prefer partial shade, especially in hot climates. They can tolerate full sun in cooler climates. Choose a location with well-drained soil.
2. Prepare the Soil: Amend the soil with compost or other organic matter to improve drainage and fertility.
3. Dig Holes: Dig holes that are slightly larger than the root balls of your seedlings. Space the holes about 12-18 inches apart.
4. Gently Remove Seedlings: Carefully remove the seedlings from their tray or pots. Gently loosen the roots if they are circling the bottom of the container.
5. Plant Seedlings: Place the seedlings in the holes and backfill with soil. Gently firm the soil around the base of the plants.
6. Water Thoroughly: Water the newly transplanted seedlings thoroughly.
7. Mulch: Apply a layer of mulch around the base of the plants to help retain moisture and suppress weeds.
Tips for Success
* Be Patient: Growing Coral Bells from seed takes time and patience. Don’t get discouraged if you don’t see results immediately.
* Use Fresh Seeds: Fresh seeds have a higher germination rate.
* Provide Adequate Light: Coral Bells need bright light to thrive.
* Avoid Overwatering: Overwatering can lead to fungal diseases.
* Monitor for Pests and Diseases: Keep an eye out for pests and diseases, such as aphids and powdery mildew.
* Label Everything: Keep track of your varieties with labels.
* Enjoy the Process: Growing Coral Bells from seed is a rewarding experience. Enjoy the journey!
Troubleshooting
* Seeds Not Germinating: Make sure the seeds are fresh, the temperature is warm enough, and the soil is moist.
* Seedlings Damping Off: Provide better ventilation and avoid overwatering.
* Seedlings Leggy: Provide more light.
* Yellowing Leaves: Could be overwatering, underwatering, or nutrient deficiency. Adjust accordingly.
Growing Coral Bells from seed is a labor of love, but the results are absolutely stunning. I hope this guide has helped you feel confident in your ability to grow these beautiful plants. Happy gardening!
Conclusion
So, there you have it! Growing Coral Bells from seeds might seem a little daunting at first, but with a little patience and the right approach, you can unlock a world of vibrant foliage and delicate blooms right in your own backyard. This DIY trick isn’t just about saving money; it’s about connecting with the natural world on a deeper level and experiencing the immense satisfaction of nurturing life from its very beginning.
Why is this a must-try? Because it opens up a far wider range of Coral Bells varieties than you’ll typically find at your local garden center. Imagine a tapestry of colors and textures, from the deep purples of ‘Palace Purple’ to the shimmering silvers of ‘Silver Scrolls,’ all grown from seeds you carefully sowed. Plus, you’ll have a much larger quantity of plants to work with, allowing you to create stunning mass plantings or share the beauty with friends and neighbors.
Don’t be afraid to experiment! Once you’ve mastered the basic technique, try different seed starting mixes to see which works best for you. Some gardeners swear by a mix of peat moss and perlite, while others prefer a soilless mix specifically designed for seed starting. You can also play around with different light levels during germination. While Coral Bells seeds need light to germinate, too much direct sunlight can scorch the delicate seedlings. A bright, indirect light source is usually ideal.
Consider variations in your planting design too. Coral Bells are incredibly versatile and can be used in a variety of garden settings. Try planting them in containers for a pop of color on your patio, or use them as edging plants along a walkway. They also make excellent companions for other shade-loving plants like hostas, ferns, and astilbes. Think about the overall color scheme of your garden and choose Coral Bells varieties that will complement your existing plants.
The key to success with growing Coral Bells from seeds is consistency and attention to detail. Keep the soil consistently moist, but not waterlogged, and provide adequate light. Be patient, as germination can take several weeks. And don’t be discouraged if some seeds don’t sprout. It’s all part of the learning process.
We wholeheartedly encourage you to give this DIY trick a try. It’s a rewarding experience that will not only beautify your garden but also deepen your appreciation for the wonders of nature. Once you’ve successfully grown your own Coral Bells from seeds, we’d love to hear about your experience! Share your tips, tricks, and photos in the comments below. Let’s create a community of Coral Bells enthusiasts and inspire others to embark on this exciting gardening adventure. Remember, every successful garden starts with a single seed, and yours could be the start of something truly beautiful. So, grab your seeds, get your hands dirty, and let the magic begin!
Frequently Asked Questions (FAQ)
What is the best time of year to start Coral Bells seeds?
The ideal time to start Coral Bells seeds is late winter or early spring, about 8-10 weeks before the last expected frost. This allows the seedlings enough time to develop before being transplanted outdoors in the spring. Starting them indoors gives them a head start and protects them from harsh weather conditions. However, you can also start them in the fall in a cold frame or unheated greenhouse for transplanting the following spring. The key is to provide them with enough time to establish a strong root system before facing the stresses of outdoor conditions.
How long does it take for Coral Bells seeds to germinate?
Germination time for Coral Bells seeds can vary, but typically it takes anywhere from 14 to 21 days. However, some seeds may take longer to germinate, so be patient and don’t give up too soon. Factors such as temperature, moisture, and light can all influence germination time. Maintaining a consistent temperature of around 65-70°F (18-21°C) and keeping the soil consistently moist are crucial for successful germination. Remember that Coral Bells seeds need light to germinate, so don’t bury them too deeply.
What kind of soil is best for starting Coral Bells seeds?
A well-draining, sterile seed starting mix is essential for growing Coral Bells from seeds. Avoid using garden soil, as it may contain pathogens or weed seeds that can harm the delicate seedlings. A mix of peat moss and perlite or vermiculite is a good option, as it provides good drainage and aeration. You can also purchase commercially available seed starting mixes from your local garden center. Make sure the mix is lightweight and doesn’t compact easily, as this can hinder root development.
How much light do Coral Bells seedlings need?
Coral Bells seedlings need bright, indirect light to thrive. Avoid placing them in direct sunlight, as this can scorch the delicate leaves. A sunny windowsill that receives filtered light is a good option. You can also use grow lights to provide supplemental light, especially if you’re starting your seeds indoors during the winter months. Position the grow lights a few inches above the seedlings and adjust the height as they grow. Aim for about 12-16 hours of light per day.
How often should I water Coral Bells seedlings?
Keep the soil consistently moist, but not waterlogged. Water the seedlings gently whenever the top inch of soil feels dry to the touch. Use a spray bottle or watering can with a fine rose to avoid disturbing the delicate seedlings. Overwatering can lead to fungal diseases, so it’s important to allow the soil to dry out slightly between waterings. Good drainage is also essential to prevent root rot.
When can I transplant Coral Bells seedlings outdoors?
Transplant Coral Bells seedlings outdoors after the last expected frost, when the soil has warmed up and the seedlings have developed several sets of true leaves. Harden off the seedlings by gradually exposing them to outdoor conditions for a week or two before transplanting. Start by placing them in a sheltered location for a few hours each day, gradually increasing the amount of time they spend outdoors. Choose a location that receives partial shade, especially during the hottest part of the day.
What are some common problems when growing Coral Bells from seeds?
Some common problems when growing Coral Bells from seeds include damping off, fungal diseases, and pest infestations. Damping off is a fungal disease that can cause seedlings to collapse and die. To prevent damping off, use a sterile seed starting mix, avoid overwatering, and provide good ventilation. Fungal diseases can also be a problem, especially in humid conditions. To prevent fungal diseases, avoid overcrowding the seedlings and provide good air circulation. Pests such as aphids and spider mites can also attack Coral Bells seedlings. Inspect the seedlings regularly and treat any infestations promptly with insecticidal soap or neem oil.
Can I collect seeds from my existing Coral Bells plants?
Yes, you can collect seeds from your existing Coral Bells plants, but keep in mind that the resulting plants may not be true to type, meaning they may not look exactly like the parent plant. This is because Coral Bells are often hybrids, and the seeds may not inherit all of the parent plant’s characteristics. However, collecting seeds can still be a fun and rewarding experiment. Allow the seed heads to dry on the plant before harvesting them. Store the seeds in a cool, dry place until you’re ready to sow them.
Are Coral Bells deer resistant?
Coral Bells are generally considered to be deer resistant, but deer may still browse on them if other food sources are scarce. The level of deer resistance can also vary depending on the specific variety of Coral Bells. Some varieties, such as those with hairy leaves, tend to be more deer resistant than others. If deer are a problem in your area, you can protect your Coral Bells with deer fencing or repellents.
How do I care for Coral Bells after transplanting them outdoors?
After transplanting Coral Bells outdoors, water them regularly, especially during dry spells. Fertilize them in the spring with a balanced fertilizer. Deadhead spent flower stalks to encourage more blooms. Mulch around the plants to help retain moisture and suppress weeds. Coral Bells are relatively low-maintenance plants, but they will benefit from regular care. In colder climates, you may need to provide winter protection, such as mulching around the base of the plants or covering them with burlap.
Leave a Comment