
Grow Cilantro at Home, even if you think you have a black thumb! Have you ever been halfway through making your favorite salsa or tacos, only to realize you’re completely out of fresh cilantro? It’s a culinary crisis, I know! But what if I told you that you could banish those cilantro-less emergencies forever? This DIY guide is your passport to a constant supply of this vibrant herb, right from your own kitchen or garden.
Cilantro, also known as coriander (the seeds!), has a rich history, dating back to ancient Egypt and even mentioned in the Bible. For centuries, cultures around the world have prized it for its culinary and medicinal properties. But let’s be honest, buying cilantro from the store can be a gamble. Sometimes it’s wilted, sometimes it’s expensive, and sometimes it just doesn’t have that fresh, zesty flavor we crave.
That’s where this DIY magic comes in! Learning how to grow cilantro at home is not only incredibly rewarding, but it’s also surprisingly easy. I’m going to share simple, step-by-step tricks and hacks that will have you harvesting your own fragrant cilantro in no time. Whether you have a sprawling garden or just a sunny windowsill, I’ll show you how to cultivate this flavorful herb and elevate your cooking to a whole new level. Get ready to ditch the store-bought bunches and embrace the joy of homegrown cilantro!
Growing Cilantro at Home: A Comprehensive DIY Guide
Hello, fellow garden lovers! I love fresh cilantro, and nothing is better than harvesting it directly from your own garden. Cilantro can be a bit tricky, but with the right tips and tricks, you can successfully grow it at home. In this article, I’ll show you how to do it—step by step!
What You’ll Need:
- Cilantro seeds (organic is best!)
- Pots or planter boxes (at least 15 cm / 6 inches deep)
- High-quality potting soil or seed-starting mix
- Watering can or spray bottle
- A sunny location (at least 6 hours of sun per day)
- Optional: Slow-release fertilizer or liquid fertilizer for herbs
Preparation: The Key to Success
Before we get started, good preparation is the key. Cilantro doesn’t like to be transplanted, so it’s important to sow it directly into its final pot or planter box.
1. Choosing the Right Pot:
Cilantro develops a taproot, so it needs enough space downwards. Choose pots or planter boxes with a depth of at least 15 cm (6 inches), or even better, 20 cm (8 inches). Make sure the pots have drainage holes so excess water can run off. Waterlogging is poison for cilantro!
2. The Right Soil:
Use high-quality potting soil or seed-starting mix. This is loose, well-draining, and contains enough nutrients for the first few weeks. I like to mix a little sand into my soil to improve drainage.
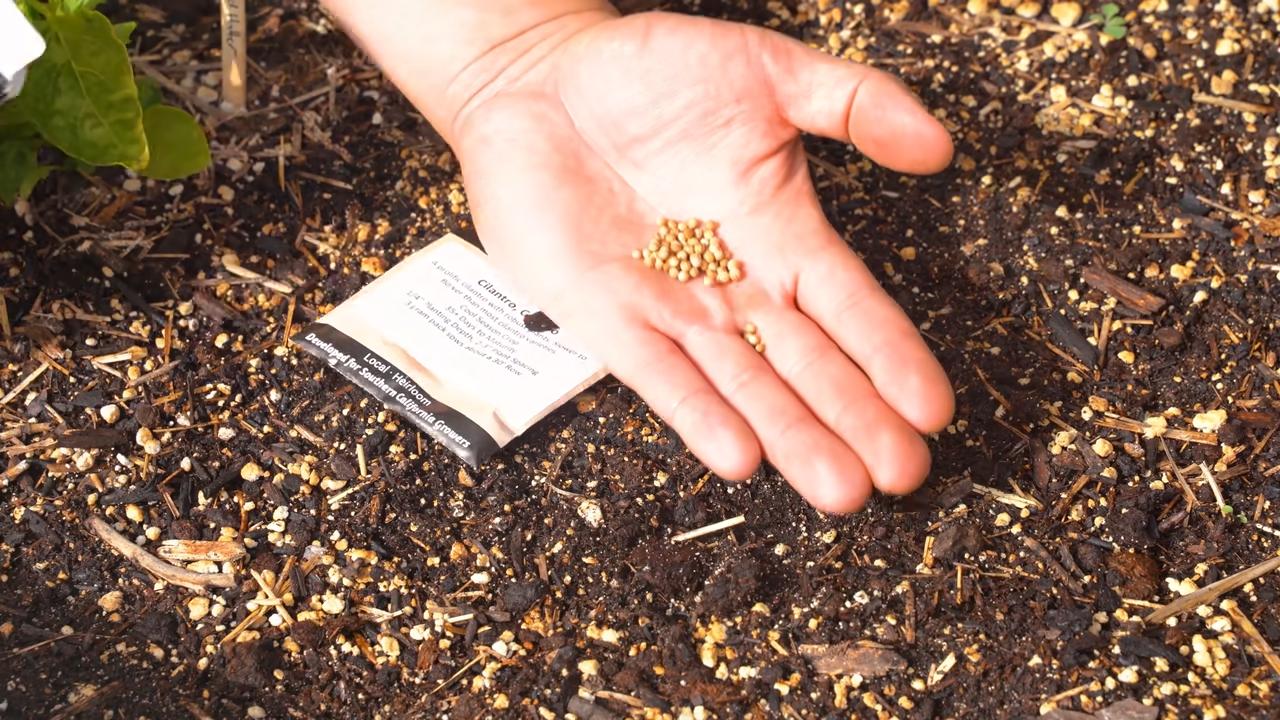
3. Preparing the Seeds:
Coriander seeds are actually small fruits that contain two seeds each. To speed up germination, you can lightly scarify the seeds before sowing. This is very simple: place the seeds between two sheets of sandpaper and gently rub them together. Or you can lightly roll over the seeds with a rolling pin. This breaks open the hard shell and allows the seeds to germinate more easily.
Sowing: The Right Way to Do It
Now comes the exciting part: sowing! Cilantro can be sown from spring to autumn, as long as the temperatures are not too high. Cilantro likes it cool; temperatures above 25°C (77°F) can cause it to bolt quickly (which we want to avoid, as the leaves become less aromatic).
1. Sowing the Seeds:
Fill the pots or planter boxes with soil and moisten it lightly. Distribute the seeds evenly over the soil. I always sow a little more densely, as not all seeds will germinate. Cover the seeds with a thin layer of soil (about 0.5 cm / 0.2 inches).
2. Watering In:
Water the soil gently, preferably with a spray bottle, so the seeds are not washed away. The soil should be moist, but not wet.
3. The Right Location:
Place the pots in a sunny location. Cilantro needs at least 6 hours of sun per day to grow well. If you don’t have a sunny spot, you can also use a grow light.
Care: To Make Your Cilantro Thrive
After sowing, proper care is crucial for success. Cilantro is relatively low-maintenance, but there are a few things you should keep in mind.
1. Watering:
Cilantro needs regular water, especially during germination and growth. The soil should always be slightly moist, but not wet. It’s best to water in the morning so the leaves can dry during the day. Avoid watering the leaves directly, as this can promote fungal diseases.
2. Fertilizing:
Cilantro is not a heavy feeder, but regular fertilizing promotes growth and yield. You can either use a slow-release fertilizer for herbs, which you mix into the soil when planting, or fertilize every two weeks with a liquid fertilizer. Be sure to follow the dosage recommendations on the packaging.
3. Preventing Bolting:
As mentioned, cilantro tends to bolt quickly, especially in high temperatures. To prevent this, you should harvest the plants regularly. Harvesting the leaves stimulates growth and delays flowering. If flowers do form, you can simply snip them off.
4. Pests and Diseases:
Cilantro is relatively resistant to pests and diseases. Occasionally, aphids may appear. You can simply rinse them off with a jet of water or use a biological insecticide. Waterlogging can lead to fungal diseases. Therefore, ensure good drainage and avoid watering the leaves directly.
The Harvest: Finally, Fresh Cilantro!
After about 6-8 weeks, you can harvest your cilantro for the first time.
1. When to Harvest:
Harvest the leaves as soon as they are large enough. It’s best to harvest in the morning, as the leaves are most aromatic then.
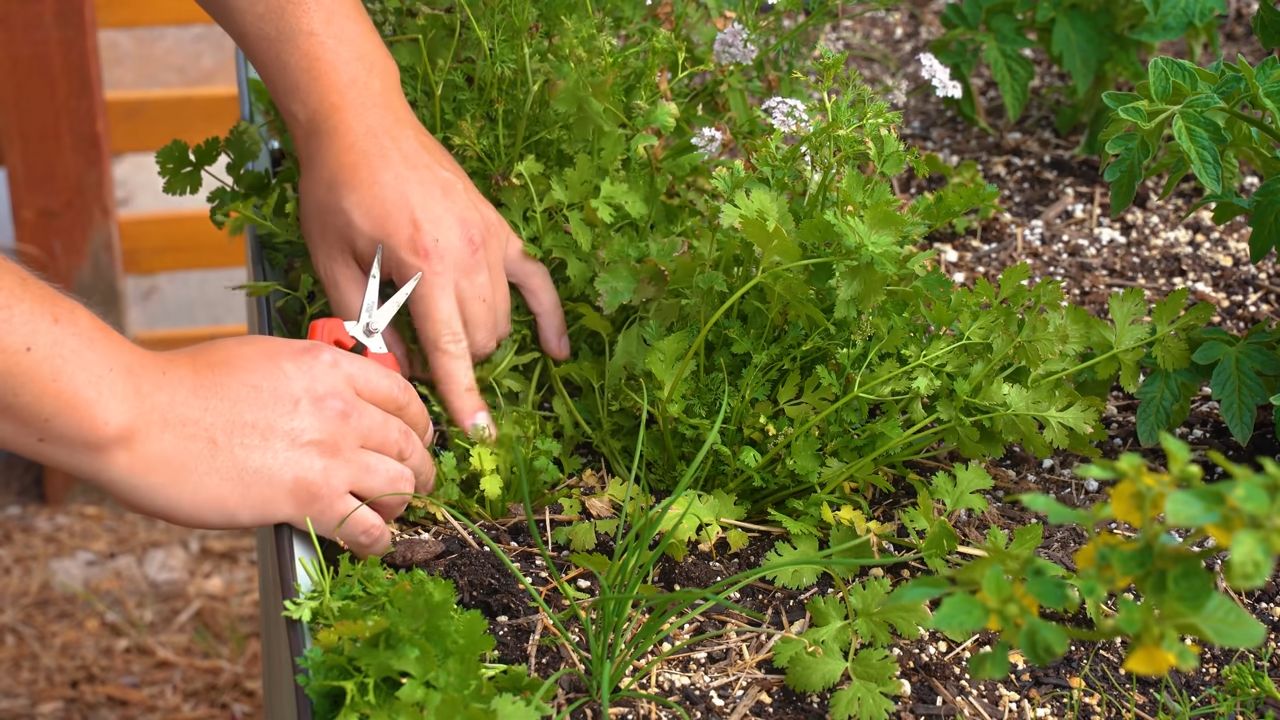
2. How to Harvest:
Cut the leaves with scissors or a knife. Cut the stems just above the ground so the plant can produce new shoots.
3. Storage:
Fresh cilantro keeps in the refrigerator for about a week. Wrap the leaves in a damp paper towel and place them in a plastic bag. You can also freeze cilantro. Chop the leaves finely and freeze them in ice cube trays with water.
Cilantro in Winter: How to Overwinter It
Cilantro is an annual, meaning it dies after flowering. In mild winters, however, it can self-sow and sprout again in the spring. If you want to overwinter your cilantro, you can plant it in a pot and bring it indoors. Place it in a bright location and water it sparingly.
Summary: The Most Important Tips for Growing Cilantro
- Choose the right pot: At least 15 cm (6 inches) deep with drainage holes.
- Use high-quality soil: Potting soil or seed-starting mix with good drainage.
- Prepare the seeds: Lightly scarify the seeds before sowing.
- Sow the seeds correctly: Distribute them evenly and cover with a thin layer of soil.
- Water regularly: The soil should always be slightly moist.
- Fertilize regularly: With a slow-release or liquid fertilizer for herbs.
- Prevent bolting: Harvest regularly and snip off any flowers.
- Harvest correctly: Cut the leaves just above the ground.
I hope this guide helps you grow your own cilantro at home. With a little patience and care, you will soon have a bountiful harvest. Happy gardening
Conclusion
So, there you have it! Growing cilantro at home isn’t just a fun project; it’s a game-changer for your culinary adventures. Imagine having fresh, vibrant cilantro readily available whenever a recipe calls for it. No more last-minute grocery store runs or settling for wilted, sad-looking bunches. This simple DIY trick empowers you to elevate your dishes with the bright, citrusy flavor of homegrown cilantro, adding a touch of freshness that store-bought herbs simply can’t match.
But the benefits extend beyond convenience and flavor. By cultivating your own cilantro, you’re also reducing your environmental footprint. Think about it: less packaging waste, fewer transportation emissions, and a smaller reliance on industrial agriculture. You’re contributing to a more sustainable lifestyle, one delicious sprig at a time.
And the best part? It’s incredibly versatile! While we’ve outlined a straightforward method, feel free to experiment with different varieties of cilantro. Some gardeners swear by slow-bolting varieties, which are less prone to going to seed quickly in warmer weather. Others prefer to grow cilantro in containers, allowing them to easily move the plants indoors during extreme temperatures. You can even try succession planting, sowing new seeds every few weeks to ensure a continuous harvest throughout the growing season.
Consider these variations to personalize your cilantro-growing experience:
* Hydroponic Cilantro: For those with limited space or a penchant for modern gardening techniques, hydroponic cilantro cultivation is an excellent option. It requires no soil and can be done indoors year-round.
* Cilantro Microgreens: If you’re impatient or just want a quick burst of flavor, grow cilantro microgreens. They’re ready to harvest in just a week or two and pack an intense cilantro punch.
* Companion Planting: Cilantro is a great companion plant for many vegetables, including tomatoes, peppers, and carrots. It can help repel pests and attract beneficial insects.
Don’t be intimidated if you’re a beginner gardener. Growing cilantro at home is surprisingly easy, and even a small amount of effort can yield impressive results. The satisfaction of harvesting your own herbs and using them in your cooking is truly rewarding.
We wholeheartedly encourage you to give this DIY trick a try. Start small, be patient, and don’t be afraid to experiment. Once you taste the difference between homegrown cilantro and the store-bought variety, you’ll never go back.
And most importantly, we want to hear about your experiences! Share your tips, tricks, and triumphs in the comments below. Let us know what worked for you, what challenges you faced, and what delicious dishes you created with your homegrown cilantro. Your feedback will not only help other readers but also inspire us to continue sharing valuable gardening tips and tricks. Let’s build a community of cilantro-loving gardeners! So get your hands dirty, plant some seeds, and prepare to enjoy the fresh, vibrant flavor of homegrown cilantro. You won’t regret it!
Frequently Asked Questions (FAQ)
Why is my cilantro bolting (going to seed) so quickly?
Bolting is a common issue with cilantro, especially in warm weather. Cilantro is a cool-season herb, and when temperatures rise, it tends to bolt in an effort to reproduce. Several factors can contribute to bolting, including:
* High Temperatures: Cilantro thrives in temperatures between 60°F and 70°F (15°C and 21°C). When temperatures consistently exceed 75°F (24°C), bolting is more likely.
* Insufficient Watering: Drought stress can also trigger bolting. Ensure your cilantro receives consistent moisture, especially during hot weather.
* Poor Soil: Cilantro prefers well-drained soil that is rich in organic matter. Poor soil can stress the plant and make it more susceptible to bolting.
* Lack of Nutrients: A lack of essential nutrients can also contribute to bolting. Consider fertilizing your cilantro with a balanced fertilizer every few weeks.
* Variety: Some cilantro varieties are more prone to bolting than others. Look for slow-bolting varieties, such as ‘Slow Bolt’ or ‘Santo,’ which are specifically bred to resist bolting.
To prevent bolting, try these tips:
* Plant cilantro in a location that receives partial shade, especially during the hottest part of the day.
* Water cilantro regularly, especially during dry spells.
* Amend the soil with compost or other organic matter to improve drainage and fertility.
* Fertilize cilantro with a balanced fertilizer every few weeks.
* Pinch off any flower buds as soon as they appear to encourage leaf production.
* Consider succession planting, sowing new seeds every few weeks to ensure a continuous harvest.
How often should I water my cilantro?
Cilantro needs consistent moisture to thrive, but it doesn’t like to be waterlogged. The frequency of watering will depend on several factors, including the weather, the type of soil, and the size of the container.
As a general rule, water cilantro when the top inch of soil feels dry to the touch. During hot, dry weather, you may need to water daily. In cooler, wetter weather, you may only need to water every few days.
When watering, water deeply and thoroughly, ensuring that the water reaches the roots. Avoid overhead watering, as this can promote fungal diseases.
If you’re growing cilantro in a container, be sure to choose a pot with drainage holes to prevent water from accumulating at the bottom.
What kind of soil is best for growing cilantro?
Cilantro prefers well-drained soil that is rich in organic matter. A good soil mix for cilantro should be:
* Well-Draining: Cilantro doesn’t like to sit in soggy soil, so it’s important to choose a soil mix that drains well.
* Rich in Organic Matter: Organic matter helps to improve soil drainage, aeration, and fertility.
* Slightly Acidic to Neutral: Cilantro prefers a soil pH between 6.0 and 7.0.
You can amend your existing soil with compost, aged manure, or other organic matter to improve its drainage and fertility. You can also purchase a pre-made potting mix specifically designed for herbs.
Can I grow cilantro indoors?
Yes, you can definitely grow cilantro indoors! In fact, growing cilantro indoors can be a great way to extend the growing season and enjoy fresh herbs year-round.
To grow cilantro indoors, you’ll need:
* A Sunny Location: Cilantro needs at least 6 hours of sunlight per day. If you don’t have a sunny window, you can supplement with a grow light.
* Well-Draining Soil: Use a well-draining potting mix specifically designed for herbs.
* A Container with Drainage Holes: Choose a pot that is at least 6 inches deep and has drainage holes to prevent water from accumulating at the bottom.
* Regular Watering: Water cilantro when the top inch of soil feels dry to the touch.
* Fertilizer: Fertilize cilantro with a balanced fertilizer every few weeks.
How do I harvest cilantro?
Harvest cilantro when the leaves are about 4-6 inches long. To harvest, simply snip off the stems with scissors or pruning shears. Avoid cutting more than one-third of the plant at a time, as this can stress the plant and slow down growth.
You can harvest cilantro multiple times throughout the growing season. Regular harvesting will also encourage the plant to produce more leaves.
Once cilantro begins to bolt, the leaves will become bitter. If this happens, you can still harvest the seeds, which can be used as a spice (coriander).
What are some common pests and diseases that affect cilantro?
Cilantro is generally a pest-resistant plant, but it can be susceptible to a few common pests and diseases, including:
* Aphids: Aphids are small, sap-sucking insects that can cause leaves to become distorted and yellow.
* Spider Mites: Spider mites are tiny pests that can cause leaves to become stippled and discolored.
* Powdery Mildew: Powdery mildew is a fungal disease that can cause a white, powdery coating to form on the leaves.
* Damping Off: Damping off is a fungal disease that can kill seedlings.
To prevent pests and diseases, follow these tips:
* Plant cilantro in well-drained soil.
* Water cilantro regularly, but avoid overwatering.
* Provide good air circulation.
* Inspect plants regularly for signs of pests and diseases.
* Remove any infected leaves or plants immediately.
* Use organic pest control methods, such as insecticidal soap or neem oil.
By following these tips, you can successfully grow cilantro at home and enjoy fresh, flavorful herbs all season long!

Leave a Comment