
Grow chayote squash easily and unlock a world of culinary possibilities right in your own backyard! Have you ever dreamed of harvesting your own unique and delicious vegetables, impressing your friends and family with something they’ve probably never seen before? Well, get ready, because growing chayote squash is surprisingly simple, and I’m here to show you how with some easy DIY tricks.
Chayote, also known as vegetable pear or mirliton, has a fascinating history, particularly in Mesoamerica where it originated. For centuries, it has been a staple food, valued for its versatility and nutritional benefits. It’s not just a food source; it’s a part of cultural heritage. Imagine connecting with that history by cultivating your own chayote!
But why should you bother learning to grow chayote squash easily? In today’s world, where we’re increasingly conscious of where our food comes from, growing your own produce offers a sense of control and satisfaction. Plus, chayote is incredibly adaptable and can thrive in various climates. It’s a prolific producer, meaning you’ll be rewarded with a bountiful harvest from just a single plant. These DIY tricks will save you time, money, and effort, ensuring you get the most out of your chayote growing experience. Let’s get started and transform your garden into a chayote haven!
Chayote Anbauen: Dein Einfacher DIY-Leitfaden für eine Reiche Ernte
Hallo Gartenfreunde! Habt ihr schon mal von Chayote gehört? Diese vielseitige Kürbisart ist nicht nur lecker, sondern auch überraschend einfach anzubauen. Ich zeige euch, wie ihr mit ein paar einfachen Schritten eure eigene Chayote-Pflanze ziehen und eine reiche Ernte einfahren könnt. Lasst uns loslegen!
Was du für den Chayote-Anbau brauchst:
* Eine reife Chayote-Frucht: Das ist das A und O! Sucht euch eine Frucht aus, die keine Beschädigungen hat und bereits zu keimen beginnt (kleine Triebe an der Spitze).
* Einen großen Topf (mindestens 20 Liter): Chayote-Pflanzen brauchen Platz für ihre Wurzeln.
* Gute Blumenerde: Eine Mischung aus Gartenerde, Kompost und Sand ist ideal.
* Einen sonnigen Standort: Chayote liebt die Sonne!
* Eine Rankhilfe: Diese Kürbisart klettert gerne, also braucht sie etwas zum Festhalten.
* Geduld: Der Anbau von Chayote braucht etwas Zeit, aber es lohnt sich!
Chayote-Anbau: Schritt-für-Schritt-Anleitung
Phase 1: Die Chayote zum Keimen bringen
1. Die Chayote vorbereiten: Nehmt eure reife Chayote-Frucht und untersucht sie genau. Achtet auf kleine Triebe oder Anzeichen von Keimung an der Spitze. Wenn ihr keine seht, ist das kein Problem. Die Frucht wird im Topf keimen.
2. Den Topf vorbereiten: Füllt euren großen Topf mit der Blumenerde. Lasst etwa 5 cm Platz bis zum Rand. Die Erde sollte locker und gut durchlässig sein.
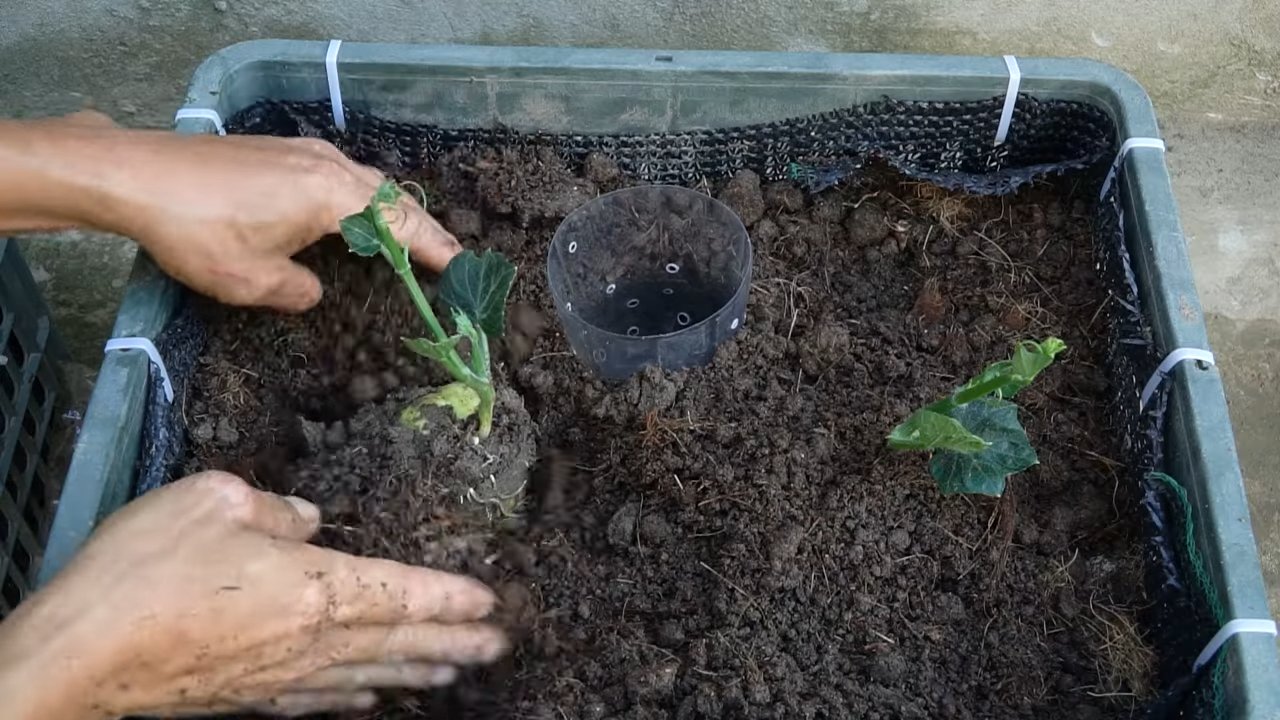
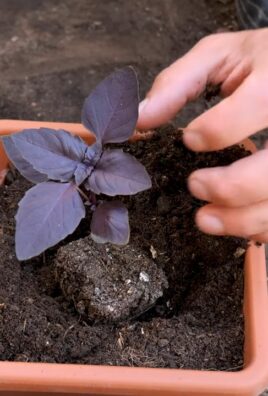
3. Die Chayote einpflanzen: Legt die Chayote-Frucht horizontal auf die Erde. Die Spitze, an der die Triebe erscheinen sollen, sollte leicht nach oben zeigen. Drückt die Frucht leicht in die Erde, sodass etwa die Hälfte der Frucht bedeckt ist.
4. Angießen: Gießt die Erde vorsichtig an, bis sie gut durchfeuchtet ist. Achtet darauf, dass ihr die Frucht nicht direkt mit Wasser übergießt, um Fäulnis zu vermeiden.
5. Der richtige Standort: Stellt den Topf an einen warmen und hellen Ort. Direkte Sonneneinstrahlung ist ideal. Die Temperatur sollte idealerweise zwischen 20 und 25 Grad Celsius liegen.
6. Geduld haben: Jetzt heißt es warten! Es kann einige Wochen dauern, bis die Chayote keimt. Haltet die Erde feucht, aber nicht nass. Überprüft regelmäßig, ob sich Triebe bilden.
Phase 2: Die Chayote-Pflanze pflegen
1. Die Rankhilfe anbringen: Sobald die Chayote-Pflanze anfängt zu wachsen, braucht sie eine Rankhilfe. Ihr könnt einen Bambusstab, ein Spalier oder ein Drahtgitter verwenden. Steckt die Rankhilfe in den Topf und bindet die Triebe vorsichtig daran fest.
2. Regelmäßig gießen: Chayote-Pflanzen brauchen viel Wasser, besonders während der Wachstumsperiode. Gießt die Pflanze regelmäßig, aber vermeidet Staunässe. Die Erde sollte immer leicht feucht sein.
3. Düngen: Um das Wachstum zu fördern, könnt ihr die Chayote-Pflanze regelmäßig düngen. Verwendet einen organischen Dünger oder einen Flüssigdünger für Gemüse. Befolgt die Anweisungen auf der Verpackung.
4. Schneiden: Um die Chayote-Pflanze in Form zu halten und die Fruchtbildung zu fördern, könnt ihr sie regelmäßig schneiden. Entfernt abgestorbene Blätter und Triebe. Kürzt lange Triebe ein, um die Pflanze buschiger zu machen.
5. Schutz vor Schädlingen: Chayote-Pflanzen können von Blattläusen, Schnecken oder anderen Schädlingen befallen werden. Überprüft die Pflanze regelmäßig und bekämpft Schädlinge bei Bedarf mit natürlichen Mitteln.
Phase 3: Die Chayote ernten
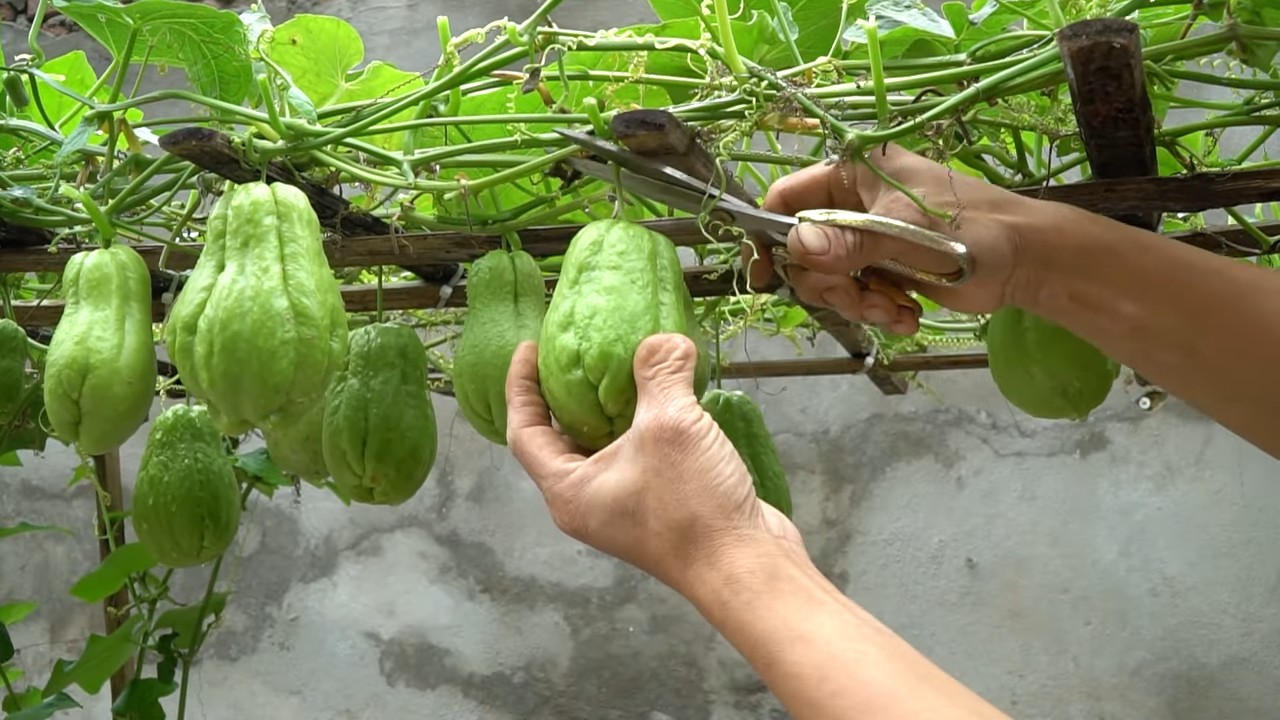
1. Der richtige Zeitpunkt: Chayote-Früchte sind erntereif, wenn sie eine hellgrüne Farbe haben und sich leicht von der Pflanze lösen lassen. Die Größe der Früchte variiert je nach Sorte.
2. Die Ernte: Schneidet die Chayote-Früchte vorsichtig mit einem Messer oder einer Schere ab. Lasst einen kleinen Stiel an der Frucht, um die Haltbarkeit zu verlängern.
3. Die Lagerung: Chayote-Früchte können im Kühlschrank für einige Wochen gelagert werden. Wickelt sie in ein feuchtes Tuch, um sie vor dem Austrocknen zu schützen.
Zusätzliche Tipps für eine erfolgreiche Chayote-Ernte
* Der richtige Boden: Chayote bevorzugt einen gut durchlässigen und humusreichen Boden. Verbessert euren Gartenboden mit Kompost oder anderem organischen Material.
* Die richtige Bewässerung: Chayote-Pflanzen brauchen viel Wasser, besonders während der heißen Sommermonate. Gießt die Pflanzen regelmäßig und achtet darauf, dass der Boden nicht austrocknet.
* Der richtige Standort: Chayote-Pflanzen brauchen viel Sonne, um gut zu wachsen und Früchte zu tragen. Wählt einen sonnigen Standort in eurem Garten.
* Die richtige Rankhilfe: Chayote-Pflanzen sind Kletterpflanzen und brauchen eine Rankhilfe, um sich daran festzuhalten. Ihr könnt ein Spalier, ein Drahtgitter oder einen Zaun verwenden.
* Die richtige Düngung: Chayote-Pflanzen brauchen regelmäßig Dünger, um gut zu wachsen und Früchte zu tragen. Verwendet einen organischen Dünger oder einen Flüssigdünger für Gemüse.
* Die richtige Schädlingsbekämpfung: Chayote-Pflanzen können von verschiedenen Schädlingen befallen werden, wie z.B. Blattläusen, Schnecken oder Raupen. Überprüft die Pflanzen regelmäßig und bekämpft Schädlinge bei Bedarf mit natürlichen Mitteln.
* Die richtige Ernte: Chayote-Früchte sind erntereif, wenn sie eine hellgrüne Farbe haben und sich leicht von der Pflanze lösen lassen. Erntet die Früchte regelmäßig, um die Fruchtbildung zu fördern.
* Die richtige Lagerung: Chayote-Früchte können im Kühlschrank für einige Wochen gelagert werden. Wickelt sie in ein feuchtes Tuch, um sie vor dem Austrocknen zu schützen.
Chayote in der Küche: Vielseitige Verwendungsmöglichkeiten
Chayote ist ein unglaublich vielseitiges Gemüse, das in der Küche vielfältig eingesetzt werden kann. Hier sind einige Ideen:
* Roh: Chayote kann roh in Salaten gegessen werden. Sie hat einen milden, leicht süßlichen Geschmack.
* Gekocht: Chayote kann gekocht, gedünstet, gebraten oder gegrillt werden. Sie passt gut zu Fleisch, Fisch oder Gemüse.
* Gefüllt: Chayote kann gefüllt und im Ofen gebacken werden.
* Eingelegt: Chayote kann eingelegt werden und als Beilage zu verschiedenen Gerichten serviert werden.
* Suppe: Chayote kann in Suppen verwendet werden.
* Chutney: Chayote kann zu Chutney verarbeitet werden.
Ich hoffe, dieser Leitfaden hat euch geholfen, den Chayote-Anbau zu verstehen. Mit ein wenig Geduld und Pflege könnt ihr bald eure eigenen Chayote-Früchte ernten und genießen! Viel Erfolg beim Gärtnern!
Conclusion
So, there you have it! Growing chayote squash easily isn’t just a pipe dream; it’s an achievable reality with a little know-how and the right approach. We’ve walked you through the process, from selecting the perfect mature fruit to nurturing your seedling and providing the ideal growing conditions. But why should you bother with all this effort?
The answer is simple: fresh, homegrown chayote squash offers a flavor and satisfaction that store-bought varieties simply can’t match. Imagine the crisp, mild taste of your own chayote in a stir-fry, a refreshing salad, or even a comforting soup. Plus, you’ll have the satisfaction of knowing exactly where your food came from and that it was grown without harmful pesticides or chemicals.
Beyond the taste, growing chayote squash is a rewarding experience in itself. It’s a chance to connect with nature, learn about the life cycle of a plant, and enjoy the abundance of your own backyard. And let’s not forget the sheer volume of squash one plant can produce! You’ll have plenty to share with friends, family, and neighbors.
But the benefits don’t stop there. Chayote is incredibly versatile in the kitchen. While we’ve focused on the basic growing process, feel free to experiment with different varieties. Some chayotes are smoother, while others are spikier. Some are lighter in color, while others are a deeper green. Each variety offers a slightly different flavor profile, so explore and find your favorite!
Consider these variations to elevate your chayote growing experience:
* Vertical Gardening: Chayote vines are vigorous climbers, making them perfect for vertical gardening. Train them up a trellis, fence, or even a pergola to create a beautiful and productive green wall.
* Companion Planting: Plant beneficial herbs and flowers alongside your chayote to attract pollinators and deter pests. Marigolds, basil, and nasturtiums are excellent choices.
* Seed Saving: Once you’ve successfully grown your own chayote, save the seeds from the most productive and flavorful fruits to continue the cycle year after year.
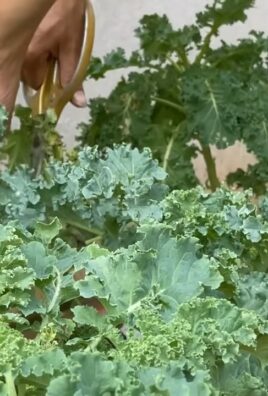
* Chayote Greens: Don’t forget about the leaves and shoots! Young chayote greens are edible and can be used in salads or stir-fries, adding another dimension to your harvest.
We’ve provided you with the tools and knowledge to embark on your chayote-growing adventure. Now, it’s time to get your hands dirty! Don’t be afraid to experiment, adapt the techniques to your specific climate and growing conditions, and most importantly, have fun.
We’re confident that you’ll be amazed at how easy and rewarding it is to grow your own chayote squash. So, grab a mature fruit, follow our simple steps, and get ready to enjoy the delicious bounty of your own garden.
And finally, we want to hear from you! Share your experiences, tips, and photos with us in the comments below. Let’s create a community of chayote enthusiasts and learn from each other. Happy growing!
Frequently Asked Questions (FAQ)
What is the best time of year to start growing chayote squash?
The ideal time to start growing chayote squash depends on your climate. In warmer regions with mild winters, you can start the process in late winter or early spring. In colder regions, it’s best to wait until after the last frost. The key is to ensure that the soil temperature is consistently warm enough for germination and growth. Aim for soil temperatures above 65°F (18°C). Starting indoors a few weeks before the last expected frost can give you a head start. Remember, chayote needs a long growing season to produce a good harvest.
How much space does a chayote plant need?
Chayote vines are vigorous growers and require ample space to thrive. Each plant needs at least 8-10 feet of space in all directions. They are best grown on a sturdy trellis, fence, or pergola that can support their weight. Proper spacing allows for adequate air circulation, which helps prevent fungal diseases. If you’re planting multiple chayote plants, space them at least 10 feet apart to avoid overcrowding. Consider the mature size of the vine when choosing a location for your chayote plant.
What kind of soil is best for growing chayote squash?
Chayote squash prefers well-drained, fertile soil that is rich in organic matter. Amend your soil with compost, aged manure, or other organic materials to improve its drainage and fertility. A slightly acidic to neutral soil pH (6.0-7.0) is ideal. Avoid heavy clay soils that retain too much moisture, as this can lead to root rot. If you have clay soil, consider growing your chayote in raised beds or containers with a well-draining potting mix. Regular soil testing can help you determine if your soil needs any amendments.
How often should I water my chayote plant?
Chayote plants need consistent moisture, especially during hot, dry weather. Water deeply and regularly, ensuring that the soil remains consistently moist but not waterlogged. Avoid overhead watering, as this can promote fungal diseases. Drip irrigation or soaker hoses are excellent options for delivering water directly to the roots. Mulching around the base of the plant can help retain moisture and suppress weeds. Check the soil moisture regularly and adjust your watering schedule accordingly.
How do I fertilize my chayote plant?
Chayote plants are heavy feeders and benefit from regular fertilization. Apply a balanced fertilizer (e.g., 10-10-10) every 4-6 weeks during the growing season. You can also supplement with organic fertilizers such as compost tea or fish emulsion. Avoid over-fertilizing, as this can lead to excessive vine growth at the expense of fruit production. Monitor the plant’s growth and adjust your fertilization schedule as needed. A soil test can help you determine if your soil is deficient in any essential nutrients.
How long does it take for chayote squash to mature?
Chayote squash typically takes 4-6 months to mature from planting to harvest. The exact time will depend on your climate and growing conditions. The fruits are ready to harvest when they are firm, smooth, and light green in color. Avoid harvesting chayote squash that is too young or too old, as the flavor and texture will not be optimal. Regular harvesting encourages continued fruit production.
Are there any common pests or diseases that affect chayote squash?
Chayote squash is generally resistant to pests and diseases, but it can be susceptible to certain problems. Common pests include aphids, squash bugs, and spider mites. These can be controlled with insecticidal soap or neem oil. Fungal diseases such as powdery mildew and downy mildew can also affect chayote plants, especially in humid conditions. Prevent these diseases by providing good air circulation, avoiding overhead watering, and applying a fungicide if necessary. Regularly inspect your plants for signs of pests or diseases and take action promptly.
Can I grow chayote squash in a container?
Yes, you can grow chayote squash in a container, but you’ll need a large container (at least 20 gallons) to accommodate the plant’s extensive root system. Choose a well-draining potting mix and provide a sturdy trellis for the vine to climb. Container-grown chayote plants may require more frequent watering and fertilization than those grown in the ground. Be sure to provide adequate sunlight and protection from strong winds.
How do I store chayote squash after harvesting?
Chayote squash can be stored in a cool, dry place for several weeks. Avoid storing them in the refrigerator, as this can cause them to become mushy. Wrap the chayote squash in paper towels or place them in a perforated plastic bag to help retain moisture. Check them regularly for signs of spoilage and discard any that are soft or discolored.
Can I eat the seeds of chayote squash?
Yes, the seed inside the chayote squash is edible and has a mild, nutty flavor. It can be eaten raw or cooked. Some people prefer to remove the seed before cooking the chayote, while others leave it in. The seed is a good source of nutrients and adds a unique texture to dishes.
Leave a Comment