
Grow Celery at Home Easily, you say? Absolutely! Imagine stepping outside your back door and snipping fresh, crisp celery stalks for your salads, soups, or even just a healthy snack. No more limp, store-bought celery that’s been sitting in the fridge for days. This isn’t just a dream; it’s a reality you can achieve with a few simple tricks and a little bit of patience.
For centuries, celery has been cultivated for its culinary and medicinal properties. From ancient Greece, where it was used to crown victors in athletic games, to its modern-day presence in almost every grocery store, celery has a rich history. But did you know that growing your own celery is not only possible but also incredibly rewarding?
In today’s world, where we’re all looking for ways to eat healthier, save money, and connect with nature, learning how to grow celery at home easily is a game-changer. Think about it: you’ll have access to fresh, organic celery whenever you want, without the need for plastic packaging or long trips to the supermarket. Plus, it’s a fantastic way to reduce your carbon footprint and enjoy the satisfaction of nurturing your own food. I’m excited to share some simple DIY tricks that will help you cultivate a thriving celery patch, even if you’re a complete beginner. Let’s get started!
Grow Celery at Home Easily: From Kitchen Scraps to Crunchy Stalks!
Hey there, fellow gardening enthusiasts! Ever wondered if you could regrow celery from that leftover base you usually toss in the compost? Well, guess what? You absolutely can! It’s a super easy and rewarding project, perfect for beginners and seasoned gardeners alike. I’m going to walk you through the whole process, step-by-step, so you can enjoy fresh, homegrown celery without even leaving your kitchen.
What You’ll Need
Before we dive in, let’s gather our supplies. This is a pretty low-key project, so you probably have most of these things already:
* Celery Base: The bottom part of a celery bunch, about 2 inches from the root end. Make sure it’s firm and healthy-looking, not mushy or discolored.
* Shallow Dish or Bowl: Something to hold water and the celery base.
* Water: Tap water is fine!
* Potting Soil: A good quality potting mix will provide the nutrients your celery needs.
* Pot: Choose a pot that’s at least 6-8 inches in diameter to give the celery roots plenty of room to grow.
* Sunny Spot: Celery loves sunshine, so find a bright spot in your home or garden.
* Spray Bottle (Optional): For misting the celery leaves.
Regrowing Celery from the Base: The Water Propagation Phase
This is where the magic begins! We’re going to coax those dormant cells in the celery base to start growing roots.
1. Prepare the Celery Base: Carefully trim the top of the celery base, leaving about 2 inches of the stalks intact. This will encourage new growth from the center.
2. Place in Water: Put the celery base in your shallow dish or bowl. Add enough water to cover the bottom inch or so of the base. You don’t want to submerge the entire thing, just the bottom where the roots will emerge.
3. Find a Sunny Spot: Place the dish in a sunny windowsill or another bright location. Celery needs plenty of light to thrive.
4. Change the Water Regularly: Every 1-2 days, replace the water in the dish. This will prevent bacteria from growing and keep the celery base healthy.
5. Observe and Wait: Within a few days, you should start to see small roots emerging from the bottom of the celery base. You’ll also notice new green shoots sprouting from the center. This is a sign that your celery is happy and ready to move on to the next phase.
Transplanting to Soil: Giving Your Celery a Home
Once your celery has developed a good root system (about an inch or two long), it’s time to transplant it to a pot with soil.
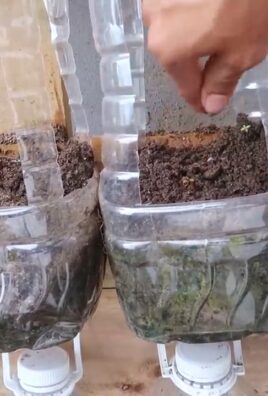
1. Prepare the Pot: Fill your pot with potting soil, leaving about an inch of space at the top. Gently pat down the soil to remove any air pockets.
2. Make a Hole: Use your finger or a small trowel to create a hole in the center of the pot, large enough to accommodate the celery base and its roots.
3. Carefully Remove the Celery: Gently lift the celery base from the water dish, being careful not to damage the delicate roots.
4. Plant the Celery: Place the celery base in the hole, making sure the roots are spread out. Cover the roots with soil, leaving the top of the celery base (where the green shoots are) exposed.
5. Water Thoroughly: Water the soil until it’s evenly moist, but not soggy.
6. Return to a Sunny Spot: Place the pot in a sunny location.
Caring for Your Celery Plant: Keeping it Happy and Healthy
Now that your celery is planted in soil, it’s important to provide it with the right care to ensure it grows into a healthy and productive plant.
1. Watering: Celery needs consistent moisture, so water it regularly, especially during hot weather. Check the soil moisture by sticking your finger into the soil. If it feels dry to the touch, it’s time to water. Avoid overwatering, as this can lead to root rot.
2. Fertilizing: Celery is a heavy feeder, meaning it needs plenty of nutrients to grow. Fertilize your celery plant every 2-3 weeks with a balanced liquid fertilizer. Follow the instructions on the fertilizer label.
3. Sunlight: Celery needs at least 6 hours of sunlight per day. If you’re growing your celery indoors, make sure it’s in a sunny windowsill or under a grow light.
4. Temperature: Celery prefers cool temperatures, between 60-70°F (15-21°C). Avoid exposing your celery plant to extreme heat or cold.
5. Pest Control: Keep an eye out for pests like aphids and slugs. If you notice any pests, you can try spraying your celery plant with insecticidal soap or neem oil.
6. Misting (Optional): Celery loves humidity, so you can mist the leaves with water every few days to keep them hydrated.
Harvesting Your Celery: Enjoying the Fruits (or Vegetables!) of Your Labor
After a few months of care, your celery plant should be ready to harvest.
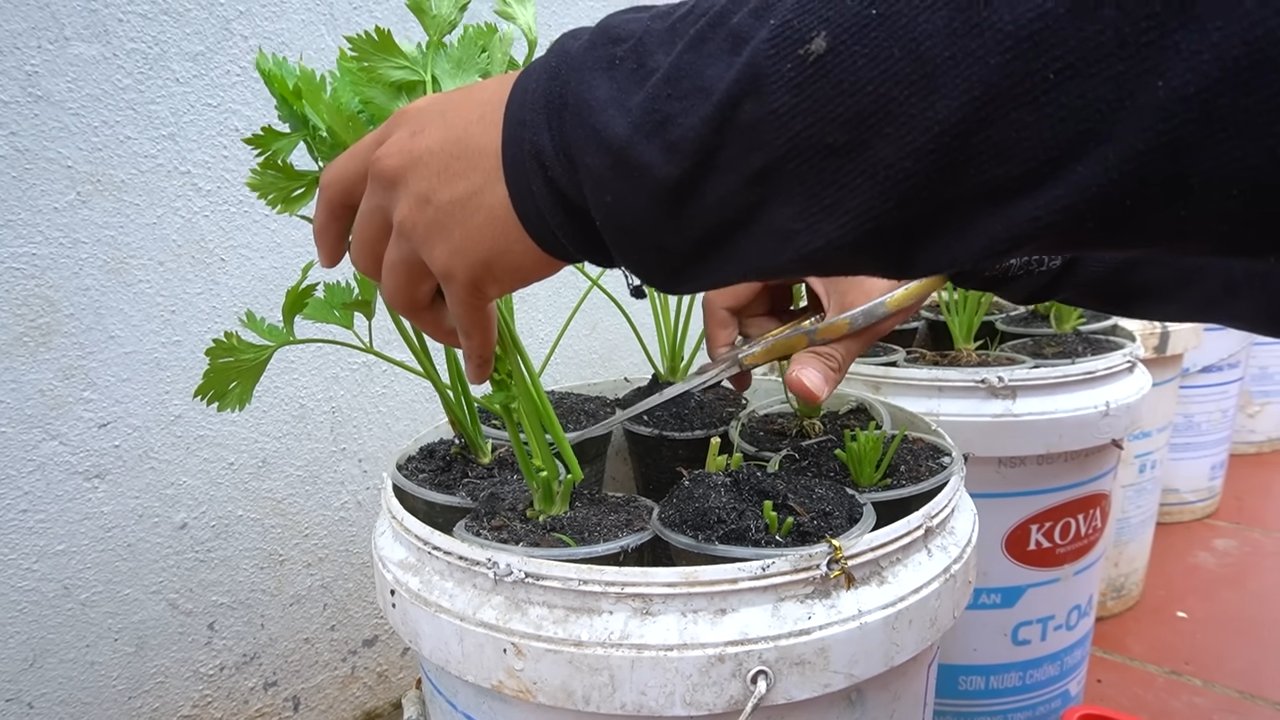
1. Harvesting Time: You can start harvesting individual stalks of celery when they reach a size you’re happy with.
2. Harvesting Method: To harvest a stalk, simply cut it off at the base of the plant with a sharp knife.
3. Continued Growth: Your celery plant will continue to produce new stalks as you harvest them.
4. Enjoy Your Harvest: Enjoy your homegrown celery in salads, soups, smoothies, or as a healthy snack!
Troubleshooting: Common Problems and Solutions
Even with the best care, you might encounter some problems while growing celery. Here are a few common issues and how to fix them:
* Yellowing Leaves: This could be a sign of overwatering, underwatering, or nutrient deficiency. Check the soil moisture and adjust your watering accordingly. Fertilize your celery plant if it’s been a while since the last feeding.
* Stunted Growth: This could be caused by lack of sunlight, poor soil, or pests. Make sure your celery plant is getting enough sunlight and fertilize it regularly. Check for pests and treat them as needed.
* Bolting (Going to Seed): This can happen if the celery plant is exposed to extreme heat or stress. Try to keep the plant cool and well-watered. Once a celery plant bolts, the stalks become bitter and tough.
* Root Rot: This is caused by overwatering and poor drainage. Make sure your pot has drainage holes and avoid overwatering. If you suspect root rot, you can try transplanting the celery plant to a new pot with fresh soil.
Tips for Success: Making Your Celery Thrive
Here are a few extra tips to help you grow the best celery possible:
* Choose the Right Variety: Some celery varieties are easier to grow than others. Look for varieties that are specifically bred for home gardens.
* Start with a Healthy Base: The quality of the celery base you start with will affect the success of your project. Choose a base that’s firm, healthy-looking, and free from blemishes.
* Be Patient: Growing celery takes time and patience. Don’t get discouraged if you don’t see results immediately. Just keep providing your celery plant with the right care, and it will eventually reward you with fresh, crunchy stalks.
* Experiment: Don’t be afraid to experiment with different growing techniques. Try different types of soil, fertilizers, and watering schedules to see what works best for you.
* Enjoy the Process: Growing celery from kitchen scraps is a fun and rewarding experience. Take the time to enjoy the process and learn from your mistakes.
I hope this guide has inspired you to try growing celery at home. It’s a simple, sustainable, and satisfying way to enjoy fresh produce. Happy gardening!

Conclusion
So, there you have it! Growing celery at home from scraps is not just a fun experiment; it’s a sustainable way to reduce food waste, enjoy fresh, flavorful celery, and connect with the natural world. It’s a simple, rewarding process that anyone can undertake, regardless of gardening experience. Forget those limp, flavorless stalks from the grocery store – imagine the crisp, vibrant celery you can harvest right from your own kitchen counter or garden!
This method of regrowing celery is a game-changer for anyone who loves to cook with this versatile vegetable. Think about the possibilities: adding freshly grown celery to your soups, stews, salads, and smoothies. The flavor is noticeably brighter and more intense than store-bought celery, adding a delightful depth to your culinary creations. Plus, you’ll have the satisfaction of knowing you grew it yourself!
But the benefits extend beyond just taste. By regrowing celery from scraps, you’re actively participating in reducing food waste. Instead of tossing the base of the celery stalk into the trash, you’re giving it a new lease on life, transforming it into a thriving plant. This small act can have a significant impact on the environment, contributing to a more sustainable lifestyle.
Don’t be afraid to experiment with variations! Try different types of celery, such as Pascal celery or Chinese celery, to see which ones thrive best in your environment. You can also experiment with different growing mediums, such as hydroponics or aquaponics, for a more advanced approach. Consider adding companion plants like onions or garlic to your celery patch to deter pests and enhance growth.
Growing celery at home is a truly rewarding experience. It’s a chance to reconnect with nature, learn about plant life cycles, and enjoy the fruits (or rather, vegetables) of your labor. It’s also a fantastic way to teach children about sustainability and the importance of reducing food waste.
We highly encourage you to give this DIY trick a try. It’s easy, inexpensive, and incredibly satisfying. Once you’ve harvested your first batch of homegrown celery, you’ll be hooked!
And we want to hear about your experiences! Share your photos, tips, and stories with us in the comments below. Let us know what challenges you faced, what successes you celebrated, and any variations you tried. Together, we can create a community of home gardeners who are passionate about growing their own food and reducing food waste. So, grab a celery stalk, get your hands dirty, and start growing! You’ll be amazed at what you can achieve.
Frequently Asked Questions (FAQ)
What kind of celery works best for regrowing?
Generally, any type of celery you buy from the grocery store will work for regrowing. However, organic celery is often recommended because it’s less likely to have been treated with chemicals that could inhibit growth. Pascal celery, the most common type found in supermarkets, is a great starting point. Experiment with different varieties if you have access to them! The key is to choose a celery stalk that looks fresh and healthy, with a firm base and vibrant green stalks. Avoid celery that is wilted, discolored, or has signs of rot.
How long does it take to regrow celery from a base?
The initial sprouting and root development typically take about 5-7 days. You’ll start to see small roots emerging from the base and new green shoots appearing from the center. After about 2-3 weeks in water, the celery will be ready to transplant into soil. Once transplanted, it can take several weeks to a few months for the celery to fully mature and be ready for harvest. The exact timeframe will depend on factors such as sunlight, temperature, and soil quality. Be patient and provide your celery with the care it needs, and you’ll be rewarded with a bountiful harvest.
What kind of soil is best for growing celery?
Celery thrives in rich, well-draining soil that is high in organic matter. A good mix would be equal parts of compost, potting soil, and perlite or vermiculite. The compost provides essential nutrients, the potting soil provides structure, and the perlite or vermiculite improves drainage and aeration. Celery also prefers slightly acidic soil with a pH between 6.0 and 6.8. You can test your soil’s pH using a soil testing kit and amend it accordingly. Before planting, amend the soil with plenty of compost or well-rotted manure to provide a nutrient-rich environment for your celery to flourish.
How much sunlight does celery need?
Celery needs at least 6 hours of sunlight per day to thrive. Choose a location in your garden that receives full sun, especially during the morning hours. If you’re growing celery indoors, place it near a sunny window or supplement with grow lights. Insufficient sunlight can result in leggy growth, pale leaves, and reduced yields. However, in very hot climates, some afternoon shade can be beneficial to prevent the celery from overheating. Monitor your celery closely and adjust its location as needed to ensure it receives the optimal amount of sunlight.
How often should I water my regrowing celery?
Celery needs consistent moisture to thrive. Water your celery regularly, keeping the soil consistently moist but not waterlogged. Check the soil moisture daily and water when the top inch feels dry to the touch. Avoid letting the soil dry out completely, as this can stress the plant and hinder growth. During hot weather, you may need to water more frequently. When watering, water deeply and thoroughly, ensuring that the water reaches the roots. Mulching around the base of the plant can help retain moisture and suppress weeds.
Can I grow celery indoors permanently?
Yes, you can grow celery indoors permanently, but it requires some extra attention. Provide your celery with plenty of sunlight, either from a sunny window or grow lights. Use a well-draining potting mix and water regularly, keeping the soil consistently moist. Fertilize your celery every few weeks with a balanced liquid fertilizer. You may also need to provide additional humidity, especially during dry winter months. Consider using a humidifier or placing the pot on a tray filled with pebbles and water. With proper care, you can enjoy fresh, homegrown celery indoors year-round.
What are some common problems when growing celery and how do I fix them?
Some common problems when growing celery include pests like aphids and celery leaf miners, diseases like celery blight and pink rot, and nutrient deficiencies. Aphids can be controlled with insecticidal soap or neem oil. Celery leaf miners can be removed by hand or treated with Bacillus thuringiensis (Bt). Celery blight and pink rot can be prevented by providing good air circulation, avoiding overhead watering, and using disease-resistant varieties. Nutrient deficiencies can be addressed by amending the soil with compost or using a balanced fertilizer. Monitor your celery regularly for signs of pests or diseases and take action promptly to prevent them from spreading.
Can I eat the celery that regrows from the base?
Yes, absolutely! The celery that regrows from the base is perfectly edible and just as nutritious as store-bought celery. In fact, many people find that homegrown celery has a more intense and flavorful taste. You can use it in all the same ways you would use store-bought celery, such as in soups, stews, salads, and smoothies. Just be sure to wash it thoroughly before eating.
How do I harvest the celery once it’s grown?
Once your celery has reached a desirable size, you can harvest it by cutting the stalks near the base of the plant. You can harvest individual stalks as needed or harvest the entire plant at once. To harvest the entire plant, simply cut it off at the base, leaving about an inch of the root system in the ground. This will allow the plant to potentially regrow again. After harvesting, wash the celery thoroughly and store it in the refrigerator.
Is growing celery at home worth the effort?
Absolutely! While it may require a little bit of effort and patience, growing celery at home is a rewarding experience that offers numerous benefits. You’ll have access to fresh, flavorful celery that is free from pesticides and other harmful chemicals. You’ll also be reducing food waste and contributing to a more sustainable lifestyle. Plus, it’s a fun and educational activity that can be enjoyed by the whole family. So, give it a try and see for yourself!
Leave a Comment