
Grow Cauliflower at Home and unlock the secrets to fresh, delicious, and homegrown goodness right in your backyard! Have you ever dreamt of serving up a vibrant, creamy cauliflower dish, knowing every floret was nurtured by your own hands? Well, dream no more! This isn’t just about growing a vegetable; it’s about connecting with nature, embracing sustainability, and experiencing the pure joy of harvesting your own food.
Cultivating cauliflower has a rich history, dating back to ancient times in the Mediterranean region. Over centuries, it has journeyed across continents, becoming a staple in diverse cuisines. From simple steamed sides to elaborate gratins, cauliflower’s versatility is undeniable. But beyond its culinary appeal, growing your own cauliflower offers a unique sense of accomplishment.
In today’s world, where we’re increasingly conscious of what we consume, knowing the origin of our food is more important than ever. Store-bought cauliflower can be expensive and may have traveled long distances, impacting its freshness and nutritional value. That’s where this DIY guide comes in! I’m going to show you simple, effective tricks and hacks to grow cauliflower at home, regardless of your gardening experience. Imagine the satisfaction of harvesting a perfect head of cauliflower, knowing you’ve bypassed the grocery store and embraced a healthier, more sustainable lifestyle. Let’s get started and transform your garden into a cauliflower haven!
Blumenkohl selber ziehen: Dein umfassender DIY-Guide
Hey Gartenfreunde! Habt ihr euch jemals gefragt, wie man diesen knackigen, vielseitigen Blumenkohl direkt im eigenen Garten anbauen kann? Ich habe es ausprobiert und kann euch sagen, es ist gar nicht so schwer, wie man denkt! Mit ein bisschen Geduld und den richtigen Tipps könnt auch ihr bald euren eigenen, frischen Blumenkohl ernten. Lasst uns loslegen!
Was du brauchst: Die Vorbereitung
Bevor wir mit dem Pflanzen beginnen, müssen wir sicherstellen, dass wir alles Notwendige zur Hand haben. Hier ist eine Liste der Dinge, die du brauchst:
* Blumenkohlsamen (wähle eine Sorte, die zu deinem Klima passt)
* Anzuchterde
* Anzuchttöpfe oder -schalen
* Gartenerde (angereichert mit Kompost)
* Kompost oder organischer Dünger
* Gießkanne oder Gartenschlauch mit Brausekopf
* Gartenwerkzeug (Spaten, Harke, Pflanzkelle)
* Mulchmaterial (Stroh, Holzhackschnitzel)
* Pflanzstäbe (optional, zur Unterstützung)
* Schutznetz (gegen Schädlinge, optional)
Aussaat: Der Start in ein blumenkohliges Leben
Die Aussaat ist der erste Schritt, um deinen eigenen Blumenkohl zu ziehen. Hier sind die Schritte, die du befolgen solltest:
1. Wähle den richtigen Zeitpunkt: Blumenkohl mag es kühl. Für eine Sommerernte solltest du die Samen im Frühjahr (März/April) im Haus vorziehen. Für eine Herbsterernte kannst du im Sommer (Juni/Juli) direkt ins Beet säen.
2. Bereite die Anzuchttöpfe vor: Fülle die Anzuchttöpfe oder -schalen mit Anzuchterde. Drücke die Erde leicht an.
3. Säe die Samen: Lege 2-3 Samen pro Topf etwa 1 cm tief in die Erde. Bedecke die Samen leicht mit Erde.
4. Gieße vorsichtig: Befeuchte die Erde mit einer Gießkanne oder einem Sprüher. Die Erde sollte feucht, aber nicht nass sein.
5. Stelle die Töpfe an einen hellen Ort: Blumenkohlkeimlinge brauchen viel Licht. Ein Fensterbrett oder ein Gewächshaus sind ideal.
6. Halte die Erde feucht: Überprüfe die Erde regelmäßig und gieße, wenn sie sich trocken anfühlt.
7. Pikiere die Keimlinge: Sobald die Keimlinge 2-3 echte Blätter haben (nicht nur die Keimblätter), kannst du sie pikieren. Das bedeutet, dass du die stärksten Keimlinge in größere Töpfe umpflanzt, damit sie mehr Platz zum Wachsen haben.
Vorbereitung des Beetes: Ein Zuhause für deinen Blumenkohl
Bevor du die Blumenkohlpflanzen ins Beet setzt, musst du das Beet vorbereiten. Blumenkohl ist ein Starkzehrer und braucht einen nährstoffreichen Boden.
1. Wähle den richtigen Standort: Blumenkohl braucht einen sonnigen Standort mit mindestens 6 Stunden Sonne pro Tag.
2. Lockere den Boden auf: Grabe den Boden um und lockere ihn mit einer Harke auf. Entferne Steine und Unkraut.
3. Reichere den Boden an: Mische Kompost oder organischen Dünger in den Boden. Blumenkohl braucht viel Stickstoff, Phosphor und Kalium.
4. Sorge für eine gute Drainage: Blumenkohl mag keine Staunässe. Wenn dein Boden schwer und lehmig ist, kannst du Sand oder Kies untermischen, um die Drainage zu verbessern.
5. Gieße das Beet: Befeuchte das Beet vor dem Pflanzen.
Das Auspflanzen: Ab ins Beet!
Jetzt ist es an der Zeit, die Blumenkohlpflanzen ins Beet zu setzen.
1. Wähle den richtigen Zeitpunkt: Warte, bis keine Frostgefahr mehr besteht, bevor du die Pflanzen ins Beet setzt.
2. Härte die Pflanzen ab: Bevor du die Pflanzen ins Beet setzt, solltest du sie abhärten. Das bedeutet, dass du sie für ein paar Tage stundenweise ins Freie stellst, damit sie sich an die Bedingungen gewöhnen können.
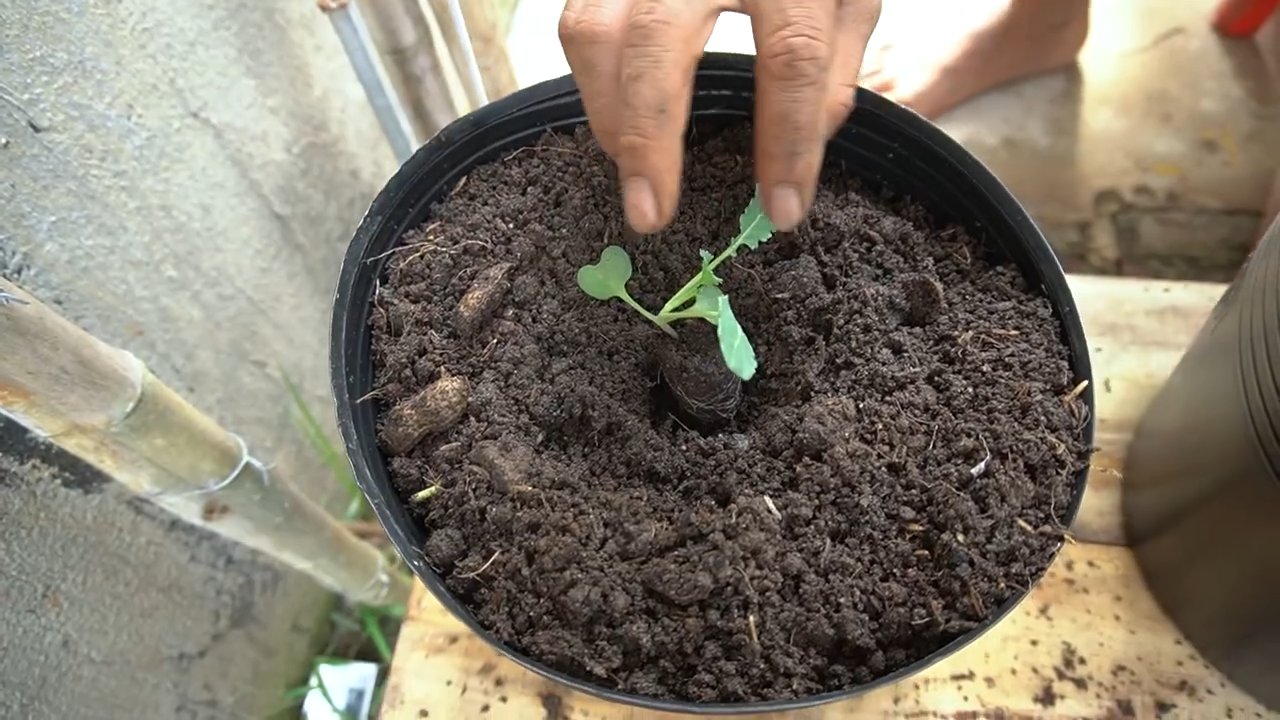
3. Pflanze die Blumenkohlpflanzen: Grabe Löcher im Beet, die groß genug sind, um die Wurzelballen der Pflanzen aufzunehmen. Der Abstand zwischen den Pflanzen sollte etwa 40-50 cm betragen.
4. Setze die Pflanzen ein: Setze die Pflanzen in die Löcher und fülle die Löcher mit Erde. Drücke die Erde leicht an.
5. Gieße die Pflanzen: Gieße die Pflanzen gründlich.
6. Mulche das Beet: Bedecke das Beet mit Mulchmaterial (Stroh, Holzhackschnitzel). Mulch hilft, die Feuchtigkeit im Boden zu halten, Unkraut zu unterdrücken und den Boden zu düngen.
7. Schütze die Pflanzen: Wenn du Probleme mit Schädlingen hast, kannst du ein Schutznetz über die Pflanzen legen.
Pflege: Damit dein Blumenkohl prächtig gedeiht
Die Pflege ist entscheidend, damit dein Blumenkohl gut wächst und eine schöne Blüte bildet.
1. Gießen: Blumenkohl braucht regelmäßig Wasser, besonders während trockener Perioden. Gieße die Pflanzen am besten morgens, damit die Blätter abtrocknen können und Pilzkrankheiten vermieden werden.
2. Düngen: Dünge die Pflanzen alle 2-3 Wochen mit einem organischen Dünger oder Komposttee.
3. Unkraut jäten: Entferne regelmäßig Unkraut, das mit dem Blumenkohl um Nährstoffe und Wasser konkurriert.
4. Schädlinge bekämpfen: Überprüfe die Pflanzen regelmäßig auf Schädlinge wie Kohlweißlinge, Blattläuse oder Erdflöhe. Bekämpfe Schädlinge mit natürlichen Mitteln wie Neemöl oder Brennnesseljauche.
5. Blanchieren (Bleichen): Um einen weißen Blumenkohlkopf zu erhalten, kannst du die Blätter über den Kopf binden, sobald er etwa die Größe einer Faust hat. Das verhindert, dass der Kopf durch Sonnenlicht grün wird. Dies ist optional, der Geschmack wird dadurch nicht beeinflusst.
Ernte: Die Belohnung für deine Mühe
Die Ernte ist der krönende Abschluss deiner Arbeit.
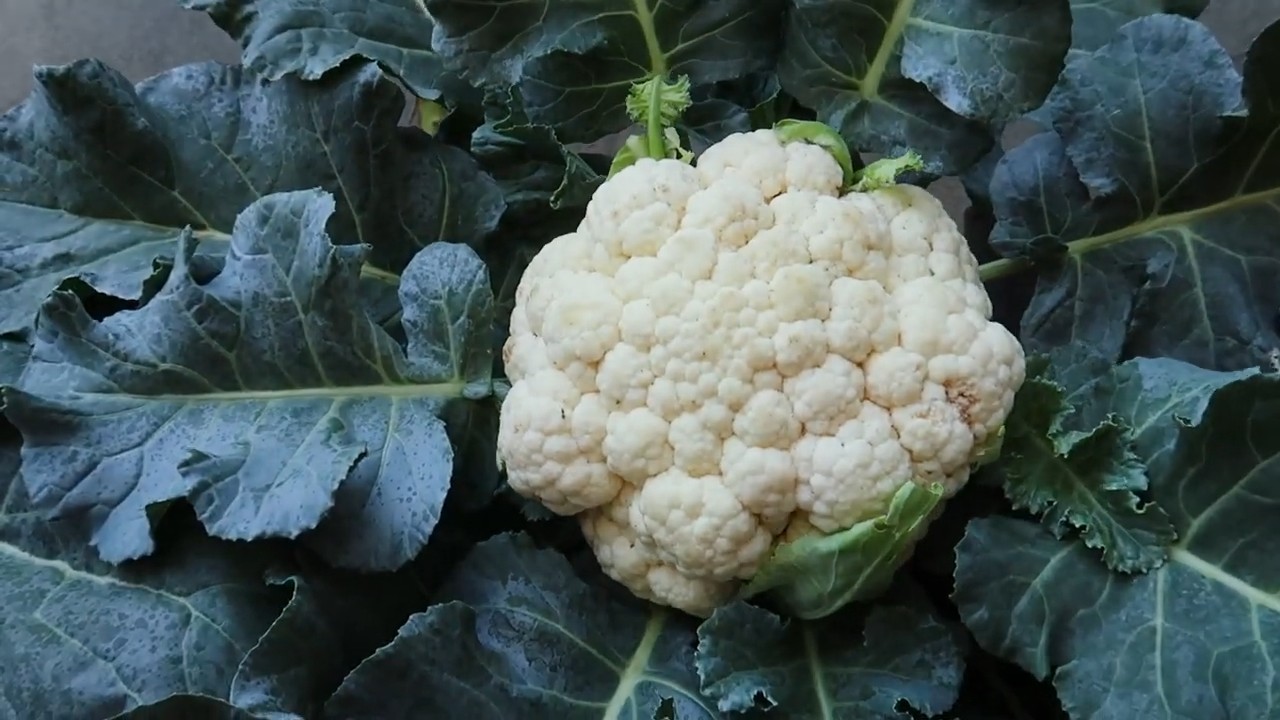
1. Wähle den richtigen Zeitpunkt: Der Blumenkohl ist erntereif, wenn der Kopf fest und kompakt ist und die Röschen noch geschlossen sind.
2. Schneide den Blumenkohl ab: Schneide den Blumenkohl mit einem scharfen Messer ab. Lasse einige Blätter am Kopf, um ihn vor dem Austrocknen zu schützen.
3. Lagere den Blumenkohl: Blumenkohl hält sich im Kühlschrank etwa eine Woche. Du kannst ihn auch einfrieren.
Häufige Probleme und Lösungen
Auch beim Blumenkohlanbau können Probleme auftreten. Hier sind einige der häufigsten Probleme und wie du sie lösen kannst:
* Gelbe Blätter: Gelbe Blätter können ein Zeichen für Nährstoffmangel sein. Dünge die Pflanzen mit einem organischen Dünger.
* Kleine Köpfe: Kleine Köpfe können durch Wassermangel oder Nährstoffmangel verursacht werden. Gieße die Pflanzen regelmäßig und dünge sie.
* Schädlinge: Bekämpfe Schädlinge mit natürlichen Mitteln.
* Krankheiten: Achte auf eine gute Belüftung und vermeide Staunässe, um Krankheiten vorzubeugen.
Zusätzliche Tipps für den erfolgreichen Blumenkohlanbau
* Wähle die richtige Sorte: Es gibt viele verschiedene Blumenkohlsorten. Wähle eine Sorte, die zu deinem Klima und deinen Bedürfnissen passt.
* Wechsel die Anbaufläche: Baue Blumenkohl nicht jedes Jahr am selben Ort an, um Krankheiten vorzubeugen.
* Beobachte deine Pflanzen: Überprüfe deine Pflanzen regelmäßig auf Schädlinge und Krankheiten. Je früher du Probleme erkennst, desto einfacher ist es, sie zu beheben.
* Sei geduldig: Blumenkohl braucht Zeit zum Wachsen. Sei geduldig und gib nicht auf, auch wenn es nicht sofort klappt.
Fazit: Dein eigener Blumenkohl ist zum Greifen nah!
Conclusion
So, there you have it! Growing cauliflower at home, while it might seem daunting at first, is an incredibly rewarding experience that puts you in control of your food source and allows you to enjoy the freshest, most flavorful cauliflower imaginable. We’ve walked you through the essential steps, from selecting the right variety and preparing your soil to nurturing your plants and harvesting your beautiful heads.
Why is this DIY trick a must-try? Because store-bought cauliflower simply can’t compare to the taste and satisfaction of harvesting your own. You know exactly what went into growing it – no mystery pesticides or long-distance transportation affecting its quality. Plus, you’ll be amazed at the difference in flavor. Homegrown cauliflower is sweeter, more tender, and bursting with freshness. It’s a culinary delight that elevates any dish.
But the benefits extend beyond just taste. Growing your own cauliflower is a fantastic way to connect with nature, get some exercise, and learn about the fascinating process of plant growth. It’s a sustainable practice that reduces your carbon footprint and promotes a healthier lifestyle.
Don’t be afraid to experiment! There are so many exciting variations you can try. Consider planting different colored cauliflower varieties, like purple or orange, for a visually stunning harvest. You can also explore companion planting to deter pests and improve soil health. Try interplanting your cauliflower with herbs like rosemary or thyme, or with nitrogen-fixing legumes like beans or peas.
And remember, success in gardening often comes from learning and adapting. Pay close attention to your plants, observe their needs, and adjust your approach as necessary. Don’t be discouraged by setbacks – every gardener experiences them. The key is to keep learning and keep growing.
We wholeheartedly encourage you to give this DIY trick a try. Start small, perhaps with just a few plants, and see how it goes. You might be surprised at how easy and enjoyable it is to grow your own cauliflower at home.
Once you’ve harvested your first head of homegrown cauliflower, we’d love to hear about your experience! Share your tips, successes, and challenges in the comments below. Let’s build a community of home gardeners who are passionate about growing their own food. We are confident that with a little effort, you can successfully **grow cauliflower at home** and enjoy the delicious rewards of your labor. Happy gardening!
Frequently Asked Questions (FAQ)
What are the best cauliflower varieties to grow at home?
Choosing the right variety is crucial for success. For beginners, we recommend starting with reliable and relatively easy-to-grow varieties like ‘Snowball Y Improved’ (a classic white cauliflower), ‘Graffiti’ (a stunning purple variety), or ‘Cheddar’ (an orange variety). Consider your local climate and growing season when making your selection. Some varieties are better suited for warmer climates, while others are more cold-hardy. Check with your local garden center or agricultural extension office for recommendations specific to your region. Also, think about the size of the cauliflower head you prefer. Some varieties produce larger heads, while others are more compact.
How much space does each cauliflower plant need?
Cauliflower plants need adequate space to grow and develop properly. Generally, you should space your plants about 18 to 24 inches apart in rows that are 30 to 36 inches apart. This spacing allows for good air circulation, which helps prevent fungal diseases. If you’re growing cauliflower in containers, choose pots that are at least 12 inches in diameter and 12 inches deep. Make sure the containers have drainage holes to prevent waterlogging. Overcrowding can lead to smaller heads and increased susceptibility to pests and diseases.
What kind of soil is best for growing cauliflower?
Cauliflower thrives in well-drained, fertile soil that is rich in organic matter. The ideal soil pH is between 6.0 and 7.0. Before planting, amend your soil with compost, aged manure, or other organic materials to improve its structure and fertility. If your soil is heavy clay, consider adding sand or perlite to improve drainage. Cauliflower is a heavy feeder, so it’s important to provide it with adequate nutrients. You can use a balanced fertilizer or a fertilizer specifically formulated for vegetables.
How often should I water my cauliflower plants?
Cauliflower plants need consistent moisture, especially during head formation. Water deeply and regularly, aiming to keep the soil consistently moist but not waterlogged. The frequency of watering will depend on your climate, soil type, and the stage of growth. Check the soil moisture regularly by sticking your finger about an inch into the soil. If it feels dry, it’s time to water. Avoid overhead watering, as this can increase the risk of fungal diseases. Instead, water at the base of the plants.
What are some common pests and diseases that affect cauliflower?
Cauliflower is susceptible to several pests and diseases, including cabbage worms, aphids, flea beetles, clubroot, and black rot. Regularly inspect your plants for signs of pests or diseases. Cabbage worms can be controlled with Bacillus thuringiensis (Bt), a natural insecticide. Aphids can be washed off with a strong stream of water or treated with insecticidal soap. Flea beetles can be deterred with row covers. Clubroot is a soilborne disease that can be prevented by maintaining a proper soil pH and practicing crop rotation. Black rot is a bacterial disease that can be prevented by using disease-free seeds and avoiding overhead watering.
How do I know when my cauliflower is ready to harvest?
Cauliflower is ready to harvest when the head is firm, compact, and has reached the desired size. The size of the head will vary depending on the variety, but generally, a head that is 6 to 8 inches in diameter is ready to harvest. The curds (the individual florets that make up the head) should be tightly packed together and free from blemishes. If the curds start to separate or the head becomes loose, it’s time to harvest. To harvest, cut the stem of the cauliflower just below the head, leaving a few leaves attached.
Can I grow cauliflower in containers?
Yes, you can successfully grow cauliflower in containers, but it requires a bit more attention than growing it in the ground. Choose a large container that is at least 12 inches in diameter and 12 inches deep. Use a high-quality potting mix that is well-draining and rich in organic matter. Water regularly and fertilize every two weeks with a balanced fertilizer. Container-grown cauliflower may require more frequent watering and fertilization than plants grown in the ground.
How can I prevent my cauliflower from turning yellow?
Cauliflower heads can sometimes turn yellow if they are exposed to too much sunlight. To prevent this, you can blanch the heads by tying the outer leaves together over the developing head. This will shield the head from the sun and keep it white. Blanching is typically done when the head is about 2 to 3 inches in diameter. Use twine or rubber bands to tie the leaves together loosely. Check the head regularly to make sure it’s not becoming too tight.
What can I do with my homegrown cauliflower?
The possibilities are endless! You can roast it, steam it, boil it, grill it, or even eat it raw. Cauliflower is a versatile vegetable that can be used in a variety of dishes, from soups and stews to salads and side dishes. You can also use it to make cauliflower rice, cauliflower pizza crust, or cauliflower mash. Get creative and experiment with different recipes to find your favorites. And don’t forget to use the leaves! They are also edible and can be used in soups, stews, or stir-fries.


Leave a Comment