
Grow Bok Choy at Home and unlock a world of fresh, flavorful possibilities right in your backyard! Have you ever dreamt of snipping vibrant, crisp greens just moments before adding them to your stir-fry? Or perhaps you’ve longed to impress your friends with a homemade kimchi featuring bok choy you nurtured yourself? Well, dream no more! This DIY guide is your passport to cultivating this nutritional powerhouse with ease.
Bok choy, also known as pak choi, boasts a rich history deeply intertwined with Asian cuisine. For centuries, it has been a staple in Chinese and other East Asian diets, celebrated not only for its delicious taste but also for its impressive health benefits. It’s packed with vitamins, minerals, and antioxidants, making it a fantastic addition to any healthy eating plan.
But why should you bother growing your own? In today’s world, where access to fresh, organic produce can be challenging and expensive, learning to grow bok choy at home offers a sustainable and rewarding solution. Imagine bypassing the grocery store lines and enjoying the satisfaction of harvesting your own food, knowing exactly where it came from and how it was grown. Plus, it’s a fantastic way to connect with nature, de-stress, and add a touch of green to your living space. Let’s dive in and discover the simple secrets to successful bok choy cultivation!
Grow Your Own Delicious Bok Choy: A Beginner’s Guide
Hey there, fellow gardening enthusiasts! I’m so excited to share my experience growing bok choy at home. It’s surprisingly easy, even if you’re a complete newbie like I was. Bok choy, also known as pak choi, is a delicious and nutritious leafy green that’s perfect for stir-fries, soups, and salads. Plus, growing your own means you get the freshest, most flavorful bok choy possible. Let’s dive in!
Choosing Your Bok Choy Variety
Before we get started, it’s good to know there are different types of bok choy. Here are a few popular options:
* Shanghai Bok Choy: This variety has light green stems and spoon-shaped leaves. It’s known for its mild flavor and tender texture. I personally love this one!
* Baby Bok Choy: As the name suggests, this is a smaller version of regular bok choy. It’s great for quick cooking and has a slightly sweeter taste.
* Canton Bok Choy: This type has dark green leaves and thick, white stalks. It has a slightly stronger flavor than Shanghai bok choy.
Choose whichever variety appeals most to you! They all grow pretty much the same way.
Getting Started: Seeds vs. Seedlings
You have two options for starting your bok choy: seeds or seedlings.
* Seeds: Starting from seeds is more economical and gives you more control over the entire growing process. I usually prefer this method.
* Seedlings: Buying seedlings is faster and easier, especially if you’re short on time or just want a head start.
I’ll cover both methods in the instructions below.
What You’ll Need
Here’s a list of everything you’ll need to grow your own bok choy:
* Bok choy seeds or seedlings
* Potting soil (if growing in containers) or garden soil (if growing in the ground)
* Containers (if growing in containers) – make sure they have drainage holes!
* Watering can or hose
* Fertilizer (optional, but recommended) – I like to use a balanced organic fertilizer.
* Trowel or small shovel
* Gardening gloves (optional, but I always wear them!)
Growing Bok Choy from Seeds: Step-by-Step
Okay, let’s get our hands dirty! Here’s how to grow bok choy from seeds:
1. Choose Your Planting Time: Bok choy is a cool-season crop, which means it grows best in spring or fall. Avoid planting during the hottest part of summer, as the heat can cause the plants to bolt (go to seed prematurely). I usually start my seeds indoors about 4-6 weeks before the last expected frost in spring, or directly sow them in the garden in late summer for a fall harvest.
2. Start Seeds Indoors (Optional): If you’re starting seeds indoors, fill small pots or seed trays with potting soil. Moisten the soil thoroughly.
3. Sow the Seeds: Sow the seeds about ¼ inch deep and gently cover them with soil. I usually plant 2-3 seeds per pot, just in case some don’t germinate.
4. Water Gently: Water the seeds gently to avoid disturbing them. I use a spray bottle to mist the soil.
5. Provide Light and Warmth: Place the pots in a warm, sunny location or under grow lights. The ideal temperature for germination is around 60-70°F (15-21°C).
6. Keep the Soil Moist: Keep the soil consistently moist, but not soggy. Check the soil daily and water as needed.
7. Thin Seedlings (If Necessary): Once the seedlings emerge and have a few true leaves (the leaves that look like miniature bok choy leaves), thin them to one plant per pot. Choose the strongest, healthiest-looking seedling and snip off the others at the soil line.
8. Harden Off Seedlings: Before transplanting the seedlings outdoors, you’ll need to harden them off. This means gradually exposing them to outdoor conditions over a period of about a week. Start by placing them in a sheltered spot outdoors for a few hours each day, gradually increasing the amount of time they spend outside. This helps them adjust to the sun, wind, and temperature changes.
9. Prepare the Planting Bed: Whether you’re growing in containers or in the ground, prepare the planting bed by loosening the soil and adding compost or other organic matter. Bok choy prefers well-drained soil that’s rich in nutrients.
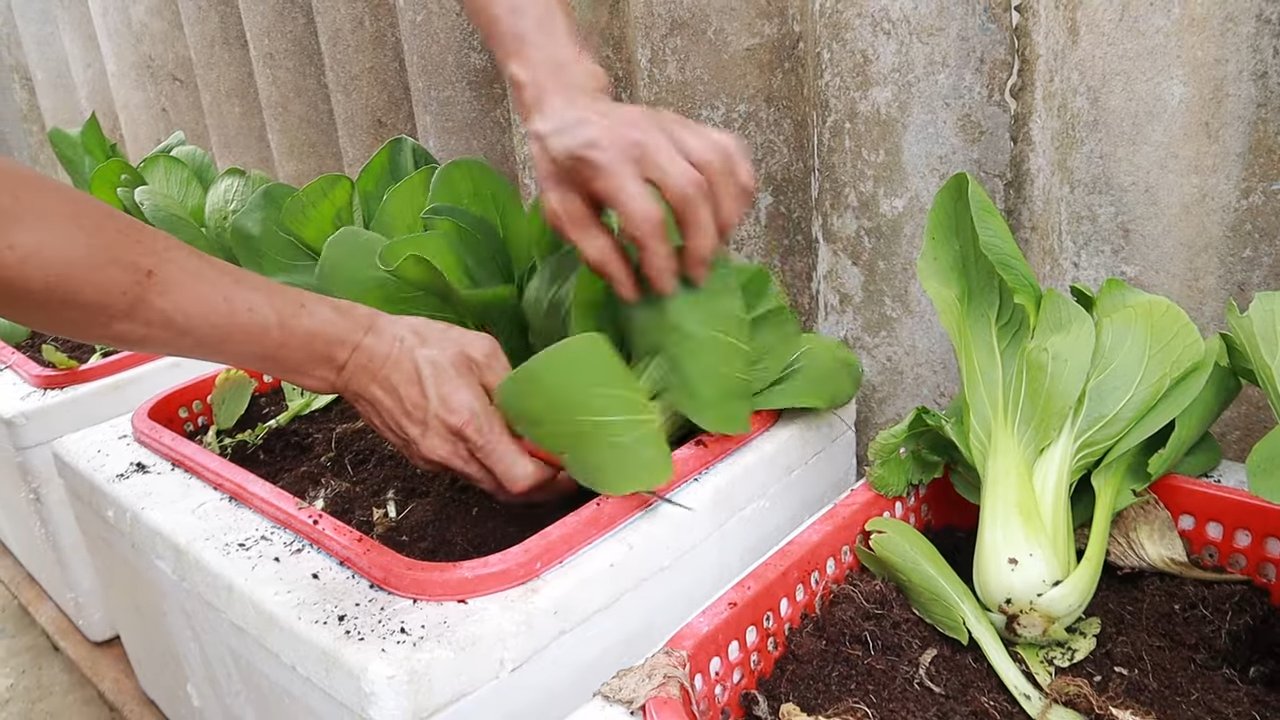
10. Transplant Seedlings (or Direct Sow): If you started seeds indoors, transplant the seedlings into the prepared planting bed, spacing them about 6-8 inches apart. If you’re direct sowing, sow the seeds about ½ inch deep and thin the seedlings to 6-8 inches apart once they emerge.
11. Water Thoroughly: Water the newly transplanted seedlings or direct-sown seeds thoroughly.
Growing Bok Choy from Seedlings: Step-by-Step
If you’re starting with seedlings, the process is even simpler:
1. Prepare the Planting Bed: Just like with seeds, prepare the planting bed by loosening the soil and adding compost or other organic matter.
2. Dig Holes: Dig holes that are slightly larger than the root balls of the seedlings, spacing them about 6-8 inches apart.
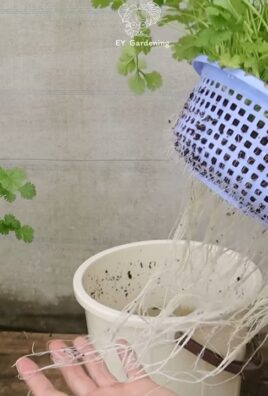
3. Remove Seedlings from Pots: Gently remove the seedlings from their pots, being careful not to damage the roots.
4. Place Seedlings in Holes: Place the seedlings in the holes and backfill with soil, gently firming the soil around the base of the plants.
5. Water Thoroughly: Water the newly transplanted seedlings thoroughly.
Caring for Your Bok Choy Plants
Now that your bok choy plants are in the ground, here’s how to keep them happy and healthy:
1. Water Regularly: Bok choy needs consistent moisture to thrive. Water regularly, especially during dry spells. Aim to keep the soil consistently moist, but not waterlogged. I usually water deeply every few days, depending on the weather.
2. Fertilize (Optional): Bok choy is a heavy feeder, so fertilizing can help boost growth and yields. I like to use a balanced organic fertilizer, following the instructions on the package. You can fertilize every few weeks, or as needed.
3. Weed Regularly: Keep the planting bed free of weeds, as they can compete with the bok choy plants for nutrients and water. I like to hand-pull weeds as soon as I see them.
4. Protect from Pests: Bok choy can be susceptible to pests like aphids, flea beetles, and cabbage worms. Inspect your plants regularly for signs of pests. If you find any, you can try using insecticidal soap or neem oil to control them. I prefer to use organic pest control methods whenever possible. You can also use row covers to protect your plants from pests.
5. Protect from Extreme Weather: Bok choy is relatively cold-hardy, but it can be damaged by frost. If a frost is predicted, cover your plants with a blanket or row cover. In hot weather, provide shade to prevent the plants from bolting.
Harvesting Your Bok Choy
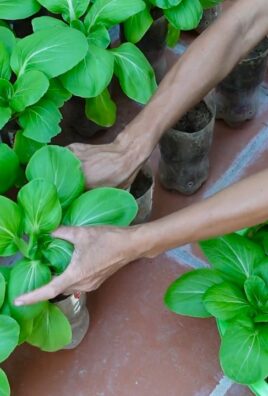
The best part! You can start harvesting bok choy when the plants are about 6-8 inches tall.
1. Harvest Individual Leaves or the Whole Plant: You can harvest individual leaves as needed, or harvest the entire plant at once. To harvest individual leaves, simply cut them off at the base of the plant. To harvest the entire plant, cut it off at the base with a sharp knife.
2. Wash and Store: Wash the harvested bok choy thoroughly and store it in the refrigerator in a plastic bag or container. It will keep for several days.
Troubleshooting
Here are a few common problems you might encounter when growing bok choy, and how to fix them:
* Bolting (Premature Flowering): Bolting is caused by stress, such as heat or lack of water. To prevent bolting, plant bok choy in the spring or fall, provide consistent moisture, and protect the plants from extreme heat.
* Pest Infestations: As mentioned earlier, bok choy can be susceptible to pests. Inspect your plants regularly and take action to control pests as soon as you see them.
* Yellowing Leaves: Yellowing leaves can be a sign of nutrient deficiency or overwatering. Make sure your soil is well-drained and fertilize as needed.
* Slow Growth: Slow growth can be caused by lack of sunlight, poor soil, or insufficient watering. Make sure your plants are getting enough sunlight, amend the soil with compost or other organic matter, and water regularly.
Enjoy Your Homegrown Bok Choy!
That’s it! You’re now ready to grow

Conclusion
So, there you have it! Growing your own bok choy at home is not only achievable, but it’s also incredibly rewarding. From seed to stir-fry, the journey is filled with the satisfaction of nurturing your own food and enjoying the freshest, most flavorful results. This DIY trick transforms a simple kitchen scrap into a vibrant, leafy green, ready to elevate your meals.
Why is this a must-try? Because it’s sustainable, cost-effective, and puts you in control of your food source. Imagine the pride of serving a dish featuring bok choy you personally cultivated, knowing exactly where it came from and how it was grown. Plus, it’s a fantastic way to reduce food waste and connect with nature, even if you only have a small balcony or windowsill.
But the fun doesn’t stop there! Feel free to experiment with different varieties of bok choy. Try growing baby bok choy for a more delicate flavor and texture, or explore colorful cultivars like red bok choy for added visual appeal. You can also adjust the growing conditions to suit your specific environment. If you live in a hotter climate, provide some afternoon shade to prevent bolting. In cooler climates, consider starting your bok choy indoors to get a head start on the growing season.
Another variation to consider is hydroponic growing. Bok choy thrives in hydroponic systems, offering a clean and efficient way to cultivate your greens. This method is particularly well-suited for indoor growing and can yield impressive results.
Don’t be afraid to get creative with your growing medium, too. While soil is the most common choice, you can also use coco coir, perlite, or a combination of different materials. Just make sure your chosen medium provides adequate drainage and aeration.
We wholeheartedly encourage you to give this DIY trick a try. It’s a simple, yet powerful way to bring fresh, healthy bok choy into your life. Once you’ve experienced the joy of growing your own, you’ll never look at bok choy the same way again.
And most importantly, we want to hear about your experiences! Share your photos, tips, and challenges in the comments below. Let’s build a community of bok choy enthusiasts and learn from each other’s successes (and occasional failures!). Your insights could inspire others to embark on their own bok choy-growing adventures. So, grab some bok choy scraps, get your hands dirty, and let the growing begin! We are confident that you will find that growing bok choy at home is easier than you think.
Frequently Asked Questions (FAQ)
What part of the bok choy do I need to regrow it?
You’ll need the base of the bok choy, the part where the stalks are connected. This is usually discarded after using the leafy parts in cooking. Make sure to leave about 2-3 inches of the base intact. This section contains the latent buds that will sprout into new growth.
How long does it take to regrow bok choy from the base?
You should start seeing new growth within a few days of placing the base in water. Within a week or two, you’ll have enough roots to transplant it into soil. The entire process, from base to harvestable bok choy, can take anywhere from 30 to 60 days, depending on the growing conditions and the variety of bok choy.
What kind of soil is best for growing bok choy?
Bok choy prefers well-draining, fertile soil that is rich in organic matter. A good potting mix amended with compost or aged manure is ideal. The soil pH should be slightly acidic to neutral, ideally between 6.0 and 7.0. Avoid heavy clay soils, as they can retain too much moisture and lead to root rot.
How much sunlight does bok choy need?
Bok choy thrives in full sun, meaning at least 6 hours of direct sunlight per day. However, in hotter climates, it can benefit from some afternoon shade to prevent bolting (premature flowering). If you’re growing bok choy indoors, place it near a sunny window or use grow lights to provide adequate illumination.
How often should I water my bok choy?
Bok choy needs consistent moisture to thrive. Water deeply whenever the top inch of soil feels dry to the touch. Avoid overwatering, as this can lead to root rot. During hot weather, you may need to water more frequently. Mulching around the plants can help retain moisture in the soil.
What are some common pests and diseases that affect bok choy?
Common pests that can affect bok choy include aphids, cabbage worms, flea beetles, and slugs. Diseases include downy mildew, clubroot, and black rot. Regularly inspect your plants for signs of pests or diseases and take appropriate action. Organic pest control methods, such as insecticidal soap or neem oil, can be effective. Ensure good air circulation to prevent fungal diseases.
Can I grow bok choy indoors?
Yes, you can absolutely grow bok choy indoors! Choose a sunny location near a window or use grow lights to provide adequate light. Use a well-draining potting mix and water regularly. Indoor-grown bok choy may not grow as large as outdoor-grown plants, but you can still harvest plenty of fresh greens.
How do I know when my bok choy is ready to harvest?
Bok choy is ready to harvest when the leaves are a good size and the stalks are firm. You can harvest the entire plant at once, or you can harvest individual leaves as needed. For baby bok choy, harvest when the leaves are about 4-6 inches long.
What are some ways to use homegrown bok choy?
Homegrown bok choy is incredibly versatile and can be used in a variety of dishes. It’s delicious stir-fried, steamed, sautéed, or added to soups and stews. You can also use it in salads or as a side dish. The leaves and stalks are both edible and nutritious.
What if my bok choy starts to flower (bolts)?
Bolting is when a plant prematurely flowers, usually due to stress from heat or lack of water. Once bok choy bolts, the leaves can become bitter. To prevent bolting, provide adequate water, shade during hot weather, and harvest regularly. If your bok choy does bolt, you can still eat the leaves, but they may not be as flavorful. You can also collect the seeds for future planting.
Leave a Comment