
Grow Black Corn at Home? Absolutely! Imagine the look on your friends’ faces when you serve up vibrant, almost gothic, ears of corn you grew yourself. It’s not just a conversation starter; it’s a testament to your gardening prowess! Forget the same old yellow kernels; we’re diving into the fascinating world of black corn, a variety that’s as nutritious as it is visually stunning.
Black corn, also known as purple corn in some varieties, boasts a rich history, particularly in South America. For centuries, indigenous cultures have cultivated this unique grain, using it not only for food but also for natural dyes and traditional medicines. The deep, dark color comes from anthocyanins, powerful antioxidants that offer a range of health benefits.
But why should you bother trying to grow black corn at home? Well, besides the sheer novelty and bragging rights, it’s a fantastic way to add diversity to your garden and your diet. Store-bought corn often lacks the freshness and unique flavor that homegrown varieties offer. Plus, knowing exactly where your food comes from and how it was grown is incredibly rewarding. This DIY guide will walk you through every step, from selecting the right seeds to harvesting your own beautiful, black corn. Let’s get started and transform your garden into a source of delicious and visually striking produce!
Schwarzer Mais Anbauen: Dein DIY-Leitfaden für Zuhause
Hey Leute! Habt ihr schon mal von schwarzem Mais gehört? Ich war total fasziniert, als ich das erste Mal davon gelesen habe. Nicht nur, dass er super cool aussieht, er ist auch noch richtig gesund! Schwarzer Mais ist reich an Anthocyanen, das sind die gleichen Antioxidantien, die auch in Blaubeeren vorkommen. Und das Beste: Man kann ihn auch zu Hause anbauen! Ich zeige euch, wie es geht. Keine Sorge, es ist einfacher als ihr denkt.
Was du brauchst: Die Materialliste
Bevor wir loslegen, hier eine Liste mit allem, was du brauchst:
* Schwarze Maissamen: Die bekommt ihr online oder in gut sortierten Gartencentern. Achtet darauf, dass sie für eure Klimazone geeignet sind.
* Anzuchttöpfe oder -schalen: Für die Voranzucht.
* Anzuchterde: Spezielle Erde für die Anzucht, die ist nährstoffarm und locker.
* Gartenerde: Für das Beet oder den Kübel, in dem der Mais später wachsen soll.
* Kompost oder organischer Dünger: Für eine gute Nährstoffversorgung.
* Gießkanne oder Schlauch: Zum Bewässern.
* Spitzhacke oder Spaten: Zum Umgraben des Beets.
* Pflanzstäbe (optional): Für zusätzlichen Halt, besonders bei Wind.
* Vogelschutznetz (optional): Um die jungen Pflanzen vor Vögeln zu schützen.
* Geduld: Mais braucht Zeit zum Wachsen!
Die Vorbereitung: Der Grundstein für eine reiche Ernte
Bevor wir mit dem Pflanzen loslegen, müssen wir ein paar Vorbereitungen treffen. Das ist wichtig, damit der Mais später gut wächst und wir eine reiche Ernte haben.
1. Die Samen auswählen und vorbereiten
* Samenquelle: Achtet darauf, dass ihr hochwertige Samen von einem vertrauenswürdigen Anbieter kauft. Lest euch Bewertungen durch und fragt im Zweifelsfall nach.
* Samenprüfung (optional): Um sicherzustellen, dass die Samen keimfähig sind, könnt ihr eine Keimprobe machen. Legt dazu ein paar Samen auf ein feuchtes Küchenpapier, rollt es zusammen und steckt es in eine Plastiktüte. Nach ein paar Tagen sollten die Samen keimen.
* Einweichen (optional): Das Einweichen der Samen in lauwarmem Wasser für 12-24 Stunden kann die Keimung beschleunigen.
2. Den richtigen Standort finden
* Sonne, Sonne, Sonne: Mais liebt die Sonne! Wählt einen Standort, der mindestens 6-8 Stunden Sonne pro Tag bekommt.
* Windschutz: Ein windgeschützter Standort ist ideal, da hohe Maispflanzen leicht umknicken können. Eine Hecke oder ein Zaun können hier helfen.
* Guter Boden: Der Boden sollte locker, gut durchlässig und nährstoffreich sein.
3. Den Boden vorbereiten
* Umgraben: Grabt den Boden gründlich um, um ihn aufzulockern. Entfernt dabei Steine, Wurzeln und Unkraut.
* Verbessern: Mischt Kompost oder organischen Dünger unter die Erde, um sie mit Nährstoffen anzureichern.
* Drainage: Wenn der Boden zu lehmig ist, könnt ihr Sand untermischen, um die Drainage zu verbessern.
Die Anzucht: Der Start in ein neues Maisleben
Ich ziehe meinen Mais immer gerne vor, weil ich finde, dass er dann einen besseren Start hat. Das ist aber kein Muss, ihr könnt ihn auch direkt ins Beet säen.
1. Die Anzuchttöpfe vorbereiten
* Töpfe füllen: Füllt die Anzuchttöpfe oder -schalen mit Anzuchterde.
* Andrücken: Drückt die Erde leicht an.
2. Die Samen säen
* Sätiefe: Legt die Samen etwa 2-3 cm tief in die Erde.
* Abstand: Lasst zwischen den Samen etwa 5 cm Platz.
* Bedecken: Bedeckt die Samen mit Erde und drückt sie leicht an.
3. Gießen und pflegen
* Gießen: Gießt die Erde vorsichtig an, sodass sie feucht, aber nicht nass ist.
* Standort: Stellt die Töpfe an einen warmen und hellen Ort.
* Feuchtigkeit: Haltet die Erde feucht, aber vermeidet Staunässe.
* Keimung: Nach etwa einer Woche sollten die Samen keimen.
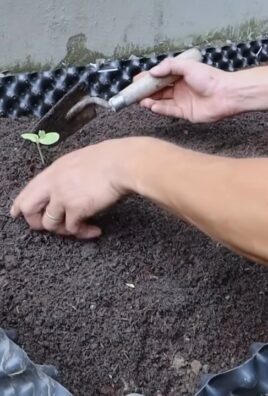
Das Auspflanzen: Ab ins Beet!
Sobald die kleinen Maispflanzen etwa 10-15 cm groß sind, können sie ins Beet umziehen.
1. Die Pflanzen vorbereiten
* Abhärten: Gewöhnt die Pflanzen langsam an die Bedingungen im Freien, indem ihr sie tagsüber für ein paar Stunden nach draußen stellt.
* Gießen: Gießt die Pflanzen vor dem Auspflanzen gründlich.
2. Das Beet vorbereiten
* Pflanzlöcher: Grabt Pflanzlöcher im Abstand von etwa 30-40 cm.
* Abstand zwischen den Reihen: Lasst zwischen den Reihen etwa 60-70 cm Platz.
3. Die Pflanzen einsetzen
* Vorsichtig: Nehmt die Pflanzen vorsichtig aus den Töpfen und setzt sie in die Pflanzlöcher.
* Tiefe: Setzt die Pflanzen so tief ein, wie sie vorher im Topf standen.
* Andrücken: Drückt die Erde um die Pflanzen herum leicht an.
4. Gießen und schützen
* Gießen: Gießt die Pflanzen nach dem Auspflanzen gründlich.
* Vogelschutznetz (optional): Schützt die jungen Pflanzen mit einem Vogelschutznetz vor Vögeln.
Die Pflege: Damit der Mais prächtig gedeiht
Mais ist relativ pflegeleicht, aber ein paar Dinge solltet ihr beachten, damit er gut wächst.
1. Gießen
* Regelmäßig: Gießt den Mais regelmäßig, besonders in trockenen Perioden.
* Tiefgründig: Gießt tiefgründig, damit das Wasser auch die Wurzeln erreicht.
* Vermeiden: Vermeidet Staunässe.
2. Düngen
* Regelmäßig: Düngt den Mais regelmäßig mit Kompost oder organischem Dünger.
* Stickstoff: Mais braucht viel Stickstoff, besonders in der Wachstumsphase.
* Dosierung: Achtet auf die Dosierungsanleitung des Düngers.
3. Unkraut entfernen
* Regelmäßig: Entfernt regelmäßig Unkraut, damit der Mais nicht konkurriert.
* Hacken: Lockert den Boden regelmäßig mit einer Hacke auf.
4. Stützen (optional)
* Pflanzstäbe: Bei Wind können hohe Maispflanzen umknicken. Stützt sie gegebenenfalls mit Pflanzstäben.
5. Schädlinge und Krankheiten
* Beobachten: Beobachtet die Pflanzen regelmäßig auf Schädlinge und Krankheiten.
* Bekämpfen: Bekämpft Schädlinge und Krankheiten frühzeitig mit geeigneten Mitteln.
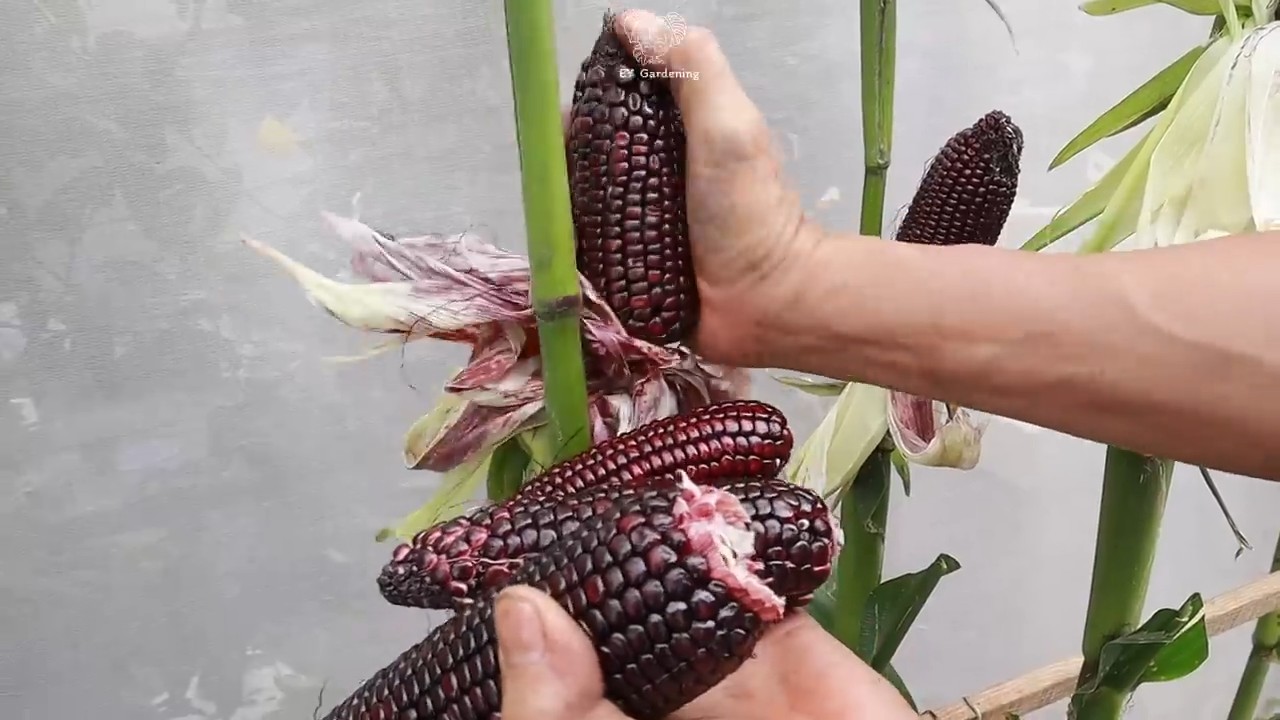
Die Ernte: Der Lohn der Mühe
Nach etwa 90-120 Tagen ist es endlich soweit: Der schwarze Mais ist reif und kann geerntet werden!
1. Reife erkennen
* Trockene Hüllblätter: Die Hüllblätter der Maiskolben sollten trocken und braun sein.
* Seidenfäden: Die Seidenfäden, die aus den Kolben herausragen, sollten ebenfalls trocken und braun sein.
* Feste Körner: Die Körner sollten fest und prall sein.
2. Ernten
* Abdrehen: Dreht die Maiskolben vorsichtig vom Stiel ab.
* Hüllblätter entfernen: Entfernt die Hüllblätter und die Seidenfäden.
3. Verwenden
* Sofort: Ihr könnt den schwarzen Mais sofort essen, kochen, grillen oder zu Mehl verarbeiten.
* Lagern: Zum Lagern

Conclusion
So, there you have it! Growing black corn at home is not just a fun gardening project; it’s a gateway to unlocking a world of culinary possibilities and a deeper connection with the food you eat. From the vibrant color that adds a unique visual appeal to your dishes to the enhanced nutritional benefits and the satisfaction of harvesting your own crop, the rewards are plentiful.
This isn’t just about growing corn; it’s about embracing a more sustainable and flavorful lifestyle. Imagine the look on your friends’ faces when you serve them homemade black corn tortillas, a vibrant black corn salsa, or even a striking black corn polenta. The possibilities are endless, limited only by your imagination.
Don’t be afraid to experiment! Try different varieties of black corn to find your favorite flavor profile. Some varieties are sweeter, while others have a more earthy, nutty taste. Consider companion planting with beans and squash to create a thriving, self-sustaining garden ecosystem. You can also adjust the growing conditions to influence the color intensity of the kernels. For example, cooler temperatures during the ripening stage can sometimes deepen the black pigmentation.
And remember, growing black corn at home is a learning process. Don’t be discouraged if your first attempt isn’t perfect. Every season brings new opportunities to refine your techniques and improve your yield. The key is to be patient, observant, and willing to adapt to the specific needs of your plants.
We highly encourage you to embark on this exciting journey of growing black corn at home. It’s a rewarding experience that will not only enhance your culinary creations but also deepen your appreciation for the natural world.
Once you’ve harvested your first crop, we’d love to hear about your experience! Share your photos, recipes, and tips with us in the comments below. Let’s create a community of black corn enthusiasts and inspire others to discover the joys of growing their own food. What are you waiting for? Get those seeds started and prepare to be amazed by the beauty and bounty of homegrown black corn!
Frequently Asked Questions (FAQ)
What exactly *is* black corn, and is it different from regular corn?
Black corn, also known as purple corn or blue corn depending on the specific variety, is a type of corn that gets its distinctive color from high levels of anthocyanins. Anthocyanins are powerful antioxidants also found in blueberries, blackberries, and other dark-colored fruits and vegetables. While it’s still corn, the anthocyanins give it a slightly different flavor profile, often described as earthier and nuttier than yellow corn. Nutritionally, it boasts higher antioxidant content, making it a healthier choice. So, while it’s related to regular corn, it’s definitely a unique and beneficial variation.
Is it difficult to grow black corn compared to other types of corn?
Generally, growing black corn is not significantly more difficult than growing other types of corn. The basic requirements are the same: plenty of sunlight (at least 6-8 hours per day), well-drained soil, and consistent watering. However, some varieties of black corn may be more susceptible to certain pests or diseases, so it’s important to choose a variety that is well-suited to your local climate and growing conditions. Also, remember that corn is wind-pollinated, so planting in blocks rather than a single row will improve pollination rates and yield.
What kind of soil is best for growing black corn?
Black corn thrives in well-drained soil that is rich in organic matter. Before planting, amend your soil with compost, aged manure, or other organic materials to improve its fertility and drainage. A slightly acidic to neutral soil pH (around 6.0 to 7.0) is ideal. If your soil is heavy clay, consider adding sand or other drainage materials to improve its texture. A soil test can help you determine the specific nutrient needs of your soil and guide your fertilization strategy.
How often should I water my black corn plants?
Consistent watering is crucial, especially during germination and the early stages of growth. Aim to keep the soil consistently moist but not waterlogged. Water deeply and less frequently, rather than shallowly and often. This encourages the roots to grow deeper, making the plants more drought-tolerant. During hot, dry weather, you may need to water more frequently. A good rule of thumb is to water when the top inch of soil feels dry to the touch.
What are some common pests and diseases that affect black corn, and how can I prevent them?
Common pests that can affect black corn include corn earworms, aphids, and stalk borers. Diseases include corn smut, rust, and leaf blight. To prevent these problems, practice good garden hygiene by removing weeds and debris that can harbor pests and diseases. Crop rotation can also help to break the life cycle of pests and diseases. Consider using organic pest control methods, such as introducing beneficial insects or applying neem oil. Choose disease-resistant varieties of black corn whenever possible.
When is the best time to harvest black corn?
The best time to harvest black corn depends on how you plan to use it. If you’re harvesting for fresh eating, wait until the silks have turned brown and dry and the kernels are plump and milky. You can test the kernels by piercing one with your fingernail; if it releases a milky liquid, it’s ready to harvest. If you’re harvesting for cornmeal or flour, allow the kernels to dry completely on the stalk before harvesting. The kernels should be hard and dry to the touch.
Can I save seeds from my black corn crop to plant next year?
Yes, you can save seeds from your black corn crop, but keep in mind that corn is open-pollinated, meaning that it can cross-pollinate with other varieties of corn growing nearby. If you want to save true-to-type seeds, you’ll need to isolate your black corn from other corn varieties by at least a few hundred feet. Allow the ears to dry completely on the stalk, then remove the kernels and store them in a cool, dry place.
What are some creative ways to use black corn in cooking?
Black corn can be used in a variety of dishes, just like regular corn. It’s delicious grilled, roasted, or steamed. You can also use it to make tortillas, tamales, polenta, cornbread, and salsa. The vibrant color of black corn adds a unique visual appeal to any dish. Try using it in salads, soups, and stews for a pop of color and flavor. You can even grind it into flour to make black corn pancakes or muffins. The possibilities are endless!
Does black corn have any special nutritional benefits?
Yes, black corn is rich in anthocyanins, which are powerful antioxidants that have been linked to a variety of health benefits, including reduced risk of heart disease, cancer, and age-related cognitive decline. It also contains fiber, vitamins, and minerals. The darker the color of the corn, the higher the concentration of anthocyanins.
Where can I find black corn seeds to get started?
Black corn seeds are available from a variety of sources, including online seed companies, local nurseries, and garden centers. Look for reputable seed suppliers that offer high-quality seeds and good customer service. Be sure to choose a variety that is well-suited to your local climate and growing conditions. Some popular varieties include ‘Blue Hopi,’ ‘Cherokee Blue,’ and ‘Black Aztec.’
Leave a Comment