
Grow Bitter Melon Sack Method: Unlock a Bountiful Harvest with This Simple DIY!
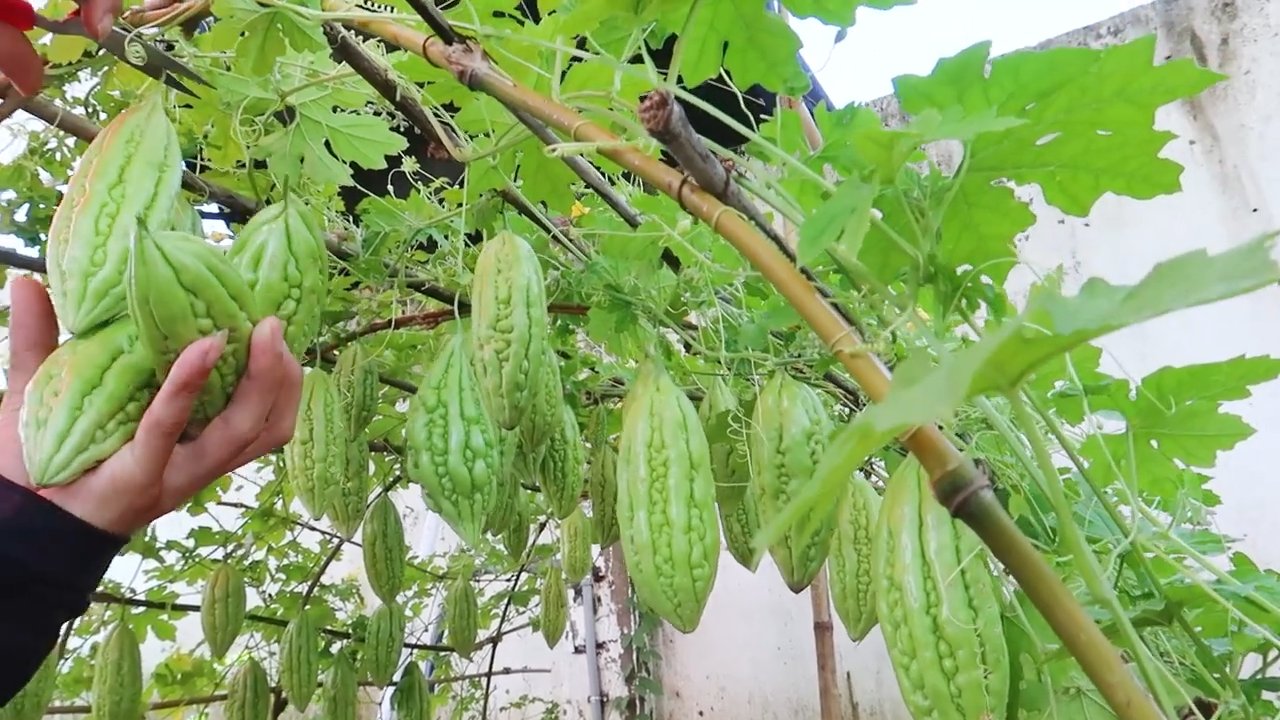
Have you ever dreamed of harvesting basketfuls of vibrant, healthy bitter melon right from your own backyard? I know I have! But sometimes, space constraints or challenging soil conditions can make traditional gardening feel like an uphill battle. That’s where the ingenious grow bitter melon sack method comes in – a game-changer for urban gardeners and anyone looking for a creative and efficient way to cultivate this nutritious vegetable.
The practice of growing vegetables in containers, including sacks, has roots stretching back centuries, with various cultures adapting the technique to suit their environments and resource availability. Think of the hanging gardens of Babylon, or the ingenious ways communities in resource-scarce regions have maximized food production. Today, this spirit of innovation lives on in DIY gardening hacks like this one!
Why is this grow bitter melon sack method so essential? Well, for starters, it’s incredibly space-saving, perfect for balconies, patios, or even small yards. It also allows you to control the soil quality, ensuring your bitter melon gets the nutrients it needs to thrive. Plus, it’s a fantastic way to recycle old sacks and reduce waste! I’m excited to share this simple yet effective technique that will help you enjoy a delicious and rewarding harvest, no matter your gardening experience.
Bittermelon im Sack anbauen: Eine DIY-Anleitung für üppige Ernten
Ich liebe Bittermelonen! Ihr einzigartiger, bitterer Geschmack ist einfach unwiderstehlich. Aber der Anbau kann manchmal eine Herausforderung sein, besonders wenn man wenig Platz hat. Deshalb habe ich eine Methode entwickelt, die sich als unglaublich effektiv erwiesen hat: der Anbau im Sack! Diese Methode ist nicht nur platzsparend, sondern auch kostengünstig und ermöglicht eine reiche Ernte. Lasst uns gemeinsam eintauchen und lernen, wie ihr eure eigenen Bittermelonen im Sack anbauen könnt.
Was du brauchst: Die Materialliste
Bevor wir loslegen, stelle sicher, dass du alles griffbereit hast. Das spart Zeit und Frustration. Hier ist eine Liste der Dinge, die du benötigst:
* Sack: Ein robuster Jutesack, Kartoffelsack oder ein großer Pflanzsack (mindestens 50 Liter Volumen). Ich bevorzuge Jutesäcke, da sie atmungsaktiv sind.
* Erde: Hochwertige Blumenerde, idealerweise eine Mischung aus Gartenerde, Kompost und Kokosfasern.
* Bittermelonensamen: Kaufe qualitativ hochwertige Samen von einer vertrauenswürdigen Quelle.
* Dünger: Organischer Dünger wie Komposttee oder ein Langzeitdünger.
* Rankhilfe: Bambusstäbe, ein Rankgitter oder eine Schnur, an der die Bittermelonen hochklettern können.
* Gießkanne oder Schlauch: Zum Bewässern der Pflanzen.
* Schere oder Messer: Zum Zuschneiden von Rankhilfen und Säcken.
* Handschuhe: Zum Schutz deiner Hände.
* Optional: Perlite oder Vermiculit zur Verbesserung der Drainage.
Schritt-für-Schritt-Anleitung: So gelingt der Anbau im Sack
Jetzt, wo wir alles haben, können wir mit dem eigentlichen Anbau beginnen. Keine Sorge, es ist einfacher als es aussieht!
1. Die Vorbereitung des Sacks
1. Reinigung: Wenn du einen gebrauchten Sack verwendest, reinige ihn gründlich mit Wasser und Seife, um eventuelle Krankheitserreger zu entfernen.
2. Drainage: Schneide am Boden des Sacks einige kleine Löcher (ca. 1 cm Durchmesser) für eine gute Drainage. Das verhindert Staunässe, die Bittermelonen nicht mögen.
3. Verstärkung (optional): Wenn der Sack sehr dünn ist, kannst du ihn mit einer zusätzlichen Schicht Stoff oder Plastik verstärken, um ihn haltbarer zu machen.
2. Die Vorbereitung der Erde
1. Mischen: Mische die Blumenerde, den Kompost und die Kokosfasern in einem großen Behälter. Das Verhältnis sollte ungefähr 1:1:1 sein.
2. Dünger hinzufügen: Mische den organischen Dünger gemäß den Anweisungen auf der Verpackung unter die Erde.
3. Drainage verbessern (optional): Wenn du Perlite oder Vermiculit verwendest, füge etwa 10-20% zur Erdmischung hinzu, um die Drainage weiter zu verbessern.
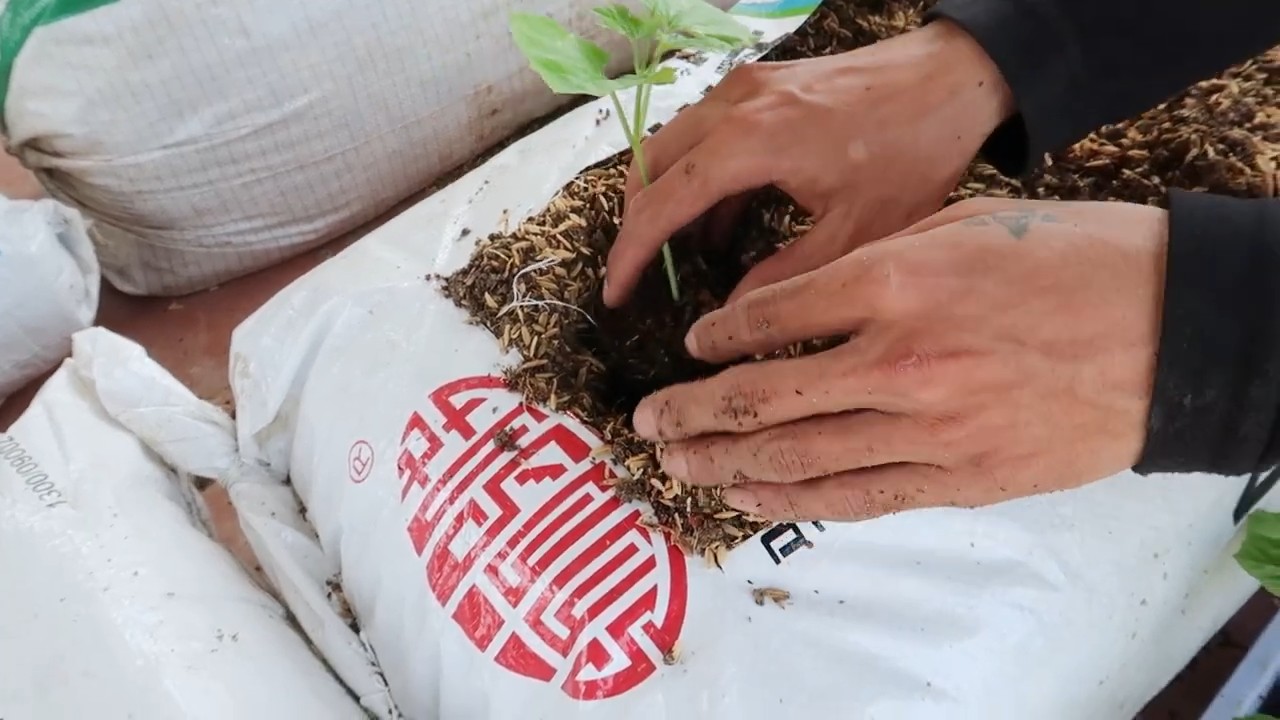
3. Das Befüllen des Sacks
1. Bodenlage: Fülle den Sack mit einer Schicht Kies oder Blähton (ca. 5-10 cm hoch), um die Drainage zusätzlich zu verbessern.
2. Erde einfüllen: Fülle den Sack mit der vorbereiteten Erdmischung, bis etwa 10-15 cm unter dem Rand.
3. Erde andrücken: Drücke die Erde leicht an, um Lufteinschlüsse zu vermeiden.
4. Die Aussaat der Bittermelonensamen
1. Samen vorbereiten (optional): Um die Keimung zu beschleunigen, kannst du die Samen vor der Aussaat 24 Stunden in lauwarmem Wasser einweichen.
2. Aussaat: Mache kleine Löcher (ca. 2-3 cm tief) in die Erde. Ich empfehle, 2-3 Samen pro Loch zu säen, um sicherzustellen, dass mindestens eine Pflanze keimt.
3. Abdecken: Bedecke die Samen mit Erde und drücke sie leicht an.
4. Bewässern: Gieße die Erde vorsichtig mit einer Gießkanne oder einem Schlauch, bis sie gut durchfeuchtet ist.
5. Die Platzierung und Pflege des Sacks
1. Standort: Stelle den Sack an einen sonnigen Standort, der mindestens 6-8 Stunden Sonnenlicht pro Tag erhält. Bittermelonen lieben die Sonne!
2. Rankhilfe installieren: Platziere die Rankhilfe (Bambusstäbe, Rankgitter oder Schnur) in der Nähe des Sacks, damit die Bittermelonen daran hochklettern können.
3. Bewässerung: Gieße die Pflanzen regelmäßig, besonders während trockener Perioden. Die Erde sollte immer leicht feucht sein, aber nicht nass.
4. Düngung: Dünge die Pflanzen alle 2-3 Wochen mit Komposttee oder einem anderen organischen Dünger.
5. Beschneidung: Entferne regelmäßig Seitentriebe, um die Bildung von Früchten zu fördern.
6. Schutz vor Schädlingen: Überprüfe die Pflanzen regelmäßig auf Schädlinge wie Blattläuse oder Spinnmilben. Bei Bedarf kannst du biologische Schädlingsbekämpfungsmittel verwenden.
Zusätzliche Tipps für eine erfolgreiche Ernte
Hier sind noch ein paar zusätzliche Tipps, die dir helfen werden, eine reiche Ernte zu erzielen:
* Bestäubung: Bittermelonen sind einhäusig, das heißt, sie haben männliche und weibliche Blüten an derselben Pflanze. Manchmal kann die Bestäubung schwierig sein, besonders in Innenräumen. In diesem Fall kannst du die Blüten manuell bestäuben, indem du mit einem kleinen Pinsel den Pollen von den männlichen Blüten auf die weiblichen Blüten überträgst.
* Mulchen: Bedecke die Erde um die Pflanzen mit Mulch (z.B. Stroh oder Holzhackschnitzel), um die Feuchtigkeit zu speichern und Unkraut zu unterdrücken.
* Unterstützung der Früchte: Wenn die Bittermelonen größer werden, kann es notwendig sein, sie mit kleinen Netzen oder Stoffstreifen zu unterstützen, um zu verhindern, dass sie abbrechen.
* Ernte: Ernte die Bittermelonen, wenn sie die gewünschte Größe und Farbe erreicht haben. Die Reifezeit hängt von der Sorte ab, aber in der Regel sind sie nach etwa 2-3 Monaten erntereif.
Problemlösung: Häufige Herausforderungen und Lösungen
Auch beim Anbau im Sack können Herausforderungen auftreten. Hier sind einige häufige Probleme und wie du sie lösen kannst:
* Gelbe Blätter: Gelbe Blätter können ein Zeichen für Überwässerung, Nährstoffmangel oder Schädlingsbefall sein. Überprüfe die Bewässerung, dünge die Pflanzen und untersuche sie auf Schädlinge.
* Keine Früchte: Wenn die Pflanzen blühen, aber keine Früchte bilden, kann dies an mangelnder Bestäubung liegen. Bestäube die Blüten manuell oder sorge für eine bessere Belüftung, um Insekten anzulocken.
* Schädlinge: Blattläuse, Spinnmilben und andere Schädlinge können die Pflanzen befallen. Verwende biologische Schädlingsbekämpfungsmittel oder spüle die Pflanzen mit Wasser ab.
* Krankheiten: Pilzkrankheiten können auftreten, wenn die Pflanzen zu feucht sind. Sorge für eine gute Belüftung und vermeide Überwässerung.
Warum der Anbau im Sack so toll ist
Ich liebe diese Methode aus verschiedenen Gründen:
* Platzsparend: Ideal für Balkone, Terrassen oder kleine Gärten.
* Kostengünstig: Benötigt nur wenige Materialien, die oft recycelt werden können.
* Mobil: Der Sack kann leicht an einen anderen Standort verschoben werden.
* Gute Drainage: Die Löcher im Sack sorgen für eine gute Drainage und verhindern Staunässe.
* Einfache Pflege: Die Pflanzen sind leicht zu pflegen und zu düngen.
Ich hoffe, diese Anleitung hat dir geholfen, den Anbau von Bittermelonen im Sack zu verstehen. Mit ein wenig Geduld und Pflege wirst du bald eine reiche Ernte genießen können. Viel Erfolg und guten Appetit!
Conclusion
So, there you have it! The sack method for growing bitter melon is more than just a gardening hack; it’s a game-changer for anyone looking to cultivate this unique and nutritious vegetable, especially in limited spaces or challenging soil conditions. We’ve walked you through the process, highlighting its simplicity and effectiveness. But why is this DIY trick a must-try?
Firstly, the sack method provides exceptional drainage and aeration, two critical factors for healthy bitter melon growth. Bitter melon roots are susceptible to root rot in overly saturated soil, and the sack’s porous nature prevents waterlogging. This translates to stronger, healthier plants and a more abundant harvest.
Secondly, this method is incredibly space-efficient. Whether you have a sprawling garden or a small balcony, the sack method allows you to maximize your growing area. You can easily hang the sacks, stack them, or arrange them in a way that suits your available space. This is particularly beneficial for urban gardeners or those with limited land.
Thirdly, the sack method offers superior control over soil composition. You can create the perfect growing medium for your bitter melon by carefully selecting the soil mix you use in the sack. This is especially useful if your native soil is poor or unsuitable for bitter melon cultivation. You can tailor the soil to provide the optimal nutrients and pH level for vigorous growth.
But the benefits don’t stop there. The sack method also helps to protect your bitter melon plants from soilborne pests and diseases. By elevating the plants off the ground, you reduce their exposure to harmful organisms that can damage their roots and foliage. This can significantly improve the overall health and productivity of your plants.
Now, let’s talk about variations. While we’ve focused on using burlap sacks, you can experiment with other materials like grow bags or even repurposed plastic feed sacks (just be sure to poke plenty of drainage holes!). You can also adjust the size of the sack to accommodate different varieties of bitter melon or to suit your specific needs.
Consider adding a trellis or support structure near the sack to provide the bitter melon vines with something to climb on. This will help to keep the fruits off the ground and improve air circulation, further reducing the risk of disease. You can also experiment with different fertilizers and watering techniques to optimize your bitter melon growth.
Don’t be afraid to get creative and adapt the sack method to your own unique gardening style and environment. The possibilities are endless!
We wholeheartedly encourage you to try this DIY trick and experience the joy of growing your own fresh, delicious bitter melon. It’s a rewarding and satisfying experience that will connect you with nature and provide you with a healthy and nutritious food source.
Once you’ve tried the sack method, we’d love to hear about your experience! Share your photos, tips, and tricks with us in the comments section below. Let’s build a community of bitter melon enthusiasts and learn from each other’s successes and challenges. Your insights could help other gardeners discover the benefits of this amazing growing technique. Remember, successful **grow bitter melon** cultivation is within your reach!
Frequently Asked Questions (FAQ)
What type of sack is best for growing bitter melon?
While burlap sacks are a popular and eco-friendly choice, you can also use grow bags made from breathable fabric or even repurposed plastic feed sacks. The key is to ensure that the sack provides good drainage and aeration. Burlap sacks are naturally porous, allowing excess water to escape and air to circulate around the roots. Grow bags offer similar benefits, while plastic feed sacks will require you to poke plenty of drainage holes to prevent waterlogging. Consider the size of the sack as well; a larger sack will provide more room for the roots to grow and support a larger plant.
What kind of soil should I use in the sack?
A well-draining and nutrient-rich soil mix is essential for growing healthy bitter melon plants. A good option is to combine equal parts of compost, potting soil, and perlite or vermiculite. Compost provides essential nutrients and improves soil structure, potting soil provides a good base for root growth, and perlite or vermiculite improves drainage and aeration. You can also add a slow-release fertilizer to the soil mix to provide a steady supply of nutrients throughout the growing season. Avoid using heavy clay soil, as it can become waterlogged and suffocate the roots.
How often should I water my bitter melon plants grown in sacks?
The watering frequency will depend on several factors, including the weather, the size of the sack, and the type of soil you’re using. Generally, you should water your bitter melon plants whenever the top inch of soil feels dry to the touch. Water deeply, ensuring that the entire root ball is thoroughly moistened. Avoid overwatering, as this can lead to root rot. During hot and dry weather, you may need to water more frequently. Check the soil moisture regularly and adjust your watering schedule accordingly.
How much sunlight do bitter melon plants need?
Bitter melon plants thrive in full sun, requiring at least 6-8 hours of direct sunlight per day. Choose a location for your sack that receives plenty of sunlight throughout the day. If you live in a particularly hot climate, you may need to provide some afternoon shade to protect the plants from scorching. Insufficient sunlight can lead to stunted growth and reduced fruit production.
How do I fertilize my bitter melon plants grown in sacks?
Bitter melon plants are heavy feeders and require regular fertilization to produce abundant fruit. You can use a balanced fertilizer, such as a 10-10-10 or 20-20-20, or a fertilizer specifically formulated for vegetables. Apply the fertilizer according to the package instructions, typically every 2-3 weeks. You can also supplement with organic fertilizers, such as compost tea or fish emulsion. Avoid over-fertilizing, as this can burn the roots and damage the plants.
How do I support the bitter melon vines as they grow?
Bitter melon vines are vigorous climbers and require a trellis or other support structure to grow properly. You can use a bamboo trellis, a wire fence, or even a sturdy branch. Train the vines to climb the support structure by gently guiding them and tying them with soft twine or plant ties. Providing adequate support will help to keep the fruits off the ground, improve air circulation, and reduce the risk of disease.
How long does it take for bitter melon to mature?
Bitter melon typically takes 60-90 days to mature after planting. The exact time will depend on the variety of bitter melon, the growing conditions, and the climate. You can harvest the fruits when they are still green and slightly immature, or you can wait until they turn yellow or orange. The taste of bitter melon becomes more bitter as it ripens.
What are some common pests and diseases that affect bitter melon plants?
Common pests that affect bitter melon plants include aphids, spider mites, and squash bugs. You can control these pests with insecticidal soap, neem oil, or by handpicking them off the plants. Common diseases that
So, there you have it! The sack method for growing bitter melon is more than just a gardening hack; it’s a game-changer for anyone looking to cultivate this unique and nutritious vegetable, especially in limited spaces or challenging soil conditions. We’ve walked you through the process, highlighting its simplicity and effectiveness. But why is this DIY trick a must-try?
Firstly, the sack method provides exceptional drainage and aeration, two critical factors for healthy bitter melon growth. Bitter melon roots are susceptible to root rot in overly saturated soil, and the sack’s porous nature prevents waterlogging. This translates to stronger, healthier plants and a more abundant harvest.
Secondly, this method is incredibly space-efficient. Whether you have a sprawling garden or a small balcony, the sack method allows you to maximize your growing area. You can easily hang the sacks, stack them, or arrange them in a way that suits your available space. This is particularly beneficial for urban gardeners or those with limited land.
Thirdly, the sack method offers superior control over soil composition. You can create the perfect growing medium for your bitter melon by carefully selecting the soil mix you use in the sack. This is especially useful if your native soil is poor or unsuitable for bitter melon cultivation. You can tailor the soil to provide the optimal nutrients and pH level for vigorous growth.
But the benefits don’t stop there. The sack method also helps to protect your bitter melon plants from soilborne pests and diseases. By elevating the plants off the ground, you reduce their exposure to harmful organisms that can damage their roots and foliage. This can significantly improve the overall health and productivity of your plants.
Now, let’s talk about variations. While we’ve focused on using burlap sacks, you can experiment with other materials like grow bags or even repurposed plastic feed sacks (just be sure to poke plenty of drainage holes!). You can also adjust the size of the sack to accommodate different varieties of bitter melon or to suit your specific needs.
Consider adding a trellis or support structure near the sack to provide the bitter melon vines with something to climb on. This will help to keep the fruits off the ground and improve air circulation, further reducing the risk of disease. You can also experiment with different fertilizers and watering techniques to optimize your bitter melon growth.
Don’t be afraid to get creative and adapt the sack method to your own unique gardening style and environment. The possibilities are endless!
We wholeheartedly encourage you to try this DIY trick and experience the joy of growing your own fresh, delicious bitter melon. It’s a rewarding and satisfying experience that will connect you with nature and provide you with a healthy and nutritious food source.
Once you’ve tried the sack method, we’d love to hear about your experience! Share your photos, tips, and tricks with us in the comments section below. Let’s build a community of bitter melon enthusiasts and learn from each other’s successes and challenges. Your insights could help other gardeners discover the benefits of this amazing growing technique. Remember, successful **grow bitter melon** cultivation is within your reach!
Frequently Asked Questions (FAQ)
What type of sack is best for growing bitter melon?
While burlap sacks are a popular and eco-friendly choice, you can also use grow bags made from breathable fabric or even repurposed plastic feed sacks. The key is to ensure that the sack provides good drainage and aeration. Burlap sacks are naturally porous, allowing excess water to escape and air to circulate around the roots. Grow bags offer similar benefits, while plastic feed sacks will require you to poke plenty of drainage holes to prevent waterlogging. Consider the size of the sack as well; a larger sack will provide more room for the roots to grow and support a larger plant.
What kind of soil should I use in the sack?
A well-draining and nutrient-rich soil mix is essential for growing healthy bitter melon plants. A good option is to combine equal parts of compost, potting soil, and perlite or vermiculite. Compost provides essential nutrients and improves soil structure, potting soil provides a good base for root growth, and perlite or vermiculite improves drainage and aeration. You can also add a slow-release fertilizer to the soil mix to provide a steady supply of nutrients throughout the growing season. Avoid using heavy clay soil, as it can become waterlogged and suffocate the roots.
How often should I water my bitter melon plants grown in sacks?
The watering frequency will depend on several factors, including the weather, the size of the sack, and the type of soil you’re using. Generally, you should water your bitter melon plants whenever the top inch of soil feels dry to the touch. Water deeply, ensuring that the entire root ball is thoroughly moistened. Avoid overwatering, as this can lead to root rot. During hot and dry weather, you may need to water more frequently. Check the soil moisture regularly and adjust your watering schedule accordingly.
How much sunlight do bitter melon plants need?
Bitter melon plants thrive in full sun, requiring at least 6-8 hours of direct sunlight per day. Choose a location for your sack that receives plenty of sunlight throughout the day. If you live in a particularly hot climate, you may need to provide some afternoon shade to protect the plants from scorching. Insufficient sunlight can lead to stunted growth and reduced fruit production.
How do I fertilize my bitter melon plants grown in sacks?
Bitter melon plants are heavy feeders and require regular fertilization to produce abundant fruit. You can use a balanced fertilizer, such as a 10-10-10 or 20-20-20, or a fertilizer specifically formulated for vegetables. Apply the fertilizer according to the package instructions, typically every 2-3 weeks. You can also supplement with organic fertilizers, such as compost tea or fish emulsion. Avoid over-fertilizing, as this can burn the roots and damage the plants.
How do I support the bitter melon vines as they grow?
Bitter melon vines are vigorous climbers and require a trellis or other support structure to grow properly. You can use a bamboo trellis, a wire fence, or even a sturdy branch. Train the vines to climb the support structure by gently guiding them and tying them with soft twine or plant ties. Providing adequate support will help to keep the fruits off the ground, improve air circulation, and reduce the risk of disease.
How long does it take for bitter melon to mature?
Bitter melon typically takes 60-90 days to mature after planting. The exact time will depend on the variety of bitter melon, the growing conditions, and the climate. You can harvest the fruits when they are still green and slightly immature, or you can wait until they turn yellow or orange. The taste of bitter melon becomes more bitter as it ripens.
What are some common pests and diseases that affect bitter melon plants?
Common pests that affect bitter melon plants include aphids, spider mites, and squash bugs. You can control these pests with insecticidal soap, neem oil, or by handpicking them off the plants. Common diseases that affect bitter melon plants include powdery mildew, downy mildew, and root rot. You can prevent these diseases by providing good air circulation, avoiding overwatering, and using disease-resistant varieties.
Can I grow bitter melon in a container instead of a sack?
Yes, you can grow bitter melon in a container, but the sack method offers some advantages, such as better drainage and aeration. If you choose to grow bitter melon in a container, make sure it is large enough to accommodate the plant’s root system. A 5-gallon container or larger is recommended. Use a well-draining potting mix and provide adequate support for the vines.
How do I harvest bitter melon?
Harvest bitter melon when the fruits are still green and slightly immature, or when they turn yellow or orange, depending on your preference. Use a sharp knife or pruning shears to cut the fruits from the vine, leaving a short stem attached. Handle the fruits carefully to avoid bruising them. Bitter melon can be stored in the refrigerator for up to a week.
Leave a Comment